Table of Contents
Advertisement
Quick Links
User's Guide
MP-1722-V1.00
FAQs
How to Use This Manual
Safety Precautions
Legal Limitations on Use of Your Product and Use of Images
Before Using the Machine
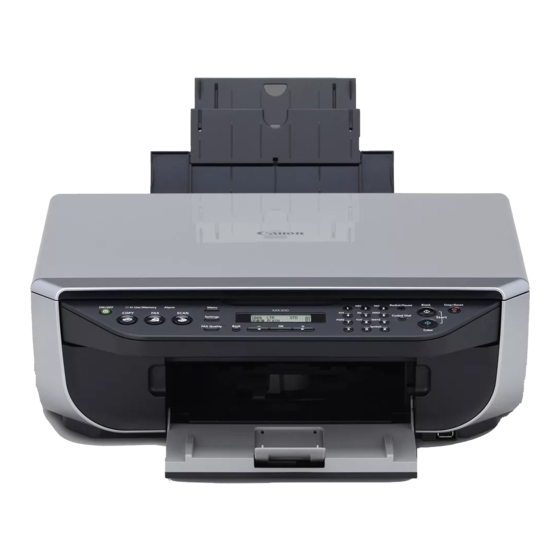
Main Components
Handling the Original Document
Loading Printing Paper
Loading Paper
Loading Envelopes
Loading Small-Sized Paper
Printing Media
General Information
Compatible Media Types
Copying
Making Copies
Changing the Copy Settings
Using Useful Copy Functions
Printing from Your Computer
Printing with Windows
Printing with Macintosh
1
Advertisement
Table of Contents

Related Manuals for Canon PIXM MX300 Series


Summary of Contents for Canon PIXM MX300 Series
- Page 1 User's Guide MP-1722-V1.00 FAQs How to Use This Manual Safety Precautions Legal Limitations on Use of Your Product and Use of Images Before Using the Machine Main Components Handling the Original Document Loading Printing Paper Loading Paper Loading Envelopes Loading Small-Sized Paper Printing Media General Information Compatible Media Types...
- Page 2 Scanning Images About Scanning Images Scanning Methods Faxing Preparing the Machine for Fax Registering Sender Information Registering the Destination Sending Faxes Using Other Useful Sending Functions Receiving Faxes Using Other Useful Receiving Functions Document Stored in Memory Summary of Reports and Lists Routine Maintenance When Printing Becomes Faint or Colors Are Incorrect Printing the Nozzle Check Pattern...
- Page 3 Printing Area Uninstalling the On-Screen Manuals Transporting the Machine Opening the Printer Properties Dialog Box (Windows) Opening the Page Setup and Print Dialog Box (Macintosh) Opening the Printer Setup Utility (Print Center) (Macintosh) Opening the Canon IJ Printer Utility (Macintosh)
-
Page 4: How To Use This Manual
How to Use This Manual The screen of this on-screen manual consists of two parts: the Menu frame (on the left) and the Content frame (on the right). Note The example screenshots in this section are in English. Menu frame Content frame Note Operations explained in this manual are specific to computers... - Page 5 Navigating in the Content Frame Click a character string with a blue underline to jump to the associated page. : Click to jump to the previous page. : Click to jump to the next page. : Click to jump to the beginning of this page. Printing This Manual...
- Page 6 To print a topic, click on a blank area of the Content frame to make sure it is active, then click the Print button. Note Clicking the Print button without making the Content frame active may print the Menu frame instead. To print a topic, click on a blank area of the Content frame to make sure it is active, then select Print on the File menu, and click the Print button.
-
Page 7: Symbols Used In This Manual
Note You can click to specify the search scope. Search XXXX: Searches in the on-screen manual currently opened. * Where "XXXX" is your machine's name and on-screen manual's title. Search all help: Searches all the online help installed on your computer. Symbols Used in This Manual Warning Instructions that, if ignored, could result in death or serious personal injury... - Page 8 Trademarks "Microsoft" is a registered trademark of Microsoft Corporation. "Windows" is a trademark of Microsoft Corporation, registered in the U.S. and other countries. "Windows Vista" is a trademark of Microsoft Corporation. "Macintosh" and "Mac" are trademarks of Apple Inc., registered in the U.S. and other countries.
-
Page 9: Safety Precautions
Safety Precautions Please read the safety warnings and cautions provided in this manual to ensure that you use the machine safely. Do not attempt to use the machine in any way not described in this manual. Warning This product emits low level magnetic flux. If you use a cardiac pacemaker and feel abnormalities, please move away from this product and consult your doctor. - Page 10 If you detect smoke, unusual smells or strange noises around the machine, immediately unplug the machine at the power supply and call for service. Periodically, unplug the machine and use a dry cloth to wipe off any dust or dirt collected on the plug and the power outlet.
- Page 11 Do not attempt to disassemble or modify the Maintaining the machine. There are no user serviceable parts machine inside the machine. The machine contains high-voltage components. Never attempt any maintenance procedure not described in this guide. Working around Do not use highly flammable sprays near the machine.
-
Page 12: Ink Cartridges
Never remove the plug by pulling on the cord. Do not use an extension lead/ cord. Working around Never put your hands or fingers in the machine while it is printing. the machine When moving the machine, carry the machine at both ends. - Page 13 Do not shake FINE Cartridges (Ink Cartridges). Ink may spill out and stain clothing or the surrounding area. Never touch the electrical contacts or Print Head Nozzles on a FINE Cartridge (Ink Cartridge) after printing. The metal parts may be very hot and could cause burns.
- Page 14 Legal Limitations on Use of Your Product and Use of Images It may be unlawful to make copies of, scan, print, or use reproductions of the following documents. The list provided is non-exhaustive. When in doubt, check with a legal representative in your jurisdiction.
-
Page 15: Before Using The Machine
Before Using the Machine Main Components Front View Document Cover Open when loading an original document on the Platen Glass. Paper Support Pull out fully to support paper loaded on the tray. Paper Guide Slide against the left side of the paper stack to support paper so that it feeds properly. Rear Tray Load paper here before printing. -
Page 16: Rear View
Output Tray Extension Supports output printouts. Platen Glass Load original documents to copy, scan, or fax here. Operation Panel Changes the settings and operates the machine. See Operation Panel Name. Rear View (10) External Device Jack Connect the external device. Note Remove the Telephone connector cap to connect the external device. - Page 17 (12) USB Port Plug in the USB cable connecting the machine to a computer here. Important While the machine is printing from or scanning images to the computer, or the computer is in the sleep mode or standby mode, do not disconnect or connect the USB cable.
- Page 18 (16) Scanning Unit (Printer Cover) Scans original documents. Open it when replacing the FINE Cartridges or removing jammed paper remaining inside the machine. (17) Scanning Unit Support Holds the Scanning Unit (Printer Cover) being open. (18) Paper Thickness Lever Switches the clearance between the Print Head and the loaded paper to match the media type.
- Page 19 ON/OFF button / Power lamp Turns the machine on and off. Lights or flashes green to indicate the power status. Before turning on the machine, make sure the Document Cover is closed. Note The machine cannot receive faxes when the power is turned off. The power cannot be turned off while the machine is sending or receiving a fax, or when there are unsent faxes stored in the machine's memory.
- Page 20 Displays messages, menu selections, and the operational status. Numeric buttons Enter numerical values such as the number of copies, as well as fax/telephone numbers and characters. (10) Redial/Pause button Redials the last number called using the Numeric buttons. Also enters pauses between or after numbers when dialing or registering numbers.
-
Page 22: Handling The Original Document
Handling the Original Document This section describes how to load the original document on the Platen Glass. Original Document Requirements The original documents you load on the Platen Glass for copying, scanning, or faxing must meet these requirements: Document type Paper documents Photographs Books... - Page 23 Platen Glass. Place the original in landscape orientation and align the upper corner of it with the alignment mark as shown in the figure above. Important Do not place any objects weighing more than 4.4 lb / 2.2 kg on the Platen Glass.
-
Page 24: Loading Printing Paper
Note We recommend using genuine Canon photo media when printing photographs. For details on the specialty media Canon provides for use with its various printers, see Compatible Media Types. Flatten the four corners of the paper before loading it. - Page 25 Note Align the edges of paper neatly before loading. Loading paper without aligning the edges may cause paper jams. If paper is curled, hold the opposing curled corners and gently bend them in the opposite direction until the paper becomes completely flat. Paper is curled..
-
Page 26: Load The Paper
any other type of paper. See Compatible Media Types. Note If the corners or edges of the paper are smudged, try to print with the Paper Thickness Lever set to the right. It may improve print quality. Reset the Paper Thickness Lever to the left when you finish printing. The position of the Paper Thickness Lever. - Page 27 Note When performing copy direct printing without using a computer, select the size and type of the loaded paper using the Operation Panel. For details on settings, see Changing the Copy Settings Changing the Print Settings. When using the machine connected to a computer, select the size and type of the loaded paper in Page Size (or Paper Size) and Media Type in the printer driver.
-
Page 28: Loading Envelopes
Loading Envelopes Use either European DL or US Comm. Env. #10-sized envelope. Important You need to print from the computer to print on envelopes. Do not use the following envelopes: - Envelopes with a double flap (or sticker flaps) - Envelopes with an embossed or treated surface - Envelopes with pressure seals - Envelopes whose gummed flaps are already moistened and adhesive Prepare the envelopes. - Page 29 * The above illustrations show a side view of the leading edge of the envelope. Important The envelopes may jam in the machine if they are not flat or the edges are not aligned. Make sure that no curl or puff exceeds 0.1 inches / 3 mm. Load the envelopes.
- Page 30 Up to 10 envelopes can be loaded at once. Pinch the Paper Guide and slide it against the left side of the envelope. Set the Paper Thickness Lever to the right. Note Reset the Paper Thickness Lever to the left when you finish printing. The position of the Paper Thickness Lever.
- Page 31 Loading Small-Sized Paper You can use 4" x 6" / 101.6 x 152.4 mm, 5" x 7" / 127.0 x 177.8 mm, and Credit card-sized papers. Load the paper. Load the paper against the right side of the Rear Tray with the print side facing UP. Pinch the Paper Guide and slide it against the left side of the paper stack.
-
Page 33: Printing Media
Printing Media General Information You can use the following sizes and types of paper and other media. Size The following table shows page sizes that can be used. Page Size Width x Height Letter 8.50 x 11.00 inches / 215.9 x 279.4 mm Legal 8.50 x 14.00 inches / 215.9 x 355.6 mm 5.83 x 8.27 inches / 148.0 x 210.0 mm... - Page 34 Paper decorated with glitter, etc. Weight 17 to 28 lb / 64 to 105 gsm (plain paper except for genuine Canon media) Do not use paper heavier or lighter than this (except for genuine Canon media), as it could jam...
- Page 35 in the machine.
-
Page 36: Table Of Contents
Do not touch the printed surface nor stack the printed sheets until the ink is fixed. Note You may not be able to purchase some Canon genuine papers depending on the country or region of purchase. For information on the page sizes available for each Canon genuine paper, visit our... -
Page 37: Super White Paper
General Information. Avoid using plain paper smaller than A5. Compatible Paper Weight: 17 to 28 lb / 64 to 105 gsm (non-Canon genuine plain paper) Paper Support Load Limit: 100 sheets * Proper feeding of paper may not be possible at this maximum capacity depending on the type of paper or environmental conditions (either very high or low temperature and humidity). -
Page 38: High Resolution Paper Hr-101N
This paper is thicker than High Resolution Paper and has a glossy printing surface to produce printouts close to photograph quality. Paper Support Load Limit: See Paper Support Load Limit for Canon Genuine Photo Papers. * When loading paper in stacks, the print side may be marked as it is fed in or sheets may be stuck to one another causing them not to be fed properly. -
Page 39: Matte Photo Paper
This is a thick matte water-resistant paper and provides superior color reproduction. It is suitable for a variety of printing purposes such as paper crafts, calendars, and photos with matte finish. Paper Support Load Limit: See Paper Support Load Limit for Canon Genuine Photo Papers. -
Page 40: Photo Paper Plus Glossy
This is a thick paper with a glossy water-resistant coating and provides superior color reproduction. It is ideal for printing high quality photographs. Paper Support Load Limit: See Paper Support Load Limit for Canon Genuine Photo Papers. * When loading paper in stacks, the print side may be marked as it is fed in or sheets may be stuck to one another causing them not to be fed properly. -
Page 41: Photo Paper Pro
This is a thick paper with a treated surface that enhances gloss and provides superior color reproduction. It is ideal for printing high quality photographs. Paper Support Load Limit: See Paper Support Load Limit for Canon Genuine Photo Papers. * When loading paper in stacks, the print side may be marked as it is fed in or sheets may be stuck to one another causing them not to be fed properly. -
Page 42: T-Shirt Transfers
This paper can be used only when printing from your computer. Paper Support Load Limit for Canon Genuine Photo Papers A4, Letter, 5" x 7" / 127.0 x 177.8 mm, and 8" x 10" / 203.2 x 254.0 mm: 10 sheets... -
Page 44: Making Copies
Copying Making Copies This section describes the basic procedure to make copies. Prepare for copying. Turn on the machine. Press the COPY button. Load paper. Loading Printing Paper. Load the original on the Platen Glass. Note For details on the types and conditions of originals which you can copy, Loading Original Documents. -
Page 45: Reducing Or Enlarging A Copy
Intensity Press the Settings button to adjust the settings as necessary. Note To change the page size, media type, intensity, or image quality, Changing the Copy Settings. To copy with various layouts, see Using Useful Copy Functions. Press the Color button for color copying, or the Black button for black & white copying. - Page 46 OK button. PRESET RATIO: You can select one of the preset ratios to reduce or enlarge copies. Press the button to select a preset ratio to match the size of your original document and printing paper. ZOOM: You can specify the copy ratio as a percentage to reduce or enlarge copies. Press the button to specify the reduction or enlargement ratio (25 - 400%).
- Page 47 Note When you choose FIT-TO-PAGE, the document size may not be detected correctly depending on the original. In this case, choose ZOOM or PRESET RATIO. Finalize the settings. Press the OK button. The LCD returns to the copy standby mode. Start copying.
-
Page 48: Changing The Copy Settings
Changing the Copy Settings You can change the copy settings such as the page size, media type, or image quality. Press the Settings button repeatedly to switch the item to set. Note (asterisk) on the LCD indicates the current setting. The settings of the page size, media type, and image quality are retained even if the machine is turned off. -
Page 49: Image Quality
PLAIN PAPER / PHOTO PAPER PRO / PHOTO PAPER PLUS / MATTE PHOTO PAPR / GLOSSY INTENSITY Change the intensity. MANUAL ADJUST / AUTO ADJUST (A) Note If you select MANUAL ADJUST, use the button to decrease the intensity or the button to increase it. -
Page 50: Using Useful Copy Functions
Using Useful Copy Functions Special Copy You can copy in various layouts. Copying Thick Originals Such as Books (FRAME ERASE) Copying on Stickers (STICKER COPY) Copying without Borders (BORDERLESS COPY) Repeating an Image on a Page (IMAGE REPEAT) Copying Two Pages to Fit onto a Single Page (2-ON-1) Copying Four Pages to Fit onto a Single Page (4-ON-1) Prepare for copying. - Page 51 Note To cancel Special copy settings, press the Stop/Reset button in the SPECIAL COPY menu. If the number of copies or the intensity has been set already, press the Stop/Reset button twice. Copying Thick Originals Such as Books (FRAME ERASE) When copying a thick original document such as books, you can copy without black margins around the image.
-
Page 52: Number Of Copies
Copying on Stickers (STICKER COPY) You can easily make 16 stickers from 4" x 6" / 101.6 x 152.4 mm photos or graphics using Canon sticker paper. Platen Glass (Place document face down) 16 stickers... - Page 53 Note You can only load one sheet of stickers at a time in the Rear Tray. You cannot specify the settings other than intensity. Copying without Borders (BORDERLESS COPY) You can copy images so that they fill the entire page without borders. Press the button to select BORDERLESS COPY, then press the OK button.
- Page 54 Note Slight cropping may occur at the edges since the copied image is enlarged to fill the whole page. You can change the width to be cropped from the borders of the original image as needed. For details, see DEVICE SETTINGS.
- Page 55 Adjust the settings for your document as necessary. Changing the Copy Settings. Press the Color button for color copying, or press the Black button for black & white copying. Important The area scanned from the original depends on the enlargement/reduction setting.
- Page 56 Note You cannot specify ENLARGE/REDUCE. Press the Color button for color copying, or press the Black button for black & white copying. When the first sheet of document finishes to be scanned, the message below is displayed. If you have another sheet of document to scan, load it on the Platen Glass and press the same button (the Black or Color button) as the first operation.
- Page 57 button. Press the button to specify the layout pattern, then press the OK button. You can select PATTERN 1, PATTERN 2, PATTERN 3, or PATTERN 4. Press the button, or the Numeric buttons to specify the number of copies. Adjust the settings for your document as necessary. Changing the Copy Settings.
-
Page 58: Printing From Your Computer
Printing from Your Computer This section describes the procedure for basic printing. Printing with Windows Note When printing photographs taken by your digital camera, you can perform Borderless Printing in easy steps using Easy-PhotoPrint EX. Easy-PhotoPrint EX is provided on the Setup CD-ROM. Easy-PhotoPrint EX supports Exif Print to optimize photographs taken by an Exif- compliant digital camera by using the print information recorded at the time of shooting to achieve higher print quality. - Page 59 Select the media type of the loaded paper in Media Type. Set Print Quality and Color/Intensity as needed. Note For details on the print settings, refer to the PC Printing Guide on- screen manual. Click OK. The Print dialog box is displayed. Note To confirm the page size, click the Page Setup tab.
- Page 60 To cancel a print job in progress, press the Stop/Reset button on the machine or click Cancel Printing on the printer status monitor. To display the printer status monitor, click Canon XXX Printer (where "XXX" is your machine's name) on the taskbar.
-
Page 61: Printing With Macintosh
Printing with Macintosh Note Depending on your application program, operations may differ. For details, refer to the instruction manual of your application. The steps described in this section are for printing in Mac OS X v.10.4.x. Turn on the machine and load the paper in the machine. Loading Printing Paper. - Page 62 Select Quality & Media in the pop-up menu. Select the media type of the loaded paper in Media Type. Select the print mode appropriate to your document in Print Mode. Note When you select the print mode appropriate to your document in Print Mode, the document will be printed in color and at a print quality suited to the characteristics of the Media Type you have selected.
- Page 63 Click Print to print the document. Printing begins. Note Click the printer icon in the Dock to display the list of print jobs in progress. If you are using Mac OS X v.10.2.8, click the printer icon in the Dock to start up the Print Center and double-click the name of your machine in the Printer List.
-
Page 64: Scanning Images
Scanning Images This section describes how to scan images. About Scanning Images You can scan images from the machine to a computer without printing them and save them in popular image types such as JPEG, TIFF, bitmaps, or PDF. If you are scanning printed text, you can use the OCR (Optical Character Recognition) software to convert it to text data. -
Page 65: Scanning Methods
Scanning Methods You can select from the various scanning methods. If You Want to Edit or Print the Scanned Images MP Navigator EX enables you to edit the scanned images, such as optimizing or trimming. You can also start application software from MP Navigator EX to edit or print the scanned images. -
Page 66: When Using Windows Vista
Turn on the machine. Load the original document on the Platen Glass. For details, see Handling the Original Document. Press the Scan button, then press the Black or Color button. The MP Navigator EX opens. Note When using Windows Vista: The program selection screen may be displayed after performing step 4. - Page 67 Select Applications on the Go menu, then double-click the Image Capture icon. Select Preferences on the Image Capture menu. Select Other in When a scanner button is pressed, open. Select the Canon Utilities folder in Applications, select MP Navigator EX 1.0, then click Open. To quit Image Capture, select Quit Image...
-
Page 68: Preparing The Machine For Fax
Faxing Preparing the Machine for Fax Typical examples of connecting the machine are described below. The machine cannot send/receive faxes if the connection is incorrect. Connect the machine correctly. Important If the Power Disconnects Unexpectedly If there is a power failure or if you accidentally disconnect the power cord, the date/time settings as well as all documents stored in memory will be lost. - Page 69 Important Do not connect the machine and external devices in parallel to the same telephone line using a splitter (A). The machine may not operate properly. Connecting a Telephone or Answering Machine via a Computer Computer Telephone or Answering machine Users in the UK If the connector of the external device cannot be connected to the jack on the machine, you will need to purchase a B.T.
-
Page 70: Setting The Telephone Line Type
Digital Subscriber Line Splitter xDSL modem (splitter may be built-in to the modem) Computer Connecting to an ISDN Line For details on ISDN connection and settings, see the manuals supplied with your terminal adapter or dial-up router. Setting the Telephone Line Type Before using the machine, make sure you set the correct telephone line type for your telephone line. - Page 71 Press the button to select TEL LINE TYPE, then press the OK button. Press the button to select the telephone line type, then press the OK button. Suitable for pulse dialing. ROTARY PULSE: Suitable for tone dialing. TOUCH TONE: Note You cannot use ROTARY PULSE depending on the country or region of purchase.
-
Page 72: Registering Sender Information
Registering Sender Information A fax you receive may have information, such as the sender's name or the company name, the sender's phone or fax number, and the date and time of the transmission, printed in small type at the top of each page. Such sender information is called Transmit Terminal Identification, or TTI. You can register your TTI in this machine, so that the recipient of your fax will know who sent it, and when it was sent. - Page 73 Note When sending black & white faxes, you can set the sender information to print inside or outside the image area. See TX TERMINAL For color sending, the sender information is printed inside the print area and the recipient's name is not printed. You can enter the sender information from the Operation Panel.
- Page 74 Press the button to switch to uppercase letter mode (:A), lowercase letter mode (:a), or number mode (:1). You can see what mode you are in by the character displayed on the top right corner of the LCD. Press the Numeric buttons to enter a character. Press the button repeatedly until the character you want appears.
- Page 75 Press the button to select USER SETTINGS, then press the OK button two times. Press the Numeric buttons to enter the date and time (in 24-hour format), then press the OK button. Enter only the last two digits of the year. Note If you misentered the date and time, press the button to...
- Page 76 Note For details on how to enter or delete characters, see Guidelines for Entering Numbers, Letters, and Symbols. Press the OK button. Press the Numeric buttons to enter your name (max. 24 characters, including spaces), then press the OK button. Note For details on how to enter or delete characters, see Guidelines for...
- Page 77 Note This setting may not be available depending on the country or region of purchase. Press the FAX button, then press the Menu button. Press the button to select USER SETTINGS, then press the OK button. Press the button to select SUMMER TIME SET, then press the OK button.
- Page 78 Press the Numeric buttons to enter the time (in 24-hour format) when summer time starts, then press the OK button three times. Precede single digit with a zero. Set the date and time that summer time ends. Press the button to select the month when summer time ends, then press the OK button two times.
-
Page 79: Registering The Destination
Registering the Destination Registering Coded Speed Dialing Coded speed dialing allows you to dial fax/telephone numbers by simply pressing a few buttons. To dial the number, press the Coded Dial button, enter the two-digit code assigned to that number. Before you can use coded speed dialing, you need to register the recipient's fax/telephone numbers for coded speed dialing. - Page 80 Note For details on how to enter or delete numbers, see Guidelines for Entering Numbers, Letters, and Symbols. Press the Redial/Pause button to enter a pause. Press the button to enter a tone. Press the Numeric buttons to enter a name for the coded speed dialing code (max.
- Page 81 Press the Stop/Reset button. To Delete an Entire Entry: Follow the procedures from step 1 to 3 under Registering Coded Speed Dialing. Press and hold the button to delete the registered number, then press the OK button. Press the Stop/Reset button. The name will automatically be deleted when you delete the number.
- Page 82 YES: Prints the list with the destination name (DESTINATION ID) in alphabetical order. NO: Prints the list with the registered entries in numerical order.
-
Page 83: Sending Faxes
Sending Faxes Flow of Sending Faxes The operation flow of sending faxes is as follows. Step 1 Load the original to send on the Platen Glass. Loading Original Documents. Step 2 Adjust the fax quality and scan contrast. Adjusting the Scan Contrast or the Image Quality (Fax Resolution). - Page 84 Pressing the button decreases the contrast, and pressing the button increases the contrast. Press the OK button. Adjusting the Image Quality (Fax Resolution) You can adjust the image quality (fax resolution) of the document you send. The higher you set the image quality setting, the better the output quality will be at the other end, but the longer it will take for the transmission.
- Page 85 Note For details on the types and conditions of originals which you can fax, Loading Original Documents. Press the FAX button. Adjust fax settings as necessary. Adjusting the Scan Contrast or the Image Quality (Fax Resolution). Start faxing. Dial the recipient's number using the Numeric buttons or coded speed dialing. Note For details on how to use coded speed dialing, see Dialing the Coded...
- Page 86 Note To cancel sending a fax, press the Stop/Reset button. To cancel sending a fax while it is being sent, press the Stop/Reset button, then follow the instructions on the LCD. In case the machine was not able to send a fax, such as when the recipient's line was busy, the machine is equipped with the function to automatically redial the number after a specified interval.
-
Page 87: Automatic Redialing
Automatic Redialing When using memory sending to send a document and the recipient's line is busy, the machine will redial the number after a specified interval. You can customize the following automatic redialing settings: Whether or not the machine redials automatically The number of times the machine redials (1 to 10 times) The time interval between redials (1 to 99 minutes) To change the automatic redialing settings, change the AUTO REDIAL settings in TX... -
Page 88: Using Other Useful Sending Functions
Using Other Useful Sending Functions Sending from Your Computer (Windows Only) If the machine is connected to a computer, you can send faxes using the fax driver from any application software that has a printing function. For details, refer to the FAX Driver Guide on-screen manual. -
Page 89: Receiving Faxes
Receiving Faxes Flow of Receiving Faxes The operation flow of receiving faxes is as follows: Step 1 Select a receive mode. Selecting the Receive Mode. Step 2 Load A4, Letter, or Legal-sized paper. Loading Paper. Step 3 Confirm the paper settings and adjust them as needed. Changing the Print Settings. - Page 90 Note If you do not have a dedicated phone line for fax use only, you need to connect a telephone or an answering machine to the External device jack of this machine. If You Want to Receive Only Faxes Automatically with the Machine, or Have a Dedicated Telephone Line for Fax Use Only: Select FAX ONLY MODE.
- Page 91 Incoming call Voice call: The telephone will ring. Pick up the handset to answer the call. Fax: The telephone will ring. If you pick up the handset when receiving a fax, press the FAX button, then press the Color or Black button. Note If the machine is located away from the telephone, pick up the handset and dial 25 (the remote receiving ID) to receive faxes (remote reception).
- Page 92 Note Set your answering machine to answering mode and adjust it as follows: - The entire message should be no longer than 15 seconds. - In the message, tell your callers how to send a fax. The machine can be set to receive faxes automatically after the telephone rings for a specified length of time.
-
Page 93: Setting The Ring Pattern
Important When answering a voice call, be sure to pick up the handset before pressing the Stop/Reset button. If you press the Stop/Reset button before picking up the handset, the telephone call will be disconnected. Fax: The machine receives faxes automatically. Note The following settings can be modified to control how the machine handles incoming calls. -
Page 94: Setting The Receive Mode
telephone company. Note For details on the setting the ring pattern of DRPD service, see DRPD:FAX PAT. If You Want the Machine to Automatically Switch between Fax and Voice Calls by the Call Ring Patterns (Network Switch): Select NETWORK SWITCH*. * This setting may not be available depending on the country or region of purchase. -
Page 95: Changing The Print Settings
Press the button to select the receive mode. Note For details on the receive modes, see Selecting the Receive Mode. Press the OK button. The receive mode will be displayed on the bottom left of the LCD. Receive mode The receive mode is FAX ONLY MODE. FAXONLY: The receive mode is TEL PRIORITY MODE. - Page 96 Note If the sender sends a document that is larger than Letter-size, such as 11" x17" or Legal-size, the sender's machine may send the fax automatically shrunk or divided, or send only a part of the original. Press the FAX button, then press the Settings button. Press the button to select the page size from A4, 8.5"...
-
Page 97: Using Other Useful Receiving Functions
Using Other Useful Receiving Functions Memory Receiving If the machine receives a fax under one of the following conditions, the machine will not be able to print the received fax and will store it in its memory. "RECEIVED IN MEMORY" is displayed in fax mode. -
Page 99: Document Stored In Memory
Document Stored in Memory Important If you disconnect the power cord, all the documents stored in memory are deleted. Send or print necessary documents before disconnecting the power cord. Note When confirming, printing, or deleting a document stored in memory, you specify it by its transaction number. -
Page 100: Delete Document
Press the FAX button, then press the Menu button. Press the button to select MEMORY REFERENCE. Press the OK button. Press the button to select PRINT DOCUMENT or DELETE DOCUMENT. If you select PRINT DOCUMENT: Press the OK button. Press the button to select the transaction number (TX/RX NO.) of the document you want to print, or enter the number by pressing the Numeric buttons. - Page 101 Press the Stop/Reset button. Checking a Document's Details in Memory If the machine was not able to print a received fax when the machine is in one of the following situations, the fax is automatically stored in memory. If ink is low or has run out while receiving a fax If the paper size/type setting is incorrect If the paper run out while receiving a fax If the Output Tray is closed...
- Page 102 Note If you are unsure of the transaction number, print the memory list. See Printing a List of Documents in Memory.
-
Page 103: Summary Of Reports And Lists
Summary of Reports and Lists The table below shows the reports and lists that can be printed from the machine. Refer to the pages indicated for more details. Report Or List Description Activity report Shows recent fax transactions performed by your machine. - Page 104 Printing the Activity Report Manually Press the FAX button, then press the Menu button. Press the button to select PRNT REPORT/LIST, then press the OK button. Press the button to select ACTIVITY REPORT, then press the OK button. The Activity report is printed. User's Data List The User's data list enables you to confirm the current settings of the machine as well as the registered sender information.
- Page 105 RX Report The machine can print an RX (reception) report after receiving a document, confirming whether the reception was completed successfully. You can set the machine to print every time it receives a document, or only when an error occurs. Alternatively, you can disable printing of the report.
-
Page 106: Routine Maintenance
Routine Maintenance When Printing Becomes Faint or Colors Are Incorrect When printing becomes faint or colors are incorrect, the print head nozzles on FINE Cartridges are probably clogged. Print the nozzle check pattern to confirm the condition of the nozzles and then perform Print Head Cleaning. If print results are not satisfactory, performing Print Head Alignment may improve print quality. - Page 107 Note If the straight line is misaligned or the Print Head position is misaligned, align the Print Head position. Aligning Print Head on the Machine.
-
Page 108: Printing The Nozzle Check Pattern
Printing the Nozzle Check Pattern Print the nozzle check pattern to determine whether the ink ejects properly from the print head nozzles. Make sure that the machine is turned on, then load a sheet of A4 or Letter-sized plain paper in the Rear Tray. Open the Paper Output Tray, then set the Paper Thickness Lever. -
Page 109: Examining The Nozzle Check Pattern
Examining the Nozzle Check Pattern Examine the nozzle check pattern, and perform cleaning if necessary. Note The nozzle check pattern will not be printed correctly if there is not enough ink. Replace the FINE Cartridge if the remaining amount of ink is insufficient. Replacing a FINE Cartridge. -
Page 110: Print Head Cleaning
Print Head Cleaning Clean the Print Head if lines are missing or if white streaks appear in the printed nozzle check pattern. Cleaning unclogs the nozzles and restores the print head condition. Note that cleaning the Print Head causes used ink to be absorbed in the ink absorber. Cleaning the Print Head consumes ink, so perform Print Head Cleaning only when necessary. -
Page 111: Print Head Deep Cleaning
Print Head Deep Cleaning If print quality does not improve by standard Print Head Cleaning, try Print Head Deep Cleaning, which is a more powerful process. Note that cleaning the Print Head causes used ink to be absorbed in the ink absorber. Print Head Deep Cleaning consumes more ink than standard Print Head Cleaning, so perform this procedure only when necessary. - Page 112 Aligning Print Head on the Machine If ruled lines are printed misaligned or print results are otherwise unsatisfactory, adjust the print head position. Make sure that the machine is turned on, then load two sheets of A4 or Letter-sized plain paper in the Rear Tray. Open the Paper Output Tray, then set the Paper Thickness Lever.
- Page 113 Note If it is difficult to pick the best pattern, pick the setting that produces the least noticeable white streaks. Less noticeable vertical white streaks More noticeable vertical white streaks Less noticeable horizontal white streaks More noticeable horizontal white streaks Repeat the procedure until you finish inputting the pattern number for column L.
- Page 114 Repeat the procedure until you finish inputting the pattern number for column R.
- Page 115 Aligning Print Head on the Computer Make sure that the machine is on, and then load two sheets of A4 or Letter-sized plain paper in the Rear Tray. Open the Paper Output Tray, then set the Paper Thickness Lever. Put your finger in the rounded indent beside the Paper Output Tray and open it gently. Open up and set the Output Tray Extension completely by pressing down the hollow on its front side.
- Page 116 Note If it is difficult to pick the best pattern, pick the setting that produces the least noticeable white streaks. Less noticeable vertical white streaks...
- Page 117 More noticeable vertical white streaks Less noticeable horizontal white streaks More noticeable horizontal white streaks Repeat the procedure until you finish inputting the pattern number for column L, then click OK. When the confirmation message is displayed, click OK. The second pattern is printed. Check the printed patterns and select the number of the pattern in column M that has the least noticeable streaks.
- Page 118 Set the Paper Thickness Lever to the left. See Paper Thickness Lever. Print the print head alignment pattern. Open the Canon IJ Printer Utility dialog box. Opening the Canon IJ Printer Utility (Macintosh). Select Test Print in the pop-up menu.
- Page 119 Note If it is difficult to pick the best pattern, pick the setting that produces the least noticeable white streaks.
- Page 120 Less noticeable vertical white streaks More noticeable vertical white streaks Less noticeable horizontal white streaks More noticeable horizontal white streaks Repeat the procedure until you finish inputting the pattern number for column L, then click Send. Confirm the displayed message and click OK. The second pattern is printed.
- Page 121 Repeat the procedure until you finish inputting the pattern number for column R, then click Send.
-
Page 122: Replacing A Fine Cartridge
Replacing a FINE Cartridge This section explains the way to confirm the ink status and the procedure to replace FINE Cartridges. When ink runs out or other errors occur, an error message is displayed on the LCD to inform you of the error. - Page 123 Indicates the remaining ink volume at four different levels. Take the appropriate action depending on the message displayed on the LCD as follows. Ink is low. You can continue printing for a while, but we recommend you to have a new FINE Cartridge available.
- Page 124 With the Computer Screen You can confirm the status of each FINE Cartridge on the printer status monitor (Windows) and Canon IJ Printer Utility (Macintosh). Confirm whether any symbols are displayed here. Ink is low. You can continue printing for a while, but we recommend you to have a new FINE Cartridge available.
- Page 125 Click View Printer Status on the Maintenance sheet. To confirm the FINE Cartridge information, click the Ink Details menu. Note You can also display the printer status monitor by clicking Canon XXX Printer (where "XXX" is your machine's name) which appears on the taskbar during printing.
- Page 126 Electrical Contacts Print Head Nozzles To maintain optimal printing quality, we recommend the use of specified Canon brand FINE Cartridges. Refilling ink is not recommended. Once you remove a FINE Cartridge, replace it immediately. Do not leave the machine with FINE Cartridges removed.
- Page 127 Black FINE Cartridge, in whichever ink remains, only for a while. However the print quality may be reduced compared to when printing with both cartridges. Canon recommends to use new FINE cartridges in order to obtain optimum qualities. Even when printing with one ink only, print with leaving the empty FINE Cartridge installed.
- Page 128 Important If the Scanning Unit (Printer Cover) is left open for more than 10 minutes, the FINE Cartridge Holder moves to the right. Close and reopen the Scanning Unit (Printer Cover) to return the holder to the left. Remove the empty FINE Cartridge. Push down the FINE Cartridge.
- Page 129 Important Handle FINE Cartridges carefully to avoid staining your clothes or surrounding work area. Do not reattach the protective tape once you have removed it. Discard it according to the local laws and regulations regarding disposal of consumables. Do not touch the electrical contacts or Print Head Nozzles on a FINE Cartridge.
- Page 130 Caution Be sure to hold the Scanning Unit (Printer Cover) firmly, and be careful not to get your fingers caught. Note If the error message is still displayed after the Scanning Unit (Printer Cover) is closed, see An Error Message Is Displayed on the LCD.
-
Page 131: Keeping The Best Printing Results
Keeping the Best Printing Results To avoid drying of the Print Head and clogging of the nozzles, note the following. Note Ink may blur depending on the paper in the following cases: - Printed area is traced with a highlight pen or paint-stick, or - Printed area is stained with water or sweat. -
Page 133: Cleaning Your Machine
Cleaning Your Machine This section describes the cleaning procedure that is needed to maintain your machine. Caution Do not use tissue paper, paper towels, or similar materials for cleaning. Paper tissue powders or fine threads may remain inside the machine and cause problems such as a blocked Print Head and poor printing results. - Page 134 Important The inner side of the Document Cover (white sheet) is easily damaged, so wipe it gently. With a clean, soft, lint-free cloth, wipe the Platen Glass and the inner side of the Document Cover (white sheet) gently. Make sure not to leave any residue, especially on the Platen Glass.
- Page 135 Do not touch the roller with your fingers; rotate it with the cotton swab. If this does not solve the problem, contact your Canon service representative. Cleaning the Inside of the Machine (Bottom Plate Cleaning) This section describes how to clean the inside of the machine.
- Page 136 Put your finger in the rounded indent beside the Paper Output Tray and open it gently. Open up and set the Output Tray Extension completely by pressing down the hollow on its front side. Fold a single sheet of A4 or Letter-sized plain paper in half widthwise, and then unfold the paper.
-
Page 137: Cleaning The Protrusions Inside The Machine
Note When performing Bottom Plate Cleaning again, make sure to use a new piece of paper. Cleaning the Protrusions Inside the Machine If protrusions inside the machine are stained, wipe off any ink from the protrusions using a cotton swab or the like. Caution Be sure to turn off the power and disconnect the power cord before cleaning the machine. -
Page 138: Fax Settings
Changing the Machine Settings This section describes the setting items in the FAX SETTINGS menu and the DEVICE SETTINGS menu. FAX SETTINGS This section describes the setting items in the FAX SETTINGS menu. Before changing any settings, you can print the User's data list to check the current settings of the machine. -
Page 139: Speed Dial List
You can select pages to be printed. PRINT 1ST PAGE Select YES to print only the first page ONLY?: of the document. Select NO to print all the pages of the document. DELETE DOCUMENT Deletes a document stored in memory. PRNT REPORT/LIST ACTIVITY REPORT Shows recent fax transactions performed by the machine. -
Page 140: Offhook Alarm
Sets the format of dates displayed on the LCD and printed on sent faxes. Three date formats are available; YYYY/MM/DD, MM/DD/YYYY, and DD/MM/YYYY. SUMMER TIME SET Enables/disables the summer time setting. If you select ON, you can select additional sub- settings. -
Page 141: Volume Control
Enables/disables the alarm that alerts you if the handset of the telephone connected to the machine is not hung up properly. VOLUME CONTROL Sets the RX RING VOLUME and LINE MONITOR VOL.. RX RING LEVEL Adjusts the level of the ringing sound the machine makes when it receives a fax. TEL LINE TYPE Selects the telephone line type setting for the machine. -
Page 142: Dial Tone Detect
Enables/disables automatic printing of a transmission report after sending. If you select PRINT ERROR ONLY or ATTACH TX PRNT FOR EACH TX as TX REPORT, IMAGE: enables/disables printing the first page of the fax under the report. DIAL TONE DETECT If you selects ON, the machine transmits the fax after confirming the dial tone. - Page 143 DRPD:FAX RNG PAT If you select DRPD as the receive mode, select the ring pattern for the machine. This setting is only available in US and Canada. Press the FAX button, then press the Menu button. Press button to select RX SETTINGS, then press the OK button.
-
Page 144: Rx Start Speed
If you select ON as RX IMG REDUC. REDUCTION, enables selecting the DIRECTION: direction of the reduction. RX START SPEED Selects the speed at which the machine starts receiving. RX REPORT Enables/disables automatic printing of a reception report after receiving. If you select PRINT ERROR ONLY or PRINT FOR EACH RX, prints a reception report only when a print error occurred or every time you receive a fax. -
Page 145: Device Settings
DEVICE SETTINGS This section describes the procedure to change the settings in the DEVICE SETTINGS menu, taking the steps to specify EXTENDED AMOUNT as an example. Note (asterisk) on the LCD indicates the current setting. Make sure that the machine is turned on. Select the menu. -
Page 146: Pictbridge Set
PICTBRIDGE SET For details, refer to "Printing Photographs Directly from a Compliant Device" in the Quick Start Guide. OTHERS AUDIBLE TONES Selects the volume. KEYPAD VOLUME Selects the beep volume when pressing the buttons on the Operation Panel. ALARM VOLUME Selects the alarm volume. -
Page 147: Restore Default
Important Printing speed may be reduced compared to when this setting is set to OFF. This function may not be so effective depending on the image quality setting. Furthermore, certain noise, such as when the machine is preparing for printing, is not reduced. Note The noises generated while scanning or printing from the computer can also be reduced. -
Page 148: Troubleshooting
Troubleshooting This section describes troubleshooting tips for problems you may encounter when using the machine. If an Error Occurs When the Machine Is Connected to a Computer When an error occurs in printing such as the machine is out of paper or paper is jammed, a troubleshooting message is displayed automatically. -
Page 149: An Error Message Is Displayed On The Lcd
5 seconds. Canon recommends to use new genuine Canon cartridges in order to obtain optimum qualities. Please be advised that Canon shall not be liable for any malfunction or trouble caused by continuation of printing under the ink out... - Page 150 However, because printing is disabled once the ink absorber becomes completely full and until the ink absorber is replaced, you are recommended to contact your Canon service representative as early as possible. (You will need to replace a particular part of the machine.)
- Page 151 Make sure that the protective material is removed from the FINE Cartridge Holder, then turn the machine off and back on again. If the problem is not resolved, contact your Canon service representative. LOAD PAPER Reload the paper correctly and press the OK button.
- Page 152 DEVICE IN USE You are unable to turn off the machine with the ON/OFF button because the machine is CANNOT TURN OFF performing an operation. The machine is performing an operation. Wait until the operation has finished, then turn off the machine.
- Page 153 NO ANSWER The recipient's fax machine does not answer. Check the number. Try dialing again after waiting for a moment. NO TONE DETECTED The telephone line cable with a modular plug is not plugged in properly, or DIAL TONE DETECT is set to ON. Make sure that the cable is plugged in properly, and resend the fax after a while.
- Page 154 TX/RX CANCELLED You pressed the Stop/Reset button to cancel the transmission. If required, try sending or receiving again. TX/RX NO.nnnn When the machine sends or receives a fax, it assigns a unique identification number (nnnn). Write the number down if you will need it later.
-
Page 155: Lcd Cannot Be Seen At All
LCD Cannot Be Seen At All Cause Action The machine is not If the Power lamp is off powered on or the The machine is not powered on. Connect the LCD is in the screen- power cord and press the ON/OFF button. saver mode. -
Page 156: An Unintended Language Is Displayed On The Lcd
An Unintended Language Is Displayed on the LCD Cause Action The language you Select the language according to the following want to be displayed is procedure. not selected. Press the ON/OFF button to turn on the machine. Press the Menu button three times. Press the button twice, then press the OK button. - Page 157 Press the OK button. The desired language is displayed on the LCD. Press the Stop/Reset button.
-
Page 158: Cannot Install The Mp Drivers
Cannot Install the MP Drivers Cause Action If you were unable to proceed beyond the Printer Connection screen, follow the Unable to proceed procedure below to reinstall the MP Drivers. beyond the Printer Connection screen. Click Cancel on the Printer Connection screen. - Page 159 If the CD-ROM icon is still not displayed, try different disks and see if they are displayed. If other disks are displayed, there is a problem with the Setup CD-ROM. Contact your Canon service representative. Installation procedure Follow the procedure described in your setup not followed correctly.
-
Page 161: Cannot Connect To Computer Properly
Cannot Connect to Computer Properly Printing Speed Is Slow / USB 2.0 Hi-Speed Connection Does Not Work Cause Action Your system If your system environment is not fully compatible environment is not fully with USB 2.0 Hi-Speed, the machine will operate compatible with USB at a lower speed provided under USB 1.1. - Page 162 "This device can perform faster" Message Is Displayed Cause Action Your system Your system environment is not compatible with environment is not fully USB 2.0. compatible with USB Printing Speed Is Slow / USB 2.0 Hi-Speed 2.0 Hi-Speed. Connection Does Not Work.
-
Page 163: Print Results Not Satisfactory
Print Results Not Satisfactory If the print result is not satisfactory, confirm the paper and print quality settings first. Do the page size and media type settings match the size and type of the loaded paper? When these settings are incorrect, you cannot obtain a proper print result. If you are printing a photograph or an illustration, incorrect paper type setting may reduce the quality of printout color. -
Page 164: Colors Are Unclear
Cause Action Click Print Options on the Page Setup sheet. Then, select the Reduce spool data Size of the print data is size check box in the displayed dialog. extremely large. Selecting this option may reduce the print quality. Insufficient space on Delete unnecessary files to free disk space. -
Page 165: Lines Are Misaligned
Printed colors may not match screen colors due to basic differences in the methods used to produce colors. Color control settings and environmental differences can also affect how colors appear on the screen. Printing Does Not Start/Printing Is Blurred/Colors Are Wrong/Straight Lines Are Misaligned Cause Action... - Page 166 Print Head nozzles are When Printing Becomes Faint or Colors Are clogged. Incorrect and perform any necessary maintenance operation. The media is loaded Many types of paper are made to be printed on with the wrong side only a particular side of the paper. facing upwards.
- Page 167 Size of the print data is Click Print Options on the Page Setup extremely large. sheet. Then, select the Reduce spool data size check box in the displayed dialog. Selecting this option may reduce the print quality. Printing with the Page When printing with the Page Layout Printing or Layout Printing or the the stapling margin function, fine lines may not...
-
Page 168: Printed Paper Curls Or Has Ink Blots
Paper is too thin. When printing data with high color saturation such as photographs or images in deep color, we recommend using Photo Paper Pro or other Canon specialty paper. See General Information. Printing graphics with Especially if you are using plain paper to print... -
Page 169: When Copying
Send. Confirm the message and click OK. Make sure that the machine is turned on. Open the Canon IJ Printer Utility. Opening the Canon IJ Printer Utility (Macintosh). Select Custom Settings in the pop- up menu. - Page 170 Cause Action Paper feed Clean the paper feed roller. Cleaning the paper feed roller is dirty. roller will wear the roller, so perform this procedure only when necessary. For details on cleaning, see Cleaning the Paper Feed Roller (Roller Cleaning). Inside of the When performing duplex printing, if the specified page machine is...
- Page 171 Open the Canon IJ Printer Utility. Opening the Canon IJ Printer Utility (Macintosh). Select Custom Settings in the pop-up menu. Drag the Ink Drying Wait Time slide bar to set the wait time, and then click Send. Confirm the message and click OK.
- Page 172 staining or scratching the surface. Roll up the paper in a direction opposite to paper curl as seen below. Check to see that the paper curl is within approximately 0.08 to 0.2 inches / 2 to 5 mm height. We recommend printing curl-corrected paper one sheet at a time.
-
Page 173: Colors Are Uneven Or Streaked
Printing Especially if you are using plain paper to print images graphics with with high intensity, the paper may absorb too much ink the intensity and become wavy, causing paper abrasion. setting set too When printing from your computer high. Reduce the Intensity setting in the printer driver and try printing again. - Page 174 Print Head nozzles are When Printing Becomes Faint or Colors Are clogged. Incorrect and perform any necessary maintenance operations. Print Head is Aligning Print Head on the Machine misaligned. perform Print Head Alignment using the Operation Panel.
-
Page 175: The Print Result Not Satisfactory When Copying
The Print Result Not Satisfactory When Copying Cause Action The original document Check that the original is loaded correctly on the is not loaded correctly. Platen Glass. Loading Original Documents. The original document When loading the original on the Platen Glass, is not loaded with the the side to be copied should be face down. -
Page 176: Printing Does Not Start
Machine Does Not Start or Stops During Print Jobs Printing Does Not Start Cause Action Unnecessary print jobs Restarting your computer may solve the problem. are left in queue. / If there are any unnecessary print jobs, follow the Computer problems. procedure below to delete them. - Page 177 In Windows, make sure that Canon XXX Printer (where "XXX" is your machine's name) is selected in the Print dialog box. In Macintosh, make sure that your machine's name is selected in Printer in the Print dialog box.
- Page 178 Printers and Other Hardware, then Printers and Faxes. In Windows 2000, click Control Panel then Printers. Right-click the Canon XXX Printer icon (where "XXX" is your machine's name), and select Properties. Click the Ports tab to confirm the port settings. Modify them if necessary.
-
Page 179: Machine Moves But Ink Is Not Ejected
Printing documents Printing large data such as photos or graphics with plenty of takes time for the machine and the computer to photographs or process, during which the machine may appear illustrations. to have stopped operating. In addition, when printing data that uses a large amount of ink continuously on plain paper, the machine may pause temporarily. - Page 180 Printing Speed Not as Fast as Expected Note Printing speed may not improve noticeably by following the instructions below, depending on your system environment. Cause Action Printing in Quiet mode. Print speed is reduced if you specified to print in Quiet mode.
- Page 181 up menu and then click Detailed Setting. Drag the slide bar to set Print Quality to Fast. FINE Cartridge Holder Does Not Move to the Left Note Opening the Scanning Unit (Printer Cover) while printing moves the FINE Cartridge Holder to the right. Close the Scanning Unit (Printer Cover), and reopen it after printing finishes.
- Page 182 The machine has been If the machine has been printing continuously for printing continuously a long time, close the Scanning Unit (Printer for a long time. Cover), wait a while, then reopen it. If the machine has been printing continuously for a long time, the Print Head will overheat, and the machine stops printing temporarily to protect the Print Head.
-
Page 183: Paper Does Not Feed Properly
Paper Does Not Feed Properly Cause Action Printing on Check to see if the paper you are printing on is inappropriate type of not too thick or curled. paper. General Information. Paper feed roller is Clean the paper feed roller. Cleaning the paper dirty. - Page 184 Envelopes not When printing on envelopes, see Loading prepared nor loaded Envelopes, and prepare the envelopes before properly. printing. Once you have prepared the envelopes, load them in the machine in portrait orientation. If the envelopes are placed in landscape orientation, they will not feed properly.
-
Page 185: Paper Jams
Paper Jams Cause Action Paper jammed in the Remove the paper following the procedure Paper Output Slot or below. the Rear Tray. Slowly pull the paper out, either from the Rear Tray or from the Paper Output Slot, whichever is easier. If the paper tears and a piece remains inside the machine, turn the machine off, open the Scanning Unit (Printer Cover) and... - Page 186 Slowly pull out the paper from the Rear Tray and remove it. If you cannot remove the jammed paper or the paper jam error continues after removing the paper, contact your Canon service representative.
-
Page 187: Error Message Appears On The Computer Screen
Error Message Appears on the Computer Screen Service Error 5100 Is Displayed Cause Action Movement of the FINE Cancel printing from your computer, turn off the Cartridge Holder is machine. Then clear the paper jam or foreign blocked. object that is preventing the FINE Cartridge Holder from moving. - Page 188 Click the Ports tab to confirm the port settings. Make sure that a port named USBnnn (where "n" is a number) with Canon XXX Printer appearing in the Printer column is selected for Print to the following port(s). If the port setting is not correct, reinstall the MP Drivers or change the port setting according to the interface you are using.
- Page 189 The printer port is not Follow the procedure below to check the printer configured port status. appropriately. Click Control Panel, Hardware and Sound, then Device Manager. If the User Account Control screen is displayed, follow the on-screen instructions. In Windows XP, click Control Panel, Performance and Maintenance, System, then click Device Manager on the Hardware sheet.
- Page 190 The machine is not Confirm that the Power lamp is lit green. ready. If the Power lamp is off, turn the machine on. While the Power lamp is flashing green, the machine is initializing. Wait until the Power lamp stops flashing and remains lit green. If the Alarm lamp is lit orange, an error may have occurred on the machine.
-
Page 191: Other Error Messages
reinstall the MP Drivers. Error No.: 1700/1710 Is Displayed Cause Action The ink absorber is See "REQ. SERVICE SOON" in An Error almost full. Message Is Displayed on the LCD. Error No.: 2001 Is Displayed Cause Action No response from See "INCOMPATIBLE CAMERA"... - Page 192 Cause Action "Could not spool successfully due to insufficient disk space" One of the following Windows error Increase the amount of free space on the disk messages is displayed by deleting any unnecessary files. outside the printer "Could not spool successfully status monitor.
- Page 193 Windows-specific Problems Printer status monitor is Not Displayed Cause Action Printer status monitor Make sure that the Enable Status Monitor is not enabled. is selected on the Option menu of the printer status monitor. Open the printer properties dialog box. Opening the Printer Properties Dialog Box Directly from Control Panel.
-
Page 194: Error Message Appears On A Pictbridge Compliant Device
The error messages and operations may vary depending on the device you are using. For errors on non-Canon PictBridge compliant devices, check the error message on the LCD and take the appropriate action to clear the error. For details, see... - Page 195 "Paper Error" Open the Paper Output Tray. The machine resumes printing. "Paper jam" Select Stop in the display on your PictBridge compliant device to stop printing. Remove the jammed paper, load new paper, press the OK button on the machine, and try printing again.
- Page 196 After a while, plug the power cord of the machine back in, turn on the machine, and then reconnect the PictBridge compliant device to the machine. If the same error occurs, contact your Canon service representative.
-
Page 197: Scanning Problems
Scanning Problems ScanGear Won't Start Cause Action The scanner driver Follow the procedure described in your setup (ScanGear) is not sheet to reinstall the MP Drivers. installed. Other Scanning Troubles Refer to the Scanning Guide on-screen manual. -
Page 198: Problems Receiving Faxes
Problems Receiving Faxes Cannot Receive a Fax, Cannot Print a Fax Cause Action The machine is not You cannot receive faxes if the power is powered on. turned off. Press the ON/OFF button to turn the power on. After a power failure or disconnecting of the power cord, press the ON/OFF button to turn the power on. -
Page 199: Fax Only Mode
The machine is not set Check the receive mode setting, and change it to to the appropriate a mode suited to your connection if necessary. receive mode. FAX ONLY MODE If You Want to Receive Only Faxes Automatically with the Machine, or Have a Dedicated Telephone Line for Fax Use Only:. -
Page 200: Quality Of Received Fax Is Poor
This setting is only available in US and Canada. This setting may not be available depending on the country or region of purchase. Quality of Received Fax is Poor Cause Action ECM RX is set to Set ECM RX to ON. See OFF. -
Page 201: Problems Sending Faxes
Problems Sending Faxes Cannot Send a Fax Cause Action The machine is not You cannot send faxes if the power is powered on. turned off. Press the ON/OFF button to turn the power on. After a power failure or disconnecting of the power cord, press the ON/OFF button to turn the power on. -
Page 202: Cannot Send A Fax Clearly
There was an error Check the LCD for an error message. See during transmission. An Error Message Is Displayed on the LCD. Print the Activity report and check for an error. See Printing the Activity Report Manually Cannot hear the dial Check that the telephone line is connected tone. -
Page 203: Repeated Errors Occur When You Send A Fax
The document is not When loading the document on the Platen Glass, loaded with the side to the side to be scanned should be face down. be scanned face down. You are scanning thick Press on the Document Cover with your hand (max. -
Page 204: Telephone Problems
Telephone Problems Cannot Dial Cause Action The telephone line is Check that the telephone line is connected not correctly correctly. Refer to your setup sheet. connected. The telephone line Check the telephone line type setting and type is not set change it as necessary. -
Page 205: If You Cannot Resolve The Problem
If you cannot resolve the problem with any of the workarounds in this chapter, please contact the seller of the machine or your Canon service representative. Canon support staff are trained to be able to provide technical support to satisfy customers. Caution If the machine emits any unusual sound, smoke, or odor, turn it off immediately. -
Page 206: Included Items
Check that all the following items are in the box. If anything is missing or damaged, contact your Canon service representative. Setup CD-ROM Easy Setup Instructions (Setup Sheet) Quick Start Guide Canon Black and Color FINE Cartridges Power cord Telephone line cable * A USB cable is necessary to connect the machine with your computer. -
Page 207: Printing Area
Depending on the type of paper, Borderless Printing may reduce the print quality at the top and bottom edges of the paper or cause these parts to become smudged. Recommended printing area (dark Canon recommends that you print blue): within this area. (... - Page 208 Printable area (light blue): The area where it is possible to print. ( However, printing in this area can affect the print quality or the paper feed precision. A5, A4, B5, 4" x 6", 4" x 8", 5" x 7", 8" x 10", Credit Card, Wide.
- Page 209 * This page size can be used only when printing from your computer. Recommended printing area Printable area Letter, Legal Size Printable Area (width x height) Letter 8.00 x 10.69 inches / 203.2 x 271.4 mm Legal 8.00 x 13.69 inches / 203.2 x 347.6 mm...
- Page 210 Recommended printing area Printable area Envelopes Size Printable Area (width x height) European DL* 4.06 x 7.12 inches / 103.2 x 180.8 mm US Comm. Env. #10* 3.86 x 7.96 inches / 98.0 x 202.1 mm * Envelopes can be used only when printing from your computer.
- Page 211 Recommended printing area...
-
Page 212: Uninstalling The On-Screen Manuals
All of the installed on-screen manuals will be deleted at the same time. Click Start > All Programs (Programs in Windows 2000) > Canon XXX Manual (where "XXX" is your machine's name) > Uninstall. Click OK when the confirmation message appears. - Page 213 Uninstalling On-screen Manuals Other Than the PC Printing Guide and Scanning Guide Select Applications on the Go menu. Double-click the Canon Utilities folder, and then the IJ Manual folder. Drag the folder of your machine's name into the trash. Drag the XXX On-screen Manual icon (where "XXX" is your...
-
Page 214: Transporting The Machine
Transporting the Machine When relocating the machine or storing the machine for a long period of time, pack the machine using the original packing materials. If you do not have the original packing materials, pack the machine carefully using protective material and place it inside a sturdy box. - Page 215 Caution Do not transport or store the machine slanted, vertically, or upside-down, as the ink may leak and damage the machine. Shipping the Machine Before shipping the machine by a delivery service: Tape the lid of the box securely with strong tape. Clearly label the box as "FRAGILE"...
- Page 216 The Print dialog box can usually be opened by selecting Print on the File menu or the command bar in your application program. Make sure that Canon XXX Printer (where "XXX" is your machine's name) is selected, and then click Preferences (or Properties).
- Page 217 In Windows XP, click Control Panel, Printers and Other Hardware, then Printers and Faxes. In Windows 2000, click Control Panel then Printers. Right-click the Canon XXX Printer icon (where "XXX" is your machine's name), and select Properties. The printer properties dialog box opens.
- Page 218 Opening the Page Setup and Print Dialog Box (Macintosh) You can open the Page Setup dialog box and the Print dialog box from the application program you are using. Opening the Page Setup Dialog Box Open the Page Setup dialog box to specify page (paper) settings before printing. Select Page Setup on the File menu in your application program.
- Page 219 Opening the Printer Setup Utility (Print Center) (Macintosh) You can open the Printer Setup Utility either from the Finder or from an application program you are using. Opening from the Finder Select Applications on the Go menu. Double-click the Utilities folder, and then double-click the Printer Setup Utility icon.
- Page 221 Opening the Canon IJ Printer Utility (Macintosh) To open the Canon IJ Printer Utility, follow the procedure below. Select Applications on the Go menu. Double-click the Utilities folder, and then double-click the Printer Setup Utility icon. In Mac OS X v.10.2.8, double-click the Utilities folder and then the Print Center icon.