Miele PUR 98 D Operating And Installation Instructions
Hide thumbs
Also See for PUR 98 D:
- Manual (48 pages) ,
- Operating and installation instructions (44 pages) ,
- Operating and installation instructions (40 pages)

Related Manuals for Miele PUR 98 D


Summary of Contents for Miele PUR 98 D
- Page 1 Operating and installation instructions Rangehood To prevent the risk of accidents or damage to the appliance, it is essential to read these instructions before it is installed and used for the first time. en-AU, NZ M.-Nr. 10 559 450...
-
Page 2: Table Of Contents
Contents Warning and Safety instructions..............Caring for the environment ................12 Description of the functions ................13 Guide to the appliance ..................14 Operation......................16 Switching the fan on.................... 16 Selecting a power level ..................16 Run-on time......................16 Switching the fan off ................... 16 Switching the cooktop lighting on/off .............. -
Page 3: Warning And Safety Instructions
It must only be used to extract vapours and remove odours from cooking. Any other usage is at the owner's risk. Miele cannot be held liable for damage resulting from incorrect or improper use or operation. The rangehood cannot be used to ventilate the room in which it is installed in recirculation mode above a gas cooktop. - Page 4 Warning and Safety instructions This appliance is not intended for use by persons (including children) with reduced physical, sensory or mental capabilities, or lack of experience and knowledge, unless they have been given supervision or instruction concerning its use by a person responsible for their safety, and are able to recognise the dangers of misuse.
- Page 5 Unauthorised installation, maintenance and repairs (including removal of any cover) can cause considerable danger for the user. Installation, maintenance and repairs must only be carried out by a Miele authorised technician. A damaged appliance can be dangerous. Check it for visible signs of damage.
- Page 6 Under no circumstances should any other parts of the housing be opened. Faulty components must only be replaced by genuine Miele spare parts. The manufacturer can only guarantee the safety of the appliance when Miele replacement parts are used.
- Page 7 Warning and Safety instructions Using at the same time as other heating appliances that depend on the air from the room Danger of toxic fumes! Great care should be taken when using the rangehood in the same room or the same area of the house as another heating appliance that depends on the air from the room.
- Page 8 Warning and Safety instructions In order to ensure safe operation and to prevent gases given off by a heating appliance from being drawn back into the room, when the rangehood and the heater are both operated simultaneously, an underpressure in the room of 0.04 mbar (4 Pa) is the maximum permissible.
- Page 9 Warning and Safety instructions Correct use Open flames are a fire hazard! Never use an open flame under the rangehood. To avoid the danger of fire, do not flambé or grill over an open flame. When switched on, the rangehood could draw flames into the filter. Kitchen grease deposits could ignite.
- Page 10 Warning and Safety instructions The rangehood can get very hot during cooking due to heat rising from the cooktop. Do not touch the housing or the grease filters until the rangehood has cooled down. This rangehood is not suitable for placing objects on. Correct installation ...
- Page 11 Accessories Use only genuine original Miele spare parts. If spare parts or accessories from other manufacturers are used, the warranty will be invalidated, and Miele cannot accept liability.
-
Page 12: Caring For The Environment
Caring for the environment Disposal of the packing Disposing of your old material appliance The transport and protective packaging Electrical and electronic appliances has been selected from materials which often contain valuable materials. They are environmentally friendly for also contain specific materials, disposal, and can normally be recycled. -
Page 13: Description Of The Functions
Description of the functions Depending on the model of the Recirculation mode rangehood, the following options are (available as an optional extra with a available: conversion kit and charcoal filter: see “Technical Data”) Air extraction mode The air is drawn in and cleaned first by The air is drawn in and cleaned by the the grease filters and then by a charcoal grease filters and directed outside. -
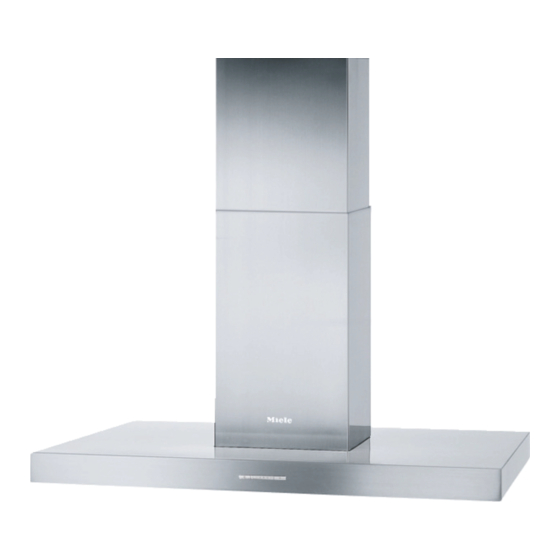
Page 14: Guide To The Appliance
Guide to the appliance... - Page 15 Guide to the appliance a Telescopic extension piece b Tower c Canopy d Controls e Grease filters f Spacer frame The spacer frame creates a shadow gap between the tower and the ceiling. The rangehood can be installed with or without the spacer frame. g Recirculation grilles (only for recirculation mode) h Cooktop lighting...
-
Page 16: Operation
Operation Switching the fan on Switching the cooktop lighting on/off Switch the fan on as soon as you start cooking. This is to ensure that vapours The cooktop lighting can be switched are captured right from the start. on and off independently of the fan. ... -
Page 17: Power Management
Operation Switching Power management on/off Power management You can deactivate the Power The rangehood is fitted with a Power management. management system. The Power Keep in mind that this may increase management system is designed to energy consumption. help save energy. It ensures that the fan power level is reduced automatically ... -
Page 18: Safety Switch-Off
Operation Safety switch-off If Power management has been deactivated, the rangehood will switch itself off automatically after 12 hours if it has been left on (fan and cooktop lighting). To switch it back on press the On/ Off control or the lighting control . -
Page 19: Energy Saving Tips
Energy saving tips This rangehood operates very efficiently and economically. The following will help you to save even more energy when using it: - Ensure that there is sufficient ventilation in the kitchen when cooking. In extraction mode, if there is insufficient air flow the rangehood cannot operate efficiently and this causes increased operating noise... -
Page 20: Cleaning And Care
Unsuitable cleaning agents can becoming dirty again, we recommend damage the surfaces and control treating them with a stainless steel care elements. product (available from Miele). Do not use any cleaning agents containing soda, acid, chloride, or Important for appliances with solvent. -
Page 21: Grease Filters
Cleaning and care Important information for the control Grease filters elements Fire hazard! If soiling is not removed promptly, it Oversaturated grease filters are a fire could cause the control elements to hazard. alter or discolor. Clean the grease filters at regular Remove any soiling immediately. - Page 22 Cleaning and care Use a standard household dishwasher detergent. Select a dishwasher programme with a wash temperature between 50 °C and 65 °C. Depending on the detergent used, cleaning the filters in the dishwasher may cause the inside filter surfaces to become discoloured.
-
Page 23: Nosmell Active Charcoal Filter
Please follow the operating instructions supplied with the filter. Charcoal filters are available to order via the Miele online shop (see end of this booklet for contact details) or directly from Miele. Press the charcoal filter into the The charcoal filters are listed under frame. -
Page 24: Changing A Lamp
Manufacturer ....... EGLO Lamp type ........GU10 Specification........ 12981 Wattage ........... 3 W ILCOS D Code..DR-3-H-GU10-50/56 These lamps are available from Miele. Insert the lever supplied into the gap between the lamp and the lamp holder. The lamp will drop downwards. -
Page 25: Installation
*INSTALLATION* Installation Before installation Before installation, it is important 4 screws M4 x 8.5 mm to read the information given on the for securing the extension piece following pages as well as the holders “Warning and Safety instructions” at the beginning of this booklet. 14 screws M4 x 8 mm Assembly parts for securing the spacer frame and... -
Page 26: Appliance Dimensions
*INSTALLATION* Installation a Installation area: cut-out for feeding Appliance dimensions through the exhaust ducting and the mains cable. In recirculation mode, only the mains cable is required. b Possible height range for appliance in extraction mode c Possible height range for appliance in recirculation mode d Alternative installation with spacer frame... -
Page 27: Safety Distance (S)
*INSTALLATION* Installation Safety distance (S) The minimum distances between the cooking surface of a cooktop (pan support(s) for gas models) and the bottom of the rangehood are as follows, unless a greater distance is specified by the manufacturer of your cooking appliance. -
Page 28: Installation Recommendations
*INSTALLATION* Installation Installation recommendations - When deciding on the safety distance between the cooktop and rangehood, please note that a distance of 650 mm above electric cooktops may be preferable to give more working space under the rangehood. - Account should also be taken of the height of the person who will be using the rangehood most often. -
Page 29: Protective Foil
*INSTALLATION* Installation Protective foil The housing components have protective foil around them to prevent them from transport damage. Please remove this foil before fitting the housing components. It can be peeled off easily. With air extraction mode: - Place a section of the exhaust ducting in the ceiling and feed it down through the cross-sectional area as illustrated. - Page 30 *INSTALLATION* Installation Use a knife to release the four spacers and the two covers from the spacer frame supplied. Drill four holes 10 mm, approx. 115 mm deep for the plugs supplied. Place the four plugs in the holes and ...
- Page 31 *INSTALLATION* Installation The spacer frame can be installed between the tower and the ceiling. This creates a shadow which gives the illusion of a gap between the ceiling and the tower. This is useful if the ceiling is Mount the spacer frame onto the not level or is uneven.
- Page 32 *INSTALLATION* Installation Hang the installation frame on the Align the installation frame and four screws. The front of the frame is secure it with the screws. marked with a “V”. The spacers, which were removed If using the spacer frame, place the from the spacer frame at the start, two covers into the fixing holes.
- Page 33 *INSTALLATION* Installation Holding the installation frame securely, remove the two fixing screws and extend the installation frame to its maximum length. Refit the screws. The directional unit from conversion kit DUI 32 (optional accessory) is installed for recirculation mode (UL): ...
- Page 34 *INSTALLATION* Installation Secure the exhaust socket to the hose using a hose clip. Secure the hose to the directional unit socket using a hose clip. Check that the hose is held securely. Push the telescopic piece over the installation frame: - with the recirculation grilles at the bottom for extraction mode (AL),...
- Page 35 *INSTALLATION* Installation Fit the four telescopic piece clamps. Bend back the two retaining tabs. When the screws are tightened, the Push the tower over the telescopic clamps spread out and push the piece and bend the retaining tabs telescopic piece upwards.
- Page 36 *INSTALLATION* Installation Depending on the rangehood, a non- return flap is supplied with the rangehood or is already fitted in the motor unit exhaust socket. With extraction mode (AL), fit the non-return flap in the exhaust socket if your ducting system is not equipped with one.
- Page 37 *INSTALLATION* Installation Connect the mains cable. See “Electrical connection”. Unscrew both screws from the installation frame again. Place the exhaust ducting onto the The canopy can now be adjusted to the exhaust socket. desired height, observing the permissible height ranges: - With extraction mode: upwards as far as it will go, downwards only to the...
- Page 38 *INSTALLATION* Installation Raise the canopy to the desired Hold the tower securely, bend back height and secure it with the screws. the retaining tabs and carefully lower the tower. The tower will fit into the cut-out in the canopy.
- Page 39 *INSTALLATION* Installation With recirculation mode (UL) rangehoods, insert the charcoal filter. Remove the grease filters from the rangehood. Insert the safety screw on the inside. Carefully remove the protective foil from the grease filters. Refit the grease filters.
-
Page 40: Connection For Air Extraction
Connection for air extraction - If the ducting has flaps, these must Before installation, it is important be opened when the rangehood is to read the information given on the switched on. following pages as well as the “Appliance dimensions” and the Remember that any constriction of “Warning and Safety instructions”... -
Page 41: Condensate Trap
Connection for air extraction Silencer Miele will not accept warranty claims for any functional defects or damage caused by inadequate ducting. Condensate trap To achieve even further reductions in noise levels, a special silencer (optional accessory) can be fitted in the ducting system. -
Page 42: Electrical Connection
*INSTALLATION* Electrical connection If a flexible connection cable is being Installation, repairs and other used to connect the appliance to the work by unqualified persons could electricity supply, the cross-sectional be dangerous. The manufacturer area of the the individual leads must be cannot be held liable for between 0.75 mm²... -
Page 43: After Sales Service And Warranty
After sales service and warranty In the event of a fault which you cannot remedy yourself, please contact Miele. The contact details for Miele are given at the back of these instructions. When contacting Miele, please quote the model and serial number of your appliance. -
Page 44: Technical Data
Technical data Fan motor 295 W Cooktop lighting 4 x 3 W Total rated load 307 W Voltage, frequency AC 230 V, 50 Hz Fuse rating 10 A Weight 34 kg Optional accessory for recirculation mode DUI 32 kit to convert from extraction mode to recirculation mode and charcoal filter DKF 12-1 or DKF 12-R (reactivatable). - Page 47 # 04 - 03 Winsland House II 689 Sukhumvit Road Singapore 238463 North Klongton Sub-District Tel.: +65-67351191 Vadhana District Fax: +65-67351161 Bangkok 10110, Thailand E-mail: info@miele.com.sg Internet: www.miele.sg Miele Global Headquarters Germany Miele & Cie. KG Carl-Miele-Straße 29, 33332 Gütersloh, Federal Republic of Germany...
- Page 48 PUR 98 D en-AU, NZ M.-Nr. 10 559 450 / 02...