Sign In
Upload
Manuals
Brands
Tripp Lite Manuals
Switch
0SU70037
Tripp Lite 0SU70037 Manuals
Manuals and User Guides for Tripp Lite 0SU70037. We have
2
Tripp Lite 0SU70037 manuals available for free PDF download: User Manual, Quick Start Manual
Tripp Lite 0SU70037 User Manual (81 pages)
Owner's Manual for 0SU70036 / 0SU70037 KVM Switches 933211
Brand:
Tripp Lite
| Category:
Switch
| Size: 3.84 MB
Table of Contents
User Guide
1
Legal Notice
2
About this Document
3
Logging
3
Product
3
Style Conventions
4
Table of Contents
5
Table of Contents
6
Table of Figures
9
1 Introduction
11
Product Overview
11
Features and Benefits
11
Terminology
12
Compatibility
12
Client Computer Operating System
12
Technical Precautions
12
Safety
13
Trademarks
13
Weee Compliance
13
2 Installation
14
Overview
14
System Components
14
The Smart 216/232 IP Unit
14
Figure 1 - Smart 216 IP Unit Front Panel
14
Figure 2 - Smart 216 IP Unit Rear Panel
15
Figure 3 - Smart 232 IP Rear Panel
15
Pre-Installation Guidelines
16
Rack Mounting the Smart 216/232 Ip Unit
16
Rack Mounting Safety Considerations
16
C Onnecting the
16
C Onnecting to the
16
Mounting the Unit
17
Figure 4 - Bracket Positions
17
Figure 5 - Bracket Connected for Rear Facing
17
Connecting the System
18
Connecting to the Servers
18
Figure 6 - Smart 216/232 IP System Overview
18
Figure 7 - ROC PS/2
18
Connecting a ROC PS/2
19
Figure 8 - ROC USB
19
Figure 9 - ROC PS/2 Connections
19
Connecting a ROC USB
20
Connecting to the Network
20
Connecting the Cat5 Cables
20
Figure 10 - ROC USB
20
Connecting the Kvm Console
21
Connecting the Power Supply
21
3 Configuring the Network
22
Boot-Up Process
22
Logging Onto the Web Configuration Interface
23
Figure 11 - OSD Main Window
23
Figure 12 - Settings Window
23
Figure 13 - Web Page
24
Figure 14 - Logon Page
24
Figure 15 - Network Configuration - Device Tab
25
Web Configuration Interface Tabs
25
Web Configuration Toolbar Buttons
26
Changing Your Password
26
Figure 16 - Change Password Page
26
Configuring the Network Settings
27
Configuring Device ID Settings
27
Configuring the Device IP Address
27
Configuring Centralized Management Settings
28
Configuring User Settings
29
Adding a User
29
Figure 17 - Users Page
29
Figure 18 - Add User Page
29
Deleting User(S)
30
Figure 19 - Delete User Confirmation
30
Blocking a User
31
Editing User Information
31
Figure 20 - Edit User Page
31
Configuring the Kvm Switch
32
Figure 21 - KVM Switch Configuration Page for Smart 232 IP
32
Configuring the Serial Port Settings
33
Figure 22 - Serial Port Page
33
Configuring the Security Settings
34
Figure 23 - Security Page
35
Configuring User Targets
36
Configuring the System Date and Time
37
Figure 24 - User Targets Page
37
Configuring Power Devices
38
Figure 25 - Date and Time Page
38
Figure 26 - Power Devices Page
38
Figure 27 - Add PDU Page
38
Editing a Power Device
39
Figure 28 - Added Power Devices
39
Figure 29 - Edit PDU Page
39
Removing a Power Device
39
Configuring Power Outlets
40
Figure 30 - Delete PDU Confirmation Page
40
Figure 31 - Power Outlets Page
40
Performing Additional Configuration Operations
41
Installing an SSL Certificate
41
Figure 32 - Assigning Servers to Power Outlets Page
41
Upgrading Firmware
42
Figure 33 - SSL Certificate Page
42
Upgrading Riccs/Rocs
43
Figure 34 - Device Version Upgrade Page
43
Figure 35 - Reboot Confirmation Page
43
Restoring Factory Settings
44
Figure 36 - Riccs/Rocs Upgrade Page
44
Backing up and Restoring
45
Figure 37 - Restore Factory Settings Page
45
Figure 38 - Backup/Restore Data Page
45
Reloading a Page
46
Saving Changes and Logging out
46
Figure 39 - Device Reboot Confirmation Message
46
Figure 40 - Save Succeeded Message
47
Figure 41 - Device Rebooting Progress Box
47
Figure 42 - Logon Page after Rebooting
47
4 Conducting a Remote Session
48
Starting a Remote Session
48
Figure 43 - Server Targets
49
Figure 44 - Remote Session Page
50
Remote Session Toolbar Buttons
50
Sharing a Remote Session
51
Exclusive Session
51
Figure 45 - Shared Remote Session
51
Displaying the Toolbar
52
Setting the Session Profile
52
Figure 46 - Session Profile Dialog Box
52
Full Screen Mode
53
Verifying Remote Presence Solutions Information
53
Changing the Video Performance Settings
54
Figure 47 - Remote Presence Solutions Information
54
Adjusting the Video
55
Figure 48 - Performance Settings
55
Refreshing the Video Image
55
Automatically Adjusting the Video Image
56
Figure 49 - Video Adjust Progress
56
Manually Adjusting Video Settings
56
Figure 50 - Manual Video Adjustments Controls
57
Managing Keyboard Sequences
58
Figure 51 - Power Menu
58
Adding a Keyboard Sequence
59
Figure 52 - Special Key Manager
59
Figure 53 - Add a Predefined Key Dialog Box
60
Recording a New Custom Key
60
Deleting Key Sequence(S)
61
Editing a Key Sequence
61
Figure 54 - Record Macro Box
61
Power Managing the Target Servers
58
Synchronizing Mouse Pointers
62
Figure 55 - Delete Key(S) Confirmation Box
62
Manually Synchronizing the Mouse
62
Figure 56 - Relative Mouse Settings
63
Figure 57 - Absolute Mouse Settings
64
Selecting the Mouse Mode
64
Figure 58 - Windows 7 Mouse Properties
65
Relative Mouse Position Mode
65
Figure 59 - Mouse Emulation Box
66
Aligning the Mouse Pointers
67
Calibrating Mouse Pointers
67
Switching to a Different Server /Device
67
Disconnecting the Remote Session
68
5 Managing the Events Log
69
Viewing the Events Log
69
Reloading the Events Log
69
Figure 60 - Events Log
69
Saving the Events Log
70
Clearing the Event Log
70
Figure 61 - Clear Events Confirmation Window
70
6 Troubleshooting - Restoring Factory Settings
71
7 Operating the Smart 216/232 Ip Switching System Locally
72
Displaying the Osd
72
Navigating the Osd
72
Figure 62 - OSD Main Window
72
Selecting a Computer
73
Power Managing a Server
73
Figure 63 - Power Control Dialog Box
73
Figure 64 - Power Prompt
73
Moving the Confirmation Label (F1)
74
Tuning (F5)
74
Figure 65 - Image Tuning Label
74
Configuring the Osd Settings (F2)
75
Changing the Network Parameters
75
Configuring the Device IP Address
75
Figure 66 - OSD Settings Window
75
Configuring Accessit Centralized Management Settings
76
Changing the OSD Hotkey
76
Changing the Keyboard Language
77
Inputting and Updating DDC Information (F10)
77
Saving Changes to Settings
77
Technical Specifications
78
Video Resolution and Refresh Rates
80
Advertisement
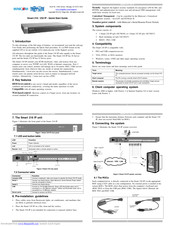
Tripp Lite 0SU70037 Quick Start Manual (2 pages)
Minicom Smart 216 / 232 IP
Brand:
Tripp Lite
| Category:
Switch
| Size: 0.28 MB
Table of Contents
System Components
1
Key Features
1
The Smart 216 Ip Unit
1
Setting the Ip Address
2
Logging into the Web Interface
2
The Osd
2
Advertisement
Related Products
Tripp Lite Minicom 0SU70036
Tripp Lite 0SU70032
Tripp Lite 0SU22082
Tripp Lite 0SU22081
Tripp Lite 0SU22090
Tripp Lite 0SU22091
Tripp Lite 0SU22181
Tripp Lite 0SU22182
Tripp Lite 0SU52091
Tripp Lite 037332225436
Tripp Lite Categories
UPS
Cables and connectors
Switch
Network Cable
Racks & Stands
More Tripp Lite Manuals
Login
Sign In
OR
Sign in with Facebook
Sign in with Google
Upload manual
Upload from disk
Upload from URL