Table of Contents
Advertisement
INSTRUCTION MANUAL
HDR5T01
116/8305
Important - Please read these instructions fully before installing or operating and keep for future
reference.
These instructions contain important information which will help you get the best from your
television and ensure safe and correct installation and operation.
For any help concerning set up and use of your STB please call the
Customer Helpline:
Lines open: 9am - 8pm Monday to Saturday and 10am - 4pm Sunday
0845 604 0105
Advertisement
Table of Contents

Related Manuals for Hitachi HDR5T01


Summary of Contents for Hitachi HDR5T01
- Page 1 INSTRUCTION MANUAL HDR5T01 116/8305 Important - Please read these instructions fully before installing or operating and keep for future reference. These instructions contain important information which will help you get the best from your television and ensure safe and correct installation and operation.
-
Page 2: Table Of Contents
Relative Volume (Optional)........22 Contents Configuring Language Preferences ...... 22 Safety Precautions ..........3 Preferred............... 22 Power Cord............. 3 Current (*) ............. 22 Overview of the Remote Control ......5 Installation & Retune ..........22 Connections on the Set Top Box ......6 Automatic Channel Scan / Retune ....... - Page 3 Features Accessories • 200 channels Please make sure that the following items are included with your device. • Programme recording • 8-Days EPG. • TV scart (with RGB and CVBS support). • Favourite list. • Parental lock options. • Manual and automatic search options. •...
-
Page 4: Safety Precautions
• Take care to provide good air circulation. Place the Safety Precautions device in a location with adequate ventilation to Power Source Power prevent heat build-up in the device. • Always use the provided AC adaptor. • Should any solid object or liquid fall into the cabinet, unplug the device and have it checked by qualified •... - Page 5 DON’T listen to headphones at high volume, as such SOME DOS AND DON’TS ON THE SAFE USE use can permanently damage your OF EQUIPMENT hearing. DON’T leave equipment switched on when it is This equipment has been designed and unattended unless it is specifically stated manufactured to meet international safety that it is designed for unattended operation or has a standards but, like any electrical equipment,...
-
Page 6: Overview Of The Remote Control
Overview of the Remote Control Portal Setup For any help concerning set up and use of your STB please call the Customer Helpline: 0845 604 0105 - 5 -... -
Page 7: Connections On The Set Top Box
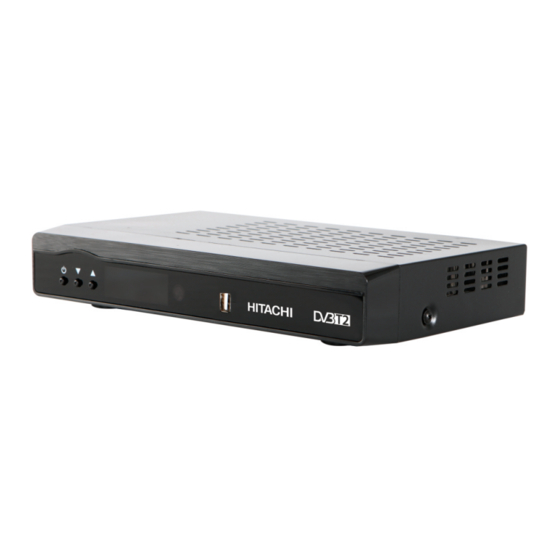
Connections on the Set Top Box 1. OPTICAL AUDIO OUT: You can use this connector to output the digital audio to an external device. See your audio system instruction book for further information. 2. ANTENNA IN: Aerial input 3. ANTENNA OUT: To watch channels on the TV 4. -
Page 8: Inserting Batteries In The Remote Control
Inserting Batteries in the Remote Control • Remove the battery cover located on the back of the remote control by gently pulling backwards from the indicated part. • Insert two AAA/R3 (2 X 1.5Volt) or equivalent type batteries inside. Place the batteries in the correct direction observing the polarity symbols (+/-) and replace the battery cover. -
Page 9: Antenna Connection
Power Connection MPORTANT: The set-top box is designed to operate on 12 V DC. For this, an adaptor is used which gives 12 V voltage. Connect this adaptor to a system that supplies 220-240V AC,50Hz. • After unpacking, allow the set-top box to reach the ambient room temperature before you connect the set to the mains. - Page 10 Power On-Off Connect all cables before plugging into the mains. After plugging in the AC adaptor for the set top box to the mains supply, a light will be seen on the front panel (Standby mode). When the set top box is first powered up please wait until the box is initialized before activating the receiver since booting of software will take some time.
-
Page 11: Important - Hard Disk Information
When the HDD is out of space, it will operate regarding Important - Hard Disk Information one of these options and delete the This Recorder has a built in hard disk (abbreviated recordings. as HDD ) for recording and playback. Beware of •... -
Page 12: First Time Installation
• To start installation process, select Yes by using First Time Installation “ ”/“ ” buttons and then press the OK button. IMPORTANT: Ensure that the aerial is connected • The box will start to search available stations. The before switching on the set top box for the first progress bar will move along the line. -
Page 13: Mute
Mute Select Yes by using “ ” or “ ” / OK buttons to cancel instant recording. • You can press to mute the sound of your set top box. The sound will be muted once this button Note: When two recordings are active, you can only is pressed. -
Page 14: Menu System
Operating the Channel List Menu System • Press “ ”/“ ” button to select the channel that will Viewing the Main Menu be processed. • Press the MENU button to view main menu. • Press “ ”/“ ” button to select a function on Channel •... -
Page 15: Adding Locks To Channels
• Pressing the numeric buttons ‘0...9’ replaces the • Select a list by pressing “ ”/“ ” buttons. Afterwards highlighted character with the characters printed select a channel by using ”/“ ” button. Press OK above the button one by one as the button is button to add selected channel to the favourites list. -
Page 16: Event Options
Record Series/Delete Series Red button (Prev Day): Displays the programmes of previous day. In the EPG menu, after you have selected a Green button (Next day): Displays the programmes programme, press the OK button and select the of the next day. Record Series option in the menu which appears and press the OK button again. -
Page 17: Configuring Timers
Note: Split programme information should be NOTE: A conflict is caused, if more than two broadcasted by the broadcaster. programmes are set for recording in the same time interval. To solve this conflict, you have to select an Multiple/Alternative Timer Record alternative for one of those programmes or cancel It is possible to record or set recording timers for two one of the recording timers. - Page 18 Recordings Library To view the list of recordings, press the MENU button to display the main menu and use the “” or “” button to highlight the “Recordings Library” line and press the OK button. Recordings Library will then be displayed with available recordings.
-
Page 19: Play Options
Play Options that are to be archived. When finished, press OK button and the following menu will be displayed: Play from start: Plays the recording from the In this menu, only Start recording at and Stop recording at options are active. If you have already beginning. -
Page 20: Max Time Shift
Displaying Chapter Options Recordings Configuration During playback of a recording, if you press the MENU To configure the playback/recording options select the button, Chapter Options menu will be displayed. Recordings option from the configuration menu. Create New Chapter Mark: You can set a chapter mark anywhere you want. -
Page 21: Active Channels
Configuration Output Settings • You can configure the main settings of your set top box using the configuration screen. • Select Configuration from Setup & Retune menu and press OK to continue. • You can press BACK button to exit TV Type •... -
Page 22: Receiver Upgrade
Receiver Upgrade Guidance Guidance setting enables or disables the menu access. Set Pin • Press OK to display the “Set PIN” window. Use numeric buttons to enter the new pin number. You will need to input your new pin a second time for verification purposes. -
Page 23: Available Langs
Current (*) narration track. Use “ ” or “ ” buttons to select an item. Then use “ ” or “ ” buttons to set. (*) These settings can be changed if only the broadcaster supports. Otherwise, settings will not be available to be changed. -
Page 24: Manual Channel Scan
IP Settings • In manual channel scan, the number of the multiplex is entered manually and only that multiplex is searched for the channels. • For each valid channel number, signal level and signal quality are shown on the screen. •... -
Page 25: Viewing The Media Browser
Shuffle (RED button) : plays the files randomly. If shuffle mode is enabled previous/next functions will also jump to the tracks randomly. Loop (GREEN button): plays all media files starting with the selected file repeatedly. Jump (Numeric buttons) : Jumps to the selected file using the numeric buttons. -
Page 26: Slideshow Options
Slideshow Options Play This (OK button) : Plays the selected file. File Operation: You can move or copy your files to Select picture in media browser using the Up or Down harddisc from external USB. Select your desired files buttons and press OK button. Press button to start by using “... -
Page 27: Hdd Initialisation
OSD Warning Messages Digital Teletext (** for UK only) Digital Teletex (** for UK only) • Press the TEXT button. HDD Initialisation • The digital teletext information appears. Whenever you switch your set top box on, the following status OSD will be displayed. This status •... -
Page 28: Player
BBC Iplayer Internet Portal On BBC channels, BBC Iplayer application is You can access internet portal using your set- avaliable on digital teletext. After pressing RED(or top box. To do this, an active internet connection TEXT) button on any BBC channel with Iplayer is required. - Page 29 Problem Possible Reasons What To Do The LED indicator does not Check if the AC adaptor is Power Adaptor is not connected. glow. plugged into the power socket. Check the aerial and video No picture or sound. No signal or weak signal. connections (scart).
-
Page 30: General Characteristics
GENERAL CHARACTERISTICS Power supply for set-top box: 12 V DC 2Amp Preffered DC Adaptor: 220 - 240 V AC, 50-60Hz Input Frequency 470Mhz-862Mhz Frequency Band Maximum Power consumption 17,5 W Standby Power Consumption 0,5 W Operating temperature 5ºC to +40ºC Storage temperature -15ºC to +55ºC Humidity... -
Page 31: Hard Disk
REMOTE CONTROL Operating Distance 7 m Max. Batteries 2x1.5V Micro (R-03/AAA) TUNERS 1 xRF In IEC-type, female (75Ohm) 1 x RF Out (loop through) IEC-type, male (75Ohm) HARD DISK Hard Disk capacity 500 GB FRONT PANEL Display : Seven segment display Remote Control Keys On / Off , Down ,Up AUDIO... - Page 32 Guarantee Product Guarantee This product is guaranteed against manufacturing defects for a period of Year This product is guaranteed for twelve months from the date of original purchase. Any defect that arises due to faulty materials or workmanship will either be replaced, refunded or repaired free of charge where possible during this period by the dealer from whom you purchased the unit.
- Page 33 Getting Started Support Technical experts are available 7 days a week •Simple help and advice on setting up your digital equipment (image). •Guidance on connecting other devices to your television such as a DVD player, Sky, home cinema system or a games console. •Order spare parts, including that lost remote control.
- Page 34 Manufacturer: Importer: Argos Ltd., Hitachi Europe Ltd., 489 - 499 Avebury Boulevard, Whitebrook Park, Lower Cookham Road, Central Milton Keynes, Maidenhead, Buckinghamshire MK9 2NW Berkshire SL6 8YA U.K. U.K. www.hitachidigitalmedia.com...