Honda WDP30X Owner's Manual
Hide thumbs
Also See for WDP30X:
- Owner's manual (76 pages) ,
- Instructions manual (75 pages) ,
- Owner's manual (24 pages)
Table of Contents
Advertisement
Quick Links
Download this manual
See also:
Owner's Manual
INTRODUCTION
Congratulations on your selection of a Honda diaphragm pump! We
are certain you will be pleased with your purchase of one of the finest
pumps on the market.
We want to help you get the best results from your new pump and to
operate it safely. This manual contains the information on how to do
that; please read it carefully.
We suggest you read the DISTRIBUTOR'S LIMITED WARRANTY
(page 21) and EMISSION CONTROL SYSTEM WARRANTY
(page 22) to fully understand coverage and your responsibilities of
ownership.
When your pump needs scheduled maintenance, keep in mind that an
authorized Honda servicing dealer is specially trained in servicing
Honda pumps and is supported by the parts and service divisions of
American Honda. Your Honda dealer is dedicated to your satisfaction
and will be pleased to answer your questions and concerns.
Keep this owner's manual handy, so you can refer to it at any time.
This owner's manual is considered a permanent part of the pump and
should remain with the pump if resold.
The information and specifications included in this publication were in
effect at the time of approval for printing. American Honda Motor Co.,
Inc. reserves the right, however, to discontinue or change
specifications or design at any time without notice and without
incurring any obligation whatever. No part of this publication may be
reproduced without written permission.
SAFETY MESSAGES
Your safety and the safety of others are very important. We have
provided important safety messages in this manual and on the pump.
This information alerts you to potential hazards that could hurt you or
others. Please read these messages carefully.
Of course, it is not practical or possible to warn you about all the
hazards associated with operating or maintaining a diaphragm pump.
You must use your own good judgment.
You will find important safety information in a variety of forms:
• Safety Labels - on the pump.
• Instructions - how to use this pump correctly and safely.
• Safety Messages - preceded by a safety alert symbol and one
of three signal words: DANGER, WARNING, or CAUTION. These
signal words mean:
DANGER
WARNING
CAUTION
Each message tells you what the hazard is, what can happen, and
what you can do to avoid or reduce injury.
• Damage Prevention Messages - You will also see other
important messages that are preceded by the word NOTICE. This
word means:
Your pump or other property can be damaged
NOTICE
if you don't follow instructions.
© 1996-2007 American Honda Motor Co., Inc.-All Rights Reserved
31TDP610
00X31-TDP-0610
You WILL be KILLED or SERIOUSLY
HURT if you don't follow instructions.
You CAN be KILLED or SERIOUSLY
HURT if you don't follow instructions.
You CAN be HURT if you don't follow
instructions.
POM52831-C
IPC
XXXXX.2007.02
K1
EM5
PRINTED IN U.S.A.
OWNER'S MANUAL
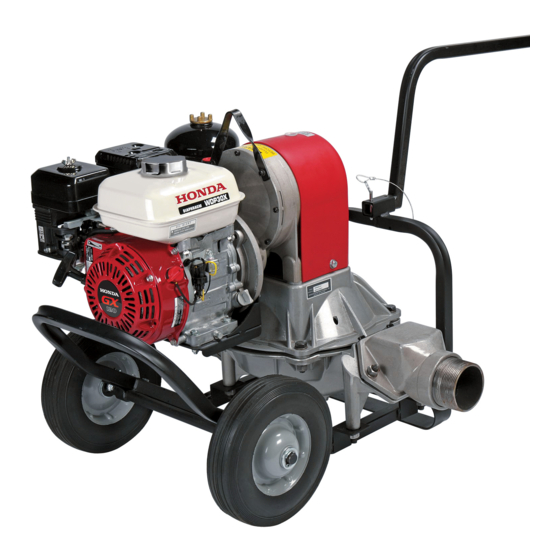
WDP30X
The engine exhaust from this product
contains chemicals known to the State of
California to cause cancer, birth defects or
other reproductive harm.
CONTENTS
INTRODUCTION ...............................1
SAFETY MESSAGES........................1
PUMP SAFETY .................................2
INFORMATION.............................2
SAFETY LABEL LOCATIONS ......2
SETTING UP YOUR NEW PUMP .....2
CONTROL LOCATIONS ...................3
BEFORE OPERATION......................3
OPERATION......................................4
PUMP PRECAUTIONS ................4
PUMP PREPARATION.................5
STARTING THE ENGINE.............6
STOPPING THE ENGINE ............6
SERVICING YOUR PUMP ................7
MAINTENANCE SAFETY.............7
MAINTENANCE SCHEDULE .......7
ENGINE MAINTENANCE .............8
REFUELING ...............................11
PUMP MAINTENANCE ..............12
TRANSPORTING ............................15
STORAGE .......................................15
WARNING:
IPC
PROBLEMS..................................... 17
TECHNICAL INFORMATION .......... 17
ALTITUDE OPERATION ............ 17
AIR INDEX.................................. 18
SPECIFICATIONS...................... 18
CONSUMER INFORMATION ......... 20
SERVICE ITEMS ........................ 20
INFORMATION........................... 20
INFORMATION........................... 20
WARRANTY ............................... 21
APPAREL WARRANTY.............. 21
WARRANTY ............................... 22
1
Advertisement
Table of Contents

Related Manuals for Honda WDP30X


Summary of Contents for Honda WDP30X
-
Page 1: Table Of Contents
When your pump needs scheduled maintenance, keep in mind that an authorized Honda servicing dealer is specially trained in servicing Honda pumps and is supported by the parts and service divisions of American Honda. Your Honda dealer is dedicated to your satisfaction and will be pleased to answer your questions and concerns. -
Page 2: Pump Safety
So if the label comes off or becomes hard to read, contact your authorized Honda pump dealer for a replacement. IMPORTANT SAFETY INFORMATION The Honda WDP30X pump is not designed to pump drinking water. Pump only non-potable water, muddy water, and water containing WARNING solids. -
Page 3: Control Locations
CONTROL LOCATIONS BEFORE OPERATION Your safety is your responsibility. A little time spent in preparation will GEAR BOX OIL FILLER MUFFLER significantly reduce your risk of injury. CAP/DIPSTICK (P. 12) GEAR BOX DRAIN Read and understand this manual. Know what the controls do and BOLT (Remove FUEL CAP how to operate them. -
Page 4: Operation
OPERATION NOTICE Due to pump movement during operation, connecting a rigid pipe to PUMP PRECAUTIONS the pump will cause pump damage. Always use flexible suction and discharge hoses to prevent pump damage. Before operating the pump for the first time, please review When water being pumped contains solids, the solids may get lodged IMPORTANT SAFETY INFORMATION (page 2) and BEFORE under the clappet valves, which will prevent the clappet valves from... -
Page 5: Pump Preparation
Optional hose kits, designed specifically for this pump, are available pump (suction head) is less than 16 feet. The suction head can be from your Honda dealer. See page 20. increased to 24 feet if the pump is primed. Suction Hose Connection To prime the pump, remove the air cushion chamber cap. -
Page 6: Starting The Engine
STARTING THE ENGINE 7. Set the throttle to the THROTTLE LEVER desired speed to 1. Turn the fuel valve to FUEL VALVE produce the best the ON position. pumping conditions. Pump output can be controlled by adjusting IDLE the throttle lever to the desired position. -
Page 7: Servicing Your Pump
1. Service more frequently when used in dusty areas. • Make sure the engine is off before you begin any maintenance or 2. These items should be serviced by an authorized Honda servicing repairs. This will eliminate several potential hazards: dealer, unless you have the proper tools and are mechanically •... -
Page 8: Engine Maintenance
Drain the oil into a suitable container. The SAE oil viscosity and service category are in the API label on the oil container. Honda recommends that you use API SERVICE FILLER category SJ or later oil with the ILSAC “starburst” certification mark CAP/DIPSTICK displayed on the container. - Page 9 Air Filter Inspection 2. To clean the foam filter SOLVENT element, wash the 1. Unscrew the outer wing nut and remove the air cleaner cover. ENGINE OIL element in a solution of OUTER household detergent and WING NUT warm water, then rinse thoroughly, or wash in nonflammable solvent.
- Page 10 Dry them Check local laws and regulations. An optional USDA approved spark thoroughly. arrester is available from an authorized Honda servicing dealer. See page 20 for part numbers. 3. Install the O-ring and sediment cup and tighten The spark arrester must be serviced every 100 hours to keep it securely.
-
Page 11: Refueling
REFUELING Fuel Filter/Fuel Line 1. Turn the fuel valve to the Honda recommends using a No-Spill® gas can (page 20). OFF position. FUEL VALVE This engine is certified to operate on unleaded gasoline with a pump 2. Remove the carburetor octane rating of 86 or higher. -
Page 12: Pump Maintenance
PUMP MAINTENANCE Pump Gear Box Oil Change 1. Run the engine for 10 minutes to warm up the gear box oil. Warm Pump Chamber Flushing oil drains quickly and completely. With the engine stopped, the pump case should be flushed after each 2. - Page 13 If the clappets are worn, torn, or damaged, replace them. If the case sealing surface is damaged and cannot be cleaned, an UPPER PUMP optional wear plate and gasket is available from your Honda water ASSEMBLY pump dealer (page 20).
- Page 14 6. If the diaphragm is 4. Install the connecting rod with the hardware shown below and 12 mm to be reused, mark torque the connecting rod bolt to 40 ft-lb (54 N•m). NUT (4) the diaphragm to CONNECTING allow it to be ROD FLANGE NYLON installed in the same...
-
Page 15: Transporting
TRANSPORTING Cleaning the Pump 1. Flush the pump chamber (page 12). BEFORE LOADING 2. Wash the pump with a garden hose or other low pressure equipment. Keep water away from controls and all other places When transporting the pump, be sure to keep it upright. If the pump is that are difficult to dry, as water may promote rust. - Page 16 PLACING IN STORAGE Draining the Fuel Tank and Carburetor 1. Remove the carburetor drain screw with a 10 mm wrench or If your pump will be stored with gasoline in the fuel tank and screwdriver, and drain the fuel into an approved gasoline container. carburetor, it is important to reduce the hazard of gasoline vapor ignition.
-
Page 17: Taking Care Of Unexpected Problems
Spark plug wet with fuel (flooded Dry and reinstall the spark plug. engine) ENGINE SERIAL Fuel filter clogged, carburetor Take the pump to an authorized Honda MODEL NAME NUMBER AND FRAME malfunction, ignition malfunction, servicing dealer for repair. valves stuck, etc. -
Page 18: Emission Control System
Intermediate 125 hours (0–80 cc inclusive) 250 hours (greater than 80 cc) The following instructions and procedures must be followed in order to keep the emissions from your Honda engine within the emissions Extended 300 hours (0–80 cc inclusive) standards. - Page 19 (0.70 ~ 0.80 mm) BLACK +200 Carburetor idle speed See page 10 1,400 -150 YELLOW Intake: See your Valve clearance 0.15 ± 0.02 mm authorized (cold) Exhaust: Honda servicing 0.20 ± 0.02 mm dealer Other specifications No other adjustments needed...
-
Page 20: Consumer Information
CONSUMER INFORMATION DEALER LOCATOR INFORMATION To find an Authorized Honda Servicing Dealer anywhere in the United REPLACEMENT PARTS, States: OPTIONAL EQUIPMENT, AND SERVICE ITEMS Visit www.hondapowerequipment.com Contact an authorized Honda servicing dealer to purchase any of these (or other) genuine, original Honda items for your pump. -
Page 21: Distributor's Limited Warranty
Warranty: What American Honda will Repair or Replace Under American Honda will repair or replace, at its option, any part that is proven to Warranty: be defective in material or workmanship under normal use during the applicable warranty time period. Warranty repairs and replacements will be American Honda will repair or replace, at its option, any power equipment made without charge for parts or labor. -
Page 22: Emission Control System Warranty
13 provinces and territories of Canada. In the Honda dealer determines it is defective or causes a failure of a warranted part, remainder of this Emission Control System Warranty, American Honda Motor your claim for repair of your engine may be denied. - Page 23 NOTES...
- Page 24 Printed on Recycled Paper...