Philips CE131 User Manual
Car audio system
Hide thumbs
Also See for CE131:
- Quick start manual (2 pages) ,
- User manual (22 pages) ,
- User manual (22 pages)

Related Manuals for Philips CE131


Summary of Contents for Philips CE131
- Page 1 Register your product and get support at www.philips.com/welcome CE131 User manual ES-AR Manual del usuario PT-BR Manual do Usuário...
-
Page 2: Table Of Contents
Contents Rear Aux Reset 8 Additional information 1 Important Detach the front panel Replace fuse Safety Remove the unit Notice 9 Product information 2 Your car audio system Introduction What’s in the box 10 Troubleshooting Overview of the main unit 11 Glossary 3 Get started Install the car audio... -
Page 3: Important
1 Important • The apparatus shall not be exposed to dripping or splashing. • Do not place any sources of danger on the apparatus (e.g. liquid filled objects, lighted candles). Safety • Read and understand all instructions Notice before you use your apparatus. If damage is caused by failure to follow instructions, the warranty does not apply. - Page 4 European Directive Philips Consumer Lifestyle may void the user’s 2002/96/EC: authority to operate the equipment. 2011 © Koninklijke Philips Electronics N.V. All rights reserved.
-
Page 5: Your Car Audio System
2 Your car audio i User manual system j Quick start guide Congratulations on your purchase, and welcome to Philips! To fully benefit from the support that Philips offers, register your product at www.philips.com/welcome. Introduction With the in-car audio system, you can enjoy your drive while listening to: •... -
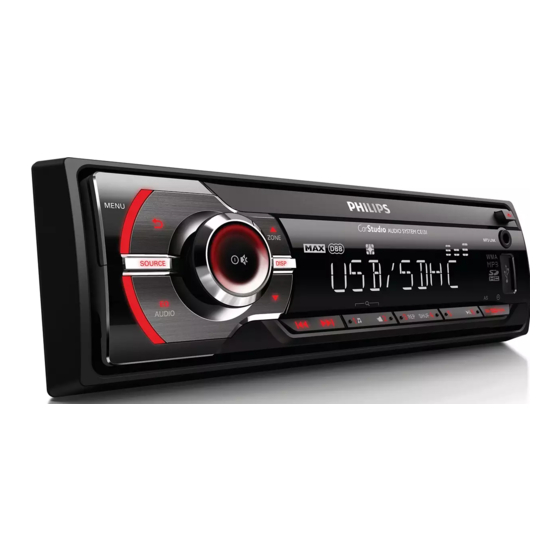
Page 6: Overview Of The Main Unit
Overview of the main unit j i h a SOURCE • Turn the unit on or off. • Confirm selection. • Select audio source. • Mute or unmute sound. b MENU • Rotate to adjust volume. • Access system menu. e ZONE •... -
Page 7: Get Started
• USB socket. Always follow the instructions in this chapter in sequence. If you contact Philips, you will be asked for the • Turn on or off Maximizing volume. model and serial number of your apparatus. The • View clock. - Page 8 White/black Left speaker (Front) strip Note Gray/black Right speaker (Front) strip • Consult a professional to connect CE131 as Purple/black Right speaker (Rear) instructed below. strip Ignition key +12V DC Connect the supplied male connector to when ON/ACC the unit.
-
Page 9: Mount Into The Dashboard
Connect the antenna and amplifier as Mount into the dashboard illustrated, if applicable. If the car does not have an on-board drive or navigation computer, disconnect the negative terminal of the car battery. • If you disconnect the car battery in a car that has an on-board drive or navigation computer, the computer Rear... -
Page 10: Attach The Front Panel
Install the sleeve into the dashboard and bend the tabs outward to fix the sleeve. Note • If the unit is not fixed by sleeve but by the supplied screws, skip this step. Reconnect the negative terminal of the car battery. Attach the front panel Place the supplied rubber cushion over Attach the trim plate. -
Page 11: Turn On
4 Listen to radio Insert the left side of the panel in the chassis until it is correctly engaged. Press the right side of the panel until it is locked into place. Tune to a radio station Press SOURCE repeatedly to select radio mode. -
Page 12: Store Radio Stations In Memory
5 Play audio files Rotate to select a setting: • [LOCAL ON] (local on): Only stations with strong signal can be broadcast. • [LOCAL OFF] (local off): Stations Play from USB with strong and weak signals can be broadcast. Note •... -
Page 13: Play Options
Search in other folder Insert the card into the card slot. » The unit starts playing from the card Press automatically. » The name of the current folder is displayed. Rotate to navigate through all folders. Press to access the selected folder. Rotate to select a track in the folder. -
Page 14: Connect External Sound Source
6 Adjust sound Rotate to select a setting: • [SHUF FLD]: start random play for all tracks in the current folder. • [SHUF ALL]: start random play for all tracks. Adjust volume • [SHUF OFF]: turn off random play. Turn clockwise/counterclockwise to increase/ decrease volume. -
Page 15: Select Preset Equalizer
Rotate to select a value. Switch music listening zone Philips’ innovative Zone technology enables driver or passengers to enjoy music with the best speakers balance and experience more vivid spacial effect as the artist is intended to create. -
Page 16: Adjust System Settings
7 Adjust system Turn demo mode on/off settings Press MENU. Press repeatedly until [DEMO] displays. Rotate to select a setting: Turn beep sound on/off • [DEMO ON] : Turn on the demo mode. When the unit is idle for Each time you press a button, the unit beeps. more than 10 seconds, all functions You can turn off/on this beep sound. -
Page 17: Rear Aux
8 Additional Rear Aux information Press MENU. Press repeatedly until [REAR AUX] is displayed. Rotate to select a setting: Detach the front panel • [AUX] : Auxiliary audio input. You can detach the front panel to deter theft. • [Telephone] : Telephone call input. Press to release the panel. -
Page 18: Remove The Unit
Maximum power output 45 W x 4 channels • If the new fuse gets damaged again, there may Continuous power 22 W x 4 RMS (4 be an internal malfunction. Consult your Philips output 10% T.H.D.) dealer. Pre-Amp output voltage 2.5 V... -
Page 19: Troubleshooting
• WMA V4, V7, V8, V9 (L1, L2) requesting service. If the problem remains • ISO9660, Joliet unsolved, go to the Philips web site (www. • Maximum title number: 512 philips.com/support). When you contact Philips, (depending on file name length) ensure that your apparatus is nearby and the •... -
Page 20: Glossary
11 Glossary A file format with a sound data compression system. MP3 is the abbreviation of Motion Picture Experts Group 1 (or MPEG-1) Audio Layer 3. With the MP3 format, one CD-R or CD-RW can contain about 10 times more data than a regular CD. - Page 22 Contenido 7 Ajuste de la configuración del sistema Activación y desactivación del pitido Configuración de apagado 1 Importante Activación y desactivación del modo Seguridad de demostración Aviso Atenuador Dance Auxiliar trasero 2 Sistema de audio para el automóvil Reestablecer Introducción Contenido de la caja Descripción de la unidad principal 8 Información adicional...
-
Page 23: Importante
1 Importante • Riesgo de daños a la pantalla de la unidad. Nunca toque, presione, frote ni golpee la pantalla con ningún objeto. Precaución Seguridad • Si se llevan a cabo procedimientos de control o ajuste diferentes de los que se mencionan •... - Page 24 Koninklijke Philips Electronics N.V. o de sus respectivos propietarios. Este producto cuenta con pilas contempladas Philips se reserva el derecho de modificar en la Directiva Europea 2006/66/EC, que no los productos en cualquier momento sin se pueden desechar junto con los residuos obligación de realizar ajustes en los insumos...
-
Page 25: Sistema De Audio Para El Automóvil
Manual del usuario j Guía de inicio rápida Felicitaciones por su compra y bienvenido a Philips. Para utilizar los servicios de asistencia técnica de Philips, registre su producto en www. philips.com/welcome. Introducción Con el sistema de audio para el auto puede manejar mientras disfruta de: •... -
Page 26: Descripción De La Unidad Principal
Descripción de la unidad principal j i h a SOURCE • Enciende o apaga la unidad. • Selecciona la fuente de audio. • Confirma la selección. b MENU • Activa o desactiva el sonido. • Accede al menú del sistema. •... - Page 27 e ZONE p EQ / AUDIO • Selecciona la banda del sintonizador. • Selecciona los ajustes del ecualizador (EQ). • Selecciona la carpeta de MP3/WMA. • Accede al menú de ajustes de audio. • Cambia de zona de reproducción. q RESET f MP3 LINK •...
-
Page 28: Introducción
Siga siempre el orden de las instrucciones de Notas sobre la conexión del parlante este capítulo. Si se comunica con Philips, le solicitarán el • Nunca conecte los cables del parlante número de serie y de modelo del producto. - Page 29 Conecte la antena y el amplificador Nota tal como se muestra en la imagen, si • Peligro Consulte con un profesional para corresponde. realizar los pasos que se describen a continuación. Rear Rear Front Front Conector Conectar a Banda Parlante izquierdo ANTENA Antena verde/...
- Page 30 Instale la manga en el tablero y doble las Montaje en el tablero del auto pestañas hacia fuera para fijarla. Si el auto no dispone de una unidad de a bordo o de un equipo de navegación, Nota desconecte el terminal negativo de la batería del auto.
-
Page 31: Encendido
Empuje el lado derecho del panel hasta que encastre en su lugar. Encendido Para encender la unidad, • pulse Vuelva a conectar el terminal negativo de Para apagar la unidad, la batería del auto. • mantenga pulsado hasta que la unidad se apague. -
Page 32: Sintoniza Una Emisora De Radio
4 Cómo escuchar Gire para seleccionar un ajuste: • [LOCAL SEEK ON] (búsqueda la radio local activada) sólo se transmitirán las emisoras con señal potente. • [LOCAL SEEK OFF] (búsqueda local desactivada): se transmitirán Sintoniza una emisora de las emisoras con señales potentes y radio. -
Page 33: Reproducción De Archivos De Audio
5 Reproducción Pulse para liberar el panel. Empuje el lado izquierdo del panel hacia de archivos de la derecha y, a continuación, tire del panel hacia el frente para quitarlo del chasis. audio Introduzca la tarjeta en la ranura para tarjetas. -
Page 34: Conexión De Una Fuente De Sonido Externa
Búsqueda de pistas MP3/WMA Repetición de la reproducción Durante la reproducción, pulse RPT. Búsqueda dentro de la carpeta actual » Aparecerá [REP] en la pantalla. Pulse » Gire para seleccionar un ajuste: Aparecerá el nombre de la pista actual. • [RPT TRK] (repetir una pista): repite la Gire para seleccionar otra pista en la... -
Page 35: Ajustar El Sonido
» [DBB ON]: la función de refuerzo Con la innovadora tecnología de zonas de reproducción de Philips, el conductor y los dinámico de graves (DBB) está activada. » [DBB OFF]: la función DBB está pasajeros pueden disfrutar de la música con el mejor balance de los parlantes y un sonido desactivada. -
Page 36: Otros Ajustes De Sonido
7 Ajuste de la Otros ajustes de sonido configuración También puede cambiar los ajustes predeterminados de EQ / AUDIO. del sistema Mantenga pulsado EQ / AUDIO durante 3 segundos. Pulse varias veces para seleccionar el elemento que desea ajustar: Activación y desactivación del •... -
Page 37: Activación Y Desactivación Del Modo De Demostración
Activación y desactivación del Auxiliar trasero modo de demostración Pulse MENU. Pulse MENU. Pulse varias veces hasta que aparezca [REAR AUX] en la pantalla. Pulse varias veces hasta que aparezca [DEMO]. Gire para seleccionar un ajuste: • [AUX]: entrada de audio auxiliar. Gire para seleccionar un ajuste: •... -
Page 38: Información Adicional
Consulte con su distribuidor de Philips. Extracción de la unidad Puede retirar la unidad del tablero. Extraiga el panel frontal y la placa. Extraiga la unidad con las herramientas de desmontaje. -
Page 39: Información Del Producto
9 Información del • Reproductores Flash USB: host USB 1.1 compatible con todas las velocidades de lectura (1.1, 2.0) producto • Tarjetas de memoria (SD / SDHC) Formatos compatibles: Nota • USB o formato de archivos de • La información del producto está sujeta a memoria: FAT16, FAT32 cambios sin previo aviso. -
Page 40: Solución De Problemas
Si no consigue resolver el problema, ingrese en el sitio web de Philips (www.philips.com/support). Cuando se comunique con Philips, recuerde tener el dispositivo cerca y tener a mano el número de modelo y el número de serie del producto. -
Page 41: Glosario
11 Glosario Formato de archivos con un sistema de compresión de datos de sonido. “MP3” es la abreviatura de Motion Picture Experts Group 1 (o MPEG-1) Audio Layer 3. Cuando se utiliza el formato MP3, un disco CD-R o CD-RW puede contener hasta 10 veces su capacidad de datos en comparación con un CD normal. - Page 42 © 2011 Koninklijke Philips Electronics N.V. All rights reserved. CE131_UM_00_V1.0...