Panasonic KX-NT700 Operating Instructions Manual
Conferencing phone manager
Hide thumbs
Also See for KX-NT700:
- Operating instructions manual (80 pages) ,
- Quick reference manual (9 pages) ,
- Specifications (2 pages)
Table of Contents
Advertisement
Advertisement
Table of Contents

Related Manuals for Panasonic KX-NT700


Summary of Contents for Panasonic KX-NT700
- Page 1 Operating Instructions for Conferencing Phone Manager IP Conferencing Phone KX-NT700 Model No. Thank you for purchasing this Panasonic product. Please read this document carefully before using this product and save for future use. KX-NT700: Version 2.1 or later Document Version 2010/02...
-
Page 2: Video Conferencing
CPM can be used to implement the following features: Video Conferencing By connecting CPM to a Panasonic Network Camera (sold separately), you can create a video conference by simply making a call. Long-distance meetings, enhanced with images as well as sound, can be held using CPM (see Page 51). - Page 3 Introduction Sharing Applications Computer files, such as Microsoft PowerPoint presentations, can be viewed and edited by both parties during a call. Documents can be shared even if one party does not have a certain application, which allows you to create documents and meeting notes while a meeting is in progress. You can also visually share your desktop or the Whiteboard feature (see Page 53).
-
Page 4: Other Information
• All other trademarks identified herein are the property of their respective owners. Notations • The KX-NT700 is called the "unit" in this manual. • Conferencing Phone Manager is abbreviated to "CPM" in this manual. • In this manual, the suffix of each model number is omitted unless necessary. -
Page 5: Table Of Contents
Table of Contents Table of Contents Before Using .....................7 Security Precautions ......................7 Data Security ........................7 Installing CPM ..................8 Installing CPM ........................8 Installing the USB Driver .................9 Installing the USB Driver ....................9 Uninstalling CPM ..................10 Uninstalling CPM ......................10 Starting/Exiting CPM ................11 Starting CPM ........................11 Exiting CPM ........................11 CPM Screens ..................12... - Page 6 Table of Contents Using with a Network Camera ..................52 Sharing Applications ................53 Sharing Applications ......................53 Programming CPM .................56 Changing the CPM's Settings ..................56 Types of CPM Settings ....................57 General ...........................57 Automatic Application Sharing ..................57 Programming the Unit ................58 Changing the Unit's Settings ..................58 Restarting the Unit ......................59 Types of Settings for the Unit ..................60 System Status Confirmation ...................60...
-
Page 7: Before Using
Before Using Before Using Security Precautions Data Security We recommend observing the security precautions described in this section, in order to prevent unauthorised access to your data. We cannot be responsible for damages resulting from the misuse of this product. Preventing Data Loss •... -
Page 8: Installing Cpm
Installing CPM Installing CPM Installing CPM System Requirements Supported operating systems Microsoft Windows XP operating system (all editions) Minimum hardware requirements – CPU: 1.6 GHz Intel Pentium microprocessor (or a CPU of similar performance) – Hard disk: 1 GB of available space –... -
Page 9: Installing The Usb Driver
Installing the USB Driver Installing the USB Driver Installing the USB Driver Connect the included USB Cable to the USB port (A) of the unit, and to the USB port of the computer. Notice • Only use the included USB cable to connect the unit and the computer. -
Page 10: Uninstalling Cpm
Uninstalling CPM erases all data stored in the phonebook and call history of CPM. Make a backup of all necessary information before uninstalling. Click [Start] ® [All Programs] ® [Panasonic] ® [Conferencing Phone Manager] ® [Uninstall]. • A confirmation dialogue box is displayed. -
Page 11: Starting/Exiting Cpm
Click in the upper-right corner of the window. Double-click the shortcut icon on your desktop. – From the [Start] menu Click [Start] ® [All Programs] ® [Panasonic] ® [Conferencing Phone Manager] ® [Conferencing Phone Manager]. Note • CPM cannot be used when the unit's operation mode is set to [USB Audio]. -
Page 12: Cpm Screens
CPM Screens Main Screen When you start CPM the following screen is displayed. Notice • If the settings for the unit are incomplete, the settings screen is displayed. Program the unit before proceeding (see Page 58). Main Screen Explanation Status display and basic operations during a call Display Description This icon shows that you are on a call. - Page 13 CPM Screens Display Description Moving the mouse pointer over this icon displays the unit's IP address or SIP extension number. When the operation mode is set to [IP-PBX], the SIP extension number is displayed. When the operation mode is set to [Peer to Peer], the IP address is displayed. Line selection combo box Select the type of line to use when making a call.
- Page 14 CPM Screens Compact screen button Click this button to only show the status display and basic operations during a call. Click again to return to the previous display. Screen switching tab Click a tab to switch to the corresponding screen. Description Displays the Phonebook screen.
- Page 15 CPM Screens Basic settings Display Description The selected line type is displayed. You can change the line type from the drop-down list (see Page 15). The selected operation mode is displayed. You can change the operation mode from the drop-down list (see Page 15). Note •...
-
Page 16: Phonebook Screen
CPM Screens Phonebook Screen When you start CPM, the Phonebook screen is displayed. On this screen, you can view phonebook entries and perform the following operations: • Make a call using the phonebook (see Page 44) • Add a new phonebook entry (see Page 42) •... - Page 17 Click to erase all phonebook entries. Erasing All Entries (see Page 45) Unit phonebook/Outlook phonebook Click one of the buttons below to display the phonebook of the KX-NT700 (Unit phonebook) or a phonebook stored in Microsoft Outlook (Outlook phonebook). Button Description Click to display the Unit phonebook (see Page 42).
-
Page 18: History Screen
CPM Screens History Screen On this screen, you can view the call history and perform the following operations: • Make a call using the call history (see Page 48) • Add a phonebook entry from the call history (see Page 48) •... - Page 19 CPM Screens Button Description Property Click to display the details of the selected call history entry. Delete Click to erase the selected call history entry. Erasing (see Page 49) Delete all Click to erase the whole call history. Erasing (see Page 49) Filter by Click to filter the call history according to the type of call.
- Page 20 CPM Screens Display Description Call The number of times that calls were made or received is displayed. Frequency Call Priority The priority of the phonebook entry in the CPM phonebook ([High], [Medium], or [Low]) is displayed. Operating Instructions for Conferencing Phone Manager Document Version 2010/02...
-
Page 21: Call Control Screen
CPM Screens Call Control Screen This screen is displayed when making or receiving calls. On this screen, you can view the status of the current call and perform the following operations: • Answer a call (see Page 39) • Create a 3-party conference call (see Page 38 and Page 39) •... - Page 22 CPM Screens Display Description This icon shows that you are on a call. This icon shows that the call has finished. This icon shows that the other party has put you on hold. This icon shows that you are on hold for a 3-party conference call. This icon shows that you are on a 3-party conference call.
- Page 23 CPM Screens Button Description End call Click to end the current call. Making Calls (see Page 37) Answering Calls (see Page 39) Speech Speed Setting Click to convert the speech speed during a call. The displayed icon changes depending on whether this feature is turned on or off. •...
-
Page 24: Maintenance Screen
CPM Screens Maintenance Screen On this screen, you can perform the following operations: • Configure CPM settings • Configure the unit's settings • Register a network camera • Back up the phonebook • Restore the phonebook • Check version information •... - Page 25 CPM Screens Operation Description Network Camera Click to register a network camera for video conferencing. registration Registering a Network Camera (see Page 51) Backup phonebook Click to back up data in the CPM phonebook or the Unit phonebook. Backing Up (see Page 47) Restore phonebook Click to restore backed up phonebook data.
-
Page 26: Unit Panel Screen
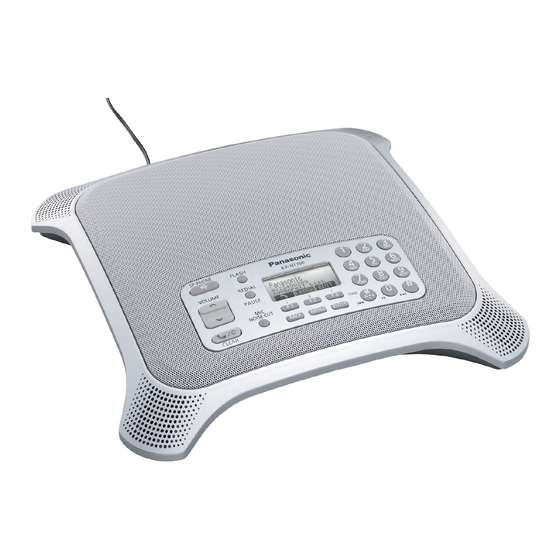
CPM Screens Unit Panel Screen Click to display the screen below. To operate the Unit Panel screen, click on the desired button. See the unit's Operating Instructions for more details on the various operations. Unit appearance varies by country or area. KX-NT700C/UK/AL/NZ/BX/ML KX-NT700NE Operating Instructions for Conferencing Phone Manager... - Page 27 CPM Screens KX-NT700RU Unit Panel Screen Explanation Button (Speakerphone Button) Used to make, answer, and end calls. Navigator/Volume Buttons ([ ] and [ ]) Used to scroll through the items displayed on the display, such as phonebook entries, programmable settings, etc. Also used to adjust the speaker volume during calls and the ringer volume. Button (Mute/Clear Button) Used to erase characters or numbers while storing a phonebook entry or making a call.
-
Page 28: Understanding The Display
CPM Screens Understanding the Display Standby Mode Phonebook SD Icon Indicates that a compatible SD memory card has been inserted in the unit. USB Icon Indicates that a computer is connected to the USB port. Line Icon (IP, TEL, PS, PC, USB-AUDIO) Indicates which line will be used when a call is made. -
Page 29: Function Buttons And Function Button Icons
CPM Screens Function Buttons and Function Button Icons By pressing a function button ([F1], [F2], and [F3]) you can select the function displayed directly above it. In this document, function buttons ([F1], [F2], and [F3]) are referred to by their corresponding icons. In the example shown here, "Press ",... - Page 30 CPM Screens Operation Icon Description Used to start recording to the SD memory card. Used to play the selected recording. PLAY Used to stop recording. STOP Recording and Playback Used to rewind the current recording. Used to fast forward the current recording. Used to erase a recording.
-
Page 31: Video Conference Screen
CPM Screens Video Conference Screen When a call is established using an IP line, a separate, video conferencing screen is automatically displayed. If a network camera (sold separately) is set up in advance (Page 51), the camera's images are displayed on the screen. - Page 32 CPM Screens Operation buttons Button Description Click to make or answer calls. Making Calls (see Page 37) Answering Calls (see Page 39) Click to end a call. Making Calls (see Page 37) Answering Calls (see Page 39) Click (increase) or (decrease) to adjust the speaker volume during a call.
- Page 33 CPM Screens Button Description Click to open the network camera registration screen. If a network camera has already been set up, clicking this button reloads the image from the network camera. Registering a Network Camera (see Page 51) Click to start sharing the computer's desktop or other applications. Sharing Applications (see Page 53) Click to start sharing the Whiteboard feature.
- Page 34 CPM Screens When the network camera is not registered When the network camera is not registered, the following screen is displayed when you start video conferencing. To register the network camera, click on the right side of the screen. The network camera registration screen is displayed (see Page 51). Operating Instructions for Conferencing Phone Manager Document Version 2010/02...
-
Page 35: Switching Between Network Camera Images
CPM Screens Switching between Network Camera Images On the Video Conference screen, you can switch between network camera images as follows: • Switch between the images of the other party's network camera and your own network camera. • Switch your own network camera's images on and off. Switching between the images of the other party's network camera and your own network camera Right-click on the image area and select [Switch Video]. - Page 36 CPM Screens Switching your own network camera's images on and off Right-click on the area of your own network camera's images on the bottom-right of the screen, and select [Hide Video]. Your own network camera's images are hidden. To redisplay your own network camera's images, right-click on the image area and select [Show Video]. Operating Instructions for Conferencing Phone Manager Document Version 2010/02...
-
Page 37: Making And Answering Calls
Making and Answering Calls Making and Answering Calls Making Calls – Right-click on the call status display and select [End call]. Making Calls Using an IP or TEL Line Note • To make a call using the phonebook, see Page 44. •... -
Page 38: Making Conference Calls
Making and Answering Calls Ending a Conference Call Making Conference Calls While on a call, you can make another call and establish a conference call (i.e., a 3-party call) including yourself and 2 other parties. You can establish a conference call using the following types of calls: –... -
Page 39: Answering Calls
Making and Answering Calls Answering Calls You can also reject a call by right-clicking on the status display of the incoming call and selecting [Reject Call]. When a call is being received, the type of call being received is shown on the display. •... -
Page 40: Conference Call
Making and Answering Calls Confirming the caller then creating a Ending a Conference Call conference call Click • The first call is put on hold, and you can talk to the second caller. Click Select the status display (A) of the party you want to end a call with, and click (B). -
Page 41: Useful Features Available During A Call
Making and Answering Calls • Useful Features Available If the other party speaks for more than 5 seconds without stopping, this feature will stop During a Call functioning. Once the other party stops talking for about 1 second, this feature will function again. -
Page 42: Phonebook
Phonebook Phonebook Adding Entries to the • The [Add Entry] dialogue box is displayed. Phonebook CPM contains 3 types of phonebooks. • CPM phonebook: Phonebook entries are stored on CPM. • Unit phonebook: Phonebook entries are stored on the unit. •... - Page 43 Phonebook Adding Entries to the Outlook Click Phonebook The Outlook phonebook can store entries in the same way as the CPM phonebook and Unit phonebook. The maximum number of entries depends on the • The adding screen can also be displayed in the version of Outlook that you are using.
-
Page 44: Making Calls Using The Phonebook
Phonebook Making Calls Using the Select a type of number from the drop-down list. • For an IP address, select [IP Address]. Phonebook • For a telephone number, select [Phone Number (TEL)]. • For a SIP extension number, select [Phone You can make a call to an entry in the phonebook in the Number (IP)]. -
Page 45: Editing Entries
Phonebook Editing Entries Erasing Entries You can edit an entry in the phonebook in the following You can erase entries in the phonebook in the following way: ways: Click Erasing 1 Entry Select the entry you want to edit. Click Click Select the entry you want to erase. -
Page 46: Transferring Phonebook Entries Between Phonebooks
Phonebook – Transferring Phonebook Right-click anywhere on the phonebook you want to erase and select [Delete All]. Entries between Phonebooks You can transfer a phonebook entry to another phonebook. Entries can only be transferred between the following phonebooks. • CPM phonebook « Unit phonebook CPM phonebook «... -
Page 47: Backing Up The Phonebook
Phonebook Backing Up the Click [OK]. • A confirmation dialogue box is displayed. Phonebook Click [Yes]. You can back up phonebook data and store it on your computer. You can also restore backed up data to a phonebook. Note • Only the CPM phonebook and Unit phonebook can be backed up. -
Page 48: Using The Call History
Using the Call History Using the Call History Making Calls Using the Adding Entries to the Call History Phonebook You can make a call using the call history on the History You can add call history entries to the CPM phonebook. screen. -
Page 49: Erasing
Using the Call History Erasing Click Click Select the entry that you want to erase. Click Click [Update Current Entry]. • The [Update Entry] dialogue box is displayed. Select the phonebook entry that you want to overwrite. • When adding a made call entry, the telephone •... -
Page 50: Filtering The Call History
Using the Call History Filtering the Call History address, telephone number, or SIP extension number). • [Number]: Calls are grouped according to the Filtering the Call History according number of the other party. to Call Type • [Name]: Calls are grouped according to the name of the other party stored in the Click phonebook. -
Page 51: Using With A Network Camera
LAN as your computer to create a video conference. The images from both the other party's and your own IP Network network camera can be displayed on one screen during (Intranet) the video conference (see Page 31). Compatible models (Panasonic Network Cameras) – BB-HCE481 – BB-HCM581 –... -
Page 52: Using With A Network Camera
Using with a Network Camera camera's IP address and port number Using with a Network automatically by following the procedure below. Camera Click [Search]. • A list of up to 10 network cameras Before using CPM with a network camera, it is connected to the LAN is displayed necessary to connect a network camera (sold in the [Choose Network Camera]... -
Page 53: Sharing Applications
Sharing Applications Sharing Applications • Sharing Applications If you check the [Share in true color] checkbox in the sharing settings dialogue box, the shared application will be displayed on the other party's You can share your computer's desktop and various screen in the same colours as your own screen. - Page 54 Sharing Applications Whiteboard Feature Screen Click • The [Whiteboard] screen is displayed. Save the data. A Colour Palette Follow the procedure below to save data. B Tool Palette From the File menu, click [Save] or [Save As]. If you clicked [Save As], enter a file name and Button Description click [Save].
- Page 55 Sharing Applications Button Description Zoom Tool Used to zoom in to a certain part of the whiteboard. Remote Pointer Tool Used to draw the other party's attention to a certain part of the whiteboard. Lock Contents Tool Used to prevent the other party from overwriting the current data.
-
Page 56: Programming Cpm
Programming CPM Programming CPM Changing the CPM's Settings You can view and change the CPM's settings. Click Click [CPM program settings]. • The feature settings screen is displayed. Change the settings as required (see Page 57). Click [OK]. • You will return to the Maintenance screen. •... -
Page 57: Types Of Cpm Settings
Programming CPM Types of CPM Settings The various types of CPM settings are listed here. General Setting and Description Available Settings Default Setting Language Deutsch Select the language for CPM. English(UK) English(US) Español Varies by the selection Français made for the [Program Français(C) Language] setting Italiano... -
Page 58: Programming The Unit
Programming the Unit Programming the Unit Changing the Unit's • To close the screen without changing any settings, click [Cancel]. Settings Note • If you change a setting that requires restarting You can view and change the unit's settings from CPM. the unit, a confirmation message is displayed. -
Page 59: Restarting The Unit
Programming the Unit Restarting the Unit Click Click [Unit settings]. • The feature settings screen is displayed. Click [Restart] on the left side screen. Click [Restart] on the right side screen. • A confirmation message is displayed. To restart the unit, click [Yes]. Document Version 2010/02 Operating Instructions for Conferencing Phone Manager... -
Page 60: Types Of Settings For The Unit
Programming the Unit Types of Settings for the Unit The various types of settings for the unit are listed here. System Status Confirmation Setting and Description Check the following settings: – Software Version – IP Address – Subnet Mask – Default Gateway –... -
Page 61: Basic Settings
Programming the Unit Basic Settings Setting and Description Available Settings Default Setting Language Available languages KX-NT700C: English(US) Determines the unit's display language. vary by country or area. KX-NT700UK: English(UK) Deutsch KX-NT700AL: English(UK) English(UK) KX-NT700NZ: English(UK) English(US) KX-NT700RU: PУCCКИЙ Español KX-NT700BX: English(UK) Français KX-NT700ML: English(UK) Français(C) -
Page 62: Line Selection
Programming the Unit Setting and Description Available Settings Default Setting Ringtone Tone Pattern 1 Determines the ringtone. Tone Pattern 2 Tone Pattern 1 Tone Pattern 3 LCD Contrast Determines the LCD contrast of the 6 levels Level 3 unit's display. Key Tones Determines whether tones are heard when the unit's buttons are pressed. -
Page 63: Ip Network Settings
Programming the Unit Setting and Description Available Settings Default Setting Flash Time KX-NT700C: 700 ms Determines the flash time. KX-NT700UK: 110 ms KX-NT700AL: 110 ms 900 ms Notice KX-NT700NZ: 600 ms 700 ms • KX-NT700RU: 700 ms Set this parameter to match the 600 ms KX-NT700BX: 700 ms specification of the TEL line. -
Page 64: Signalling Protocol Settings
Programming the Unit Setting and Description Available Settings Default Setting Default Gateway Set this parameter to match the IP address of the IP network's default gateway. See "IP Network Settings" in the — 0.0.0.0 unit's Operating Instructions for more details. This parameter is only available when [IP Address Mode] is set to [Static]. -
Page 65: Voip Settings
Programming the Unit VoIP Settings Setting and Description Available Settings Default Setting Preferred Codec G.722 Determines the preferred codec for IP calls. G.711μ-law G.722 G.711A-law G.729a RTP Packet Size 20 ms Determines the size of outgoing RTP packets. 30 ms 40 ms 20 ms 50 ms... -
Page 66: System Options
Programming the Unit System Options Setting and Description Resets all system data, user data, and all settings: Reset All Data Allows you to reset all system data and user data. The unit is returned to its factory default state when this feature is executed. -
Page 67: Troubleshooting
Troubleshooting Troubleshooting If you are experiencing trouble, refer to the information in this section. Before troubleshooting, confirm that the unit and computer are connected properly. General Use Issue Possible Cause & Solution Reference I cannot connect to the unit. • The USB cable is not connected properly. - Page 68 Troubleshooting Issue Possible Cause & Solution Reference I cannot receive IP calls. • The [Operation Mode] setting is not correct. → Change the setting to [Peer to Peer] if you want to make or receive peer to peer IP calls (i.e., calls made by Page 15 specifying the called party's IP address).
-
Page 69: Phonebook
Troubleshooting Issue Possible Cause & Solution Reference The call duration is not • CPM was started after establishing a call. displayed on the Call → Call duration is not displayed at the bottom of the Call — Control screen. Control screen when the CPM was started after the call was established. -
Page 70: Video Conferencing
Troubleshooting Video Conferencing Issue Possible Cause & Solution Reference I cannot create a video • The conditions for creating a video conference have not been conference. met. → Check that the following conditions have been met. – The call is a 2-party call using an IP line. Page 51 –... -
Page 71: Index
Index Index Language LCD Contrast Line Selection Adjusting the Volume 39, 41 Answering Calls Application Sharing Maintenance Screen Making Calls Making Conference Calls Mute Call Control Screen Mute microphone Call History Adding Entries to the Phonebook Erasing Filtering Network Camera Making Calls Call Waiting 39, 62... - Page 72 Index SIP Proxy Server: User Domain Name SIP Registrar Server: IP Address SIP Registrar Server: Port Number SIP Signalling Port Number SIP ToS Field Speaker Volume Speech Speed Speed Conversion Subnet Mask System Requirements System Status Confirmation TEL Line Level Reduction Time Time Format Troubleshooting...
- Page 73 Notes Document Version 2010/02 Operating Instructions for Conferencing Phone Manager...
- Page 74 1-62, 4-chome, Minoshima, Hakata-ku, Fukuoka 812-8531, Japan Copyright: This material is copyrighted by Panasonic System Networks Co., Ltd., and may be reproduced for internal use only. All other reproduction, in whole or in part, is prohibited without the written consent of Panasonic System Networks Co., Ltd.