
Related Manuals for Wacker Neuson BFS 1345


Summary of Contents for Wacker Neuson BFS 1345
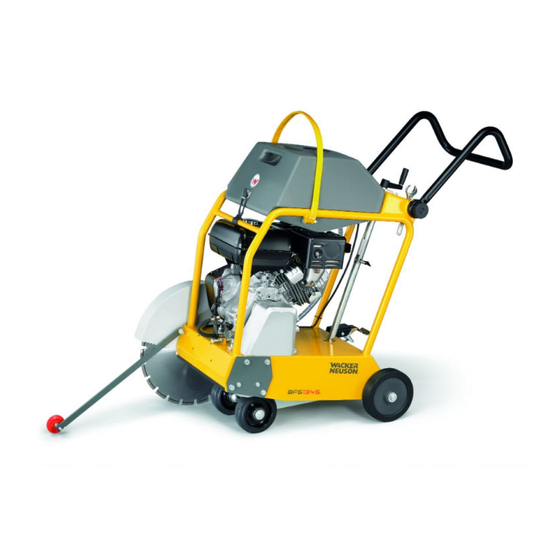
- Page 1 0203599en 11.2008 Floor saw BFS 1345 B, BZ Operator's manual...
- Page 3 Important note EPA-certified engine This machine is equipped with an EPA-certified engine. Relevant details can be found in the instructions of the engine manu- facturer. Warning The engine's exhaust fumes contain chemicals which are known to the State of California to cause cancer, congenital defects or other repro- ductive anomalies.
- Page 4 T00940en.fm...
-
Page 5: Foreword
Wacker Construction Equipment AG. Any type of reproduction, distribution or saving on data carriers of any type or method not authorized by Wacker Neuson represents an infringe- ment of valid copyrights and will be prosecuted. We expressly reserve the right to make technical modifications - even without special notice - which aim at further improving our machines or their safety standards. -
Page 6: Table Of Contents
Table of contents Foreword Safety information General instructions ................8 Operation ....................8 Safety checks ..................10 Maintenance ..................11 Transport .....................11 Maintenance checks ................11 Technical data Description Application ...................13 Maximum permissible tilt ..............13 Functional description .................14 General instructions for use for diamond-edged cutting blades ..15 Transport to the worksite Operation Adjusting the handle ................17... - Page 7 Table of contents Maintenance Maintenance schedule ................29 Checking engine oil level ..............30 Changing the engine oil ...............30 Cleaning the air cleaner ..............31 Cleaning the screws, nuts and bolts ............31 Tightening the belt ................32 Changing the belt ................33 Checking the spark plug ..............34 Signs EC Declaration of Conformity DIN EN ISO 9001 Certificate...
-
Page 8: Safety Information
Safety information Safety information for floor saws with combustion engine drive General instructions 2.1.1 Floor saws may only be operated by persons who ∗ are at least 18 years of age, ∗ are physically and mentally fit for this job, ∗... - Page 9 Safety information 2.2.9 Open flames and smoking are strictly prohibited in the immediate vicinity of this machine. 2.2.10 The tank lid must be tightly secured. When the motor is switched off, the fuel tap - if there is one - must be closed. When transported over long distances, the tank of gasoline or mixed gasoline driven engines must be completely emptied.
-
Page 10: Safety Checks
Safety information Safety checks 2.3.1 Floor saws may only be operated with all safety devices installed. 2.3.2 Before starting operation, the operator has to check that all control and safety devices are functioning properly. 2.3.3 Prior to starting the cutting operation, the following have to be checked on a daily basis: ∗... -
Page 11: Maintenance
Only use original spare parts. Alterations to this machine, incl. adjust- ments of the maximum engine speed set by the manufacturer may only be carried out with the express permission of Wacker Neuson. In case of non-observance, all liability shall be refused. -
Page 12: Technical Data
Technical data Technical data 1345 AB 1345 ABZ 1345 B 1345 BZ 0008764 0008909 Item no. 0610242 0610243 0610141 0610142 Length x Width x Height mm (in): 1,160 x 568 x 1,078 (45.67 x 22.36 x 42.44) Weight kg (lb): 95 (209) 96 (212) 95 (209) -
Page 13: Description
Description Description Application ∗ Cutting expansion joints in concrete and asphalt surfaces. ∗ Repair work on streets, e.g. cutting out damaged areas in asphalt and concrete. ∗ Straightening blacktops and concrete surfaces. ∗ For demolition jobs and refurbishment of old buildings. ∗... -
Page 14: Functional Description
Description Functional description The floor saw must only be operated in a forward direction (see arrow). The drive motor (1) attached to the frame drives the cutting blade via the belt (2). The cutting blade can be infinitely adjusted by means of a crank handle (3), 1 turn corresponds to a cutting depth adjustment of 5 mm. -
Page 15: General Instructions For Use For Diamond-Edged Cutting Blades
Never exceed the maximum speeds (imprinted on cutting blade)! ∗ Use a suitable diamond-edged cutting blade for the material to be cut (asphalt, concrete ...). Wacker Neuson offers an extensive range of di- amond-edged cutting blades in different qualities. ∗... -
Page 16: Transport To The Worksite
Transport to the worksite Transport to the worksite Requirements: ∗ When transporting the floor saw, use only suitable hoisting gear with a minimum load-bearing capacity of 150 kg. ∗ Always turn off the motor during transportation! ∗ Empty the water tank! ∗... -
Page 17: Operation
Operation Operation Adjusting the handle 6.1.1 Handle The width and height of the handles can be adjusted according to the use and the body height of the operator. To do this, release the clamping lever (1) and apply it in the new position. 6.1.1 Stirrup handle (alternative version) The height of the stirrup handle can be adjusted according to the use... -
Page 18: Adjusting / Aligning The Guide Wheel
Operation Adjusting / Aligning the guide wheel 6.2.1 Adjusting the guide wheel The guide wheel is designed to help the operator in making long, straight cuts. The guide wheel can be exactly adjusted to the cutting blade by loosening the jam nut (1) and turning the screw (2). 6.2.2 Aligning the guide wheel To do this, make a cut of approx. -
Page 19: Cutting Depth Setting
Operation Cutting depth setting With the crank (1) you can set the cutting depth precisely. One turn changes the cutting depth by exactly 5 mm. Turn the crank in the clockwise direction to increase the cutting depth and turn it in the counterclockwise direction to reduce the cutting depth. -
Page 20: Water Tank
Operation Water tank The floor saw features an integrated, removable water tank (1). To fit the water tank, attach the retaining clamp (2) and tighten it with the strap (3). To remove the water tank or to attach an external water supply, you can disconnect the hose on two different spots (4). -
Page 21: Parking Brake
Operation Parking brake 6.6.1 Integrated parking brake The machine features an integrated parking brake. The front wheels are automatically blocked in transport position (lowest cutting position without a cutting blade) or if the maximum cutting depth is exceeded. 6.6.2 Manual parking brake (accessories) Press the pedal (1) down to block the right rear wheel. -
Page 22: Assembling The Cutting Blade
Operation Assembling the cutting blade 6.7.1 Checking a new cutting blade: ∗ The blade type must be suitable for the material to be cut. Observe the peripheral speed, refer to the "Technical data"! ∗ The arbor diameter of the cutting blade must precisely fit the shaft to ensure smooth blade running. -
Page 23: Disassembling The Cutting Blade
Operation Disassembling the cutting blade Proceed as follows for the disassembly of the cutting blade: 1. Turn off the engine (2) and the water supply (3). 2. Turn the crank (4) in the counterclockwise direction until the blade is clear of the ground. 3. -
Page 24: Checking The Motor Before Starting
Operation Checking the motor before starting Oil level indicator Upper level mark Lower level mark 6.9.1 Engine oil Switch off the engine. Prior to checking the engine oil level or refilling engine oil, make sure that the engine bolting level is aligned horizontally. ∗... -
Page 25: 6.10 Starting The Engine
Operation 6.10 Starting the engine The cutting blade must not be in contact with the ground. Switch the main switch (1) to "I". Close Close Open Open the fuel tap. Throttle lever (2) Fast Slow Start position Shift the throttle lever (2) to approximately 1/3 of the full throttle position. - Page 26 Operation Close the choke. ∗ If the engine is warm or at high ambient temperatures, open the choke approximately half way or fully. ∗ If the engine is cold or at low ambient temperatures, close the choke. Recoil starter ∗ Slowly pull the recoil starter handle until you can feel resistance (compression stroke).
-
Page 27: 6.11 Engine Operation
Operation 6.11 Engine operation After the engine has started, shift the throttle lever to low (L) engine speed and allow the engine to warm up for a few minutes. Slowly shift the throttle lever towards the (H) position for high engine speed in order to set the required engine speed. -
Page 28: 6.12 Switch Off The Engine
Operation 6.12 Switch off the engine 6.12.1 To turn off the engine in the event of an emergency, switch the main switch (1) to "0". Under normal circumstances, proceed as follows: 1. Shift the throttle lever (2) to the (L) position for low engine speed and allow the engine to operate at idle speed for a short time before switching it off. -
Page 29: Maintenance
50 hours (weekly) Spark plug Clean, set electrode gap 0.7-0.8 mm. Engine oil Change. Fuel filter Have this replaced by Wacker Neuson service. 200 hours Spark plug Change. 300 hours (annually) Have this repaired by Wacker Neuson service. Valve clearance... -
Page 30: Checking Engine Oil Level
Maintenance Checking engine oil level ∗ Switch off the engine. ∗ Align the engine bolting level horizontally. ∗ Remove any dirt around the oil level dipstick. ∗ Remove the oil level dipstick and wipe it with a clean, lint-free cloth. ∗... -
Page 31: Cleaning The Air Cleaner
Maintenance Cleaning the air cleaner Plastic nut Urethane foam Air cleaner cap Element A dirty air cleaner causes starting difficulties, a drop in power, engine faults and considerably reduces the service life of the engine. Always keep the air cleaner cartridge clean. Therefore, the air cleaner cartridge has to be cleaned regularly. -
Page 32: Tightening The Belt
Maintenance Tightening the belt Check the belt in the course of the weekly engine maintenance and re- tighten it as follows, if necessary: 1. Remove the belt guard. 2. Loosen the jam nut (1). 3. Loosen the four fastening nuts of the engine until the engine can be moved without play. -
Page 33: Changing The Belt
Maintenance Changing the belt 1. Remove the belt guard. 2. Loosen the jam nut (1). 3. Loosen the four fastening nuts of the engine until the engine can be moved without play. 4. Unscrew the bearing flange (6 screws - (4)). 5. -
Page 34: Checking The Spark Plug
Maintenance Checking the spark plug 0.7 - 0.8 mm ∗ Remove any soot deposits from the electrodes of the spark plug using a spark plug cleaner or a wire brush. ∗ Check the spark plug gap and set it to 0.7 - 0.8 mm, if necessary. ∗... -
Page 35: Signs
Signs Signs Cutting depth setting Note - Caution, risk of injury - Read the operator's manual. - Wear a helmet, eye protection and ear protection! - Machine may not be offset with the cutting blade rotating. Sound power level Rotational direction arrow Depth of cut indicator SK00693en.fm... - Page 36 Signs SK00693en.fm...
-
Page 37: Ec Declaration Of Conformity
EC Declaration of Conformity Manufacturer Wacker Construction Equipment AG Preußenstraße 41 D-80809 München Product Type BFS 1345 AB BFS 1345 AB BFS 1345 B BFS 1345 BZ Product type Floor saw Item number 0008764 0610242 0008909 0610243 0610141 0610142 Installed power output... -
Page 39: Din En Iso 9001 Certificate
DIN EN ISO 9001 Certificate Prüf- und Zertifizierungsinstitut VERBAND DER ELEKTROTECHNIK ELEKTRONIK INFORMATIONSTECHNIK e.V. C E R T I F I C A T E Registration-Number: 6236/QM/06.97 This is to certify that the company Wacker Construction Equipment AG Wacker-Werke GmbH & Co. KG at the following locations Head Office Munich Preußenstraße 41... - Page 40 Wacker Construction Equipment AG – Preußenstraße 41 – 80809 München – Deutschland – Tel.: +49-(0)89-354 02-0 – Fax: +49-(0)89-354 02-390 Wacker Corporation – P.O. Box 9007 – Menomonee Falls, WI 53052-9007 – USA – Tel.: +1(1)262-255-0500 – Fax: +1(1)262-255-0550 – Support: 800-770-0957 Wacker Machinery (HK) Ltd.–...