Panasonic WJ-HDE300 Instruction Manual
Hide thumbs
Also See for WJ-HDE300:
- Service manual (44 pages) ,
- Instructions manual (20 pages) ,
- Conversion manual (12 pages)

Related Manuals for Panasonic WJ-HDE300


Summary of Contents for Panasonic WJ-HDE300
- Page 1 Extension Unit Instructions WJ-HDE300 Model No. E xt en si on U ni t 3 0 0 W J- H D E Before attempting to connect or operate this product, please read these instructions carefully and save this manual for future use.
- Page 2 ON-OFF Model No. WJ-HDE300 switch is in the ON position. The power cord is the main power disconnect for all Serial No.
-
Page 3: Important Safety Instructions
■ Important Safety Instructions 1) Read these instructions. 2) Keep these instructions. 3) Heed all warnings. 4) Follow all instructions. 5) Do not use this apparatus near water. 6) Clean only with dry cloth. 7) Do not block any ventilation openings. Install in accordance with the manufacturer's instructions. 8) Do not use near any heat sources such as radiators, heat registers, stoves, or other apparatus (including amplifiers) that produce heat. -
Page 4: Table Of Contents
Contents ■ Important Safety Instructions ....... 3 ■ General ..........5 ■... -
Page 5: General
■ General The extension unit WJ-HDE300 can accommodate up to four hard disk drives per unit to add available disk space to the digital disk recorder WJ-HD316A/WJ-HD309A series. Up to seven extension units can be connected to a digital disk recorder. The units can be operated in RAID level 5* mode for high tolerance to disk error. -
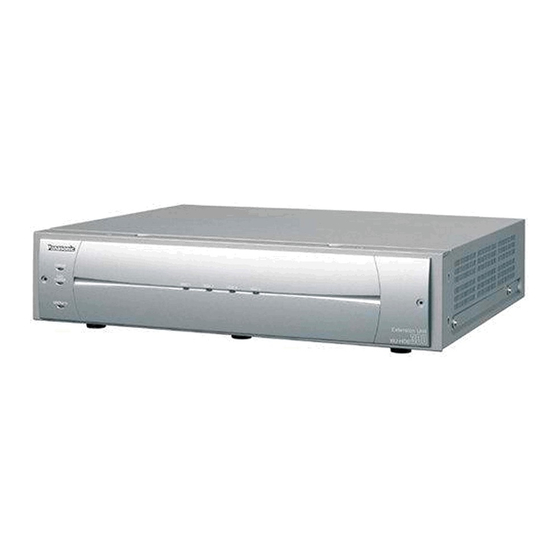
Page 6: Appearance
■ Appearance ● Front View ERROR HDD 1 HDD 2 HDD 3 HDD 4 POWER OPERATE Extension Unit WJ-HDE q Error indicator [ERROR] r HDD access indicators [HDD 1] [HDD 2] [HDD 3] Lights when an error occurs. Refer to Troubleshooting [HDD 4] for details. -
Page 7: Rear View
● Rear View SIGNAL GND POWER AC IN y Serial in connector [IN] !0 Power switch [POWER] Connect the WJ-HD300 series digital disk recorder or Turn on the power of the unit with this switch before other extension unit with the supplied serial cable. turning on the power of the digital disk recorder, or turn them on simultaneously. -
Page 8: Inside The Front Lid
● Inside the Front Lid Important • Changing the MODE switch will not be accepted when the ERROR indicator lights red and/or when HDD 1-4 q’ RESET indicate a system error status by lighting red and orange. When this happens, ask your dealer to solve MODE w’... -
Page 9: Replacing/Mounting Hdds
■ Replacing/Mounting HDDs • The replaced/added HDDs will be formatted. SINGLE mode: Only the replaced/added HDD will be formatted. For example, when the HDD Up to four HDDs (locally procured) can be installed in an 4 of the extension unit 2 is replaced, extension unit. - Page 10 2-2 Slide the front cover to the left. Remove two of the HDD mounting brackets. 2-3 Pull the front cover toward you. • Remove the four screws and pull the brackets toward you. 2 - 3 2 - 2 2 - 3 2-4 Disconnect the harness.
- Page 11 Place the brackets with the fixed HDDs into the unit and Attach the front cover as it was. fix them using the four screws removed in step 3. 11-1 Align the left edges of both the front cover and the •...
-
Page 12: Mounting In A Rack
Note: Be sure to make a space of 1 U (44 mm) between the units for ventilation in a rack. Connection Diagram Unit Layout & Wiring Digital Disk Layer1 Digital Disk Recorder Recorder EXT STORAGE 1U Space WJ-HDE300 #1 Layer2 WJ-HDE300 OUT2 OUT1 Unit #1 WJ-HDE300 #2 Layer3 WJ-HDE300 #3 1U Space... -
Page 13: How To Mount
● How to Mount Turn off the power of the unit and detach the plug from the outlet. When not turning off the power, open the front cover and turn off the HDD POWER switch. Remove the six rubber feet by removing the six screws from the bottom of the unit Remove 6 screws Fix the Rack Mounting Brackets (supplied) on both... -
Page 14: Connections
MONITOR (VGA) ALARM/CONTOROL PSÆDATA RS-485(CAMERA) 10/100BASE-T EXIT STORAGE How to fix the cables AC IN CAMERA EXT STORAGE Cable clamp WJ-HDE300 #1 Screw for the SIGNAL GND cable clamp POWER AC IN OUT2 OUT1 WJ-HDE300 #2 WJ-HDE300 #3 SIGNAL GND... -
Page 15: Setup Procedures
■ Setup Procedures The following pages describe procedures on how to set up or change the disk mode, how to recover data in RAID5, or how to check the unit number using the HDD SAFETY MODE. Notes: • Refer to the operating instructions of the digital disk recorder WJ-HD316A/WJ-HD309A series for setup menu opera- tions. - Page 16 Setup to the RAID5 mode Notes: • It will take about 3 or 5 minutes to complete the sys- Perform the following to set up the unit to the RAID5 mode tem check. for the first time. • When the system has been already run, "HDD SAFETY MODE"...
- Page 17 → The password entry window will be displayed. Formatting (Initialization) the hard disk It is necessary to initialize the hard disk in the following cases. HDD DISK MENU Digital Disk Recorder WJ-HD300A TOP MENU When replacing or adding the hard disk FORMAT MIRROR ON MIRROR OFF...
- Page 18 ● Initializing selected hard disk (the selected unit HDD DISK MENU when using the RAID5 mode) Digital Disk Recorder WJ-HD300A DISK SELECT THE SETTING METHOD • Select "SELECTED DISK" for the SINGLE mode or "ONE Auto Setup All Copy Area All Pre REC Area Detailed Setup UNIT"...
-
Page 19: Changing Setups
● Changing Setups 3 Initializing the unit MODE 1 Set the MODE switch to SINGLE. SINGLE RAID5 Changing the total number of HDD in 2 While holding down the RECOVER but- ton, press the RESET button. RAID5 3 While holding down the RECOVER button, release Do the following when the total number of the hard the RESET button about 1 second later. - Page 20 Changing hard disk mode 2 Change the mode • Confirm that the HDD POWER indicator on the front Do the following when the hard disk mode is changed panel of the extension unit went out. from SINGLE to RAID5 or vice versa after the system •...
-
Page 21: Recovery Of Raid5 Disk
● Recovery of RAID5 Disk 2 Replacement • Confirm that the HDD POWER indicator on the front Replacing and recovering RAID5 disk panel of the extension unit went out. • Replace the faulty hard disk referring to ■ When an HDD access indicator on the front panel of the Replacing/Mounting HDD. - Page 22 4 HDD SAFETY MODE OFF • Select EXIT and press the SET button to close the • Select OFF on the HDD SAFETY MODE window and menu. press the SET button. HDD DISK MENU Digital Disk Recorder WJ-HD300A TOP MENU THE CANDIDATE FOR A FORMAT ALL FORMAT SELECTED DISC MIRROR FORMAT 160GB...
- Page 23 → The recorder will restart and the HDD SAFETY Setting/Changing hard disk mode after MODE window will be displayed. resetting error It is impossible to change or set up the hard disk mode when the ERROR indicator and one of HDD access indicators is lit red or is blinking.
- Page 24 → After that, the HDD DISK MENU respective to the 4 MODE switch setting Set the MODE switch to SINGLE or RAID5. selected mode (SINGLE or RAID5) will be dis- played automatically. MODE MODE HDD DISK MENU Digital Disk Recorder SINGLE RAID5 SINGLE RAID5 WJ-HD300A...
-
Page 25: Unit Number Check
● Unit Number Check 2 Unit number check • Confirm that the HDD POWER indicators on the How to check the unit number front panel of the extension units have gone out. • On the front panel of the recorder, press the Each extension unit is given a unit number depending Camera Selection buttons from [1] to [7] in order. -
Page 26: Troubleshooting
■ Troubleshooting Symptom Cause What to do No power is supplied. Insufficient power cord connection Securely connect the power cord. POWER switch or HDD POWER switch is Turn on the POWER switch and HDD turned off. POWER switch. ERROR indicator lights orange. Cooling fan(s) may be faulty. -
Page 27: Specifications
■ Specifications Required power: 120 V AC 60 Hz Power consumption: 85 W (including 4 HDDs when installed) Interface: 2-wire serial, 480 Mbps logical speed Operating temperature: +5 °C to +45 °C (41 °F to 113 °F) Operating humidity: Less than 85 % Dimensions: 420 mm (W) x 88 mm (H) x 350 mm (D), rubber feet exclusive 19-9/16"... - Page 28 Security Systems Group PANASONIC SALES COMPANY www.panasonic.com/cctv DIVISION OF MATSUSHITA ELECTRIC OF PUERTO RICO INC. Executive Office: One Panasonic Way 3E-7, Secaucus, New Jersey 07094 San Gabriel Industrial Park 65th Infantry Ave. KM. 9.5 Carolina, Zone Office P.R. 00985 (809)750-4300 Eastern: One Panasonic Way, Secaucus, NJ 07094 (201) 348-7303 Central: 1707 N.Randal Road, Elgin, IL 60123 (847) 468-5205...