D-Link DCS-5300 User Manual
10/100 pan/tilt network camera
Hide thumbs
Also See for DCS-5300:
- User manual (143 pages) ,
- Quick installation manual (25 pages) ,
- User manual (109 pages)
Table of Contents
Advertisement
Advertisement
Table of Contents

Related Manuals for D-Link DCS-5300


Summary of Contents for D-Link DCS-5300
-
Page 2: Table Of Contents
Router Set-Up and Installation ......24 Reset and Restore ..........64 Viewing Your Camera ..........27 I/O Connector ............65 Using the DCS-5300 with an Internet Browser ..28 Adjusting the Cameras Focus ....... 69 Home Page Screen............29 Technical Specifications........... 70 Home >... -
Page 3: Package Contents
Category 5 Ethernet Cable Note: Using a power supply with a different voltage than the one included with the DCS-5300 will cause damage and void the warranty for this product. If any of the above items are missing, please contact your reseller. -
Page 4: Introduction
Ethernet, Fast Ethernet or broadband Internet connection to provide remote high-quality audio and 4x digital zoom The DCS-5300 is the latest product added to the D-Link Network Camera line. The camera features a motorized pan and tilt function found on more expensive cameras. This function allows the viewing area of the camera to extend 270 side-to-side and 90 up and down. - Page 5 Nothing herein represents a warranty or representation that the D-Link product provided herein is suitable for the end-user’s intended use under the applicable laws of his or her state. D-Link disclaims any liability whatsoever for any end-user use of the D-Link product, which fails to comply with applicable state, local, or federal laws.
-
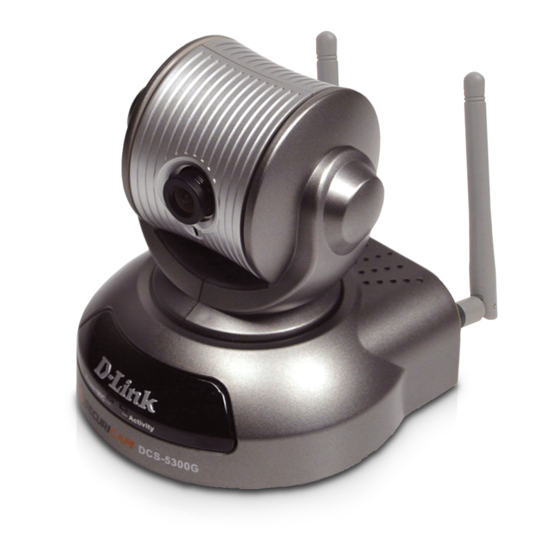
Page 6: Hardware Overview
The DCS-5300 Network Camera has an internal microphone. However, you have the option of using an external microphone by plugging it into the microphone connector. AV Out - Plug the included A/V cable into the A/V out connector to use the DCS-5300 with a television or VCR. D-Link DCS-5300 User Manual... -
Page 7: Bottom Panel
I/O Connector - The DCS-5300 provides a terminal block with two pairs of connectors situated on the back panel. One pair is for input and the other is for output. The I/O connectors provide the physical interface to send and receive digital signals to a variety of external alarm devices. -
Page 8: Hardware Installation
Attach the external power supply Attach the external power supply to the DC power input connector located on the DCS-5300’s back panel labeled 12VCD and connect the other end to your wall outlet. -
Page 9: Installation Wizard
Camera. The camera has a built-in Web server. This Web server will allow the camera to access the Internet without being attached to a computer and permits users to view the video and audio remotely. After running the Installation Wizard, you will be able to operate the DCS-5300 and view the camera remotely through Internet Explorer 6.x and above. - Page 10 Please wait while the InstallShield Wizard prepares to install. Click Next The InstallShield will install in the following folder. To install into a different folder, click Browse and select another folder. Click Next D-Link DCS-5300 User Manual...
- Page 11 Select the Program folder that Setup will add program icons to. You may type a new folder name, or select one from the existing folders list. Click Next Please wait while the Installation Wizard is installed. Installation is now complete. Click Finish D-Link DCS-5300 User Manual...
- Page 12 The opening Installation Wizard screen will appear and show a MAC address of the DCS-5300 and an IP Address (which may or may not be correct depending on what you have your DCS-5300 connected to). If you have a DHCP* server on your network, there will be a valid IP Address displayed here, indicated by a “Yes”...
- Page 13 The Installation Wizard will now show a MAC address for the DCS-5300 and an IP address. This IP address may not be correct at this step in the installation until you see “Yes” under the assigned column. The camera is now automatically configured with an IP address consistent to the device it is connected to.
-
Page 14: Installation Wizard Screen
Enter a Camera Name and create a Root password for the camera. Date/Time Enter the Date and Time for each camera. These settings can also be configured Settings: on the Tools > System screen (page 53) when configuring the camera via a Web browser. D-Link DCS-5300 User Manual... - Page 15 Web Browser. Click Next and then Apply to save the configured settings. Users can click Previous to modify changes or mistakes. After the settings have been saved, click the Done button that appears. D-Link DCS-5300 User Manual...
- Page 16 Click the Reset to Default tab to reset the camera’s settings to factory defaults. Reset to Default: About: Click About to display the current version and date. Exit: Click the Exit tab to exit the Installation Wizard screen. D-Link DCS-5300 User Manual...
-
Page 17: Enabling Upnp ™ For Windows ® Xp
® UPnP is short for Universal Plug and Play, which is a networking architecture that provides compatibility among ™ networking equipment, software, and peripherals. The DCS-5300 is a UPnP enabled Network Camera. If your operating ™ system is UPnP enabled, the device will be easier to configure. If you do not want to use the UPnP functionality, it ™... - Page 18 Click Add/Remove Windows Components The following screen will appear: Click Add/Remove Windows Components Click Details Click Universal Plug and Play Click OK D-Link DCS-5300 User Manual...
- Page 19 Click Next Please wait while Setup configures the components. Click Finish D-Link DCS-5300 User Manual...
- Page 20 IP address (in this example, 198.168.0.146). DCS-5300-146 After you click on the DCS-5300-146 icon, your Internet browser will automatically be opened to the IP Address of the DCS-5300, in this example it is: http://192.168.0.146. Your DCS-5300 may have a different IP Address.
-
Page 21: Testing The Dcs-5300 Network Camera
Testing the DCS-5300 Network Camera Open your Internet browser and type in the IP address of the DCS-5300. In this example the address is: http://192.168.0.146 (your DCS-5300 may have a different IP address based on what you found with the Installation Wizard program.) The window in the center of your browser is the camera image window. -
Page 22: Security
Password is defined, only the Administrator has access to the management of the Network Camera. This procedure should be done as soon as possible since the security features of the Network Camera will not be enabled until the Administrator Password is defined. D-Link DCS-5300 User Manual... -
Page 23: Using & Configuring The Dcs-5300 With A Nat Router
Run the Installation Wizard program from the CD included with the DCS-5300. Follow the steps in the Quick Installation Guide to configure the DCS-5300. The camera will be assigned a local IP Address that allows it to be recognized by the router. - Page 24 Run your Internet Explorer Web browser. In the address bar, type in the IP Address that was assigned to the Network Camera by the Installation Wizard program. The DCS-5300 Home Page appears with a window displaying live video from the camera. You are able to view this screen from any PC running Internet Explorer on your LAN.
-
Page 25: Router Set-Up And Installation
Router Set-Up and Installation The following steps generally apply to any router that you have on your network. The D-Link DI-614+ is used as an example to clarify the configuration process. Configure the initial settings of the DI-614+ by following the steps outlined in the DI-614+ Quick Installation Guide. - Page 26 • Open Virtual Server Ports to Enable Remote Image Viewing The firewall security features built into the DI-614+ router prevent users from accessing the video from the DCS-5300 over the Internet. The router connects to the Internet over a series of numbered ports. The ports normally used by the DCS-5300 are blocked from access over the Internet.
- Page 27 Enter valid ports in the Virtual Server section of your router Please make sure to check the box on this line to enable settings D-Link DCS-5300 User Manual...
-
Page 28: Viewing Your Camera
80. To access from a computer on your local (home) network, simply enter the local IP Address of the Camera followed by a colon and the port number (e.g., http://205.163.122.96:83). http://205.163.122.96:83 Viewing the DCS-5300 Remotely D-Link DCS-5300 User Manual... -
Page 29: Using The Dcs-5300 With An Internet Browser
Using the DCS-5300 with an Internet Browser If you are following this manual in the order it is presented, you should now have an operating DCS-5300 Network Camera configured with the Installer program. This section of the manual will deal with using the Network Camera: •... -
Page 30: Home Page Screen
Home Page Screen The image from the DCS-5300 should be visible from the Home Page on your computer monitor. To the right of the image are controls that allow you to pan and tilt the camera. Pan and tilt can also be controlled within the image. - Page 31 The image from the DCS-5300 should be visible from the Home Page on your computer monitor. There are two buttons on the left side of the Home Page: Connection Type and Configuration. Click on the Connection Type button to change settings related to the connection.
-
Page 32: Home > Connections Screen
UDP -> TCP -> HTTP. After the client connects to the DCS-5300 successfully, the working protocol will be displayed in “Protocol Option”. The chosen protocol will be recorded in the user’s PC and used for the next connection. If the network environment is... -
Page 33: Home > Configuration
Click Configuration There are 5 tabs across the top of the Configuration screen. From each tab, different elements of the DCS-5300 can be configured. The Advanced tab is the default screen in Configuration and Network is the default screen under Advanced. -
Page 34: Configuration > Advanced > Network
Configuration > Advanced > Network Reset IP Address Once the DCS-5300 is configured, this box should be unchecked at all times. If the box has been checked and the at next boot: connection is lost, run Installation Wizard to find the camera’s IP address. -
Page 35: Ftp Settings
Granted folder on the external FTP server. The string must conform to the external FTP server. Some FTP servers cannot accept a preceding slash symbol before the path if there is no virtual path mapping. Refer to the instructions of the external FTP server for folder: details. The folder privilege must be open for upload. D-Link DCS-5300 User Manual... -
Page 36: Http Settings
Primary FTP If the DCS-5300 is located inside a network that is protected by a firewall, a data connection for FTP may be prohibited. Passive Passive Mode: mode FTP can bypass this rule and allow the uploading of snapshots. If the passive mode is selected, the DCS-5300 can automatically attempt to upload in active mode if the external FTP server does not support passive mode. - Page 37 Apply Invalid settings may cause the DCS-5300 to not respond. Change the configuration settings only if necessary. Consult with your network administrator or your Internet Service Provider (ISP) if you do not have the necessary information. If you cannot connect to the camera, refer to page 64 for camera reset and restore factory settings procedures.
-
Page 38: Configuration > Advanced > Ddns & Upnp
With most Cable and DSL connections, you are assigned a dynamic IP address and that address is used only for the duration of that specific connection. With the DCS-5300, you can setup your DDNS service and the DCS-5300 will automatically update your DDNS server every time it receives a different IP address. Depending on the service, this update may take a few hours. - Page 39 UPnP is short for Universal Plug and Play, which is a networking architecture that provides compatibility among networking equipment, software, and peripherals. The DCS-5300 is a UPnP enabled Network Camera. If your operating system is UPnP enabled, the device will be easier to configure. If you do not want to use the UPnP functionality, it can be disabled by unselecting “Enable UPnP”.
-
Page 40: Configuration > Advanced > Audio/Video
Audio Source: Select either an internal or external microphone as the audio source. If you choose to use an external microphone, connect it to the microphone connection at the rear of the DCS-5300. Color: Select the option for color or monochrome video display. - Page 41 This setting will utilize more bandwidth to send the maximum frames when images change drastically. Flip: Vertically rotate the video. Mirror: Horizontally rotate the video. Check both flip and mirror if the DCS-5300 is to be installed upside down. White balance: Choose the suitable option for the best color temperature. Click...
- Page 42 If you get some broken pictures in a slow network, you can set TCP protocol in Connection type for a more accurate transmission but the received images may have a lag. Note that any slow connection with multiple users will impair performance. D-Link DCS-5300 User Manual...
-
Page 43: Configuration > Advanced > Image Setting
15. If the image quality is still not improved, select a lower bit rate. Configuration > Advanced > Image Setting Click Image Settings Click the Image Setting button from the Configuration screen to access additional settings that affect how the video image appears. D-Link DCS-5300 User Manual... -
Page 44: Configuration > Advanced > Motion Detection
Configuration > Advanced > Motion Detection Click the Motion Detection button from the Configuration screen to access settings that effect how the DCS-5300 Network Camera can serve as a security device by recording only when motion is detected. Click Motion Detection... - Page 45 (Note: remember that you can have up to 3 windows selected for motion detection). You can return to the DCS-5300 Home Page and the monitored window will not be visible, but the red frame will show on the home page when motion is detected.
-
Page 46: Configuration > Advanced > Camera Control
Configuration > Advanced > Camera Control Click the Camera Control button from the Configuration screen to access settings that affect how the DCS-5300 Network Camera can pan and move to preset locations. Click Camera Control Pan Speed: Select the speed at which the camera will pan for a full cycle from the pull down menu. Select a value between -5 and +5, -5 being the slowest setting. - Page 47 Click this to allow the DCS-5300 to be controlled by the included remote. Current Position: Enter a name for the position at which you would like to preset the DCS-5300. Click Add to add the new preset position to the Preset Locations list.
-
Page 48: Configuration > Tools > Admin
Configuration > Tools > Admin Click on the Tools tab to access 4 utility screens for controlling and administering the DCS-5300. The default screen in Tools is the Admin screen. The DCS-5300 is manufactured without any passwords by default. This allows the ability to access the DCS-5300 (including the Configuration) by anyone as long as the IP address is known. -
Page 49: Configuration > Tools > System
Adjust the date and time according to what is entered by the administrator. Notice the format in the related field while typing. Automatic: Synchronize with the NTP server over the Internet whenever the DCS-5300 starts up. It will fail if the assigned timeserver cannot be reached. D-Link DCS-5300 User Manual... - Page 50 NTP server: Assign the IP address or domain name of the timeserver. Leaving the text box blank will let DCS-5300 connect to default time servers. Time zone: Used to adjust the hour of timeservers for local settings. Apply Click D-Link DCS-5300 User Manual...
-
Page 51: Configuration > Tools > Applications
Take snapshots After a snapshot is taken because of a trigger, at second(s) after another snapshot will be taken after the event: configured time in seconds. D-Link DCS-5300 User Manual... -
Page 52: Sequential Operation
FTP server settings in network configuration. Sequential Operation Snapshot every The DCS-5300 will send snapshots at the specified interval to the external server according to the chosen method. second(s): Remember this operation is dependent to the weekly schedule. - Page 53 5 seconds after 3 o’clock, January 2nd, A.D. 2002. If the suffix is omitted, the file named “video.jpg” on the external FTP suffix: server will be refreshed at the specified interval. Click Apply D-Link DCS-5300 User Manual...
-
Page 54: Configuration > Tools > Default
After confirmation, the system will restart and require the Installation Wizard software program to locate the IP address of the DCS-5300. Click Apply under Calibrate to restore them camera’s factory lens position. This means that the camera will be recalibrated to the default center to position to recover from any external forces that may have affected it. -
Page 55: Configuration > Status > Device Info
Configuration > Status > Device Info Click on the Status tab to access Device Info and a Log of DCS-5300 system activity. The Device Info is the default screen when you click on the Status tab. The Device Info screen lists the following important settings that are currently set for the DCS-5300: •... -
Page 56: Configuration > Help
Configuration > Help Click on the Help tab to access descriptions of the particular function you need help with. The help screen is organized in the order of the tabs and then each menu item under that tab. D-Link DCS-5300 User Manual... -
Page 57: Record Snapshots To Your Ftp Server With Motion Detection
Click the Motion Detection button under the Advanced tab from the Configuration screen to access settings that affect how the DCS-5300 Network Camera can serve as a security device by recording only when motion is detected. In this window, follow the steps below to ensure that motion detection is correctly enabled: •... - Page 58 Next, click the Network button under the Advanced tab to set the FTP server settings for the DCS-5300. In this window, enter the settings for the FTP server you wish to record to. Optionally, you can enter settings for a secondary backup FTP server.
- Page 59 For detailed information about each setting, please refer to Configuration > Advanced > Network in the section titled “Using the DCS-5300 With an Internet Browser” (page 28). Click the apply button when finished. D-Link DCS-5300 User Manual...
- Page 60 Next, click the Applications button under the Tools tab to set the application settings for the DCS-5300. In this window, follow the steps below to set the application settings for snapshots to be recorded to an FTP site: • Select the weekdays you would like to record and enter the “Snapshots begin”...
-
Page 61: Appendix
Q: What is the maximum number of users that can be allowed to access DCS-5300 simultaneously? A: The maximum number of users that can log onto the Network Camera at the same time is 10. Please keep in mind the overall performance of the transmission speed will slow down when many users are logged on. - Page 62 Q: Why am I unable to access the Network Camera from a web browser? A1: If a router or firewall is used on the network, the correct ports for the DCS-5300 may not be configured on the router or firewall. To correct the problem, you need to determine if the DCS-5300 is behind a router or firewall and if the router or firewall is properly configured for the ports the DCS-5300 is using.
- Page 63 Web management you need to adjust the image related parameters such as brightness, contrast, hue and power line frequency for fluorescent light . Please refer to the Advanced > Image Setting section on Page 47 and 48 for detailed information. D-Link DCS-5300 User Manual...
-
Page 64: How To Ping Your Ip Address
Follow the step-by-step procedure below to utilize the PING command but first you must disconnect Network Camera from the network. Start a DOS window. Type ping x.x.x.x, where x.x.x.x is the IP address of the Network Camera. The replies, as illustrated below, will help diagnose any connection problems. D-Link DCS-5300 User Manual... -
Page 65: Reset And Restore
There is a button hidden in the pinhole beside the Ethernet socket. It is used to reset the system or restore the factory default settings. Sometimes resetting the DCS-5300 will return the system back to a normal state. If the system still... -
Page 66: I/O Connector
I/O Connector Definition for the Network Camera The DCS-5300 provides a general I/O terminal block with one digital input and one relay switch for device control. Pin 1 and pin 2 can be connected to an external sensor and the state of voltage will be monitored from the initial state ‘LOW’. - Page 67 Configuring Your Camera for External Trigger Based Recording To configure your camera to record when triggered by an external device, you must first set your SMTP or FTP set- tings in order to send snapshots to your email account or FTP server. D-Link DCS-5300 User Manual...
- Page 68 Configuring Your Camera for External Trigger Based Recording (continued) Click the Network button under the Advanced tab to set the SMTP or FTP server settings for the DCS-5300. Click Network In this window, enter the settings for the SMTP or FTP server to which recorded snapshots will be sent. For detailed information about each setting, please refer to Configuration >...
- Page 69 Next, click the Applications button under the Tools tab to set the application settings for the DCS-5300. Click Application In this window, follow the steps below to set the application settings for snapshots to be sent to your email account or FTP server when triggered by a motion sensor or other external device: •...
-
Page 70: Adjusting The Cameras Focus
DO NOT over-turn the lens in either direction as it will be out of focus or may damage the camera. To help you get the best image quality, keep in mind that while adjusting the DCS-5300’s focus you can preview the image quality from your Web browser. -
Page 71: Technical Specifications
Up to 30 fps at 160x120 Up to 30 fps at 320x240 General I/O 1 opto-isolated sensor input (max. 12VDC 50mA) 1 relay output (max. 24VDC 1A, 125VAC 0.5A) Security Administrator and user group protected Password authentication D-Link DCS-5300 User Manual... - Page 72 Viewing system requirement Protocol ActiveX Operating system Microsoft Windows ® XP, 2000, ME or 98SE Browser Internet Explorer 6.x or above Environmental Operating F to 113 Storage F to 158 Humidity Max 95% RH Safety FCC class B D-Link DCS-5300 User Manual...