Yamaha YSP-3000 Service Manual
Hide thumbs
Also See for YSP-3000:
- Owner's manual (663 pages) ,
- Reference manual (12 pages) ,
- New product bulletin (2 pages)
Table of Contents
Advertisement
This manual has been provided for the use of authorized YAMAHA Retailers and their service personnel.
It has been assumed that basic service procedures inherent to the industry, and more specifically YAMAHA Products, are already
known and understood by the users, and have therefore not been restated.
WARNING:
IMPORTANT:
The data provided is believed to be accurate and applicable to the unit(s) indicated on the cover. The research, engineering, and
service departments of YAMAHA are continually striving to improve YAMAHA products. Modifications are, therefore, inevitable
and specifications are subject to change without notice or obligation to retrofit. Should any discrepancy appear to exist, please
contact the distributor's Service Division.
WARNING:
IMPORTANT:
I CONTENTS
TO SERVICE PERSONNEL .......................................... 2
FRONT PANELS ............................................................ 3
REAR PANELS .............................................................. 4
BOTTOM PANEL ........................................................... 5
REMOTE CONTROL PANELS ...................................... 5
INTERNAL VIEW ........................................................... 7
SET MENU TABLE /
......................................... 18-29
1 0 1 0 5 9
DIGITAL SOUND PROJECTOR
YSP-3000/YSP-30D/
Failure to follow appropriate service and safety procedures when servicing this product may result in personal
injury, destruction of expensive components, and failure of the product to perform as specified. For these reasons,
we advise all YAMAHA product owners that any service required should be performed by an authorized
YAMAHA Retailer or the appointed service representative.
The presentation or sale of this manual to any individual or firm does not constitute authorization, certification or
recognition of any applicable technical capabilities, or establish a principle-agent relationship of any form.
Static discharges can destroy expensive components. Discharge any static electricity your body may have
accumulated by grounding yourself to the ground buss in the unit (heavy gauge black wires connect to this buss).
Turn the unit OFF during disassembly and part replacement. Recheck all work before you apply power to the unit.
...................................... 6-7
.............................. 8
......... 9
............. 9-17
2007
This manual is copyrighted by YAMAHA and may not be copied or
redistributed either in print or electronically without permission.
HTY-7030
SERVICE MANUAL
IMPORTANT NOTICE
SELF-DIAGNOSTIC FUNCTION /
DISPLAY DATA ........................................................... 52
IC DATA ................................................................. 53-62
BLOCK DIAGRAM ....................................................... 63
PRINTED CIRCUIT BOARDS ................................ 64-75
PIN CONNECTION DIAGRAMS ............................ 76-77
SCHEMATIC DIAGRAMS ...................................... 79-86
REPLACEMENT PARTS LIST ............................ 87-107
REMOTE CONTROL .......................................... 108-110
ADJUSTING SYSTEM PARAMETERS /
......................................................... 111-115
All rights reserved.
......................................... 30-51
P.O.Box 1, Hamamatsu, Japan
'07.10
Advertisement
Table of Contents

Related Manuals for Yamaha YSP-3000


Summary of Contents for Yamaha YSP-3000
-
Page 1: Table Of Contents
This manual has been provided for the use of authorized YAMAHA Retailers and their service personnel. It has been assumed that basic service procedures inherent to the industry, and more specifically YAMAHA Products, are already known and understood by the users, and have therefore not been restated. -
Page 2: To Service Personnel
YSP-3000/YSP-30D/HTY-7030 I TO SERVICE PERSONNEL AC LEAKAGE WALL EQUIPMENT TESTER OR 1. Critical Components Information OUTLET UNDER TEST EQUIVALENT Components having special characteristics are marked s and must be replaced with parts having specifications equal to those originally installed. 2. Leakage Current Measurement (For 120V Models Only) -
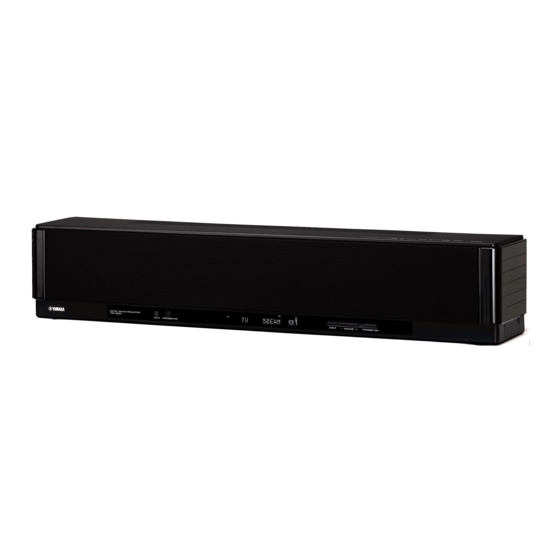
Page 3: Front Panels
YSP-3000/YSP-30D/HTY-7030 I FRONT PANELS K, A, G, E, L, V models YSP-3000 (U, C, K, A, G, E, L, V, J models) J model Top view U, C models Front view YSP-30D (B model) Top view Front view HTY-7030 (G, E models) -
Page 4: Rear Panels
YSP-3000/YSP-30D/HTY-7030 I REAR PANELS YSP-3000 (U, C models) YSP-3000 (U, C, K, A, G, E, L, V models) HTY-7030 (G, E models) YSP-30D (B model) U, C, A models U, C models YSP-3000 (J model) (K model) (A model) (G, E models) -
Page 5: Bottom Panel
YSP-3000/YSP-30D/HTY-7030 I BOTTOM PANEL YSP-3000 (U, C, K, A, G, E, L, V models) YSP-3000 (J model) YSP-30D (B model) HTY-7030 (G, E models) I REMOTE CONTROL PANELS YSP-3000 YSP-3000 YSP-30D YSP-3000 (U, C models) (K, A, G, E, L, V models) -
Page 6: Specifications
YSP-3000/YSP-30D/HTY-7030 I SPECIFICATIONS / I Amplifier Section / Maximum Power / (EIAJ) [4 ohms, 10% THD] IR In U, C models ....Monoral mini jack (wired remote control) Woofer [100 Hz] ..............20 W/ch Tweeter [1 kHz] ..............2 W/ch System Connector / J model .. -
Page 7: Internal View
V model ............ AC 110-120 V, 50/60 Hz J model ............. AC 100V, 50/60 Hz Power Consumption / The “ ” logo and “Cinema DSP” are registered trademarks of YAMAHA U, C, K, A, B, G, E, L, V models ..........32 W Corporation. 735.4 (28-15/16") 152 (6") - Page 8 YSP-3000/YSP-30D/HTY-7030...
-
Page 9: Service Precautions
YSP-3000/YSP-30D/HTY-7030 I SERVICE PRECAUTIONS / Safety measures 2. Removal of HDMI P.C.B. • Some internal parts in this product contain high voltages a. Remove 4 screws (7), screw (8) and screw (9). and are dangerous. Be sure to take safety measures (Fig. - Page 10 YSP-3000/YSP-30D/HTY-7030 3. Removal of FM Tuner 4. Removal of POWER (5) P.C.B. and DAB Module INPUT P.C.B. CB11 CB507 CB504 POWER (1) P.C.B. (U, C, K, A, G, E, L, V models) (B model) a. Remove 2 screws (0). (Fig. 3) a.
- Page 11 YSP-3000/YSP-30D/HTY-7030 When checking the P.C.B.s: * Put the rubber sheet and cloth over the equipment. Then place the P.C.B.s upside down on the cloth and check it. (Fig. 6) * Reconnect all cables (connectors) that have been disconnected. Be sure to use the extension cable before servicing the following section.
- Page 12 YSP-3000/YSP-30D/HTY-7030 7. Removal of DSP P.C.B. a. Remove screw (H), screw (I) and then remove plate earth. (Fig. 7) b. Remove 3 screws (J) and then remove flame PCB/R. (Fig. 7) c. Remove 2 screws (K). (Fig. 7) d. Remove CB8. (Fig. 7) e.
- Page 13 YSP-3000/YSP-30D/HTY-7030 9. Removal of Grille Bottom Ass’y d. Remove 2 screws (T), 4 screws (U) and then remove panel side R. (Fig. 9) a. Remove 8 screws (O) and 2 screws (P). (Fig. 8) e. Remove 2 screws (V) and then remove panel side sub b.
- Page 14 YSP-3000/YSP-30D/HTY-7030 12.Removal of Driver Tweeter Cabinet array a. Remove 7 screws (Z) and 4 screws ([). (Fig. 10) b. Remove the flame top. (Fig. 10) Rear view c. Remove 6 screws (\). (Fig. 10) d. Remove 9 screws ( ] ) and then remove stopper wire.
- Page 15 YSP-3000/YSP-30D/HTY-7030 13.Removal of POWER (2), (3) and (4) P.C.B.s a. Remove 3 screws (b). (Fig. 13) b. Remove CB903. (Fig. 13) c. Remove POWER (3) P.C.B.. (Fig.13) d. Remove 10 screws (c) and then remove flame FL. (Fig. 13) e. Remove 2 screws (d). (Fig. 13) f.
- Page 16 YSP-3000/YSP-30D/HTY-7030 Disassembly Procedures as far as Driver Woofer 1. Removal of Top Cover a. Remove 6 screws (1). (Fig. 1) b. Lift up the rear of the top cover a little and after remov- ing 9 hooks, remove it rearward. (Fig. 1) To install the top cover, be sure to install 9 hooks at the front first and then install 6 screws (1).
- Page 17 YSP-3000/YSP-30D/HTY-7030 Hook Hook Driver woofer Hook Grille bottom ass'y Black color model Grille bottom ass'y Hook Hook * Do not remove this screw. Fig. 2 Grille net ass'y ASSY 3. Removal of Front Grille Use full care as you may be injured by the front grille or Fig.
-
Page 18: Updating Firmware
YSP-3000/YSP-30D/HTY-7030 I UPDATING FIRMWARE / G Operation Procedure After replacing the following parts with the replacement parts, update the latest firmware according to the following Writing to the microprocessor procedure. 1. Turn off the power of main unit and disconnect the DSP P.C.B. - Page 19 YSP-3000/YSP-30D/HTY-7030 6. Press the [Refer...] button. And select the firmware name. (Fig. 3) * The ID code and MCU type are loaded when the file is se- lected. (Fig. 3) Press the [OK] bottom. (Fig. 3) Press this button to open the window Fig.
- Page 20 YSP-3000/YSP-30D/HTY-7030 9. When the program transmission is completed, the screen appears as shown below. (Fig. 6) The press the [OK] button to end the procedure. Fig. 6 10.Disconnect the power cable of main unit from the AC outlet. 11.End “FlashSta. exe.”...
- Page 21 YSP-3000/YSP-30D/HTY-7030 4. Select the self-diagnostic function menu “19-2. checksum”. Check the displayed checksum is the same as the writ- ten firmware checksum. CHECK SUM:FAAF * When the displayed firmware version and checksum are different from written firmware version and checksum, follow the steps from 1 to 9 of “Writing to the microprocessor”...
- Page 22 YSP-3000/YSP-30D/HTY-7030 3. Select the data to be transmitted and port. · DSP HEX FILE Select “YSPx00_verxxxx.hex”. · RS232C Select the port of RS-232C. Press this button to open the window Select the firmware Select the port of RS-232C * The port selection varies depending on OS of the PC.
- Page 23 YSP-3000/YSP-30D/HTY-7030 5. Connect the power cable of main unit to the AC outlet. While pressing the “VOL+” key and “VOL-” key of the main unit, press the “STANDBY/ON” key of the remote control to activate the self-diagnostic function. 1 Using the “UP” or “DOWN” key of the remote control, select the self-diagnostic function menu in the figure below.
- Page 24 YSP-3000/YSP-30D/HTY-7030 7. Check the SUM. After downloading successfully, the value of “SUM from SET” is appeared. The procedure is completed when the value is obtained for “SUM from FILE” and “SUM from SET”. Confirm the value of SUM 8. Press the “STANDBY/ON” key of the main unit to turn off the power.
- Page 25 3 Using the “ENTER” key of the remote control, make a change as shown below. RS232C: YAMAHA 4 For restarting, use the “STANDBY/ON” key of the main unit or the remote control. RS232C: 1Ltd. Change YAMAHA to 1Ltd. 4. Start up spDownloader_2_0_x_xxx.exe, the screen will appear as shown below.
- Page 26 YSP-3000/YSP-30D/HTY-7030 5. Select the data to be transmitted and port. · COM Port Select the port of RS-232C. · D/load Protocol Select “SPCM protocol” Select the port of RS-232C Select SPCM protocol 6. Select firmware and execute writing as follows.
- Page 27 YSP-3000/YSP-30D/HTY-7030 8. Confirm Software Target and press the [Download] button. * When Source Filename is selected, Software Target box is selected automatically. Start Download 9. After downloading sccessfully, “Downloaded ‘ ***** ’ OK” is appeared. Confirm “DLOAD OK” on the Serial Log window.
- Page 28 3 Using the “RETURN” key of the remote control, make a change as shown below. RS232C: YAMAHA Change 1Ltd. to YAMAHA 4 Check the version of the firmware. Using the “LEFT” key or “RIGHT” key of the remote control, have the self-diagnostic function menu displayed as in the figure below.
- Page 29 YSP-3000/YSP-30D/HTY-7030 13.Press the “STANDBY/ON” key of the main unit to turn off the power. 14.Disconnect the power cable of main unit from the AC outlet. 15.End “spDownloader_2_0_x_xxx.exe.” 16.Disconnect the RS232C cross cable, RS232C conver- sion jig and flexible flat cable.
- Page 30 YSP-3000/YSP-30D/HTY-7030 I SELF-DIAGNOSTIC FUNCTION / This unit has self-diagnostic functions that are intended for inspection, measurement and location of faulty point. There are 21 main menu items, each of which has sub- menu items. Listed in the table below are main menu items and sub- menu items.
- Page 31 YSP-3000/YSP-30D/HTY-7030 Main menu Sub-menu 25. Y 11 (Not applied to these models. / 26. Y 12 (Not applied to these models. / 27. Y 21 (Not applied to these models. / 28. Y 22 (Not applied to these models. / 29.
- Page 32 YSP-3000/YSP-30D/HTY-7030 • Starting Self-Diagnostic Function To activate the self-diagnostic function, press the “STANDBY/ON” key of the remote control while pressing the keys of the main unit as shown below at the same time. Key of main unit / Key of remote control / Press the “STANDBY/ON”...
- Page 33 YSP-3000/YSP-30D/HTY-7030 • Display provided when Self-Diagnos- tic Function started When the monitor is connected, the list of main menu items is displayed of the monitor screen as shown below. (This list remains on display until the self diagnostic function is cancelled.)
- Page 34 YSP-3000/YSP-30D/HTY-7030 Version (1 alphabet) D-I_PROTECT C Cause: Amplifier IC is abnormal. Turning on the power without correcting the abnormality will cause the protection function to work 2 second later and the power supply will be shut off. DIG MUTE PRT Cause: Control section is abnormal.
- Page 35 YSP-3000/YSP-30D/HTY-7030 • Display during Self-Diagnostic Func- tion operation During the self-diagnostic function operation, the menu list described in the section of the startup screen appears on the superimposed screen and the function at work is indi- cated on the FL indicator. The contents displayed during the function operation are described in the later section on details of functions.
- Page 36 YSP-3000/YSP-30D/HTY-7030 • Details of Self-Diagnostic Function menu 1. DSP THROUGH The signal is not changed into beam and output from the channel specified by the sub-menu. When 2CH signals are input, they are distributed as follows at DSP1 (IC5 DSP P.C.B.).
- Page 37 YSP-3000/YSP-30D/HTY-7030 [Digital] DSP1 DSP2 D-AMP Tweeter Digital input L/LFC Analog input Woofer L/R (SUBWOOFER OUT) [Analog] DSP1 DSP2 D-AMP Tweeter Digital input L/LFC Analog input Woofer L/R (SUBWOOFER OUT)
- Page 38 YSP-3000/YSP-30D/HTY-7030 2. RAM THROUGH The signal is not changed into beam and output from the channel specified by the sub-menu. When 2CH signals are input, they are distributed as follows at DSP1 (IC5 DSP P.C.B.). L CH ..FRONT L, SURROUND L, CENTER, LFE R CH ..
- Page 39 YSP-3000/YSP-30D/HTY-7030 3. PRO LOGIC / Neo:6 PRO LOGIC I, II, Neo:6 can be selected from the sub- menu items. PRO LOGIC I (PRO LOGIC EMULATION) 3.PRO LOGIC I PRO LOGIC II 3.PRO LOGIC II Neo:6 Neo:6 4. MIC CHECK The signal inputted through the microphone is output via AD-DA at the output terminal of the subwoofer.
- Page 40 All segments OFF / OSD characters 1 ON / All segments ON (dimmer 100 %) / All segments ON (dimmer 50 %) / [Sample: YSP-3000 (U model)] Lighting of segments in lattice / OSD characters 2 ON / Lighting in lattice /...
- Page 41 YSP-3000/YSP-30D/HTY-7030 6. MANUAL TEST The noise generator with a built-in DSP outputs the test noise through the channels specified by the sub- menu. The noise frequency is 30 to 80Hz for LFE but 500 to 2kHz for others. TEST ALL...
- Page 42 YSP-3000/YSP-30D/HTY-7030 9. AD DATA CHECK This menu is used to display the A/D conversion value of the main CPU which detects panel keys of the main unit and protection functions in % using the sub-menu. During signal processing, the condition before execution is maintained.
- Page 43 YSP-3000/YSP-30D/HTY-7030 10.IF STATUS (Input function status) Using the sub-menu, the status data is displayed one after another in the hexadecimal notation. During signal processing, the status before execution of this menu is maintained. * The details of the following status information can not be disclosed because of the development purpose.
- Page 44 YSP-3000/YSP-30D/HTY-7030 11.DOCK CHECK (U, C, A, B models) This menu is used to test the DOCK connector without the iPod itself. After turning off the power, short between pins No. 14 (TX) and No. 18 (RX), between pins No. 1 (PWR) and No.
- Page 45 YSP-3000/YSP-30D/HTY-7030 12.XM CHECK (U, C models) The output check of XM radio antenna module is executed. 1 kHz, -1 dB / 44.1 kHz 1k - 1dB/44 The test tone (1 kHz, -1 dB / 44.1 kHz) is output. 1 kHz, -61 dB / 44.1 kHz 1k -61dB/44 The test tone (1 kHz, -61 dB / 44.1 kHz) is output.
- Page 46 YSP-3000/YSP-30D/HTY-7030 13.DAB CHECK (B model) Using the DIAG menu, it is possible to select DAB SCAN, DLS, SIGNAL QUALITY. DAB SCL The channel that can be received is searched. When reception is completed the SCL (Service Label) is displayed. SCL: DLS (Dynamic Label Segment) DLS (Dynamic Label Segment) of the channel being received is displayed.
- Page 47 The product ID of main unit written in HDMI module is displayed. 3301: YSP-3000, YSP-30D 3302: HTY-7030 HDMI vendor name HVN:YAMAHA The vendor name “YAMAHA” of main unit written in HDMI module is displayed. CEC:00-00-00-00 CEC (Consumer Electronics Control) receive data The CEC information is displayed. 16.HDMI SELECT The selected input signal is output to HDMI OUT by the sub-menu operation.
- Page 48 YSP-3000/YSP-30D/HTY-7030 17.VIDEO CONVERSION If one of sub menu items 2. DIGITAL COMPONENT to 6. TEST PATTERN is selected, the background color (white) of the OSD display remains as it is and cannot be changed. Once such item has been selected, turn off the power and activate the self-diagnostic function again.
- Page 49 YSP-3000/YSP-30D/HTY-7030 18.MODEL The information on the model, destination and video format is displayed. MODEL SETTING YSP-3000, YSP-30D or HTY-7030 is displayed. MODEL:YSP-3000 DESTINATION U, C, K, A, B, G, E, L or V is displayed. DEST : UC VIDEO FORMAT...
- Page 50 YSP-3000/YSP-30D/HTY-7030 20.DATE The updated date of the program, clearance of the pro- tection history and the remote control reception code are displayed. When Remo Code menu is selected, keys become non- operable due to detection of the values of all keys.
- Page 51 YSP-3000/YSP-30D/HTY-7030 21. DSP CHECK RS232C Select the protocol of RS-232C connection. Tx Test Ch RS232C: YAMAHA Have the sound produced from each driver to check its condition and installation position. Use the “ENTER” and “RETURN” keys of the remote RS232C: 1Ltd.
-
Page 52: Display Data
YSP-3000/YSP-30D/HTY-7030 I DISPLAY DATA G ANODE CONNECTION G V901 : 17-BT-28GNKF (POWER P.C.B.) 1G-15G PATTERN AREA G PIN CONNECTION – Pin No. 69 68 67 66 65 64 63 62 61 – Connection F2 NX NP NP NX NX NX NX NX Pin No. -
Page 53: Ic Data
YSP-3000/YSP-30D/HTY-7030 I IC DATA IC3: LC89057W-VF4AD-E (DSP P.C.B.) Digital audio interface transceiver EMPHA/UO AUDIO/VO XMODE Microcontroller RXOUT Cbit, Ubit RERR Demodulation Input Data RDATA & Selector Selector Lock detect RX5/VI SDIN RX6/UI RMCK RBCK Clock RLRCK TMCK/PIO0 Selector SBCK Modulation TBCK/PIO1 &... - Page 54 YSP-3000/YSP-30D/HTY-7030 Pin No. Function Name Detail of Function...
- Page 55 YSP-3000/YSP-30D/HTY-7030 IC5: D70YE101BRFP266 (DSP P.C.B.) Decoder/Post processor No replacement part available. / Program/Data JTAG EMU 256K Bytes McASP0 Data 16 Serializers Program/Data ROM Page1 C67x + Microprocessor 256K Bytes Memory Data Controller Program/Data McASP1 ROM Page2 6 Serializers 256K Bytes...
- Page 56 YSP-3000/YSP-30D/HTY-7030 Function Name Detail of Function TYPE PULL GPIO External memory interface (EMIF) address and control EM_CAS – SDRAM column address strobe EM_WE – SDRAM write enable EM_WE_DQM[0] – Write enable or byte enable for EM_D[7:0] EM_WE_DQM[1] – Write enable or byte enable for EM_D[15:8] EM_CLK –...
- Page 57 YSP-3000/YSP-30D/HTY-7030 Function Name Detail of Function TYPE PULL GPIO AXR0[3] – McASP0 serial data 3 AXR0[4] – McASP0 serial data 4 AXR0[5]/SPI1_SCS – McASP0 serial data 5 or SPI1 slave chip select AXR0[6]/SPI1_ENA – McASP0 serial data 6 or SPI1 enable (Ready) AXR0[7]/SPI1_CLK –...
- Page 58 YSP-3000/YSP-30D/HTY-7030 Function Name Detail of Function TYPE PULL GPIO CVDD Core supply DVDD I/O supply Ground 1) TYPE column refers to pin direction in functional mode. If a pin has more than one function with different directions, the functions are separated with a slash (/).
- Page 59 YSP-3000/YSP-30D/HTY-7030 IC16: M3087BFKBGP (INPUT P.C.B.) Microprocessor Port P0 Port P1 Port P2 Port P3 Port P4 Port P5 Port P6 < > < > Peripheral Functions Clock Generation Circuit A/D Converter: 1 circuit Timer (16 bits) Standard: 10 inputs COUT...
- Page 60 YSP-3000/YSP-30D/HTY-7030 Function Name Port Name Port I/O Detail of Function (P.C.B.) SDA_400L PO96 Input/Output Data input/output of HDMI serial port (400kHz) Reserved PO95 Output Terminated Reserved PO94 Output Terminated (LED) VSDET PO93 Input Frequency detection of video signal iPOD_TX PI92...
- Page 61 YSP-3000/YSP-30D/HTY-7030 Function Name Port Name Port I/O Detail of Function (P.C.B.) Reserved PO133 Output Open (/CSY2) /CSTIA PO132 Output Chip select signal to front-end DSP VCC2 TIA_BUSY PI131 Input BUSY signal from front-end DSP TIA_MUTE PO130 Output MUTE signal to front-end DSP...
- Page 62 YSP-3000/YSP-30D/HTY-7030 Function Name Port Name Port I/O Detail of Function (P.C.B.) E2PROM_CS PO113 Output Chip select signal to EEPROM Reserved PO112 Input Pull down Reserved PO111 Output Terminated Reserved PO110 Output Terminated IN_SEL_CL PO03 Output Clock signal for analog input select...
-
Page 63: Block Diagram
YSP-3000/YSP-30D/HTY-7030 I BLOCK DIAGRAM • See page 81, 82 → • See page 79, 80 → INPUT SCHEMATIC DIAGRAM SCHEMATIC DIAGRAM Digital AMP. IC13 IC509 IC17 Driver 29,35 DA70Y DA60Y YDA-138 WM8728 Woofer L ch U, C models D3_MUTE IC506... -
Page 64: Printed Circuit Boards
YSP-3000/YSP-30D/HTY-7030 I PRINTED CIRCUIT BOARDS DSP P.C.B. (Side A) /TRST DGND EMU0 EMU1 IC18 AGND IC13 WFL_OUT AGND WFR_OUT AGND WF_MUTEN D3_PROTN DGND TIBWCK TIBBCK DGND TIBSDO_C TIBSDO_S IC16 TIBSDO_F DGND +3.3V SDMB SCKB DGND AGND 24MD DGND AGND /DISABLE_Y... - Page 65 YSP-3000/YSP-30D/HTY-7030 DSP P.C.B. (Side B) IC17 IC20 IC15 • Semiconductor Location Ref no. Location Ref no. Location IC14 IC15 IC17 IC20...
- Page 66 YSP-3000/YSP-30D/HTY-7030 Circuit No. U, C K, L, V G, E IC15 R289 R295 R297 AUDIO INPUT DIGITAL INPUT INPUT P.C.B. (Side A) R331 R346 COAXIAL VIDEO AUX 2 OPTICAL X : NOT USED AUX 1 TV/STB SUBWOOFER AUX 1 TV/STB O : USED/APPLICABLE No replacement part available.
- Page 67 YSP-3000/YSP-30D/HTY-7030 Circuit No. U, C, A, B K, G, E, L, V C135 INPUT P.C.B. (Side B) R280 X : NOT USED O : USED/APPLICABLE U, C, A, B models K, G, E, L, V, J models K, A, B, G, E, L, V, J models...
- Page 68 YSP-3000/YSP-30D/HTY-7030 AMP P.C.B. (Side A) DRIVER x 3 DRIVER x 3 DRIVER x 3 DRIVER x 3 DRIVER x 3 DRIVER x 3 (TWEETER) (TWEETER) (TWEETER) (TWEETER) (TWEETER) (TWEETER) – – – – – – CB502 CB503 CB504 CB505 CB506...
- Page 69 YSP-3000/YSP-30D/HTY-7030 AMP P.C.B. (Side B) • Semiconductor Location Ref no. Location D504 D505 D511 D517 Q505 Q508...
- Page 70 YSP-3000/YSP-30D/HTY-7030 HDMI P.C.B. (Side A) +4.3V IC11 +4.3V IC16 AUX 1 +5.8V IC12 POWER (1) (CB508) HDMI • Semiconductor Location Ref no. Location Ref no. Location IC10 No replacement part available. IC11 IC12 IC14 IC15 IC16...
- Page 71 YSP-3000/YSP-30D/HTY-7030 HDMI P.C.B. (Side B) +3.3V_5 S/PDIF SDA100L SCL100L /RES_C PWR_ENB SDA400L SCL400L INPUT CEC_D (CB14) /INT_CEC HDIMT /INTH_RT HPD1ENB HPD2ENB DDC_ENB DDC_SEL0 DDC_SEL1 VSDET /RES_Rx /RES_Tx • Semiconductor Location Ref no. Location...
- Page 72 YSP-3000/YSP-30D/HTY-7030 • Semiconductor Location Ref no. Location Ref no. Location Ref no. Location Ref no. Location Ref no. Location Ref no. Location Ref no. Location D501 D518 D530 D538 IC503 IC511 Q507 D505 D519 D531 D539 IC505 Q502 D509 D520...
- Page 73 YSP-3000/YSP-30D/HTY-7030 • Semiconductor Location Ref no. Location Ref no. Location Ref no. Location Ref no. Location Ref no. Location D502 D508 D515 D525 IC508 D503 D510 D517 D526 IC512 D504 D511 D521 D541 Q505 POWER (1) P.C.B. (Side B) D506...
- Page 74 YSP-3000/YSP-30D/HTY-7030 • Semiconductor Location Ref no. Location Ref no. Location Ref no. Location Ref no. Location Ref no. Location Ref no. Location Ref no. Location D901 IC902 Q902 Q904 Q906 Q908 Q910 POWER (2) P.C.B. (Side A) IC901 Q901 Q903...
- Page 75 YSP-3000/YSP-30D/HTY-7030 POWER (3) P.C.B. (Side A) POWER (4) P.C.B. (Side A) POWER (4) P.C.B. (Side B) POWER (2) (CB903) INTELLIBEAM AUX 3 W991 JK801 JK802 STANDBY/ON VOLUME INPUT POWER (3) P.C.B. (Side B) A+12 MIC_DET AGND AGND AUX_R AUX_L AGND...
-
Page 76: Pin Connection Diagrams
YSP-3000/YSP-30D/HTY-7030 I PIN CONNECTION DIAGRAMS • ICs BD3843FS-E2 BR25L320F-W EEPROM D60YA003BPYP225 D70YE101BRFP266 SiI9134CTU SiI9135CTU TC7SH08F M3087BFKBGP LC72722PM YDA141-SZ F2621E-01-TR FA5511N-D1-TE1 LC89057W-VF4AD-E M24C02-WDW6TP M66003-0131FP-R MX29LV160CBTC-70G YDA138-EZE-2 W9816G6CH-7 W9864G6GH-7 L6732TR MB90050PF-G-118-E1 MIP2F40MSSCF MN103SFD7G MAX3232CPWR MB90050PF-G-119-E1 SN74CBT3253CPWR 1: VDD 2: FB 3: CL... - Page 77 YSP-3000/YSP-30D/HTY-7030 • Diodes 1N4002S 1SS355 D1FK60-5063 1ZB200-Y (TPA3, Q) MA8036 3.6V D1FL20U-5063 MTZJ27D MA8051 -M 5.1V RB051L-40 MTZJ7.5B MA8062-M 6.2V Anode MA8068-M 6.8V MA8100-H 10.3V Anode MA8100-M 10.0V Anode MA8110-M 11.0V MA8180-H 18.7V Cathode MA8220-L 21.3V MA8330-L 32.0V Cathode RB160M-30...
- Page 78 YSP-3000/YSP-30D/HTY-7030 MEMO MEMO...
-
Page 79: Schematic Diagrams
YSP-3000/YSP-30D/HTY-7030 SCHEMATIC DIAGRAMS DSP 1/2 IC9: WM8738 24-bit stereo ADC AVDD CONTROL INTERFACE AGND SDATO LRCLK DIGITAL AUDIO FILTERS INTERFACE BCLK MCLK IC10 IC20 IC20: TC7SH126FU IC10, 11: PQ1CZ41H2Z Chopper regulators Bus buffer IN A Voltage ON/OFF regulator circuit ON/OFF control PWM COMP. - Page 80 YSP-3000/YSP-30D/HTY-7030 DSP 2/2 DIGITAL IN Page 81 Page 81 Page 85 IC16: W9864G6GH-7 to INPUT_CB10 to INPUT_CB11 to POWER (1)_CB507 64 M x 4 banks SDRAM CLOCK BUFFER COLUMN DECODER COLUMN DECODER IC21 CELL ARRAY CELL ARRAY BANK #0 BANK #1...
- Page 81 YSP-3000/YSP-30D/HTY-7030 INPUT 1/2 Page 79 IC5: MB90050PF-G-118-E1 IC5: MB90050PF-G-119-E1 to DSP_CB2 OSD controller OSD controller Serial input Serial input Each block Each block SCLK control SCLK control Page 86 VOUT IC21 VOUT Analog Analog 11.1 switch YOUT switch YOUT to POWER (5)_W951...
- Page 82 YSP-3000/YSP-30D/HTY-7030 INPUT 2/2 YSP-3000 YSP-30D YSP-3000 HTY-7030 YSP-3000 YSP-30D YSP-3000 HTY-7030 YSP-3000 YSP-30D YSP-3000 HTY-7030 # All voltages are measured with a 10MΩ/V DC electronic voltmeter. # Components having special characteristics are marked s and must be replaced with parts having specifications equal to those originally installed.
- Page 83 YSP-3000/YSP-30D/HTY-7030 DRIVER DRIVER WOOFER L WOOFER R WOOFER L Page 85 to POWER (1)_CB504 CB511 IC504 IC506, 509: YDA138-EZE-2 Digital audio power amplifier IC506 IC509 No replacement part available. IC504 CB501 No replacement part available. No replacement part available. No replacement part available.
- Page 84 YSP-3000/YSP-30D/HTY-7030 HDMI AUX1 IC15 No replacement part available. HDMI Transmitter HDMI Receiver IC12 No replacement part available. IC16 Page 81 to INPUT_CB14 IC2: SiI9134CTU IC10: TB7102F IC11: PQ033EZ01ZP IC8: SN74LV244APWR HDMI transmitter Octal buffers/drivers with 3-state outputs Step-down DC-DC converter IC...
- Page 85 YSP-3000/YSP-30D/HTY-7030 POWER 1/2 Safety measures • Some internal parts in this product contain high voltages and are dangerous. Be sure to take safety measures during servicing, such as wearing insulating gloves. • Note that positions indicated below are dangerous even after the power is turned off because an electric charge remains and a high voltage continues to exist there.
- Page 86 YSP-3000/YSP-30D/HTY-7030 POWER 2/2 IC953 CB951 W951 IC801 IC951 JK802 IC801 11.1 W952 W801 Page JK801 11.1 to INPUT_CB8 IC802 IC802 IC952 POWER (4) POWER (5) (B model) W901 CB902 -32.1 -19.5 -26.8 12.0 -15.6 -19.5 -31.9 -15.6 -19.4 -19.3 -29.8 -19.9...
-
Page 87: Replacement Parts List
YSP-3000/YSP-30D/HTY-7030 I REPLACEMENT PARTS LIST • ELECTRICAL COMPONENT PARTS WARNING G Components having special characteristics are marked s and must be replaced with parts having specifications equal to those originally installed. G The chip resistor is not supplied as a replacement part. - Page 88 YSP-3000/YSP-30D/HTY-7030 P.C.B. DSP ✻ New Parts...
- Page 89 YSP-3000/YSP-30D/HTY-7030 P.C.B. DSP ✻ New Parts...
- Page 90 YSP-3000/YSP-30D/HTY-7030 P.C.B. DSP and P.C.B. INPUT ✻ New Parts...
- Page 91 YSP-3000/YSP-30D/HTY-7030 P.C.B. INPUT ✻ New Parts...
- Page 92 YSP-3000/YSP-30D/HTY-7030 P.C.B. INPUT ✻ New Parts...
- Page 93 YSP-3000/YSP-30D/HTY-7030 P.C.B. INPUT ✻ New Parts...
- Page 94 YSP-3000/YSP-30D/HTY-7030 P.C.B. INPUT and P.C.B. AMP ✻ New Parts...
- Page 95 YSP-3000/YSP-30D/HTY-7030 P.C.B. AMP ✻ New Parts...
- Page 96 YSP-3000/YSP-30D/HTY-7030 P.C.B. AMP and P.C.B. HDMI ✻ New Parts...
- Page 97 YSP-3000/YSP-30D/HTY-7030 P.C.B. HDMI ✻ New Parts...
- Page 98 YSP-3000/YSP-30D/HTY-7030 P.C.B. HDMI and P.C.B. POWER ✻ New Parts...
- Page 99 YSP-3000/YSP-30D/HTY-7030 P.C.B. POWER ✻ New Parts...
- Page 100 YSP-3000/YSP-30D/HTY-7030 P.C.B. POWER ✻ New Parts...
- Page 101 YSP-3000/YSP-30D/HTY-7030 P.C.B. POWER ✻ New Parts...
- Page 102 YSP-3000/YSP-30D/HTY-7030 P.C.B. POWER ✻ New Parts...
- Page 103 YSP-3000/YSP-30D/HTY-7030 Carbon Resistors Value 1/4W Type Part No. 1/6W Type Part No. Value 1/4W Type Part No. 1/6W Type Part No. 1.0 Ω 3100 3100 10 kΩ 7100 7100 HJ35 HF85 HF45 HF45 1.8 Ω ❊ 3180 11 kΩ 7110...
- Page 104 Black color model Flame PCB Flame PCB 7 (1) U, C, K, A, G, E, L, V models Silver color model HTY-7030 YSP-3000 / 30D 7 (4) YSP-30D (B model) 7 (2) BAFFLE UNIT Silver color model 7 (5) 7 (3)
- Page 105 YSP-3000/YSP-30D/HTY-7030 ✻ New Parts ✻ New Parts...
- Page 106 YSP-3000/YSP-30D/HTY-7030 • ACCESSORIES • BAFFLE UNIT 1-42 1-32 1-42 1-21 1-13 1-15 1-42 1-16 1-15 1-16 1-17 1-42 1-45 1-42 1-32 1-18 U, C, K, A, B, G, 206 x1 1-23 200-1 E, L, V models 1-23 1-15 1-16 202 U, C, L, V models...
- Page 107 YSP-3000/YSP-30D/HTY-7030 • SERVICE TOOL ✻ New Parts...
-
Page 108: Remote Control
YSP-3000/YSP-30D/HTY-7030 I REMOTE CONTROL • SCHEMATIC DIAGRAM J model U, C, K, A, B, G, E, L, V models DTA113ZKA 6.8ohms DTC144EKA IC2 1pin IC3 3pin 22k-ohms 1000µF 2.2mF 6.3V 5.5V (for BU) MIE-544A2 2ohms (1/4W) 16 24 32 40 48 56... - Page 109 YSP-3000/YSP-30D/HTY-7030 • PANELS • KEY CODE YSP-3000 YSP-30D (U, C models) (B model) 78-4A is transmitted. 78-49 is transmitted. 78-DE is transmitted. 78-BC is transmitted. 78-DF is transmitted. 78-DF is transmitted. 78-4B is transmitted. ^ ^ ^ ^ ^ ^ ^ ^ ^ ^...
- Page 110 YSP-3000/YSP-30D/HTY-7030 • PANEL • KEY CODE YSP-3000 Key layout (J model) Indicator LED Indicator LED K58 K59 K58 K59 K2 K3 K4 K2 K3 K4 K5 K6 K7 K8 K5 K6 K7 K8 K9 K10 K11 K12 K9 K10 K11 K12...
- Page 111 YSP-3000/YSP-30D/HTY-7030...
- Page 112 YSP-3000/YSP-30D/HTY-7030...
- Page 113 YSP-3000/YSP-30D/HTY-7030...
- Page 114 YSP-3000/YSP-30D/HTY-7030...
- Page 115 YSP-3000/YSP-30D/HTY-7030...
- Page 116 YSP-3000/YSP-30D/ HTY-7030...