Kenwood KDC-C467FM Instruction Manual
Kenwood cd autochanger/controller/fm modulator system instruction manual
Hide thumbs
Also See for KDC-C467FM:
- Instruction manual (21 pages) ,
- Service manual (28 pages) ,
- Instruction manual (26 pages)
Table of Contents
Advertisement
Quick Links
KDC-C517FM
KDC-C467FM
COMPACT
DIGITAL AUDIO
CD AUTOCHANGER / CONTROLLER / FM MODULATOR SYSTEM
INSTRUCTION MANUAL
CHANGEUR AUTOMATIQUE DE CD / CONTROLEUR / SYSTEME
A MODULATION DE FM
MODE D'EMPLOI
SISTEMA DEL MODULADOR DE FM / CONTROLADOR / CAMBIADOR
AUTOMATICO DE DISCOS COMPACTOS
MANUAL DE INSTRUCCIONES
SISTEMA MODULADOR FM/CONTROLADOR / CHANGER AUTOMÁTICO DE CDs
MANUAL DE INSTRUÇÕES
Take the time to read through this instruction manual.
Familiarity with installation and operation procedures will help you
obtain the best performance from your new compact disc auto changer.
For your records
Record the serial number, found on the back of the unit, in the spaces desig-
nated on the warranty card, and in the space provided below. Refer to the
model and serial numbers whenever you call upon your KENWOOD dealer for
information or service on the product.
Model KDC-C517FM,KDC-C467FM Serial number
©B64-1798-10 (KW)
Advertisement
Table of Contents

Related Manuals for Kenwood KDC-C467FM


Summary of Contents for Kenwood KDC-C467FM
-
Page 1: Instruction Manual
Record the serial number, found on the back of the unit, in the spaces desig- nated on the warranty card, and in the space provided below. Refer to the model and serial numbers whenever you call upon your KENWOOD dealer for information or service on the product. -
Page 2: Table Of Contents
Contents Before use Warning...3 Safety Precautions ...4 Handling Compact Discs ...6 Loading Compact Discs ...7 Buttons Display Unit ...8 Remote ...8 Operations Playing CDs ...8 Fast Fowarding and Reversing Disc Play ...9 Track Search...9 Disc Search ...9 Direct Track Search ...9 Direct Disc Search...10 Track Repeat ...10 Disc Repeat...10... -
Page 3: Warning
KENWOOD CORPORATION 2967-3, ISHIKAWA-CHO, HACHIOJI-SHI TOKYO, JAPAN KENWOOD CORP. CERTIFIES THIS EQUIPMENT CONFORMS TO DHHS REGULATIONS N0.21 CFR 1040. 10, CHAPTER I, SUBCHAPTER J. Location : Rear Panel FCC WARNING This equipment may generate or use radio frequency energy. -
Page 4: Safety Precautions
• The reception of the tuner may be reduced a little if the KDC-C517FM, KDC-C467FM is used. • If the sound is lower than the tuner sound, raise up the volume level of the CD with using the receiver. - Page 5 Safety Precautions 2CAUTION Do not set the remote on hot places such as above the dashboard. Loading and Replacing the Batteries: Use two "AAA" batteries. Slide the cover while pressing downwards to remove it as illustrated. – Insert the batteries with the poles aligned properly, following the illustration inside the case.
-
Page 6: Handling Compact Discs
Handling Compact Discs Playing a CD that is dirty, scratched or warped can cause the sound to skip and the unit to operate incorrectly, resulting in worsened sound quality. Take the following precautions to prevent your CDs from getting scratched or damaged. Handling CDs •... -
Page 7: Loading Compact Discs
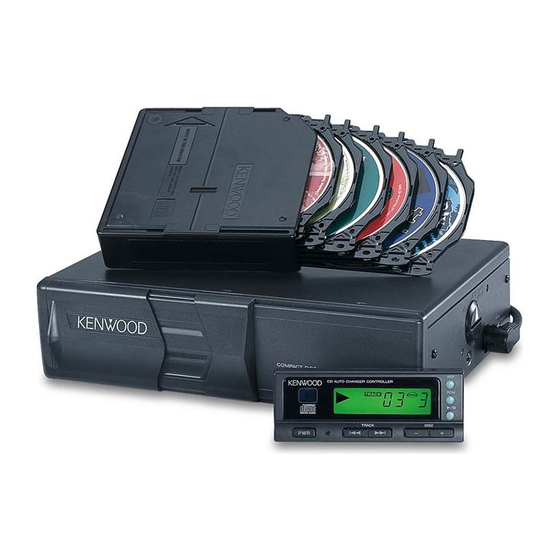
Loading Compact Discs "KENWOOD" Projection Make sure the disc magazine is the right way up with the Kenwood logo on the top.Pull the tray out by the projection. Place the disc on the tray with the label facing upwards. Insert the tray into the disc magazine until it locks. -
Page 8: Buttons Display Unit
Buttons Display Unit C D A U T O C H A N G E R C O N T R O L L E R T R A C K FREQ LEVEL R D M R E P T R A C K ¢... -
Page 9: Fast Fowarding And Reversing Disc Play
Fast Forwarding and Reversing Disc Play Fast Forwarding Disc Play : Hold down on the ¢ button. Release your finger to play the disc at that point. Reversing Disc Play : Hold down on the 4 button. Release your finger to play the disc at the point. Track Search Search forward or backward through the tracks on the disc until you reach the one that you want to listen to. -
Page 10: Direct Disc Search
Operations Direct Disc Search Using the remote, directly input the disc number that you want to listen to. Using the number buttons on the remote, input the number of the disc that you want to listen to. The selected disc number will blink in the display for 10 seconds. -
Page 11: Disc Scan
Disc Scan Successively play the beginning of each disc on a changer until you find the one that you want to listen to. Starting the disc scan: Press the D.SCAN button. The D.SCN indicator lights up and the first 10 seconds of each disc are played, in the order in which they are loaded on the changer. -
Page 12: Changing The Transmission Frequency
Operations Changing the Transmission Frequency To set the frequency change mode Press the REP button for at least three seconds. The FREQ indicator will light up and the currently set frequency will be displayed. F R E Q M H z NOTE •... -
Page 13: Modulation Level/Dynamic Control
Modulation level / Dynamic control To set the control mode Press the RDM button on the display unit for at least three seconds. The LEVEL indicator will light up and the currently set modulation level will be displayed. Modulation level L E V E L Number for prevention of distortion setting... -
Page 14: Accessories
Accessories External view ... Number of items ...1 ...4 ...1 ...1 2CAUTION The use of any accessories except for those provided might result in damage to the unit. Make sure only to use the accessories shipped with the unit, as shown above. Installation Procedure 1. -
Page 15: Connecting Wires To Terminals
Installation Procedure ■ Angle adjustment switches The angle adjustment switches on the both saides of the unit are to be set according to the angle of installation of the CD auto changer. Set both of the two switches to the same position. -
Page 16: Installation
In case of hanging in the trunk Use the holes marked (¶) to install the unit. Bottom view Side view KDC-C517FM KDC-C467FM φ 4 ■ Installation of FM modulator unit Install the FM modulator unit beneath the front seat using φ... - Page 17 Installation ■ Installation of Display unit • Installation without using the trim mount plate Display unit Attach one velcro to the slanted-line of the the display units as shown above, and attach the other velcro to the parts where you wish to attach the display units.
-
Page 18: Troubleshooting Guide
Troubleshooting guide What might seem to be a malfunction in your unit may just be the result of slight misoperation or miswiring. Before calling service, first check the following table for possible problems. PROBLEM The power is not turned on. The wiring harness fuse blows. - Page 19 Troubleshooting guide PROBLEM Sound skips due to vibration. Something is touching the CD auto-changer. The disc is dirty or damaged. The unit is mounted at a slant. Changer unit is mounted in an unstable place. The angle adjustment switches are set improperly. Nothing appears on the display.
- Page 20 Troubleshooting guide The following messages are displayed when certain problems are occurring in your system. Take the recommended actions. 01 E: No disc magazine has been loaded in the changer. The disc magazine is not completely loaded. Load the disc magazine properly. 02 E: No disc has been loaded in the disc magazine.
-
Page 21: Specifications
Specifications Specifications subject to change without notice. Disc section Laser Diode...GaAlAs (λ=780 nm) Digital Filter (D/A) ...8 Times Over Sampling D/A Converter...1 bit Spindle speed ...500 ~ 200 rpm (CLV) Wow & Flutter ...Below Measurable Limit Frequency Response (±1 dB) ...10 Hz ~ 20 kHz Modulating Frequency (200KHz STEP) ...87.7, 87.9, 88.1, 88.3, General Operating Voltage...14.4 V (11 ~ 16 V)