Table of Contents
Advertisement
Quick Links
Advertisement
Table of Contents

Related Manuals for Baumatic BWC157


Summary of Contents for Baumatic BWC157
- Page 1 USER MANUAL COMPRESSOR WINE COOLER: BUILT-UNDER BWC157 / BWC319 / BWC646/ BBC6178...
-
Page 2: Table Of Contents
CONTENTS IMPORTANT SAFETY INFORMATION ���������������������������������������������������1 DESCRIPTION OF APPLIANCE AND INSTALLATION ���������������������������3 22L (BWC157) ��������������������������������������������������������������������������������������������������������������������������������������������� 3 58L (BWC319) ��������������������������������������������������������������������������������������������������������������������������������������������� 3 145L (BWC646 and BBC6178) ��������������������������������������������������������������������������������������������������������������� 4 ACCESSORY INSTALLATION BEFORE OPERATING ������������������������������5 UNPACKING AND CLEANING THE WINE COOLER �������������������������������������������������������������������������� 5 LOCK & UNLOCK THE DOOR (FOR OPTION) ������������������������������������������������������������������������������������� 5 OPERATING THE WINE COOLER ������������������������������������������������������������6... -
Page 3: Important Safety Information
INSTRUCTION MANUAL ● Please remove all packaging, stickers and films from the products surface and clean the product’ s surfaces with a damp cloth and mild detergent before using for the first time. ● Let the appliance stand upright for approximately hours before connecting it to the power source, which helps to reduce the possibility of a cooling-system malfunction from handling during transportation. - Page 4 INSTRUCTION MANUAL ● To ensure proper ventilation for the appliance, the front of the unit must be completely unobstructed� Locate the unit away from direct sunlight and sources of heat (stove, heater, radiator, etc�)� ● Do not attempt to repair or replace any part of the appliance unless it is specifically recommended in this manual�...
-
Page 5: Description Of Appliance And Installation
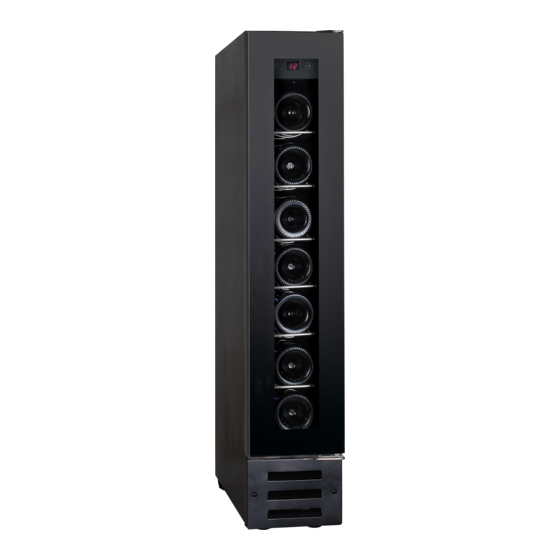
INSTRUCTION MANUAL DESCRIPTION OF APPLIANCE AND INSTALLATION The following pictures only show description of appliance� The dimension and shelf quantity may differ among the models of the same series� „ 22L – Model BWC157 Single Zone Handle Control Panel Outside Cabinet... -
Page 6: 145L (Bwc646 And Bbc6178)
INSTRUCTION MANUAL • Height Adjustable: 870-890mm >34¼” (870mm) 34¼” (870mm) 33½” (850mm) (150mm) „ 145L – Model BWC646 Wine Cooler and Model BBC6178 Beverage Centre Single Zone Handle Control Panel Outside Cabinet Deep Shelf Door Handle Gasket Shallow Shelf Front Louvre Adjustable Foot Dual Zone... -
Page 7: Accessory Installation Before Operating
INSTRUCTION MANUAL • Height Adjustable: 870-890mm ACCESSORY INSTALLATION BEFORE OPERATING „ UNPACKING AND CLEANING THE WINE COOLER ● Remove the exterior and interior packing materials� 24 hours ● Let the appliance stand upright for approximately before connecting it to the power source, which helps to reduce the possibility of a cooling-system malfunction from handling during transportation�... -
Page 8: Operating The Wine Cooler
INSTRUCTION MANUAL ● Insert the key into the lock and turn it counter-clockwise to unlock the door� To lock it, please turn clockwise� Please save the key well� OPERATING THE WINE COOLER „ WORKING CLIMATE ● The appliance is designed for operating from ST to T climate (see below climate class chart)�... -
Page 9: Control Panel
INSTRUCTION MANUAL ● To prevent damaging the door gasket, make sure to have the door opened fully all the way before pulling the shelves out� ● Please store wine in sealed bottles� ● Do not cover the shelves with aluminium foil or any other shelf material which may prevent air circulation�... -
Page 10: Power On/Off Control
INSTRUCTION MANUAL For Dual Zone Upper Zone Lock ⁄ Unlock Display Window Power Lighting ºC⁄ºF Bottom Zone Zone Select Interchange Display Window „ POWER ON/OFF CONTROL ● When the appliance is plugged in to a power outlet, it powers on automatically� ●... -
Page 11: Temperature Setting
INSTRUCTION MANUAL it will change to display the real temperature of the inside cabinet after 10 seconds without being touched� ● When the temperature probe is out of order, the display window will show with “HH” or “LL” instead of a digital figure while continuous buzz sound will be heard� In case of this happens, this appliance is considerately designed to keep periodical running of compressor and fans which helps to keep the coldness of the inside cabinet to protect your stored wines�... -
Page 12: Selecting Fahrenheit(ºf) & Celsius (ºc) Display
INSTRUCTION MANUAL „ SELECTING FAHRENHEIT(ºF) & CELSIUS (ºC) DISPLAY For Single Zone ● Touch the symbols with 2 fingers at the same time and hold for 5 seconds, will interchange the Fahrenheit and Celsius display� For Dual Zone ● Directly touching the symbol , will interchange the Fahrenheit and Celsius display for both zones at the same time�... -
Page 13: Troubleshooting
INSTRUCTION MANUAL ● Ensure that the unit is adequately ventilated� Never cover air vents� ● Only open the door when necessary� Avoid leaving the door open for long periods or opening/closing the door frequently� TROUBLESHOOTING ● If you feel the appliance is not working properly, follow these instructions to try to see if you can solve the problem simply by yourself before calling for service�... -
Page 14: Reverse The Door Swing
INSTRUCTION MANUAL REVERSE THE DOOR SWING Note: ● Door Reversal is NOT available for a unit with Control Panel on Door� The following operation is only for a unit with Control Panel inside the cabinet� „ For 22L/58L/145L Remarks: ● The instruction is based on a unit with Right Hinge installed already� To reverse the door from right hinge to left hinge, you need to get ready 2 new spare parts: an Upper Left Hinge, and a Bottom Left Hinge�... - Page 15 INSTRUCTION MANUAL 3� Unscrew the Upper Right Hinge and Bottom Right Hinge from the cabinet� Keep them well for door re-installation� Upper Right Hinge Bottom Right Hinge 4� Pull out the 6 Plastic Caps at the front left corner of the cabinet� And move them all to the right side�...
- Page 16 INSTRUCTION MANUAL 6� Loose the 2 screws with a cross screwdriver� Keep these screws and the handle well on one side for using later� Screws(x2) Door Handle 7� Turn the door by 180 (upside down) � 8 Insert the Pivot Hinge into the bottom hinge hole of the door� Pivot Hinge...
- Page 17 INSTRUCTION MANUAL 9� Install the door to the left hinge side by tightening the Pivot Hinge with the 2 screws� Bottom Left Hinge Pivot Hinge Screws (2pcs) 10� To reinstall the handle to the left top of door frame� Screws(x2) Door Handle...
- Page 18 THIS PAGE HAS BEEN LEFT BLANK INTENTIONALLY...
- Page 19 THIS PAGE HAS BEEN LEFT BLANK INTENTIONALLY...