Table of Contents
Advertisement
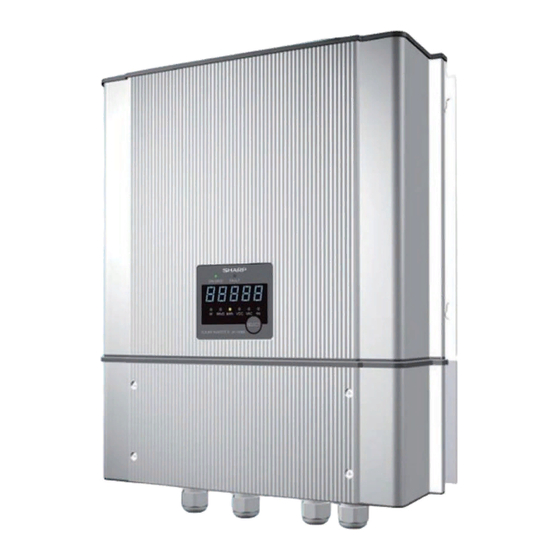
JH-1600E
Solar Power Inverter
INSTALLATION &
OPERATION MANUAL
• IMPORTANT SAFETY INSTRUCTIONS ................................ 1
Conventions Used ................................................................... 1
General Safety Precautions for Installation ............................. 1
• Introduction............................................................................ 2
Outline of Grid-Interactive Home PV System .......................... 2
• Dimensions ............................................................................ 3
Solar Power Inverter................................................................ 3
Mounting Bracket..................................................................... 4
Unpacking Carton Box............................................................. 4
• Installation.............................................................................. 5
Planning the Installation .......................................................... 5
Inverter Location...................................................................... 5
• Installing Solar Power Inverter............................................. 6
Mount the Solar Power Inverter............................................... 7
• Wiring Solar Power Inverter ................................................. 9
Before wiring.......................................................................... 10
Removing the Front Panel..................................................... 11
Solar Power Inverter Wiring Overview................................... 12
• Connecting to DC Disconnect............................................ 13
• Connecting to AC Disconnect............................................ 15
• Test Run ............................................................................... 18
Checking the PV Array DC Voltage....................................... 18
Checking the AC Utility Voltage............................................. 18
Starting Up the Inverter ......................................................... 18
• Monitoring the Inverter ....................................................... 19
Display Panel......................................................................... 19
Status Indicator Lights ........................................................... 19
Monitoring the Front Display.................................................. 20
Emergency Stop .................................................................... 22
Restart ................................................................................... 22
• Specification ........................................................................ 23
Electrical Specification........................................................... 23
Environment Specification ..................................................... 23
Mechanical Specification ....................................................... 23
How to Set Parameter ........................................................... 24
Checking Output Power......................................................... 25
MODEL
Page
Advertisement
Table of Contents

Related Manuals for Sharp JH-1600E


Summary of Contents for Sharp JH-1600E
-
Page 1: Table Of Contents
MODEL JH-1600E Solar Power Inverter INSTALLATION & OPERATION MANUAL Page • IMPORTANT SAFETY INSTRUCTIONS ........ 1 Conventions Used ..............1 General Safety Precautions for Installation ......1 • Introduction................2 Outline of Grid-Interactive Home PV System ......2 • Dimensions ................3 Solar Power Inverter.............. - Page 2 (60) months from the date of original purchase. Such faults will be rectified by Sharp Corporation free of charge by either repair or replacement at Sharp's option when used under normal use and reasonable care in the opinion of Sharp in accordance with the manufacturers instructions.
-
Page 3: Important Safety Instructions
IMPORTANT SAFETY INSTRUCTIONS SAVE THESE INSTRUCTIONS This manual contains important safety instructions that shall be followed during the installation and maintenance of the solar power inverter. To reduce the risk of electrical shock, and to ensure the safe installation and operation of the solar power inverter, the following words appear throughout this manual to inform you of or alert you to something that may cause a dangerous situation or that safety instructions must be followed. -
Page 4: Introduction
Isolates the AC power from the solar power inverter. The JH-1600E incorporates anti-islanding in accordance with AS 4777. The JH-1600E has a detector circuit to sense ground faults from the PV array. The JH-1600E also complies with local EMC requirement. -
Page 5: Dimensions
Dimensions Solar Power Inverter (Unit: mm) -
Page 6: Mounting Bracket
Mounting Bracket EXTRUDE M5xP0.8-4PL (Unit: mm) Unpacking Carton Box Before installation, make sure all the items listed below are included within the carton box. • Bracket ..................1 piece • Installation & operation manual..........1 manual • Inspection report ...............1 report • Screws (for the solar power inverter) ........2 pieces (#6-32 UNC*10) •... -
Page 7: Installation
Installation Planning the Installation The following issues need to be considered when planning for an installation using the inverter. See the specified sections for detailed. - Inverter Location (Page 5) - Installing Solar Power Inverter (Page 6) - Wiring Solar Power Inverter (Page 9) Preparing for the Installation Ensure your electricity provider is consulted for any requirements for connecting to or returning power to the grid. -
Page 8: Installing Solar Power Inverter
Installing Solar Power Inverter WARNING: BURN HAZARD Do not install in a location where people can accidentally come into contact with the inverter. High temperatures can be present on the inverter, causing a potential burn hazard. In extreme condition, the inverter chassis can reach temperatures about 70°C, which can cause skin burns if accidentally touched. -
Page 9: Mount The Solar Power Inverter
Mount the Solar Power Inverter Make sure the supporting surface is strong enough to handle 50 kg. Wall Mount Bracket Dimensions The dimensions of the mounting bracket are shown in figure below. (Unit: mm) (1) Use 10 pcs screws ( 5.5*1.8*80) to fix the mounting bracket. Wall (2) Seal the space between the bracket and the wall with cauking as shown the picture below. - Page 10 (3) Place the JH-1600E on the mounting bracket. Key holes located on the upper side and middle side of the inverter unit are for hanging the unit on the bracket. place key holes on the 4 hexa bolt head the bracket.
-
Page 11: Wiring Solar Power Inverter
Wiring Solar Power Inverter • All of the procedure must be completed by a qualified electrician. • Wiring the solar power inverter and the DC disconnect enclosure must be performed using electrical conduit. • Completely cover the surface of the entire PV array with an opaques (dark) material before wiring the solar modules. -
Page 12: Before Wiring
Specification section on page 23.) Recommended AC circuit breaker: For JH-1600E: 10 Amps / 250 V To wire the main utility service panel to inverter: (1) Connect the ground wire (green and yellow) from the ground terminal in the main utility service panel to GND ( ) terminal in the inverter. -
Page 13: Removing The Front Panel
Removing the Front Panel Remove the front panel of the solar power inverter. (1) Remove the 4 screws from the lower part of the front panel of the solar power inverter. Then remove the front panel. Screws Screws (2) The four glands shown below should be used for the purpose indicated. If there are any unused or open glands, they should be covered. -
Page 14: Solar Power Inverter Wiring Overview
(2) Turning off the DC disconnect and the AC disconnect (3) Making the DC connections from PV array to the inverter (4) Making the AC connections from inverter to main utility service panel SHARP Solar Power Inverter Utility Grid Utility Meter... -
Page 15: Connecting To Dc Disconnect
Connecting to DC Disconnect Make sure DC disconnect is open. This section describes the connection between the solar power inverter and the DC disconnect from the PV string. DC terminal block for DC disconnect Follow all WARNING and CAUTION of Wiring Solar Power Inverter (page 9). (1) Install two copper wires (positive and negative) from the DC disconnect through the conduit. - Page 16 (3) Connect the black wire to the positive terminal of the terminal block, and tighten the screw firmly to clamp the wire. (4) Attach a forked spade or lug connector to the cables before connecting to the terminal block. (5) Connect the white wire to the negative terminal of the terminal block, and tighten the screw firmly to clamp the wire.
-
Page 17: Connecting To Ac Disconnect
Connecting to AC Disconnect This section describes the connection between the solar power inverter and the AC disconnect. The wires needed are the AC output cable from the solar power inverter (one pair of wires) and the grounding wire. Follow all WARNING and CAUTION of Wiring Solar Power Inverter (page 9). •... - Page 18 (2) Connect one wire to the N terminal of the AC terminal block, and tighten the screw firmly to clamp the wire. Connect the other wire (after performing step 2) to the L terminal, and tighten the screw firmly to clamp the wire. (3) Connect the grounding wire to the leftmost GND terminal of the AC terminal block, and tighten the screw firmly to clamp the wire.
-
Page 19: Test Run
Test Run Checking the PV Array DC Voltage To check the PV array DC voltage: (1) Uncover the PV arrays and expose them to full sunlight. The sunlight must be intense enough to produce the required output voltage. (2) Measure the PV array open circuit DC voltage across the DC positive (+) and negative (-) terminals. -
Page 20: Monitoring The Inverter
Monitoring the Inverter Display Panel ON-GRID FAULT Wh/D kWh SELECT SOLAR INVERTER JH-1600E ON-GRID LED (Green) Flashing = Standby On = ON-Grid Fault LED (Red) Fault condition (please see more detail in Error / Fault Code list.) W LED (Yellow) -
Page 21: Monitoring The Front Display
Monitoring the Front Display Display Flowchart Night Displays output power instantaneously. Press Press "SELECT". "SELECT". Displays today watt-hour. Press Press "SELECT". "SELECT". Displays life kilowatt-hour. Press Press "SELECT". "SELECT". Displays input PV array voltage instantaneously. Press Press "SELECT". "SELECT". Displays output utility voltage instantaneously. -
Page 22: Islanding Protection
Islanding Protection The inverter will shut down when the power from the grid becomes abnormal or fails. This will provide safety to the people working on the power lines and protect the home circuits and solar power inverter. The solar power inverter continually monitors the voltage and frequency of the grid through an internal control circuit. It will detect an abnormal condition or failure of the grid. -
Page 23: Emergency Stop
Emergency Stop Turn off the AC disconnect and the DC disconnect when you execute an emergency stop of the inverter. Turn off Turn off Restart Turn on the AC disconnect first, and then DC disconnect. The inverter restarts automatically. -
Page 24: Specification
Specification Electrical Specification Input JH-1600E Absolute maximum array open circuit voltage 350 V Start voltage Above 70 V Input voltage, operation voltage range 60~320 V Input voltage, MPPT voltage range 60~320 V Input voltage, Maximum power point range* 200~320 V... -
Page 25: Checking Output Power
Setting item Setting code Parameter Utility over-voltage parameter (V) Utility under-voltage parameter (V) Over-voltage /Under-voltage settling time (Sec) Utility frequency over parameter (Hz) Utility frequency under parameter (Hz) Utility frequency over/under settling time (Sec) Protection timer (Sec) Option One thing *This setting is not used. - Page 26 Memo...
- Page 27 1 Huntingwood Drive, Huntingwood, NSW 2148. by phone on: 1300 135 022 or by fax on: 1300 727 717 WEB site http://www.sharp.net.au/ TiNSJ0546SNZZ...