
Related Manuals for Casio W62CA


Summary of Contents for Casio W62CA
- Page 1 Contents/Ready Contents/Ready Phone Call Inputting Characters Address Book/ Pair Function Mail Camera EZweb EZ Navi au Media Tuner Other Functions Troubleshooting/ Remote Ctrl Lock Index...
- Page 2 (Information) On-Line Manual All mentions of “the W62CA” in this manual refer to “the G’zOne W62CA.” The typeface, fonts, and colors of the texts on the screens shown in this manual may differ from the actual contents. Also, certain icons and the scroll bars may be omitted.
-
Page 3: Cellphone Etiquette
Cellphone Etiquette Mind your manners! A cellphone always emits weak radio waves while it is turned on. Enjoy operation of your cellphone without forgetting to be considerate of those around you. Some locations do not allow the use of cellphones. Using a cellphone while driving is dangerous and prohibited by the Traffic Control Law. -
Page 4: Cellphone Basics
PCs. Page function. Page Page EZweb Water & Shock Resistance G’zGEAR Download “Chaku- W62CA provides Six tools with GPS ® water and shock and direction/ ”/other data or access sites. resistance against the temperature/ rain and strenuous... -
Page 5: Manner Mode And Answer Memo
Normally leave the phone turned on. The phone needs to be turned on to make and receive calls. Hold down F for at least 2.5 seconds to turn on W62CA. After a while, W62CA turns on with tone and the standby screen appears. -
Page 6: Never Use Your Cellphone While Driving
Never use your cellphone while driving! Do not use the cellphone while driving a car/motorcycle/bicycle. It may cause a traffic accident. Use of the cellphone while driving a car/motorcycle is forbidden by the law. Use of the cellphone while driving a bicycle may be punished by the law too. Reading mail or looking Holding a cellphone in at the display. -
Page 7: Beware Of Spam And One-Ring Calls
A “One-ring Call” (wan-giri in Japanese) rings your phone only once, in an attempt to make you call back to a service that automatically bills you very high charges. If W62CA received a “One-ring Call,” the icon appears at the head of an incoming history. -
Page 8: Disaster Message Board Service
Disaster Message Board Service Disaster Message Board The Disaster Message Board lets you use EZweb to register information about your well-being in case of a major disaster. The information you register can be accessed from anywhere in Japan over EZweb or the Internet. When a major disaster strikes, you can use your au cellphone to access the “... - Page 9 Registration Access Disaster Message Board top screen Information registration screen Information screen Registration contents are retained for up to 72 hours. You can register up to 10 entries per phone number. Registering a new entry while there are already 10 registered entries, automatically overwrites the oldest entry.
-
Page 10: Table Of Contents
Contents Phone Call Making a Call ..........28 Making an International Call .......29 Answering a Call .........30 Cellphone Etiquette Redialing (Outgoing Histories/Incoming Mind your manners! ........1 Histories) ..........31 One-ring Calls ..........31 Changing the Ringtone ........32 Cellphone Basics Adjusting the Ringtone Volume ....34 Adjusting the Earpiece Volume during a Features ............2 Call ............35... - Page 11 EZ Navi Features ........72 au Media Tuner au Media Tuner Features ......75 Configuring au Media Tuner Initial Settings ..............77 Using Television (1Seg).......79 Exiting au Media Tuner ........81 Other Functions Security Setup Features ......82 Troubleshooting If you lose your W62CA ......85 Index...
-
Page 12: Ready
Ready Before using the W62CA, check the contents of the package coming with your W62CA. You should also familiarize yourself with basic operations, like how to charge the battery, how to turn the power on, etc. Checking the Contents of the Package... -
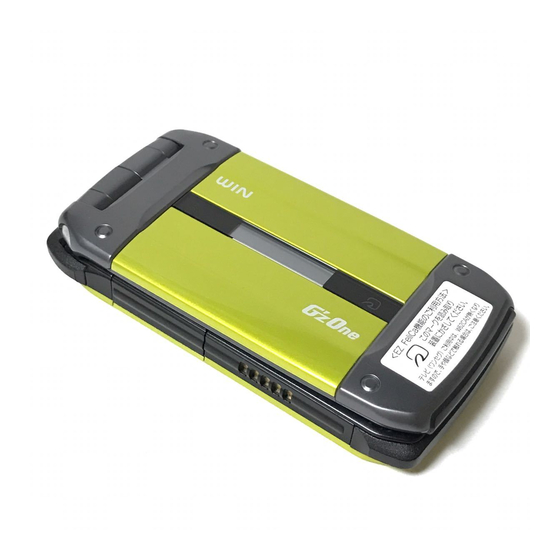
Page 13: Names Of Parts
Names of Parts Front Back Temperature Earpiece sensor FeliCa mark Speaker Main display Sub display Photo light/ Pocket light Center key LED indicator Bumper A Built-in TV antenna Cursor key Optical sensor Camera lens Application key Infrared port Address book key EZ key Camera start indicator Mail key... -
Page 14: Charging The Battery Pack
The battery pack that comes with the phone is not fully charged when you purchase it. Be sure to charge the battery pack before using the W62CA for the first time. Charging takes about 140 minutes. You should recharge the battery pack whenever the battery level icon... - Page 15 (charging battery icon) to display. When charging is completed, the LED indicator will go out. To remove the W62CA from the desktop holder, hold the holder by hand and remove W62CA. You can connect the common AC adaptor 01/02 (option) to the W62CA directly to charge the battery pack.
-
Page 16: Turning On Power
Turning On Power Hold down F for at least 2.5 seconds. The message “Now Loading...” will appear on the display for a short while, followed by the standby screen. Icon Signal Very Out of Strong Medium Weak Strength Weak Range •... -
Page 17: Security Code And Passwords
Security Code and Passwords The W62CA lets you use the numbers and passwords described below. Be sure to take steps so you do not to forget your numbers and passwords. You will need them to perform various operations and to access subscription services. -
Page 18: Selecting English As The Display Language
Selecting English as the Display Language While the standby screen is displayed, press c . Use j to select “ ” (Function), and then press ) (Select). Press 3 ( (Screen Display). - Page 19 Press 4 (Set Language). Press 2 (English). This selects English as the display language. Even if English is selected as the display language, schedule and other dates are displayed in the format year/month/day. Folder names inside of the Data Folder are also displayed in year/month/day format.
-
Page 20: Operation Basics
Hold down F to return to the standby screen. When is displayed in the lower right corner of the photo screen etc., pressing 5 will display key help. Holding down c for at least one second toggles side key’s disabling feature on and off while W62CA is folded. -
Page 21: Display Indicators
The date and time are set automatically. Selects the user defined icons such as Photo (DSC Mode), calculator, Emission OFF Mode, G’zGEAR, Sports Timer, and “01 ” (information from CASIO)(Notepad 01), etc. by pressing d and a. isplay FeliCa Lock on... -
Page 22: Main Menu
Main Menu There are four initial main menus (“Carbon pattern,” “G-gallery,” “Eco & Ego G,” and “Simple”) for W62CA. Pressing c while the standby screen is displayed displays the main menu. The menu structure depends on the type of the main menu. - Page 23 Using the “G-gallery” menu If your cellphone color is “Frozen White,” the initial main menu is “G-gallery.” Use a to select the icon, and then press c (Select) to access the function associated with the icon. G’zGEAR Camera Sports Timer LISMO Player Run&Walk Menu Life&News...
-
Page 24: Using The Main Menu
Using the “Simple” menu Use j to select the icon, and then press c (Select) to access the function associated with the icon. Camera Photo/Movie/Bar Code Reader LISMO Player Play music/video clips EARTH COMPASS, EARTH LOCATOR, G’zGEAR HEAT GAUGE, SEA TIDE, etc. Data Folder Check and play stored data micro SD... - Page 25 Using Soft Keys Soft keys are the keys you use to execute the functions along with the bottom of the screen. The table below explains how to assign the soft keys to the on-screen functions. Note that the function of each soft key depends on the currently displayed screen.
-
Page 26: Initializing E-Mail And Ezweb
Initializing E-mail and EZweb An EZweb subscription is required to use e-mail, EZweb or other EZ services. If you did not subscribe when you purchased your phone, contact your nearest au shop or the au Customer Service Center. You will be assigned an e-mail address automatically when you perform the EZweb initialization procedure. -
Page 27: Looking Up Your Current Phone Number And E-Mail Address
Looking Up Your My phone number and mail address Current Phone Number and E-mail Address While the standby screen is displayed, press c . Press 0 . Your current phone number and e-mail address appear. -
Page 28: Changing Your E-Mail Address
Changing Your E-mail Address E-mail address @ezweb.ne.jp Part you can change Domain name While the standby screen is displayed, press L . Press 0 (E-mail Setup). Press 4 (Other). Press 1 (E ) (Change E-mail Address). - Page 29 Enter your Security Code, press c (OK), use j to select “ ” (Send), and then press c (Select). Use j to select “ ” (Accept), and then press c (Select). Use j to select the text box, and then press c (Input).
-
Page 30: Phone Call Making A Call
Phone Call Making a Call While the standby screen is displayed, use the number keys ( 0 to 9 ) of the keypad to enter the phone number you want to call. When calling a standard phone, you need to enter the area code. -
Page 31: Making An International Call
Making an International Call au International Call Service Available without any additional application. Ex: To call 212-123- in the USA 005345 Press N. Area code International access code Country code (USA) Phone number • Calling charges for this service are added to monthly mobile phone calling charges and billed together. -
Page 32: Answering A Call
Answering a Call Press N to answer an incoming call. After you finish a call, press F to hang up. Display for Incoming Calls If the caller’s name is in your address book, it appears on the display. If not, only the caller’s phone number is displayed. -
Page 33: Redialing (Outgoing Histories/Incoming Histories)
Redialing (Outgoing Histories/ Incoming Histories) While the standby screen is displayed, press s . r: Displays outgoing histories. l: Displays incoming histories. Use j to select the number you want to dial, and then press N . The phone stores up to 50 histories each for the outgoing histories and incoming histories. -
Page 34: Changing The Ringtone
Changing the Ringtone While the standby screen is displayed, press c , use a to select “Function,” and then press c (Select). Press 2 (Sound/Vib/ Lamp). Press 1 (Incoming Setup). Press 1 (Incoming Call). - Page 35 Use j to select press c (Select). Press 1 (Original). To hear the currently selected ringtone, press & (Play). Use j to select the ringtone you want, and then press c (Set). Press % (OK). The ringtone is set. ® You can also download a “Chaku-Uta ”...
-
Page 36: Adjusting The Ringtone Volume
Adjusting the Ringtone Volume To adjust the ringtone volume, perform steps 1 through 4 under “Changing the Ringtone” (page 32), and then continue with the following steps. Use j to select press c (Select). Use j to adjust the ringtone volume, and then press c (Set). -
Page 37: Adjusting The Earpiece Volume During A Call
Adjusting the Earpiece Volume during a Call During a call, use j to adjust the volume. u: Increases volume. d: Decreases volume. You can adjust the earpiece volume (level 1-5 and Max). Turning On Manner Mode While Manner Mode is set to on, the phone alerts incoming calls to you by vibrating. -
Page 38: Turning On Answer Memo
Turning On Answer Memo While the standby screen is displayed, hold down C for at least one second. This turns on Answer Memo. The icon appears on the display while Answer Memo is turned on. You can use Answer Memos (up to 6 memos), and each memo can contain up to 30 seconds recording time. -
Page 39: Playing An Answer Memo
Playing an Answer Memo When there is a recorded Answer Memo The message “Answer Memo” appear on the standby screen. Select “Answer Memo,” and press c (Select). “Answer Memo List” appears. Use j to select the Answer Memo you want to hear, and then press c (Play). -
Page 40: Inputting Characters
Inputting Characters Input characters using keypad keys 0 through 9 , and * . The table below shows the characters each key cycles through when you press it. Number of Presses Space Switch between upper case and lower case of the entered alphabet character. Inputs ( ) when no character is entered. -
Page 41: Inputting An E-Mail Address
Inputting an E-mail Address Inputting “mark@ezweb.ne.jp” In this example, we will input “mark@ezweb.ne.jp” for [E-mail Address1]. To input [E-mail Address1], perform steps 1 through 6 under “Registering an Address Book” (page 41), and then perform the following steps. Input “mark.” To input “m”: Press 6 once. -
Page 42: Inputting Pictograms
Inputting Pictograms The following procedure shows how to input pictograms into the body text when creating a new e-mail message. Press R . You can switch between Pictogram Symbol (Full-Size/Half-Size) Face Mark Pictogram by pressing R. Use a to select the pictogram you want, and then press c (Select). -
Page 43: Address Book Registering An Address Book
Address Book Registering an Address Book While the standby screen is displayed, hold down & for at least one second. Select “ [Name],” and then press c (Select). Enter the name, and then press c (OK). [Reading] is generated automatically when you enter a name. To input text “Inputting Characters”... - Page 44 Enter the phone number, and then press c (OK). Use j to select the No. Type, and then press c (Select). When entering the number of a standard phone, be sure to include the area code. Use j to select “...
-
Page 45: Editing An Address Book Record
Editing an Address Address Birthday Book Record Group Example: To edit the phone number of “Tom Carter” While the standby screen is displayed, press & , use a to select the record you want to edit. Press c (Detail), and then &... -
Page 46: Adding Outgoing Or Incoming History Data To The Address Book
Adding Outgoing or Incoming History Data to the Address Book While the standby screen is displayed, press s , use j to select the phone number you want to register, and then press % (SubMenu). Incoming history submenu screen r: Displays outgoing histories. l: Displays incoming histories. -
Page 47: Dialing From The Address Book
Dialing from the Address Book While the standby screen is displayed, press & , and then use a to select the record whose phone number you want to dial. Press c (Detail). The detail screen of the record appears. Use j to select the phone number, and then press N . -
Page 48: Pair Function
Pair Function You can register up to five phone numbers (like frequently used ones from the address book). You can make calls or send mails to these registered numbers (called Pair Partners) more easily. Registering a Pair Partner While the standby screen is displayed, press N . -
Page 49: Making A Phone Call Or Sending Mail To A Pair Partner
Making a Phone Call or Sending Mail to a Pair Partner While the standby screen is displayed, press N . Use s to select the Pair Partner. Use j to select “Call,” and then press c (Select). Sending E-mail: Selecting “E-mail” and then pressing c (Select) will display a screen for composing and sending an e-mail message. -
Page 50: Mail
Mail EZweb subscription required Your W62CA supports two types of mail: e-mail and C-mail. Using E-mail To use e-mail, you need to subscribe to an EZweb service. If you did not subscribe when you purchased your phone, contact your nearest au shop or the au Customer Service Center. -
Page 51: Using C-Mail
Using C-mail C-mail lets you exchange text messages that contain up to 50 double-byte characters (100 single-byte characters) with another au cellphone that supports C-mails. Page C-mail transmission fee is charged when sending C-mail. C-mail Center C-mail Center C-mail Center C-mail Center C-mail Center C-mail Center... -
Page 52: Creating And Sending E-Mail Messages
Creating and Sending E-mail Messages While the standby screen is displayed, press L . Press 1 (Create New). Select “ Address,” and then press c (Select). Press c (Select). : Address to which the e-mail will be sent. You can send e-mail up to 30 recipients (includes To/Cc/Bcc, within 640 single- byte characters) at a time. - Page 53 Use j to select the e-mail address you want to enter, and then press c (Select). Press & (OK). Use j to select “ Subject,” and then press c (Select). : Subject of the e-mail message. Enter the subject, and then press c (OK).
-
Page 54: Reading Received E-Mail Messages
Reading Received E-mail Messages When you receive an e-mail The message “E-mail” and appear on E-mail icon the standby screen. Select “E-mail,” and then press c (Select). Press c (Select). : Indicates an unread message. : Indicates an already read message. Use j to select the unread e-mail you want to view, and then press... -
Page 55: Reading An E-Mail Message With An Attached Photo
Reading an E-mail Message with an Attached Photo Use j to select the e-mail message, and then press c (Select). Use j to select the attached data, and then press c (Select). Use j to select a file name, and then press c (Play). -
Page 56: Replying To A Received E-Mail Message
Replying to a Received E-mail Message To reply to an e-mail message, perform steps 1 through 3 under “Reading Received E-mail Messages” (page 52), and then perform the following steps. Press & (Reply). (Subject) is prefixed with “Re:,” and the body text of the e-mail is quoted. Use j to select “... -
Page 57: Avoiding Spam
Avoiding Spam It is recommended that you use our mail filter function to block spam. You can use the “Supportive settings” to easily configure mail filter settings by answering questions that appear on the display. Configuring Mail Filter Settings Example: To access the “ ”... -
Page 58: Creating And Sending C-Mail Messages
Creating and Sending Hold down . . . C-mail Messages While the standby screen is displayed, hold down L for at least one second. Press 1 (Create New). Enter the body text, and then press c (OK). Select “ [Address],” and then press c (Edit). - Page 59 Press 1 (Quote Adrs Book), use a to select an addressee, and then press c (Detail). You can also select a phone number from sent histories or received histories, or you can enter an address. Use j to select the phone number you want to enter, and then press c (Select).
-
Page 60: Reading Received C-Mail Messages
Reading Received C-mail Messages When you receive a C-mail The message “C-mail” and appear on C-mail icon the standby screen. Select “C-mail,” and then press c (Select). Press c (Select). : Indicates an unread message. : Indicates an already read message. Use j to select the unread C-mail you want to view, and then press... -
Page 61: Camera
Camera The W62CA has a CMOS camera with approximately 1.97 million effective pixels and powerful functions to support various types of digital imaging. You can attach the photos that you shot to e-mail messages. Using the Camera Shooting a Photo (page 61) - Page 62 Auto Focus W62CA has built-in auto focus function. You can shoot photos with the subject properly focused simply by pressing the shutter key. Photo Sizes The following shows the sizes of the photos that can be recorded with your W62CA.
-
Page 63: Shooting A Photo
Shooting a Photo While the standby screen is displayed, press c , use a to select “Camera,” and press c (Select). Press 1 (Photo (W.paper Mode)). Point the lens at the subject, and press c (Shoot). The phone emits a shutter sound. Note that the phone emits the shutter sound even if it is in Manner Mode. -
Page 64: Viewing Photos
Viewing Photos While the standby screen is displayed, press c , use a to select “Data Folder,” and then press c (Select). Use j to select “Photo Folder,” and then press c (Select). Selecting “All Data” displays a list of all photos in the “Photo Folder.”... -
Page 65: Attaching A Photo To An E-Mail Message
Attaching a Photo to an E-mail Message Perform the procedure from step 1 to 2 under “Shooting a Photo” (page 61), and then perform the following steps. Press & (E-mail), and then press 1 (E-mail). The photo you shot is stored in the “Photo Folder”... -
Page 66: Ezweb
EZweb EZweb subscription required Using EZweb To use EZweb, you need to subscribe to an EZweb beforehand. If you did not subscribe when you purchased your phone, contact your nearest au shop or the au Customer Service Center. In addition to an EZweb subscription, you also need to perform an initialization procedure before you can use EZweb. -
Page 67: Displaying The Au One Top
Displaying the au one Top While the standby screen is displayed, press R , use s to select “EZweb,” and then press 1 (au one Top). (Search by keyword) Provides information search function by keywords (Mail) Provides another e-mail address for both cellphone and PC use (My Page) Provides various information, useful tools or mass storage capabilities to suit your needs... -
Page 68: Bookmarking Sites You Frequently Access
Bookmarking Sites You Bookmark Frequently Access Display a site you want to bookmark, and press % (BrowserMenu). Press 1 (New bookmark). You may not be able to bookmark some sites. Press % (Reg). The message “Registered to Bookmark” appears when registration is completed. You can store up to 100 sites in the Bookmark(s). -
Page 69: Viewing A Bookmarked Site
Viewing a Bookmarked Site While the standby screen is displayed, press R . Use s to select “EZweb,” and then press 2 (Bookmark(s)). Use j to select a site or folder, and then press c (Connect/Select). If you selected a folder, use j to select a site, and then press c (Connect). -
Page 70: Downloading Chaku-Uta /Chaku-Uta-Full
® Downloading Chaku-Uta ® Chaku-Uta-Full ® ® To download a Chaku-Uta /Chaku-Uta-Full perform step 1 under “Displaying the au one Top” (page 65), and then perform the following steps. Use j to select “ ” (Search by Category), and then press c (OK). - Page 71 In addition to transmission charges, you will be charged according to the ® ® pricing policy of each site to download Chaku-Uta /Chaku-Uta-Full other contents from a fee-based site. Perform the same procedure to download wallpaper and use it for the standby screen background.
-
Page 72: Ez News Flash/Au One Gadget
EZ News Flash/au one Gadget EZweb subscription required EZ News Flash displays a scrolling ticker showing the latest news on the standby screen, and you can view information by selecting it. au one Gadget displays an application called gadget on the standby screen. EZ News Flash/au one Gadget is available just after making initial settings for EZweb (page 24). -
Page 73: Setting Ez News Flash Service
Setting EZ News Flash service You can use EZ News Flash with simple settings for no charge. Refer to “Initializing E-mail and EZweb” (page 24), complete initializing, and then make settings for EZ News Flash. Press u in the standby screen, select the ticker and press c (OK). -
Page 74: Ez Navi
These functions enable you to check the location of an au cellphone supporting “Security Navi” and receive an alert mail which is sent to a particular au phone whenever another phone enters (or is inside of) or exits (or is outside of) a preset area by operating W62CA. -
Page 75: Ez Navi Walk
Z06A-No.2137 Evacuate Navi You can use the map data stored in the Data Folder of the W62CA to locate the nearest refuge shelter or to determine the direction to your home ( (Evacuate Area Map)). You also can access the Evacuate Navi EZweb site to... - Page 76 All display information is intended for reference purposes only. Be sure to follow all instructions issued by police, fire department personnel, government officials, etc. Due to GPS satellite conditions and other factors, it may take some time for Evacuate Navi to indicate your current location. The display layout and contents shown here are for example purposes only.
-
Page 77: Au Media Tuner
au Media Tuner EZweb subscription required au Media Tuner makes it possible to enjoy using Television (1Seg) and EZ Channel-Plus. au Media Tuner Features With au Media Tuner, you can switch between television operation screen/data operation screen and enjoy Television (1Seg) of terrestrial digital audio broadcasts. &(Vol/Ch) &( )(Back) - Page 78 EZweb. You will not be able to view au Media Tuner broadcasts after changing models or on a W62CA whose contract has been cancelled. You can use au Media Tuner to play back programs stored in your Data Folder even after changing models or canceling your contract.
-
Page 79: Configuring Au Media Tuner Initial Settings
Configuring au Media Tuner Initial Settings Perform the following procedure before using au Media Tuner for the first time. While the standby screen is displayed, hold down g for at least one second. Escape clause is displayed. If you select “OK ( )”... - Page 80 You may run into problems when configuring channel settings in step 3 in areas where 1Seg terrestrial digital television broadcast for cellphone/ mobile service has just started. Whenever you start up au Media Tuner, the channel you were viewing the last time you used it will appear first.
-
Page 81: Using Television (1Seg)
Using Television (1Seg) While the standby screen is displayed, hold down g for at least one second. You need to perform an initialization procedure before you can use au Media Tuner. If you have not performed initialization yet, refer to “Configuring au Media Tuner Initial Settings”... - Page 82 To switch between the earphone and speaker a On the television operation screen/data operation screen while au Media Tuner is running, press % ( ) (Function). b Use j to select “ ” (Sound Settings) and then press c ( ) (Select).
-
Page 83: Exiting Au Media Tuner
Exiting au Media Tuner Press F , use j to select “ ” (Yes), and then press c (OK). -
Page 84: Other Functions
To stop Safety Buzzer To stop Safety Buzzer, input the lock No., and then press c (OK). You cannot turn off W62CA or perform any other operation while the Safety Buzzer is sounding. The Safety Buzzer will continue to sound until you input the lock No. - Page 85 In addition to the functions covered in this Basic Manual, your W62CA also has the following features. Global Passport GSM Infrared Communication W62CA supports Global Passport GSM You can exchange the data stored based on au IC-Card. in your Address Book, Schedule,...
-
Page 86: Troubleshooting
Troubleshooting Symptom What to check What to do Page Is the battery pack Correctly install the battery pack. installed correctly? The phone Is the battery pack P.12 does not turn Charge the battery pack. charged? Are you holding down F Hold down F for at least 2.5 seconds P.14 for at least 2.5 seconds? -
Page 87: If You Lose Your W62Ca
Setting Remote Ctrl Lock makes it possible to perform a remote operation that activates Auto Lock, FeliCa Lock and Address Book Lock to lock the W62CA. This helps to avoid unauthorized use of your phone and its features. Configuring operating environment settings for Remote... - Page 88 Lock activated), and the W62CA will be locked using Auto Lock, FeliCa Lock and Address Book Lock. Remote Ctrl Lock cannot be activated if the W62CA is not turned on or if it is outside its service area, or when “ON” is selected for “Emission OFF (M52).”...
- Page 89 Using the Security Lock Service to activate Remote Ctrl Lock With the Security Lock Service, you can activate Auto Lock, FeliCa Lock and Address Book Lock remotely by placing a call to an au Customer Service Center or with your computer even if Remote Ctrl Lock is not set beforehand. The Security Lock Service is free.
-
Page 90: Index
Hot Dial ..........82 Viewing photos ......... 62 Casio round-type earphone jack conversion adaptor 03 ....10 Incoming histories ......31 Casio USB cable 03 (MiniB) ....10 Initial settings (e-mail and EZweb) ... 24 Cellphone Etiquette ......1 ® ®... - Page 91 Soft keys ..........23 SONY MDR-E0921 ......10 Looking up your phone number ..25 Spam ..........5, 55 Standby screen ......14, 19 Submenus ........... 23 Mail ............48 C-mail ..........49 E-mail ..........48 Television (1Seg) ........ 75 Mail filter .........
- Page 92 From au cellphones: (toll free) Sales: KDDI Corporation Okinawa Cellular Telephone Company Manufactured by CASIO COMPUTER CO., LTD. Cellphone and PHS operators collect and recycle unused telephones, batteries and battery chargers at stores bearing the logo regardless of brand and manufacturer to protect the environment and reuse valuable resources.