Table of Contents
Advertisement
Advertisement
Table of Contents

Related Manuals for Casio C781


Summary of Contents for Casio C781
- Page 1 User Guide C781...
-
Page 2: Table Of Contents
CHAPTER 1. BEFORE USING ENDING A CALL ..................... 37 MISSED CALL NOTIFICATION ................. 37 BEFORE USING ....................7 WAIT/PAUSE ......................38 INSIDE THE PACKAGE ....................8 MAKING AN INTERNATIONAL CALL ..............39 HANDSET DESCRIPTIONS ..................9 3 WAY CALLING ..................... 39 DISPLAY INDICATORS .................... 12 CALL WAITING ....................... - Page 3 CHAPTER 4. MENU FUNCTION MENU FUNCTION..................59 CONTACTS ......................60 MESSAGING ......................68 SETTINGS ....................... 75 OPTIONS ........................ 78 RECENT CALLS ....................... 78 MEDIA CENTER ...................... 81 VZ NAVIGATOR ....................... 86 SETTINGS & TOOLS ....................87 CHAPTER 5. SAFETY AND WARRANTY SAFETY AND WARRANTY ................131 SAFETY INFORMATION FOR WIRELESS HANDHELD PHONES ......
-
Page 4: Before Using
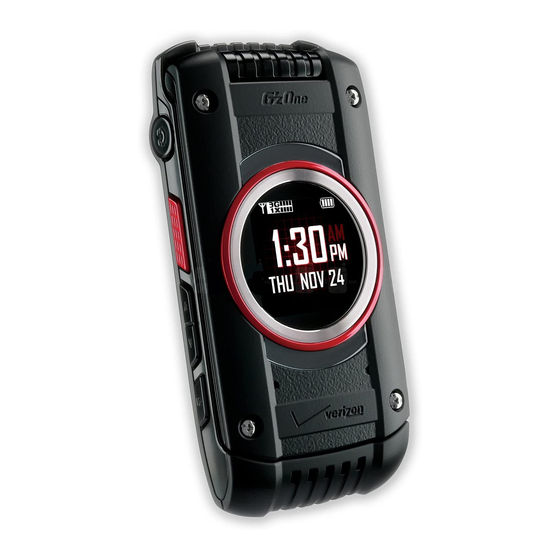
BEFORE USING This chapter provides important information about using the C781 including: INSIDE THE PACKAGE REMOVING THE BATTERY HANDSET DESCRIPTIONS CHARGING THE BATTERY DISPLAY INDICATORS BATTERY HANDLING INFORMATION FEATURT OVERVIEW USING A MEMORY CARD INSTALLING THE SIM CARD AND BATTERY... - Page 5 INSIDE THE PACKAGE HANDSET DESCRIPTIONS This package should include all items pictured below. If any are missing or different, 1. Earpiece: Allows you to hear immediately contact the retailer where you purchased the phone. the other caller. 2. Main Display Screen: Displays all the information needed to operate your phone.
- Page 6 7. [ ] Voicemail Key: In idle mode, press and hold to automatically connect 11. [ ] END/PWR Key: Press and hold to turn the phone on/off or press to to your voicemail box. end a call or browser session. Within a menu, press to return to idle mode. 8.
-
Page 7: Display Indicators
17. Front Display Screen: Displays incoming calls, messages, signal, battery Main Indicator Icons strength, time and date. Airplane Mode: Transmitting and receiving information is restricted. 18. Camera: Built-in camera lens. 1x and PTT services are available. 19. Sim Card Slot: Allows you to insert a SIM card. The SIM Card comes pre- installed in the device (located under the battery). - Page 8 Main Indicator Icons Main Indicator Icons Bluetooth: Indicates Bluetooth mode. Voicemail: Indicates you have voicemail messages. Bluetooth Active: Indicates Bluetooth Active mode. Alarm On: Appears when an alarm is set. Bluetooth Connected: Indicates a Bluetooth Device is connected. DST: DST (Daylight Saving Time) is active. Battery Level: Battery charging level - the more blocks, the stronger the charge.
- Page 9 PTT Icons New Contact Icons PTT Connecting to Group Mobile1 Ringtone PTT Connected to Group Mobile2 PTT Listening to Individual Home Speed Dial PTT Talking to Individual Business Voice Dial PTT Listening to Group Personal Email Address PTT Talking to Group Business Email WL Messenger PTT Call Ended...
-
Page 10: Featurt Overview
Opened Download Picture WATER RESISTANCE Unread EMS Message The C781 is water resistant. It provides reliable performance for outdoor activities, and in wet conditions such as driving rain or high humidity. Read EMS Corrupt Message The tested devices meets the requirements of the MIL-STD-810G (Rain & immersion 1m, 30min) standard. -
Page 11: Installing The Sim Card And Battery
2. Slide the battery into the slot by aligning the contacts (1) and press down until you hear “click (2). ” Battery Terminals 3. Insert the battery cover into the slots (1) and Charging Terminals press the battery cover in the direction of the arrow (2). -
Page 12: Removing The Battery
REMOVING THE BATTERY CHARGING THE BATTERY 1. Slide the battery cover latch to the FREE 1. Connect the USB data cable into the cableless position in the direction of the arrow as wall adapter. shown in the figure. 2. Plug the USB data cable into the phone’ s charging/data jack and the wall adapter end into an electrical outlet. -
Page 13: Battery Handling Information
• Battery operating time gradually decreases over time. • If the battery fails to perform normally, you may need to replace the battery. The C781 supports the use of a microSD™ memory card as a source of external memory. USING A MICROSD... -
Page 14: Connecting To The Haedset
4. Press the OK Key to confirm. To prevent possible damages, please keep the microSD card slot closed at all times regardless of whether a microSD card is inserted or not. REMOVING A MICROSD CARD 1. Open the microSD card cover, and use your thumb to press and release the microSD card. -
Page 15: Basic Operation
BASIC OPERATION This chapter addresses and explains the basic features for C781 including: TURNING THE PHONE ON AND OFF 3 WAY CALLING MENU ACCESS CALL WAITING MENU SUMMARY VOLUME QUICK ADJUSTMENT MAKING A CALL CALLER ID ABOUT PUSH TO TALK... -
Page 16: Turning The Phone On And Off
TURNING THE PHONE ON AND OFF MENU SUMMARY TURNING ON Main Menu 2nd DEPTH 3rd DEPTH 1. Press and hold the END/PWR Key until the phone display turns on. 1. New Contact 2. Enter your 4-digit lock code if the phone is locked. 2. -
Page 17: Making A Call
Main Menu 2nd DEPTH 3rd DEPTH Main Menu 2nd DEPTH 3rd DEPTH 1. Apps 12. USB Mode 2. Mobile Web 13. Phone Info 1. My Ringtones 14. SIM Info 3. Tunes & Tones 2. My Sounds 15. Data Manager 1. V CAST Videos 16. -
Page 18: About Push To Talk
ABOUT PUSH TO TALK 3. Keep pressing the PTT Key while talking and then release the PTT Key Push to Talk calls may only be made with other Verizon Wireless Push to Talk Release the PTT Key to let the other party talk. subscribers, and only from the National Enhanced Services Rate and Coverage Area. -
Page 19: Answering Calls
ANSWERING PTT CALLS 3. Wait until the “OK to Talk’ tone sounds and the message “Talking to” appears on the display. Speak while pressing down PTT Key INCOMING A BARGE CAll 4. Release the PTT Key to let the other party talk. When you receive a barge call, you will hear the calling party speaking through the 5. -
Page 20: Wait/Pause
MAKING AN INTERNATIONAL CALL DISPlAY ThE MISSED CAll FROM ThE NOTIFICATION 1. Select View Now and press the OK Key. 1. Press and hold the Shift Key 2. To dial the phone number, press the SEND Key - The “+” symbol, required for international calls appears. 2. -
Page 21: Volume Quick Adjustment
VOLUME QUICK ADJUSTMENT SPEAKERPHONE The Speakerphone feature lets you hear audio through the speaker and talk without ADjUSTING ThE MASTER VOlUME holding the phone. 1. Press the Volume Keys to adjust the master volume level. 1. To activate, with the flip open, press the Speakerphone Key - To check the ringtone’... -
Page 22: Text To Speech
TEXT TO SPEECH AVAILABLE OPTIONS DURING A CALL During a phone call, you can access the following features by pressing the Right Soft READING OUT UNREAD MESSAGES WhEN ThE FlIP OPEN [Options]. Press the OK Key to select any of the following options: With the flip open, the handset reads out the text information with a synthetic voice. -
Page 23: Motion Detection
MAkING AN EMERGENCY CAll IN ANY NETWORk MODE 1. Enter any of the numbers 911, *911, #911 and press the SEND Key . In ALL NETWORK MODE CDMA Mode, GSM Mode Global Mode. The phone will stay in Emergency Mode for 5 minutes. While the phone is in Emergency Mode, the phone can receive an incoming call from any available system or you can make outgoing calls even in the Emergency Callback Mode. -
Page 24: Memory Function
MEMORY FUNCTION This chapter addresses memory functions including: STORING A PHONE NUMBER TEXT INPUT USING THE TEXT INPUT MODE ONE, TWO, THREE DIGIT SPEED DIALING C 7 8 1... -
Page 25: Storing A Phone Number
STORING A PHONE NUMBER ADDING OR ChANGING GROUPS To organize your Contacts into groups: ADDING A NEW CONTACT 1. Press the Right Soft Key [Contacts], then select the Contact you want to 1 Enter the phone number you want to save. add to a group. - Page 26 5. To view the selected picture press the Left Soft Key [View]. ADDING OR ChANGING BIRThDAY 6. Press the OK Key to select the image. To add or change information: 1. Press the Right Soft Key [Contacts], then select the Contact you want to 7.
- Page 27 4. Select either AIM, Yahoo! WL Messenger and press the OK Key. 3. Select the number to assign as the default number and press the Right Soft 5. Enter the user’ s Screen Name and press the OK Key to save. [Options].
-
Page 28: Text Input
4. Select Remove Speed Dial and press the OK Key. English Spanish 5. Select and press the OK Key to erase. . @ ? ! - , & : ‘ / and 1 6. Press the OK Key [SAVE] to save. a b c 2 a á... -
Page 29: One, Two, Three Digit Speed Dialing
ONE, TWO, THREE DIGIT SPEED DIALING NUMERIC MODE Allows you to enter numbers. Ideal for frequently dialed numbers, this feature allows contact entries to be dialed via 1. From the text entry screen, press the Left Soft Key [Abc], select the keypad with only one, two or three key presses. -
Page 30: Menu Function
MENU FUNCTION This chapter addresses accessing the menu and using its functions and features to customize your C781. CONTACTS MESSAGING SETTINGS OPTIONS RECENT CALLS MEDIA CENTER VZ NAVIGATOR SETTINGS & TOOLS C 7 8 1... -
Page 31: Contacts
CONTACTS 3. To add a contact, press the OK Key [ADD]. Select the contact to add and press the OK Key [MARK] then press the Left Soft Key [Done] to add. NEW CONTACT TO ChANGE GROUP NAME To add a new mumber to our contacts 1. - Page 32 2. Select PTT Contact List then press the OK Key. 3. Select the Temp PTT Group entry. You can select one of the following options: 3. Enter a name in the Go To field or select the PTT contact. - Press the Left Soft Key [Remove] to remove the entry.
- Page 33 TO ERASE A SAVED SPEED DIAl 4. Select From Contacts and press the OK Key. Select a contact from your Contact List. When adding a new contact, select New Contact 1. Press the OK Key [MENU], select Contacts and press the OK Key. Select Speed and press the Dials...
- Page 34 2. Select Personal Info and press the OK Key [VIEW]. SEND MY NAME CARD WITh VOICE MESSAGE 3. Select the note to edit and press the OK Key [VIEW]. 1. Press the OK Key [MENU], select Contacts and press the OK Key. Select Name Card then press the OK Key.
-
Page 35: Messaging
MESSAGING 4. Enter the message and press the OK Key [SEND]. As long as one field is complete in the TXT Message, the message will be saved in the WhEN A NEW MESSAGE ARRIVES Sent box. 1. The received message display appears when a new message arrives. PICTURE MESSAGE 2. - Page 36 8. Press the Right Soft Key [Options] to access the following options. 7. Press the Right Soft Key [Options] to access the following options. • Preview: Preview a written Picture Message. • Preview: Preview a written Picture Message. • Save As Draft: Save the Picture Message.
- Page 37 SENT 8. Press the Right Soft Key [Options] to access the following options. • Review: Review a written Voice Message. Manages TXT, Picture, Video, and Voice messages already sent or waiting to be sent. • Save As Draft: Save the Voice Message. 1.
-
Page 38: Settings
VOICEMAIl MOBIlE EMAIl New voicemail alerts are sent by your network. These messages indicate how many new and USING MOBIlE EMAIl urgent voicemails are in your voicemail box. To read and send e-mail from your e-mail accounts: WhEN A NEW VOICEMAIl ARRIVES 1. - Page 39 AUTO ERASE INBOX 2. To edit the predefined Quick Text, select the Quick Text from the list, then press the OK Key [EDIT]. Allows you to set whether Inbox messages are deleted automatically when new messages arrive and Inbox is full. 3.
-
Page 40: Options
OPTIONS Picture Message: Send a Picture message to the contact. • • Video Message: Send a Video message to the contact. To erase all messages stored in your Message or Drafts folders: • Voice Message: Send a Voice message to the contact. 1. -
Page 41: Media Center
3. Press the Right Soft Key [Options] to access the following options: 4. Press the Left Soft Key [Message] to access the following options. • Save to Contacts: Store the phone number in your Contacts. • Message: Send a TXT message to the contact. •... - Page 42 MOBIlE WEB 3. Select Record New to start your own recording or select the desired sound and Find the news you want or let it come to you. Now, a few seconds is all it takes to get press the OK Key [Play] to play. up-to-the-minute information.
- Page 43 2. Select Picture & Video and press the OK Key. TAkING PICTURES 3. Select the desired image. Press the Right Soft Key [Options] to access the 1. To access the camera, with the flip open, press the Camera Key following options. 2.
-
Page 44: Vz Navigator
4. Press the Directional Key B left or right to zoom in or out. • Detailed color maps that can be quickly panned and zoomed With VZ Navigator, 5. Press the Right Soft Key [Options] to access the following options. you’ll know exactly where you are, what’... - Page 45 • FAQs: Frequently asked questions. CAll <NAME OR #>: Use the Call command to voice dial a name from your Contact List or a phone number. MASTER VOlUME When dialing a number, pronounce each digit, but do not pause noticeably between 1.
- Page 46 GO TO <MENU>: Shortcut: With the flip open, press the Voice Commands Key on the left side of your phone to access the Voice Commands. Use the Go To command to open an application on your phone. You can say Go To by Please say a command Voice Commands 2.
- Page 47 hElP: 1. Press the OK Key [MENU], select Settings & Tools and press the OK Key. Select Settings & Tools Tools, press the OK Key, select Voice Commands 1. Press the OK Key [MENU], select and press the OK Key. Select then press the OK Key.
- Page 48 PROMPTS: ABOUT: Settings & Tools Allows you to select the Voice Commands system characteristics. 1. Press the OK Key [MENU], select and press the OK Key. Select 1. Press the OK Key [MENU], select Settings & Tools and press the OK Key. Select Tools, press the OK Key, select Voice Commands then press the OK Key.
- Page 49 SETTING ThE SChEDUlE SETTING ThE AlARM 1. Press the OK Key [MENU], select Settings & Tools and press the OK Key. Select 1. Press the OK Key [MENU], select Settings & Tools and press the OK Key. Select Tools, press the OK Key, select Calendar then press the OK Key.
- Page 50 WORlD ClOCk USING ThE G’Z GEAR ® To display the time and date in pre-programmed cities: G’zGEAR® provides you of useful tools for outdoor activities. For information about “Motion Detection, ” see page 44. SETTING ThE ClOCk 1. Press the OK key [MENU], select Settings&Tools, then press the OK key. Settings &...
- Page 51 • Temperature Comparison: The current temperature is displayed in both USING G’ZGEAR® WITh ThE FlIP ClOSED Fahrenheit and Celsius, along with the highest and lowest temperatures from You can use the G’zGEAR function when the handset’ s flip is closed. 1.
- Page 52 in some locations. Check with your local authorities or Verizon Wireless. If you want 6. The handset will prompt you with the following message on the LCD screen: more information on this function, visit the Bluetooth Technology organization Web Before Connecting To [Device Name].
- Page 53 • Send Name Card: Allows you to send name cards stored in Contacts to a DISCOVERY MODE: selected device. Set your device to be searched for by other Bluetooth® devices in the area. 1. Press the Directional Key up or down to highlight a desired contact or contacts, 1.
- Page 54 PTT SETTINGS 2. Select Call Vibrate and press the OK Key. 3. Select and press the SET Key. Allows you to set PTT settings 1. Press the OK Key [MENU], select Settings & Tools. CAllER ID READOUT PTT Settings 2. Select and then press the OK Key.
- Page 55 2. Select and press the OK Key. 2. Select the display settings including the MAIN WALLPAPER, FRONT WALLPAPER, DISPLAY THEMES, MENU LAYOUT, DIAL FONTS, MAIN CLOCK SERVICE AlERTS FORMAT, FRONT CLOCK FORMAT, and press OK Key [SET]. To set any of the three Alert options to either On or Off: To skip the step, press the Right Soft Key [Skip].
- Page 56 3. Select the following menu options: DISPlAY ThEMES Duration: 7 Seconds, 15 Seconds, 30 Seconds, Always On To choose the background screen: Settings & Tools Brightness: Medium, Medium High, High, Low, Medium Low 1. Press the OK Key [MENU], select and press the OK Key.
- Page 57 2. Select Normal Large Only and press the OK Key. To preview the font size, 6. Press the Left Soft Key [Done] to save your changes. press the Left Soft Key [Preview]. POSITION MENU ITEMS MENU FONT SIZE 1. Press the OK Key [MENU], select Settings &...
- Page 58 SET ShORTCUTS SET DIRECTIONAl kEYS: Settings & Tools Your phone offers you the option of assigning a shortcut key (Directional Key left, 1. Press the OK Key [MENU], select and press the OK Key. Select right, and down) to a favorite or often-used function. In addition, choose menu Phone Settings, press the OK Key, select Set Shortcuts...
- Page 59 lANGUAGE CURRENT COUNTRY To set the bilingual feature to either English or Español: The Current Country menu allows you to select your current location. Settings & Tools Settings & Tools 1. Press the OK Key [MENU], select and press the OK Key. Select 1.
- Page 60 RESTRICTIONS: 4. Select from the following options and press the OK Key: • Unlocked: Phone is unlocked. Use the following procedure to configure Location Setting, Calls and Messages • On Power Up: Phone will lock when it is turned on. restrictions.
- Page 61 PIN CODE: SYSTEM SElECT Allows you to edit/lock your PIN code: Your phone is Quad-Band Capable, which means it will work in both CDMA and GSM 1. Press the OK Key [MENU], select Settings & Tools and press the OK Key. Select Destinations.
- Page 62 3. Select either G’zGEAR My Pics/Videos and press the OK Key. TTY MODE • G’zGEAR: When this feature is On, shaking the phone to the left or right will change the You can attach a TTY device to your phone enabling you to communicate with parties Tool in the G’zGEAR Application.
- Page 63 DTMF TONES • NDD Prefix • Area/City Code To set the Key Tone length and touch tone playback speed: • National Number Length Settings & Tools 1. Press the OK Key [MENU], select and press the OK Key. Select 5. Press the OK Key to save. Call Settings, press the OK Key, select DTMF Tones...
- Page 64 USING ThE CARD MEMORY OPTIONS - Displays the followings: Software Version, Version, Version, Browser Version, Media Center Version, MSUI Version, Version, Allows you to view the card memory information and erase/move the file location. Settings & Tools MEID, Software Update Client, BT Mac Address,...
- Page 65 OPERATING SYSTEM SET UP WIZARD To view the operating system information: To set up options using the Set up Wizard: Settings & Tools 1. Press the OK Key [MENU], select and press the OK Key. 1. Press the OK Key [MENU], select Settings &...
-
Page 66: Safety And Warranty
SAFETY AND WARRANTY This chapter addresses the safety guidelines and precautions to follow when operating your phone. Before operating your phone, please be aware of all the safety details. This chapter contains the terms and conditions of services and the warranty for your phone. Please review them thoroughly. SAFETY INFORMATION FOR WIRELESS HEARING AID COMPATIBILITY (HAC) FOR HANDHELD PHONES... -
Page 67: Safety Information For Wireless Handheld Phones
SAFETY INFORMATION FOR WIRELESS HANDHELD PHONES Do not use the phone with a damaged antenna. If a damaged antenna comes into contact with the skin, a minor burn may result. Please contact your local READ THIS INFORMATION BEFORE USING YOUR HANDHELD dealer for replacement antenna. - Page 68 PACEMAkERS VEhIClES The Health Industry Manufacturers Association recommends that a minimum RF signals may affect improperly installed or inadequately shielded electronic separation of six (6”) inches be maintained between a handheld wireless systems in motor vehicles. Check with the manufacturer or its representative phone and a pacemaker to avoid potential interference with the pacemaker.
-
Page 69: Safety Information For Fcc Rf Exposure
SAFETY INFORMATION FOR FCC RF EXPOSURE Areas with a potentially explosive atmosphere are often, but not always, clearly marked. They include fueling areas such as gas stations; below deck on boats; WARNING! READ THIS INFORMATION BEFORE USING fuel or chemical transfer or storage facilities; vehicles using liquefied petroleum CAUTIONS gas (such as propane or butane);... -
Page 70: Sar Information
SAR INFORMATION The highest SAR value for this model phone when tested for use at the ear is 0.995 W/Kg and when worn on the body, as described in this user guide, is THIS MODEL PHONE MEETS THE GOVERNMENT’S 1.12 W/Kg. (Body-worn measurements differ among phone models, depending REQUIREMENTS FOR EXPOSURE TO RADIO WAVES. -
Page 71: Hearing Aid Compatibility (Hac) For Wireless Telecommunications Devices
HEARING AID COMPATIBILITY (HAC) FOR WIRELESS A digital wireless phone is considered Hearing Aid Compatible for inductive coupling (telecoil mode) if it has a “T3” or “T4” rating. TELECOMMUNICATIONS DEVICES PCD’S COMMITMENT hOW WIll I kNOW IF MY hEARING AID WIll WORk WITh A PARTICUlAR PCD believes that all of our customers should be able to enjoy the benefits of DIGITAl WIRElESS PhONE? digital wireless technologies. - Page 72 1. Do wireless phones pose a health hazard? • Cooperate in providing users of wireless phones with the best possible The available scientific evidence does not show that any health problems are information on possible effects of wireless phone use on human health. associated with using wireless phones.
- Page 73 These RF exposures are limited by Federal Communications Commission safety However, none of the studies can answer questions about long-term exposures, guidelines that were developed with the advice of FDA and other federal health since the average period of phone use in these studies was around three years. and safety agencies.
- Page 74 The Project has also helped develop a series of public information documents 8. What has FDA done to measure the radiofrequency energy coming from wireless phones ? on EMF issues. FDA and the Cellular Telecommunications & Internet Association (CTIA) have a formal Cooperative Research and Development Agreement The Institute of Electrical and Electronic Engineers (IEEE) is developing a technical (CRADA) to do research on wireless phone safety.
- Page 75 For example, you could use a headset and carry the wireless phone away from completed in late 2000. This standard will allow manufacturers to ensure that your body or use a wireless phone connected to a remote antenna. Again, the cardiac pacemakers and defibrillators are safe from wireless phone EMI.
-
Page 76: Avoid Potential Hearing Loss
AVOID POTENTIAL HEARING LOSS • Do not listen at any volume that causes you discomfort. If you experience ringing in your ears, hear muffled speech or experience any temporary hearing difficulty Prolonged exposure to loud sounds (including music) is the most common cause after listening to your portable audio device, discontinue use and consult your of preventable hearing loss. -
Page 77: Fcc Compliance Information
NATIONAl INSTITUTE FOR OCCUPATIONAl SAFETY AND hEAlTh • Connect the equipment into an outlet of a circuit different from that to which the receiver is connected. 1600 Clifton Rd Atlanta • Consult the dealer or an experienced radio/TV technician for assistance. GA 30333. - Page 78 (c) Damage from exposure to moisture, humidity, excessive temperatures or To obtain repairs or replacement within the terms of this Warranty, the product should be delivered with proof of Warranty coverage (e.g. dated bill of sale), extreme environmental conditions; the consumer’ s return address, daytime phone number and/or fax number and (d) Damage resulting from connection to, or use of any accessory or other product complete description of the problem, transportation prepaid, to the Company at not approved or authorized by the Company;...
- Page 79 IN USA: Personal Communications Devices, LLC. 555 Wireless Blvd. Hauppauge, NY 11788 1-800-229-1235 IN CANADA: PCD Communications Canada Ltd. 5535 Eglinton Avenue West, Suite 234 Toronto, Ontario M9C 5K5 1- 800-465-9672...