Table of Contents
Advertisement
Advertisement
Table of Contents

Related Manuals for Baumatic BDW65S


Summary of Contents for Baumatic BDW65S
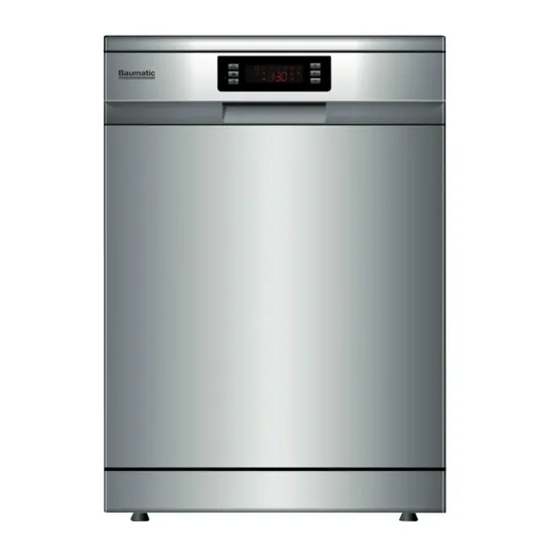
- Page 1 BDW65S/W 60 cm Freestanding electronic dishwasher...
- Page 2 USER MANUAL FOR YOUR BAUMATIC BDW65S/W 60cm Freestanding Electronic Dishwasher NOTE : This User Instruction Manual contains important information, including safety & installation points, which will enable you to get the most out of your appliance. Please keep it in a safe place so that it is easily available for future reference; for you or any person not familiar with the operation of the appliance.
-
Page 4: Table Of Contents
Contents Environmental note Important safety information 6 – 8 Specifications 9 - 12 Product dimensions Product specifications 9 - 10 Energy efficiency details Electrical details Description of the appliance Control panel Display icons Using your dishwasher 13 -27 Before first use Filling with rinse aid Setting the rinse aid level Filling with dishwasher detergent... -
Page 5: Environmental Note
This should be undertaken by a competent person. Disable the door lock to make sure that children cannot get stuck inside the appliance. o The packaging materials that Baumatic uses are environmentally friendly and can be recycled. o Please discard all packaging material with due regard for the... -
Page 6: Important Safety Information
General Safety o Repairs to your appliance must only be carried out by a Baumatic engineer or one of its authorised service agents. Any attempt by an inexperienced person to repair the appliance, could result in injury or damage to your dishwasher. -
Page 7: Specifications 9
This appliance is only designed to wash normal domestic washloads. If you use your dishwasher in any other way or it is incorrectly used, then Baumatic accepts no liability for any damage that might be caused and any guarantee will be void. - Page 8 Child Safety o Your dishwasher should only be used by adults. You should not allow children in the area of the machine unsupervised. You should not let them touch the controls or play with the appliance. o It could be possible for a child or pet to gain access to the dishwasher if the door is left open.
-
Page 9: Specifications
Specifications Product dimensions Height: 845 mm Width: 598 mm Depth: 600 mm (1175 mm with door open) Product specifications o 14 Place settings o 7 programs: Normal Intensive Heavy Glass Rapid Soak 1 hour o 4 temperatures: 40°C, 50°C, 60°C, 65°C o Water consumption (normal program): 13 litres/cycle o Quiet operation (49 dB) -
Page 10: Energy Efficiency Details
o LED display o Delay start o Residual drying o Alternative wash function o Concealed heating element o Self-cleaning stainless steel micro-filter o Anti-leak device o Anti-flood device o Height adjustable upper basket o Collapsible plate racks Energy efficiency details Water consumption: 3.5 stars Energy consumption:... -
Page 11: Description Of The Appliance
Description of the appliance 1) Upper spray arm 7) Cup shelf 2) Cutlery basket 8) Lower spray arm 3) Upper basket 9) Filter assembly 4) Internal pipe 10) Inlet pipe connector 5) Lower basket 11) Drain pipe 6) Detergent dispenser Control panel 1) ON/OFF button 2) Safety lock button... -
Page 12: Display Icons
Display icons o The LED display contains numerous icons which light for different usages. For a description of each icon please see the list below. INTENSIVE program icon HEAVY program icon NORMAL program icon GLASS program icon 1 HOUR program icon RAPID program icon SOAK program icon Rinse aid indicator... -
Page 13: Using Your Dishwasher
Using your dishwasher Before first use o Locate appliance installation instructions contained within this booklet. o Fill the rinse aid dispenser and then set the rinse aid dosage. Filling with rinse aid The rinse aid is released during the final rinse and it helps to prevent water from forming droplets on your dishes. -
Page 14: Setting The Rinse Aid Level
Setting the rinse aid level The amount of rinse aid that the dishwasher requires also depends on the hardness of your water. You should experiment with the rinse aid setting, until you find a level that gives the best results. o On the first wash cycle, we would recommend... -
Page 15: Concentrated Detergent
o The section marked A in the diagram is for the main wash cycle detergent. Only one detergent tablet should be placed in the dispenser at any one time. If you are using detergent powder or liquid, should follow detergent manufacturer’s recommendations. -
Page 16: Loading The Upper Basket
Loading the upper basket The upper basket is most suited to washing delicate and light dishware, such as glasses, coffee & tea cups, saucers, plates, bowls and shallow pans (that are not heavily soiled). 1) Cups 2) Saucers 3) Glasses o You should position the dishes and cookware in such a way that they are not moved by the spray of water during the wash cycle. -
Page 17: Adjusting The Upper Basket
Adjusting the upper basket Your dishwasher has an adjustable upper basket which you can alter to the most suitable position for the items you are going to wash in the upper basket. The height of the upper basket can be adjusted by pulling the handle on either side of the basket upwards until it clips into place. -
Page 18: Folding Back The Cup Shelves
Folding back the cup shelves o For easier stacking of pots and pans, the cup shelf spikes can be folded down as shown in the image below. Loading the lower basket The lower basket is most suited to washing larger and more heavily soiled items, such as saucepans, saucepan lids and serving dishes. -
Page 19: The Cutlery Basket
o Saucepans and serving bowls must always be placed with their bases upwards. o Deep saucepans should be slanted, to allow water to run off. o The bottom rack has foldable racks at the rear of the basket that can be folded downwards, to allow for easier loading of larger saucepans and serving bowls. -
Page 20: Loading Dishes And Cutlery
1) Forks 2) Soup spoons 3) Dessert spoons 4) Teaspoons 5) Knives o The loading methods shown above for the upper basket, lower basket cutlery basket accordance with AS/NZS2007.1 testing cycle. Loading dishes and cutlery Household cloths, sponges or any other object that may absorb water SHOULD NOT be washed in a dishwasher. -
Page 21: Program Table
o Wooden platters. o Synthetic fibre items. The following items are not always suitable for washing inside a dishwasher:- o Stoneware should only be washed if the manufacturer of the item has marked it as dishwasher safe. o Plastic items (such as lunchboxes) should only be washed if the manufacturer has marked it as dishwasher safe. - Page 22 glasses and Rinse 5/27.5g light soiled Rinse pans. (60°C) Drying For normally Pre-wash 3 in 1 0.71 soiled loads, Wash Minutes such as (45°C) pots, plates, Rinse Normal** glasses and Rinse 5/27.5 g lightly soiled (50°C) pans. A Drying standard daily cycle.
-
Page 23: Setting A Wash Program
Setting a wash program Make sure that the before first use section has been followed. o Check whether the appliance needs rinse aid adding to it. o Pull out the top and bottom baskets, then load them in accordance with the loading instructions. o Push the top and bottom baskets fully back into position. -
Page 24: At The End Of A Wash Program
o Then press and hold the program button (4) for about 3 seconds to cancel the current program. You can then proceed to choose another program. o If you open the door during a wash cycle, the machine will automatically pause to allow you to add or remove dishes. The program light will stop blinking and a buzzer will sound every minute until the door is closed again. -
Page 25: Setting A Delay Start
Setting a delay start It is possible to delay the start of the wash program for up to a maximum of 24 hours. o Check whether the appliance needs rinse aid or salt adding to it. o Pull out the top and bottom baskets, then load them in accordance with the loading instructions. -
Page 26: The Alt Function
The Alt function The alt or half load function can be used when you only need to wash crockery in one basket. This function allows less water and energy consumption during the program. o Check whether the appliance needs rinse aid adding to it. o Pull out the top or lower basket, and then load it in accordance with the loading instructions. -
Page 27: Saving Energy Using Your Dishwasher
o To deactivate the safety lock, repeat the same process. The safety lock icon will no longer be lit on the display and all buttons on the control panel will be operable again. Saving energy using your dishwasher Loading dishes o Refer to the relevant section of this manual for instructions on placing items in the dishwasher for the most efficient cleaning. -
Page 28: Cleaning And Maintenance
Cleaning and maintenance IMPORTANT: The appliance should be disconnected from your mains supply before commencing any cleaning process. The filter system Your appliance is fitted with three levels of filtering; these are located in the base of the dishwasher for ease of access. Main filter Coarse filter Fine filter... -
Page 29: Cleaning The Filters
Cleaning the filters For best performance and results, the entire filter assembly should be thoroughly cleaned regularly. 1. Turn the coarse filter anti-clockwise and then lift it upwards. Rinse the filter sections under a tap to remove any food debris that remains in them. -
Page 30: Cleaning The Control Panel
Cleaning the control panel IMPORTANT: Do not use any abrasive cleaner or household polish on either the control panel or operating parts. o Wipe over the control panel using a brand new damp cloth with warm water. Cleaning the door o To clean the edge around the outside of the door, you should use a soft, damp cloth only. -
Page 31: Error Code Failure System
Error code failure system If your appliance senses that it is not operating correctly, then an error code may appear in the display window. The following error codes can possibly be remedied by the customer and the steps outlined below should be followed. BEFORE COMPLETING MAINTAINEANCE... -
Page 32: General Troubleshooting
IF THE FAULT CODE REAPPEARS AFTER FOLLOWING THE ABOVE ADVICE AND CLEARING THE FAULT CODE. YOU SHOULD TURN OFF THE APPLIANCE; DISCONNECT THE APPLIANCE FROM YOUR MAINS SUPPLY. THEN ARRANGE FOR AN ENGINEER TO ATTEND THE APPLIANCE. YOU SHOULD CONTACT THE SERVICE DEPARTMENT ON TELEPHONE NUMBER 1800 444 357. - Page 33 and let the suds evaporate. Add 1 gallon of cold water to the tub. Close and latch the dishwasher, then select the RINSE cycle. The dishwasher will drain out the water. Then open the door and check if suds have disappeared. Repeat if necessary.
- Page 34 jets to get blocked. Cloudiness on Combination of soft Use less detergent if you have soft glassware. water and too much water and select a shorter cycle to detergent. wash the glassware and get them clean. Black or grey Aluminium utensils Use a mild abrasive cleaner to marks on have rubbed against...
-
Page 35: Installation
Installation IMPORTANT: THIS INSTALLATION MUST COMPLETED BY A SUITABLY QUALIFIED PERSON. BAUMATIC ONLY SANCTION INSTALLATION GIVEN THIS INSTRUCTION MANUAL. SHOULD DISPOSE PACKAGING ENVIRONMENTALLY FRIENDLY MANNER. Positioning and levelling the appliance o Remove all packaging from the outside and inside of the dishwasher. -
Page 36: Connecting To The Mains Water Supply
o Adjust each of the four feet until the appliance is level. IMPORTANT: When the dishwasher is positioned in the location where it will be used. Make sure that all four feet are resting firmly on the floor, by pressing down on each corner and checking that the appliance stands still. -
Page 37: Connecting To The Water Outlet
Connecting to the water outlet o Secure the drain hose, so that it cannot move whilst the dishwasher is in use. The top of the hose must be at a height between 40 and 1000 mm. The free end of the hose must not be immersed in water. -
Page 38: Before First Use
o The moulded plug that is supplied with the appliance must be placed into an earthed and insulated socket. o Broken or damaged power leads must only be replaced by a suitably qualified person. A power lead of a similar type must be used in replacement. -
Page 39: Contact Details
Or any installation other than the one specified by Baumatic Ltd. has been completed. Please refer to the conditions of guarantee that appear on the warranty card that you receive with the appliance IMPORTANT: Baumatic Ltd. - Page 40 Service Telephone 1800 444 357 Website www.thinkappliances.com Applico Ltd. P.O. 92900 Onehunga, Auckland, New Zealand 1061 Website www.applico.nz United Kingdom Baumatic Ltd., Baumatic Buildings, 6 Bennet Road, Reading, Berkshire RG2 0QX United Kingdom Sales Telephone (0118) 933 6900 Website: www.baumatic.co.uk...