Table of Contents
Advertisement
Advertisement
Table of Contents

Related Manuals for Baumatic TITAN5


Summary of Contents for Baumatic TITAN5
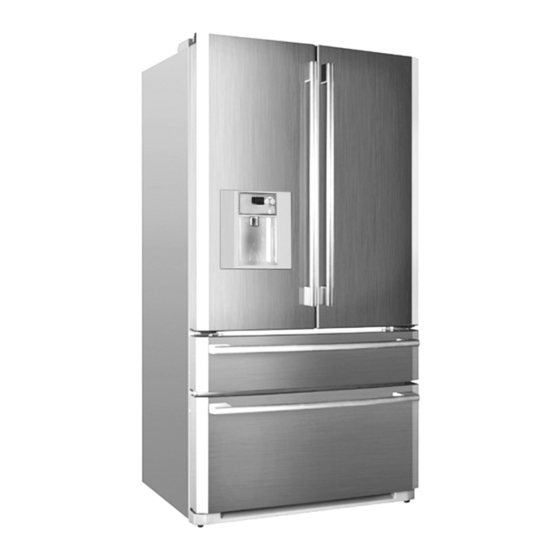
- Page 1 TITAN5 Stainless steel 4 door frost free fridge/freeze...
- Page 2 USER MANUAL FOR YOUR BAUMATIC TITAN5 Stainless steel 4 door 607 litre frost free fridge/freezer NOTE : This User Instruction Manual contains important information, including safety & installation points, which will enable you to get the most out of your appliance. Please keep it in a safe place so that it is easily available for future reference, for you or any person not familiar with the operation of the appliance.
-
Page 3: Table Of Contents
11-12 Full width pantry 12-13 General and bottle shelf height adjustment The dairy compartments The freezer section Using your Baumatic fridge freezer 15-19 Before switching on During first use The control panel Switching on the appliance Setting the temperature in the fridge section... -
Page 4: Environmental Note
This should be undertaken by a competent person. Disable the door lock to make sure that children cannot get stuck inside the appliance. o The packaging materials that Baumatic uses are environmentally friendly and can be recycled. o Please discard all packaging material with due regard for the... -
Page 5: Important Safety Information
Important safety information Your safety is of the utmost importance to Baumatic. Please make sure that you read this instruction booklet before attempting to install or use the appliance. If you are unsure of any of the information contained in this booklet, please contact the Baumatic Advice Line. - Page 6 Do not place electrical devices inside of the appliance, such as mixers or ice cream makers. Service You should not attempt to repair the appliance yourself, as this could cause injury or a more serious malfunction. If you require a service call then please contact the Baumatic Customer Care Department.
-
Page 7: Specifications Of Your Fridge Freezer
Specifications of your fridge freezer Congratulations on purchasing a Baumatic fridge freezer Dimensions of your appliance o Height: 1770 mm o Width: 910 mm o Depth: 700 mm (excluding handles) Energy efficiency class o Energy class: Cubic capacities o Gross capacity (fridge):... -
Page 8: Description Of The Appliance
IMPORTANT: When you install your appliance it is important to bear in mind its climatic rating. In order to find out the climatic rating of your appliance, you should check the rating plate. The rating plate is located inside of the fridge section. -
Page 9: The Fridge Section
The fridge section o We recommend that you leave storage space between food items, to allow for good air circulation. o The temperatures in the fresh food compartment are slightly warmer towards the top and cooler towards the base. o Please find below some storage suggestions, that you may wish to follow:- 1) Eggs, butter, cheese etc 2) Tins, cans, condiments etc... -
Page 10: Adjustable Safety Glass Shelves
Adjustable safety glass shelves o The shelves may be placed in any of the guide slots within the interior of the appliance. They are protected from sliding out. o To remove a shelf: Take off all of the items that are stored on the shelf that you want to remove. -
Page 11: Crisper Drawers
Crisper drawers The crisper drawers are designed to store fruit, vegetables or meat. The temperature inside of them can be adjusted to one that is suitable for the food items being stored. o To increase the humidity in the crisper drawer, turn the dial that is located on the right hand side of the crisper drawer. -
Page 12: Full Width Pantry
o For the storage of meat and fish, we would recommend that they are stored in a foil cover or a vinyl wrap. o Care should be taken when storing tropical fruit (bananas and pineapples etc) and tomatoes. As these types of items can easily deteriorate in a lower temperature. -
Page 13: General And Bottle Shelf Height Adjustment
o IMPORTANT: IT IS IMPORTANT THAT NONE OF THE SHELVES THAT SIT IN THE DOOR ARE OVERLOADED, AS THIS WILL DRASTICALLY REDUCE THEIR WORKING LIFE. General and bottle shelf height adjustment It is possible to adjust the height of the general shelves and bottle shelves in the doors. -
Page 14: The Freezer Section
The freezer section The freezer section consists of an upper and lower drawer. o The lower freezer drawer is suitable for freezing and storing food that needs to be kept for longer periods of time. o The upper freezer drawer contains the ice maker tray on the left hand side. -
Page 15: Using Your Baumatic Fridge Freezer
Using your Baumatic fridge freezer Before switching on o Make sure that it has been installed by a suitably qualified person, information contained Baumatic’s installation instructions. o After delivery, wait for eight hours before connecting the appliance to your mains supply. This means that any refrigerant gasses that may have been disturbed during the transportation process are allowed to settle. -
Page 16: The Control Panel
The control panel The control panel is located at the top of the fridge freezer, behind the doors to the fridge section. Express freeze button Freezer temperature adjustment buttons Freezer temperature display Fridge temperature display Fridge temperature adjustment buttons Express chill button Water filter reset button Water filter change neon Switching on the appliance... -
Page 17: Setting The Temperature In The Freezer Section
o The fridge temperature display will show the temperature being currently achieved in the fridge section. o If there is a power cut, then the fridge freezer will remember the temperature settings that had been previously set. Setting the temperature in the freezer section It is possible to set a temperature between -13°C and -19°C in the freezer section. -
Page 18: Express Chill Mode
Express chill mode This setting should be used if you want to chill something quickly, it will ensure that a powerful supply of cold air enters the fridge section. o Press the express chill button and the indicator neon will illuminate. -
Page 19: Express Freeze Mode
o It is possible to switch off express freeze mode after 3 hours. To do this, press the express freeze button again. o The indicator neon will go out, confirming that the appliance is no longer in express freeze mode. The water filter change neon o If the water filter change neon comes on, then this means that the water filter needs to be changed. - Page 20 o Make sure that you arrange food in such a way that the door can close completely. Particular attention should be given to bottles that may protrude when placed on shelves inside the main section of the refrigerator. o Some organic solutions, such as the oils in lemon/orange peel and acid in butter, can cause damage to the plastic parts contained inside of the refrigerator.
-
Page 21: The **** Freezer Compartment
The **** freezer section The freezer section is suitable for storing and freezing food. o The freezer section temperature must have already reached -18 degrees centigrade (or lower) before you attempt to store food that is already frozen or freezing fresh food. o The freezer compartment is only able to freeze a certain quantity of fresh food at one time. -
Page 22: Tips On Freezing
o After 24 hours you should check that the fresh food is satisfactorily frozen. Tips on freezing o Freezer bags, polythene wraps, aluminium foil (extra thick) and special cans for frozen foods are suitable packaging for storing frozen goods in. o Tape, rubber bands or plastic clips are suitable for sealing bags and wrappings. -
Page 23: Defrosting Frozen Food
o Take care that your frozen food packages do not start to thaw before you place them in your freezer. This will shorten the length of time that you can safely store the food for. Defrosting frozen food o Partially thawed or defrosted foods should be used as soon as possible. -
Page 24: The Dispenser Control Panel
The dispenser control panel The dispenser control panel is situated on the front of the left hand fridge section door. Digital display Hour button Minute button Safety lock button The safety lock When the safety lock is activated, the cold water dispenser is locked and you cannot adjust the time of day. -
Page 25: Setting The Time Of Day
Setting the time of day The digital display will show the time of day (in 12 hour clock format). o Check that the safety lock is not active; otherwise it is not possible to adjust the time of day. o To set the time of day, press and hold the hour and minute button until an audible signal sounds and the digital display flashes. -
Page 26: Door Left Open Alarm
Door left open alarm o If any door is left open for more than 60 seconds, an audible alarm will sound. o This audible alarm will sound at 30 second intervals to make you aware that one of the doors has been left open. o When you hear the audible alarm, you should immediately check that all of the doors are shut properly. -
Page 27: Ice Maker Advice And Maintenance
o When the ice maker is dispensing ice into the upper freezer drawer, circular dashes will appear on the digital display of the dispenser control panel. IMPORTANT: You should not attempt to open the upper freezer drawer whilst the ice maker is dispensing ice. -
Page 28: Dispenser And Ice Maker Warnings
If the ice is still discoloured then change the water filter. o If the ice is STILL discoloured after changing the water filter, then contact Baumatic Customer Care Department. o If there is a power cut you should remove all ice from the ice cube storage case. - Page 29 o Clean the door gasket with warm water or a neutral detergent that leaves no residue. A tight-sealing door gasket is critical to the efficiency of your appliance. Usage: o Do not open the door repeatedly or more frequently than you have to.
-
Page 30: Cleaning And Maintenance
Cleaning and maintenance WARNING: PLEASE ENSURE THAT YOUR APPLIANCE IS DISCONNECTED FROM YOUR MAINS SUPPLY BEFORE ATTEMPTING TO CLEAN IT. o Do not clean the appliance by pouring water onto it or spraying water over it. o The refrigerator and freezer sections should be cleaned periodically, using a solution of bicarbonate of soda and lukewarm water. -
Page 31: The Defrost Drain Hole
The defrost drain hole o Defrosting occurs automatically in the refrigerator section during operation. The defrost water is collected by the evaporating tray and evaporates automatically. o The drain hole should be cleaned periodically with the drain hole cleaner. This will prevent water from collecting in the bottom of the refrigerator, instead of flowing down the defrost drainage channel and drain hole. -
Page 32: Replacing The Light Bulb
Replacing the light bulb WARNING: PLEASE ENSURE THAT YOUR APPLIANCE IS DISCONNECTED FROM YOUR MAINS SUPPLY BEFORE ATTEMPTING TO REPLACE THE LIGHT BULB. Fridge section The light bulbs can be found behind the light covers at the top of the fridge section (below the control panel). - Page 33 Freezer section o The light bulb can be found in the middle of upper freezer compartment (in the area where the upper freezer drawer slides into). o Remove the upper freezer drawer (as described on page 40) o Remove the screw in the light cover. o Lift the light cover slightly and remove it from the appliance.
-
Page 34: Changing The Water Filter
Changing the water filter When the water filter change neon comes on, then it is necessary to change the filter cartridge and follow the process outlined below. o If the water dispenser and/or ice maker are used daily, then it will be necessary to change the water filter approximately every six months. - Page 35 o Unclip the filter handle from the cartridge. o Remove the protective heat seal from the new filter cartridge and then clip the filter handle onto it. o Insert filter cartridge into filter housing. IMPORTANT: The filter handle must be in the vertical position. o Gently turn the filter handle clockwise until it locks.
-
Page 36: Installation
The fridge water dispenser and the ice cube maker MUST NOT be used without the water filter. o Replacement water filters are available from the Baumatic Spares Department. Installation IMPORTANT: We recommend that the appliance is installed by a qualified technician. -
Page 37: Positioning
o The wiring in the mains lead is coloured as follows: Brown Live Blue Neutral Green and yellow Earth o As the colours of the wires in the appliance’s mains lead may not correspond with the coloured markings identifying the terminals in your spur box, please proceed as follows: The brown wire must be connected to the terminal marked “L”... - Page 38 o You should check whether there is electrical socket available, which will be accessible after your appliance is installed. o Place the appliance flatly and firmly solid base. appliance is fitted with adjustable feet on the front side, which can be used to level the appliance.
-
Page 39: Installation Preparation
Installation preparation IMPORTANT: A minimum of two people should complete all of the installation steps given in this manual. o Check that the appliance will easily pass through all doorways en route to its final position. o Appliance dimensions: 1770 mm(h) x 910 mm(w) x 700 mm(d). (excluding door handles). -
Page 40: Removing The Right Hand Door
o Fix the cover of the top bolts (4). Freezer door handle o Put the handle connector into the right holes on the freezer door using a screwdriver (1). o Place the freezer door handle onto the handle holder and keep the hole of the handle holder and the handle connector to the right position of the vertical direction (2). -
Page 41: Removing The Left Hand Door
o IMPORTANT: The door should be lent carefully against a wall, so that the inner or outer surfaces cannot be accidentally damaged. o After you have located the fridge freezer in its final position, the door should be refitted, following the above process in reverse. Removing the left hand door o Disconnect wire... -
Page 42: Removing The Upper Freezer Drawer
o IMPORTANT: When removing the hinge and separating it from the door, make sure that the door is supported to stop it falling forward. o Lift the left hand door off of the lower hinge and place it to one side. -
Page 43: Removing The Inner Compartment Of The Lower Freezer Drawer
o After you have located the fridge freezer in its final position, the upper freezer drawer should be refitted, following the above process in reverse. Removing the inner compartment of the lower freezer drawer o Open the lower freezer drawer as far as possible. o Pull the rear of the inner compartment of the drawer slightly upwards, to enable the front section to be released from the drawer. -
Page 44: Adjustable Feet
o Turn the screwdriver anti-clockwise to lower the adjustable feet. Levelling the doors If the height of the doors is uneven, spacer rings are supplied which can be inserted to raise the level of the doors. o Lift the door that you want to raise upwards from the lower hinge. -
Page 45: Water Supply Connection
Water supply connection o IMPORTANT: Care should be taken to make sure that the water pipe does not come into contact with any hot surfaces. o IMPORTANT: The water filter only filters the water; it does not eliminate bacteria or microbes. You must connect the water pipe to a drinkable water source. -
Page 46: Troubleshooting
IMPORTANT: Discard all ice that is produced in the 24 hour period after the ice starts to dispense. Troubleshooting IMPORTANT: If your fridge freezer appears not to be operating properly, before contacting the Baumatic Customer Care Department, please refer to the checklist on the next 4 pages. - Page 47 47 47...
- Page 51 Or any installation other than the one specified by Baumatic Ltd. has been completed. Please refer to the conditions of guarantee that appear on the warranty card that you receive with the appliance.
-
Page 52: Contact Details
Czech Republic Baumatic CR spol s.r.o. United Kingdom Průmyslová zóna Sever 696 Baumatic Ltd., 460 11 Liberec 11 Baumatic Buildings, Czech Republic 6 Bennet Road, Reading, Berkshire +420 483 577 200 RG2 0QX United Kingdom www.baumatic.cz Sales Telephone Slovakia (0118) 933 6900 Baumatic Slovakia, s.r.o.