HIKVISION DS-9600 Series Quick Operation Manual
Hide thumbs
Also See for DS-9600 Series:
- User manual (236 pages) ,
- Quick start manual (13 pages) ,
- User manual (118 pages)

Related Manuals for HIKVISION DS-9600 Series


Summary of Contents for HIKVISION DS-9600 Series
- Page 1 Quick Operation Guide of DS-9600/8600/7700/7600NI-ST and DS-7700/7600NI-SP Series NVR UD.6L0202B0007A01...
-
Page 2: Verify Contents
Quick Operation Guide of DS-9600/8600/7700/7600NI-ST and DS-7700/7600NI-SP Series NVR Thank you for purchasing our product. If there is any question or request, please do not hesitate to contact dealer. This manual is applicable to DS-7608NI-ST, DS-7616NI-ST, DS-7608NI-SP, DS-7616NI-SP, DS-7708NI-ST, DS-7716NI-ST, DS-7732NI-ST, DS-7708NI-SP, DS-7716NI-SP, DS-7732NI-SP, DS-8608NI-ST, DS-8616NI-ST, DS-8632NI-ST;... - Page 3 Quick Operation Guide of DS-9600/8600/7700/7600NI-ST and DS-7700/7600NI-SP Series NVR 3. Press the buttons on the panel of two sides and open the front panel. 4. Insert the hard disk along the slot until it is placed into position. 5. Repeat the above steps to install other hard disks onto the NVR. After having finished the installation of all hard disks, replace the front panel and lock it with the key again.
- Page 4 Quick Operation Guide of DS-9600/8600/7700/7600NI-ST and DS-7700/7600NI-SP Series NVR Steps (for DS-8600NI-ST): 1. Remove the cover from the NVR by unfastening the screws on the back and side. 2. Install the HDD in the HDD rack using the provided screws. Fasten the screws on the button to fix the HDD.
- Page 5 Quick Operation Guide of DS-9600/8600/7700/7600NI-ST and DS-7700/7600NI-SP Series NVR Steps (for DS-7600NI-ST/SP and DS-7700NI-ST/SP): Remove the cover from the NVR by unfastening the screws on the rear and side panel. Connect one end of the data cable to the motherboard of NVR and the other end to the HDD. 3.
-
Page 6: Front Panel
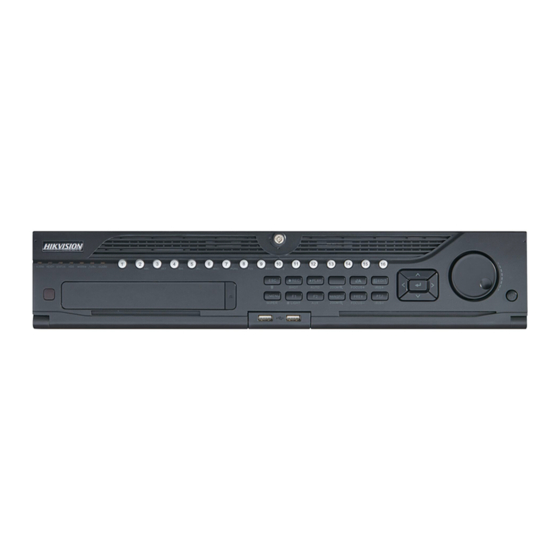
Quick Operation Guide of DS-9600/8600/7700/7600NI-ST and DS-7700/7600NI-SP Series NVR Front Panel DS-9600NI-ST DS-8600NI-ST ① Status Indicator(Alarm, Ready, Status, HDD, MODEM, Tx/Rx, Guard) ② IR Receiver ③ Front Panel Lock ④ DVD-R/W ⑤ Alphanumeric Buttons ⑥ USB Interface ⑦ Compound Buttons ⑧... - Page 7 Quick Operation Guide of DS-9600/8600/7700/7600NI-ST and DS-7700/7600NI-SP Series NVR DS-7700NI-ST/SP ① Status Indicators (Alarm, Ready, Status, HDD, Power, Tx/Rx) ② DVD-R/W ③ Control Buttons ④ Compound Buttons ⑤ Shuttle Button ⑥ Power Button ⑦ USB interface DS-7600NI-ST/SP: ① USB Interface ②...
-
Page 8: Rear Panel
Quick Operation Guide of DS-9600/8600/7700/7600NI-ST and DS-7700/7600NI-SP Series NVR Rear Panel DS-9600NI-ST DS-8600NI-ST DS-7700NI-ST Item Description VIDEO OUT BNC connector for video output. CVBS AUDIO OUT BNC connector for audio output. This connector is synchronized with CVBS video output. VGA AUDIO OUT BNC connector for audio output. - Page 9 Quick Operation Guide of DS-9600/8600/7700/7600NI-ST and DS-7700/7600NI-SP Series NVR Item Description Up position is not terminated. Down position is terminated with 120Ω resistance. RS-485 Interface Connector for RS-485 devices. T+ and T- pins connects to R+ and R- pins of PTZ receiver respectively. D+, D- pin connects to Ta, Tb pin of controller.
- Page 10 Quick Operation Guide of DS-9600/8600/7700/7600NI-ST and DS-7700/7600NI-SP Series NVR ALARM OUT Connector for alarm output. GROUND Ground (needs to be connected when NVR starts up). AC 100V ~ 240V AC 100V ~ 240V power supply. POWER Switch for turning on/off the device. USB interface Universal Serial Bus (USB) ports for additional devices such as USB mouse and USB Hard Disk Drive (HDD).
-
Page 11: Peripheral Connections
Quick Operation Guide of DS-9600/8600/7700/7600NI-ST and DS-7700/7600NI-SP Series NVR RS-232 Interface Connector for RS-232 devices. DB9 connector for VGA output. Display local video output and menu. HDMI HDMI video output connector. LAN Interface Connector for LAN (Local Area Network). RS-485 Interface Connector for RS-485 devices. -
Page 12: Alarm Connection
Quick Operation Guide of DS-9600/8600/7700/7600NI-ST and DS-7700/7600NI-SP Series NVR For DC load, JP4 can be used within the limit of 12V/1A safely. If the interface is connected to an AC load, JP4 should be left open. Use an external relay for safety (as shown in the figure above). There are 4 jumpers (JP4, JP5, JP6, and JP7) on the motherboard, each corresponding with one alarm output. -
Page 13: Controller Connection
Quick Operation Guide of DS-9600/8600/7700/7600NI-ST and DS-7700/7600NI-SP Series NVR RS-485 Connection In this manual we take the RS-485 connection of the DS-8600NI-ST as an example. To connect RS-485 devices to the NVR: Disconnect pluggable block from the RS-485 terminal block. Unfasten stop screws from the pluggable block, insert signal cables into slots and fasten stop screws. -
Page 14: Specifications
Quick Operation Guide of DS-9600/8600/7700/7600NI-ST and DS-7700/7600NI-SP Series NVR Specifications Specifications of DS-9600NI-ST Model DS-9608NI-ST DS-9616NI-ST DS-9632NI-ST IP video input 8-ch 16-ch 32-ch Video/Audio input 1-ch, BNC (2.0 Vp-p, 1kΩ) Two-way audio Recording 5MP /3MP /1080P /UXGA /720P /VGA /4CIF /DCIF /2CIF /CIF resolution /QCIF 1-ch, BNC (1.0 Vp-p, 75 Ω) - Page 15 Quick Operation Guide of DS-9600/8600/7700/7600NI-ST and DS-7700/7600NI-SP Series NVR Specifications of DS-8600NI-ST Model DS-8608NI-ST DS-8616NI-ST DS-8632NI-ST IP video input 8-ch 16-ch 32-ch Video/Audio input 1-ch, BNC (2.0 Vp-p, 1kΩ) Two-way audio Recording 5MP /3MP /1080P /UXGA /720P /VGA /4CIF /DCIF /2CIF /CIF resolution /QCIF 1-ch, BNC (1.0 Vp-p, 75 Ω)
- Page 16 Quick Operation Guide of DS-9600/8600/7700/7600NI-ST and DS-7700/7600NI-SP Series NVR Specification of DS-7700NI-ST Model DS-7708NI-ST DS-7716NI-ST DS-7732NI-ST IP video input 8-ch 16-ch 32-ch Video/Audio input 1-ch, BNC (2.0 Vp-p, 1kΩ) Two-way audio Recording 5MP /3MP /1080P /UXGA /720P /VGA /4CIF /DCIF /2CIF /CIF resolution /QCIF 1-ch, BNC (1.0 Vp-p, 75 Ω)
- Page 17 Quick Operation Guide of DS-9600/8600/7700/7600NI-ST and DS-7700/7600NI-SP Series NVR Specification of DS-7700NI-SP Model DS-7708NI-SP DS-7716NI-SP DS-7732NI-SP IP video input 8-ch 16-ch 32-ch Video/Audio input 1-ch, BNC (2.0 Vp-p, 1kΩ) Two-way audio Recording 5MP /3MP /1080P /UXGA /720P /VGA /4CIF /DCIF /2CIF /CIF resolution /QCIF 1-ch, BNC (1.0 Vp-p, 75 Ω)
- Page 18 Quick Operation Guide of DS-9600/8600/7700/7600NI-ST and DS-7700/7600NI-SP Series NVR Specifications of DS-7600NI-ST Model DS-7608NI-ST DS-7616NI-ST IP video input 8-ch 16-ch Video/Audio input 1-ch, BNC (2.0 Vp-p, 1kΩ) (Two-way audio) Audio in Recording 5MP /3MP /1080P /UXGA /720P /VGA /4CIF /DCIF /2CIF /CIF resolution /QCIF 1-ch, BNC (1.0 Vp-p, 75 Ω)
- Page 19 Quick Operation Guide of DS-9600/8600/7700/7600NI-ST and DS-7700/7600NI-SP Series NVR Specifications of DS-7600NI-SP Model DS-7608NI-SP DS-7616NI-SP IP video input 8-ch 16-ch Video/Audio input 1-ch, BNC (2.0 Vp-p, 1kΩ) (Two-way audio) Audio in Recording 5MP /3MP /1080P /UXGA /720P /VGA /4CIF /DCIF /2CIF /CIF resolution /QCIF 1-ch, BNC (1.0 Vp-p, 75 Ω)
-
Page 20: Hdd Storage Calculation Chart
Quick Operation Guide of DS-9600/8600/7700/7600NI-ST and DS-7700/7600NI-SP Series NVR HDD Storage Calculation Chart The following chart shows an estimation of storage space used based on recording at one channel for an hour at a fixed bit rate. Bit Rate Storage Used 128K 160K 192K... -
Page 21: Menu Operation
Quick Operation Guide of DS-9600/8600/7700/7600NI-ST and DS-7700/7600NI-SP Series NVR Menu Operation Menu Structure The menu structure of the DS-9600/8600/7700/7600 NI-ST and DS-7700/7600NI-SP Series NVR is shown as below: Startup and Shutdown Proper startup and shutdown procedures are crucial to expanding the life of the NVR. To start your NVR: 1. -
Page 22: Using The Start Wizard
Quick Operation Guide of DS-9600/8600/7700/7600NI-ST and DS-7700/7600NI-SP Series NVR 2. Select the Shutdown button. 3. Click the Yes button. Using the Start Wizard By default, the Setup Wizard starts once the NVR has loaded, as shown in Figure below. Start Wizard Interface Operating the Setup Wizard: 1. - Page 23 Quick Operation Guide of DS-9600/8600/7700/7600NI-ST and DS-7700/7600NI-SP Series NVR Date and Time Settings 6. After the time settings, click Next button which takes you back to the Network Setup Wizard window. DS-9600NI-ST DS-8600/7600/7700NI-ST...
-
Page 24: Network Configuration
Quick Operation Guide of DS-9600/8600/7700/7600NI-ST and DS-7700/7600NI-SP Series NVR DS-7600/7700NI-SP Network Configuration Note: Dual-NIC is only supported by DS9600NI-ST series device. And for DS-7600/7700NI-SP series NVR, the internal NIC IPv4 address should be configured for the cameras connecting to the PoE network interface of the NVR. - Page 25 Quick Operation Guide of DS-9600/8600/7700/7600NI-ST and DS-7700/7600NI-SP Series NVR Search for IP Cameras 11. Click Next button. Configure the recording for the searched IP Cameras. Record Settings 12. Click Copy to copy the settings to other channels.
-
Page 26: Live View
Quick Operation Guide of DS-9600/8600/7700/7600NI-ST and DS-7700/7600NI-SP Series NVR Copy Record Settings 13. Click OK to complete the startup Setup Wizard. Live View Some icons are provided on screen in Live View mode to indicate different camera status. These icons include: Live View Icons In the live view mode, there are icons at the right top of the screen for each channel, showing the status of the record and alarm in the channel, so that you can find problems as soon as possible. -
Page 27: Configuring Basic Parameters Of Ip Cameras
Quick Operation Guide of DS-9600/8600/7700/7600NI-ST and DS-7700/7600NI-SP Series NVR Main Menu To add the online cameras with same network segment: Click Search to search the online cameras. Camera Settings Interface Check the checkbox of certain cameras to be added. Click Quick Add to add the camera. To add other IP cameras: On the left side of the interface, you can enter the IP address, protocol, management port, and other information of the IP camera to be added. -
Page 28: Edit The Parameters
Quick Operation Guide of DS-9600/8600/7700/7600NI-ST and DS-7700/7600NI-SP Series NVR basic setting of the IP cameras. Steps: Click the icon to edit the parameters; you can edit the IP address, protocol and other parameters. Edit the Parameters Click apply to save the settings and click OK to exit the editing interface. To edit more parameters: Click the icon. -
Page 29: Ptz Control
Quick Operation Guide of DS-9600/8600/7700/7600NI-ST and DS-7700/7600NI-SP Series NVR PTZ Control Follow the procedure to set the parameters for PTZ. The configuring of the PTZ parameters should be done before you set the PTZ camera. Before you start, please check that the PTZ and the NVR are connected properly through RS-485 interface. PTZ Settings Steps: Enter the PTZ Settings interface. -
Page 30: Instant Playback By Channel
Quick Operation Guide of DS-9600/8600/7700/7600NI-ST and DS-7700/7600NI-SP Series NVR Description of the PTZ toolbar icons Icon Description Icon Description Icon Description Direction button and Zoom+, Focus+, Zoom-, Focus-, Iris- the auto-cycle button Iris+ The speed of the Light on/off Wiper on/off PTZ movement Image 3D-Zoom... - Page 31 Quick Operation Guide of DS-9600/8600/7700/7600NI-ST and DS-7700/7600NI-SP Series NVR Right-click Menu under Live View Front Panel: press PLAY button to play back record files of the channel under single-screen live view. Under multi-screen live view, record files of the top left channel (not masked) will be played back. Note: pressing numerical buttons will switch playback to related channels during playback process.
- Page 32 Quick Operation Guide of DS-9600/8600/7700/7600NI-ST and DS-7700/7600NI-SP Series NVR All-day Playback Interface with Channel List Backup Recorded files can be backed up to various devices, such as USB flash drives, USB HDDs or a DVD writer. Steps: Enter Video Export interface. Choose the channel(s) you want to back up and click on the button.
- Page 33 Quick Operation Guide of DS-9600/8600/7700/7600NI-ST and DS-7700/7600NI-SP Series NVR Quick Export using USB1-1 Check backup result. Choose the record file in Export interface and press button to check it. Checkup of Quick Export Result Using USB1-1 0202001020528...