Table of Contents
Advertisement
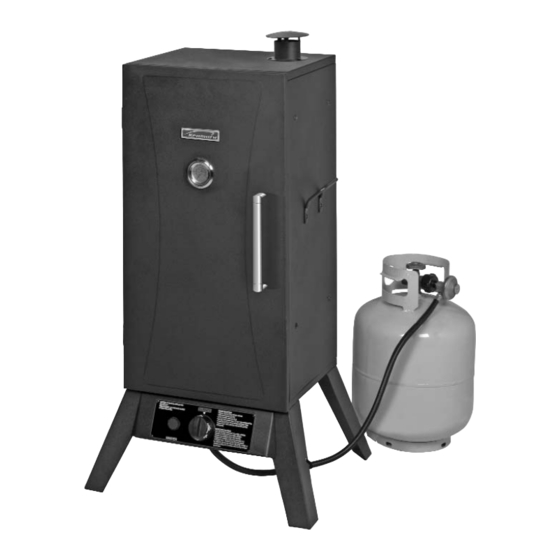
Outdoor Gas Smoker
Use & Care Guide
Ahumador a Gas
para uso al Aire Libre
Manual de uso y cuidado
Kenmore Model Number :
Numero de Modelo Kenmore:
125.15884800
NOTICE TO INSTALLER:
LEAVE THESE INSTRUCTIONS WITH THE GRILL
OWNER FOR FUTURE REFERENCE.
NOTICE TO CONSUMER:
RETAIN THIS OWNER'S MANUAL FOR FUTURE
REFERENCE.
AVISO PARA EL INSTALADOR:
ENTREGUE ESTAS INSTRUCCIONES AL
PROPIETARIO DE LA PARRILLA PARA REFERENCIA
FUTURA.
AVISO PARA EL PROPIETARIO:
GUARDE ESTAS INSTRUCCIONES DE LA PARRILLA
PARA REFERENCIA FUTURA.
Customer Support Center
Centro para Servicio al Cliente
Call us first if you have any problem with this product. We
can help you with questions about assembly and grill
operation or if there are damaged or missing parts when you
unpack this unit. Please call before returning to the store.
Llámenos primero si usted tiene cualquier problema con
este producto. Podemos ayudarle con preguntas sobre
asamblaje y la operación de esta parrilla o con piezas
dañadas o que hacen falta cuando usted saque esta unidad
de su envase. Por favor llame antes de volver a la tienda
donde hizo la compra de este producto.
1-800-848-8915
8:30am-5:00pm CST, Mon thru Friday
140-5525-0
1007
Rev. 1
Sears, Roebuck and Co., Hoffman Estates, IL 60179 U.S.A.
In the space below, record the model and serial
numbers and purchase date of your Outdoor
Electric Smoker. You will find the model and serial
numbers on the back of the unit.
En el espacio abajo, registre el modelo y los
números de serie y la fecha de compra de su
Ahumador Eléctrico para uso al aire libre. Usted
encontrará el modelo y los números de serie en la
parte posterior de la unidad.
Model No. / Num. de Modelo
Serial No. / Num. de Serie
Purchase Date / Dia de Compra ______________________
Keep this booklet and your Sears sales receipt in a safe
place for future reference.
Guarde esta manual y su recibo de venta de Sears en un
lugar seguro para referencia futura.
______________________
______________________
www.sears.com
Advertisement
Table of Contents

Related Manuals for Kenmore 125.15884800


Summary of Contents for Kenmore 125.15884800
- Page 1 Outdoor Gas Smoker Use & Care Guide Ahumador a Gas para uso al Aire Libre Manual de uso y cuidado Kenmore Model Number : Numero de Modelo Kenmore: 125.15884800 NOTICE TO INSTALLER: LEAVE THESE INSTRUCTIONS WITH THE GRILL OWNER FOR FUTURE REFERENCE.
-
Page 2: Table Of Contents
6. If a fire should occur, keep away from the appliance and immediately call your fire department. Do not Kenmore One Year Full Warranty attempt to extinguish an oil or If this product fails due to a defect in material or workmanship within one year from the date of purchase, contact Sears at grease fire with water. - Page 3 WARNING WARNING • This instruction manual contains important information • This smoker becomes extremely hot - allow the smoker to cool completely before handling. If you must handle necessary for the proper assembly and safe use of the the smoker while it is hot, ALWAYS wear protective oven appliance.
-
Page 4: Product Features
WARNING PRODUCT FEATURES • An LP cylinder not connected for use should not be stored in the vicinity of the smoker or any other appliance. DO NOT store Four adjustable spare LP cylinders within 10 feet of the smoker. LP cylinders chrome plated Appliance style must be stored outdoors, out of reach of children. - Page 5 PARTS DIAGRAM FOR MODEL 125.15884800 Inspect contents of the box to ensure all parts are included and undamaged.
- Page 6 HARDWARE BAG CONTENTS Q Q U U A A N N T T I I T T Y Y Heat Resistant Washers (Door Handle) 1/4-20 X 5/8” Bolts 10-24 Flange Nuts 10-24 X 5/8” Bolts Heat Ressistant Washers (Door Handle) 10-24 x 5/8”...
-
Page 7: Assembly Instructions
ASSEMBLY Choose a good, cleared assembly area and get a friend to help you put your smoker together. Lay cardboard down to protect smoker finish and assembly area. CAUTION: Some parts may contain sharp edges. Wear protective gloves if necessary. Leg with Hole Note: With the help of a friend, turn the smoker cabinet upside down. - Page 8 Step 4 Set the burner assembly onto the cabinet as shown. IMPORTANT: The burner tube must slide properly onto the gas valve orifice as shown. Step 5 Secure the burner assembly with the three 1/4-20 X 5/8” bolts from the inside of the cabinet.
- Page 9 Step 8 Line up the side handle with the corresponding holes on the side of the cabinet as shown. The handles must be positioned upright with the bolt holes on the bottom as shown. Insert two 10-24 X 5/8” bolts from the outside and thread into the holes in the side of the cabinet as illustrated.
- Page 10 Step 12 Slide the water pan into the bottom rack position as shown. Make sure water pan is firm and level. Wood Chip Rack Step 13 Mount the door handle with two 10-24 X 1/3” bolts, two #10 washers and two heat resistant washers.
- Page 11 Step 14 Insert the temperature gauge with bezel through the mounting hole in the front of the door. Place back plate and a hex nut onto the temperature gauge stem from the inside of the door panel and tighten it firmly. Step 15 Place one end of the S-Hook around the regulator neck or hose as shown.
- Page 12 Step 18 Using a zip tie, secure the hose to the front leg as shown. Do not pull the zip tie tight, leave it just loose enough so that the hose can be adjusted if needed. Tying the hose to the leg helps prevent the hose from coming into contact with the hot burner chamber.
-
Page 13: Connecting The Lp Tank
CONNECTING THE LP TANK WARNING • Do not store tanks under or near the smoker. WARNING • Never fill tanks more than 80% full. ALL INSTRUCTIONS AND SAFEGUARDS ON THIS PAGE If the two previous statements above are not followed MUST BE FOLLOWED TO PREVENT FIRE, DAMAGE, exactly, a fire causing death or serious injury may AND / OR INJURY. -
Page 14: Operating Instructions
CONNECTING THE LP TANK OPERATING INSTRUCTIONS P P R R E E - - U U S S E E P P R R O O C C E E D D U U R R E E S S The regulator/hose assembly should be handled carefully to prevent contamination by foreign objects and dirt. -
Page 15: Lighting Procedures
A A D D D D I I N N G G W W O O O O D D / / C C H H A A R R C C O O A A L L LIGHTING PROCEDURES To add wood chips before cooking, simply fill the wood chip I I G G N N I I T T E E R R L L I I G G H H T T I I N N G G S S Y Y S S T T E E M M : : box with your choice of flavoring hardwood chips. -
Page 16: Cooking Instructions
S S H H U U T T T T I I N N G G T T H H E E S S M M O O K K E E R R O O F F F F CAUTION: The smoker can become very hot while in use. -
Page 17: Temperature Chart
• Check water level periodically and add water if low. For AFTER USE SAFETY AND best results and to retain heat, avoid opening the door of the smoker while in use. When the door must be MAINTENANCE opened, only open it briefly. The smoker will quickly resume cooking temperature after the door is closed. -
Page 18: Storage
STORAGE • If your heat indicator seems to be out of calibration: Remove the heat indicator from the door of the smoker by loosening and removing the mounting nut from the B B E E F F O O R R E E S S T T O O R R I I N N G G Y Y O O U U R R G G R R I I L L L L : : inside. - Page 19 Get it fixed, at your home or ours! Your Home For repair – in your home – of all major brand appliances, lawn and garden equipment, or heating and cooling systems, no matter who made it, no matter who sold it! For the replacement parts, accessories and owner’s manuals that you need to do-it-yourself.