Table of Contents
Advertisement
Advertisement
Table of Contents

Related Manuals for Miele KDN 37132 iD


Summary of Contents for Miele KDN 37132 iD
- Page 1 Operating and installation instructions Frost free fridge freezer KDN 37132 iD en - GB To avoid the risk of accidents or damage to the appliance it is essential to read these instructions before it is installed and used for the first time.
-
Page 2: Table Of Contents
Contents Guide to the appliance ..........4 Optional accessories . - Page 3 Contents Freezing and storing food ......... . 31 Maximum freezing capacity.
-
Page 4: Guide To The Appliance
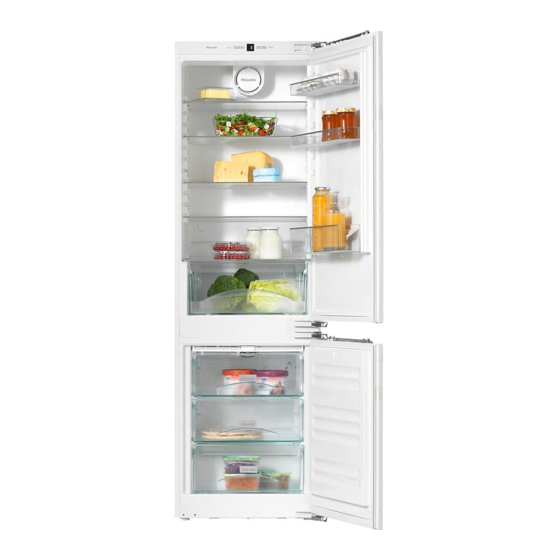
Guide to the appliance Control panel a On/Off button h Super freeze button b Temperature selector button i Alarm off button c Display j Menu symbol (Settings mode: d Alarm symbol For activating and deactivating the e Super freeze symbol lock) f Lock symbol g Temperature display... - Page 5 Guide to the appliance a Control panel b Fan c Interior lighting d Door shelf / Egg tray e Adjustable shelf f Bottle shelf g Fruit and vegetable drawer h Condensate channel and drain hole i Freezer drawers...
-
Page 6: Optional Accessories
Guide to the appliance Optional accessories Optional accessories are available from Miele or via the internet. Bottle rack Bottles can be stored horizontally using the bottle rack to save space. The bottle rack can be placed at different positions in the appliance. -
Page 7: Caring For The Environment
Caring for the environment Disposal of the packing Disposal of your old appliance material Electrical and electronic appliances often contain valuable materials. They The packaging is designed to protect also contain materials which, if handled the appliance from damage during or disposed of incorrectly, could be transportation. -
Page 8: Warning And Safety Instructions
They contain important information on installation, safety, use and maintenance. Miele cannot be held liable for damage caused by non-compliance with these Warning and Safety instructions. Keep these instructions in a safe place and ensure that new users are familiar with the content. - Page 9 The appliance is not suitable for use in areas where there is a risk of explosion. Miele cannot be held liable for damage resulting from incorrect or improper use or operation. The appliance can only be used by people with reduced...
- Page 10 Warning and Safety instructions Danger of suffocation. Packaging, e.g. plastic wrappings, must be kept out of the reach of babies and children. Whilst playing, children could become entangled in packaging or pull it over their head and suffocate. Technical safety The coolant system is tested for leaks.
- Page 11 If the electrical connection cable is faulty it must only be replaced by a Miele approved service technician to protect the user from danger. Do not connect the appliance to the mains electrical supply by a multi-socket adapter or extension lead.
- Page 12 Miele authorised service technician. Otherwise the guarantee is invalidated. Miele can only guarantee the safety of the appliance when original Miele replacement parts are used. Faulty components must only be replaced by genuine Miele original spare parts.
- Page 13 Warning and Safety instructions Correct use The appliance is designed for use within certain climate ranges (ambient temperatures), and should not be used outside this range. The climate range of the appliance is stated on the data plate inside the appliance. Installing it in a room with too low an ambient temperature will lead to the appliance switching off for longer periods so that it cannot maintain the required temperature.
- Page 14 Only use genuine original Miele accessories with this appliance. Using spare parts or accessories from other manufacturers will invalidate the guarantee, and Miele cannot accept liability.
- Page 15 Warning and Safety instructions Cleaning and care Do not use any oils or grease on the door seals, as these will cause the seals to deteriorate and become porous with time. Do not use a steam cleaning appliance to clean this appliance. Steam could reach electrical components and cause a short circuit.
- Page 16 Warning and Safety instructions Disposal of your old appliance Before disposing of an old appliance, first make the door latch or lock unusable. This way you will prevent children from accidentally locking themselves in and endangering their lives. Be careful not to damage any part of the pipework whilst awaiting disposal, e.g.
-
Page 17: How To Save Energy
How to save energy Normal energy Increased energy consumption consumption Installation site / In a ventilated room. In an enclosed, unventilated Maintenance room. Protected from direct In direct sunlight. sunlight. Not near to a heat source Near to a heat source (radiator, oven). - Page 18 How to save energy Normal energy Increased energy consumption consumption Drawers, shelves and racks arranged as they were when the appliance was delivered. Only open the door when Frequent opening of the door necessary and for as short a for long periods will cause a time as possible.
-
Page 19: Switching On And Off
Switching on and off Before using for the first time Switching on Protective foil The stainless steel trim to the interior shelves and the door shelves has a ^ Press the On/Off button. layer of protective foil to prevent damage during transportation. The appliance will start to cool and the ^ Carefully remove the protective foil temperature required will appear in the... -
Page 20: Switching Off For Longer Periods Of Time
Switching on and off Switching off for longer periods of time If the appliance is not going to be used for a longer period of time, e.g. whilst on holiday: ^ switch the appliance off, ^ disconnect it from the mains, ^ clean the appliance out and ^ leave the doors ajar to air it. -
Page 21: The Correct Temperature
The correct temperature . . . in the refrigerator It is very important to set the correct temperature for storing food in the We recommend a temperature of 4°C in appliance. Micro-organisms will cause the middle of the refrigerator. food which is not stored at the correct temperature to deteriorate rapidly. -
Page 22: Temperature Display
The correct temperature Temperature display Setting the temperature The higher or lower the temperature in The temperature display on the the refrigerator, the higher or lower it is control panel always shows the in the freezer section. required temperature. For example, if you want to set the temperature for the refrigerator section at 4 °C, ^ Press the temperature selector button... -
Page 23: Selecting Settings
Selecting settings Settings mode The lock is activated or deactivated in Settings mode. ^ Press the Super freeze button briefly Activating or deactivating the to call up the lock function. lock c1 will appear in the display. Settings mode is represented in the display by the Menu symbol X. - Page 24 Selecting settings – To deactivate the lock ^ Press the Super freeze button for approx. five seconds. The Lock symbol 0 and the Menu symbol X will light up and c will flash in the display. Settings mode is now activated. ^ Press the Super freeze button briefly to call up the lock function.
-
Page 25: Using Super Freeze
Using Super freeze Super freeze Switching off Super freeze For optimum results switch on the The Super freeze function will switch off Super freeze function before putting automatically after approx. 65 hours. The Super freeze symbol ª will go out fresh food into the freezer section. -
Page 26: Temperature And Door Alarm
Temperature and door alarm This appliance has a warning system However, if the temperature in the which ensures that the temperature in freezer section remains above the freezer section cannot rise unnoticed and to avoid energy being -18 °C for a long time, check that the wasted if a door is left open. -
Page 27: Storing Food In The Refrigerator Section
Storing food in the refrigerator section Different storage zones Do not store explosive materials in Due to the natural circulation of the air the appliance or any products in the appliance, there are different containing propellants (e.g. spray temperature zones in the refrigerator. cans). -
Page 28: Food Which Is Not Suitable For Storing In The Refrigerator
Storing food in the refrigerator section Food which is not suitable for When shopping for food storing in the refrigerator The freshness of food when first placed in the appliance is an important factor Not all food is suitable for storing in a in determining how long it stays fresh, refrigerator at temperatures below 5°C and how long it can be kept in the... -
Page 29: Storing Food Correctly
Storing food in the refrigerator section Storing food correctly Food should generally be stored covered or packaged. This will prevent food smells from affecting other food, food from drying out, and also any cross-contamination of bacteria. This is particularly important for protein-based food such as meat or fish. -
Page 30: Adjusting The Interior Fittings
Adjusting the interior fittings Adjusting the door shelf/bottle Moving the shelves shelf The shelves can be adjusted according ^ Push the door/bottle shelf upwards, to the height of the food. then remove it by pulling it forwards. ^ Raise the shelf slightly at the front, and pull it forwards a little until the ^ Replace the door/bottle shelf at the notch at the side is in line with the... -
Page 31: Freezing And Storing Food
Freezing and storing food Maximum freezing capacity Storing frozen food To ensure that fresh food placed in the When buying frozen food to store in freezer freezes through to the core as your freezer, check quickly as possible, the maximum –... -
Page 32: Home Freezing
Freezing and storing food Home freezing – Do not season fresh food or blanched vegetables before Only freeze fresh food which is in a freezing. Only season cooked food good condition. lightly before freezing, but care should be taken as the taste of some Hints on home freezing spices alters when frozen. -
Page 33: Before Placing Food In The Freezer Section
Freezing and storing food ^ Make a note of the contents and the – Freezing the maximum amount date of freezing on the packaging. (see data plate) ^ Remove the upper freezer drawers. Before placing food in the freezer ^ Place the food flat on the upper glass section cold plates so that it freezes through ^ When freezing more than 1 kg of... -
Page 34: Defrosting
Freezing and storing food Defrosting Never re-freeze partially or fully Frozen food can be defrosted in defrosted food. Consume defrosted different ways: food as soon as possible as it will lose its nutritional value and spoil if – in a microwave oven, left for too long. -
Page 35: Defrosting
Defrosting Refrigerator section Freezer section The refrigerator section defrosts This appliance is equipped with a "Frost automatically. free" system. The freezer defrosts automatically. Condensate and frost can build up on the back wall of the refrigerator section The moisture generated in the whilst it is in use. -
Page 36: Cleaning And Care
Cleaning and care – sharp metal scrapers. Do not let water get into the electronic unit or into the light. Before cleaning ^ Switch the appliance off. Do not let water get into the condensate channel and drain hole The display will go and the cooling when cleaning. -
Page 37: Cleaning The Interior And Accessories
Cleaning and care Cleaning the interior and The following are not dishwasher safe: accessories – the stainless steel trim and the protective strips on the shelves and The appliance should be cleaned door shelves regularly, at least once a month. –... -
Page 38: Door Seals
Cleaning and care Door seals Do not use any oils or grease on the door seals as these will cause the seal to deteriorate and become porous over time. ^ The door seals should be cleaned regularly with clean water, and then wiped dry with a soft cloth. -
Page 39: Problem Solving Guide
Problem solving guide Some minor problems can be corrected without contacting Miele. The following overview is designed to help you resolve these yourself. If having followed the suggestions below, you still cannot resolve the problem, please contact Miele. To prevent unnecessary loss of temperature it is advisable not to open the appliance while waiting for it to be serviced. - Page 40 Problem solving guide The compressor is switching on too frequently and for too long, so the temperature in the appliance is dropping. Problem Possible cause Remedy ^ Set the correct The temperature The temperature inside the temperature setting. inside the appliance appliance is set too low.
- Page 41 Problem solving guide Problem Possible cause Remedy ^ Uncover the ventilation The compressor The ventilation gaps in the switches on too housing unit are covered or gaps. frequently and for dusty. ^ Dust the ventilation gaps longer. regularly. ^ Only open doors when The refrigerator door or the freezer door has been you need to and then only...
- Page 42 Messages in the display Problem Possible cause Remedy F0 to F9 appear in the ^ Call Miele Service. There is a fault. display. The Alarm symbol ; will The Alarm symbol The temperature inside the ;...
- Page 43 The LED lighting may only automatically after approx. be repaired or replaced by 15 minutes if the door is left a Miele service technician. open. There are live electrical If this is not the case, then components under the there is a fault.
- Page 44 Problem solving guide Other problems Problem Possible cause Remedy The freezer section This is not a fault. The This is normal and does not door cannot be suction caused by opening require attention. opened several and closing the door several times in succession times in succession.
-
Page 45: Noises
Noises Normal noises What causes them Humming noise made by the motor (compressor). This noise Brrrrr... can get louder for brief periods when the motor is switching on. Blubb, blubb..A gurgling noise can be heard when coolant is circulating through the pipes. -
Page 46: After Sales / Guarantee
In the event of a fault which you cannot correct yourself, or if the appliance is under guarantee, please contact: – your Miele Dealer – Miele (see back cover for contact details). Please note that telephone calls may be monitored and recorded for training purposes. -
Page 47: Note For Test Institutes
Note for test institutes Testing must be carried out in accordance with the relevant Norms and Directives. In addition, the following manufacturer's instructions should be observed when preparing and carrying out tests: – Loading plans, – Instructions in the Operating and installation instructions. -
Page 48: Electrical Connection
Electrical connection Electrical connection U.K. If the connection cable has to be replaced, this must be done by a All electrical work should be carried out suitably qualified and competent by a suitably qualified and competent person. person in strict accordance with current local and national safety regulations Do not plug other appliances in behind (BS 7671 in the UK). -
Page 49: Installation
Installation Important. In environments with This appliance must be built in, high humidity condensation can otherwise it could tip up. build up on the exterior of the appliance. This can cause corrosion Location of the appliance walls. This appliance should not be installed For prevention, it is advisable to where it is exposed to direct sunlight or install the appliance with sufficient... -
Page 50: Ventilation
Installation Ventilation – The cross-sectional area for ventilation in the plinth and the Specified ventilation gaps must be housing unit and also beneath the maintained. Otherwise the ceiling needs to be at least 200 cm compressor will come on more throughout to ensure that warm air frequently and for longer, resulting in can be drawn through unhindered. -
Page 51: Before Installing The Appliance
Installation Before installing the appliance ^ Take the accessory pack which includes installation parts and other accessories out of the appliance and remove the packaging strap holding the door in place. ^ Do not remove the following from the back of the appliance: –... -
Page 52: Building-In Dimensions
Building-in dimensions Before installing the appliance make sure the housing unit is the correct size. Specified ventilation gaps must be maintained in order to ensure that the appliance functions correctly. Niche height [mm] KDN 37132 iD 1772 – 1788... -
Page 53: Changing The Door Hinging
Changing the door hinging ^ Open both appliance doors. Two people are needed for changing the door hinging. The appliance is supplied right-hand hinged. If left-hand door hinging is required, follow the instructions below. To change the door hinging you will need the following tools: ^ Remove covers a, b, c and d. - Page 54 Changing the door hinging Take care. The door is not secure once the screw has been taken out of the bearing block. ^ Pull upper bearing block h out, and replace it on the opposite side. Take care. The door is not secure as soon as the middle hinge pin has been removed.
- Page 55 Changing the door hinging ^ Place the door onto hinge pin j from ^ Unscrew bearing block k, turn it above. around and fit it on the opposite side. ^ Close the lower door. ^ Unscrew bearing block l, and screw it back in on the opposite side.
- Page 56 Changing the door hinging ^ Then fit upper door g onto the middle hinge pin. ^ Close the upper door. ^ Screw upper bearing block h back on the appliance securely. ^ Tighten all screws again. ^ Replace covers b and c.
-
Page 57: Building In The Appliance
Building in the appliance To install the appliance you will need Two people are needed for installing the following tools: this appliance. ^ The appliance must be installed in stable and correctly aligned kitchen furniture on a level surface. ^ The housing unit must be secured against the risk of tipping. - Page 58 Building in the appliance The following installation parts are – required for fitting the furniture required door: All installation parts are number coded. This coding is also used in the installation instructions. – required for installing the appliance in its housing unit: All fitting instructions given are for a right-hand hinged appliance.
- Page 59 Building in the appliance ^ Push the appliance two-thirds of the way into its niche. When doing this, make sure that the mains cable does not get trapped. Tip to help you push it into position: Secure a length of string to the plug to "increase"...
-
Page 60: Installing The Appliance
Building in the appliance Installing the appliance ^ Carefully remove the protective foil from sealing strip i. ^ Screw the lower fixing bracket j ^ Fix sealing strip i flush with the front using screws k loosely into the of the appliance on the door opening bottom of the appliance. - Page 61 Building in the appliance If the all round gap of 42 mm is not maintained between the appliance casing and the front edge of the housing unit side walls the door may not shut properly. This can cause ice to build up, condensate to accumulate and lead to faults in the appliance.
-
Page 62: Securing The Appliance In The Niche
Building in the appliance ^ Carefully unscrew adjusting screw l ^ Press the appliance up against the in the middle hinge plate until it furniture wall and then secure the touches the side wall of the furniture appliance with screws m through housing unit. - Page 63 Building in the appliance ^ If necessary, align the cover strip by For additional stability of the appliance in the unit, push the rods supplied in pushing it parallel to the top of the underneath the appliance between it unit - it should be set slightly back and the floor of the housing unit.
-
Page 64: Securing The Furniture Door To The Appliance Door
Building in the appliance ^ Position the furniture door onto the appliance door, and secure fixing guides w to the furniture door using screws x. Maintain a distance d (= the thickness of the housing unit walls) between the edge of the appliance door and outer edge of the ^ Flip the cover on fixing bracket j furniture door. - Page 68 Alteration rights reserved / 0613 M.-Nr. 09 485 700 / 00 KDN 37132 iD...