Table of Contents
Advertisement
Advertisement
Table of Contents

Related Manuals for AEG HC652600EB


Summary of Contents for AEG HC652600EB
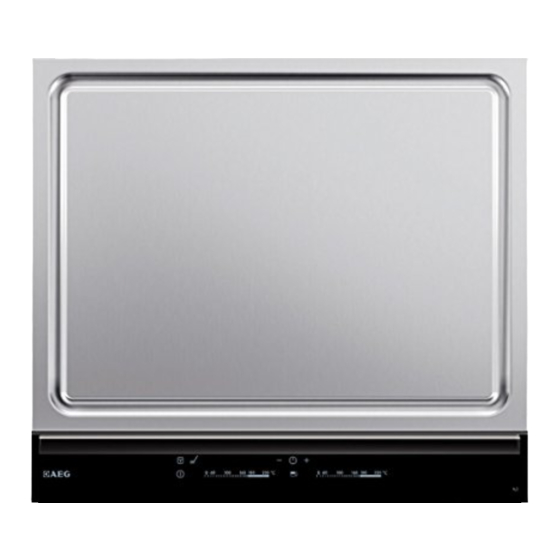
- Page 1 EN User manual HC652600EB...
-
Page 2: Table Of Contents
11. WARRANTY ............. . . 18 FOR PERFECT RESULTS Thank you for choosing this AEG product. We have created it to give you impeccable performance for many years, with innovative technologies that help make life simpler –... -
Page 3: Safety Information
ENGLISH 1. SAFETY INFORMATION Before the installation and use of the appliance, careful- ly read the supplied instructions. The manufacturer is not responsible if an incorrect installation and use cau- ses injuries and damages. Always keep the instructions with the appliance for future reference. 1.1 Children and vulnerable people safety WARNING! Risk of suffocation, injury or permanent disability. -
Page 4: Conditions Of Use
• Never try to extinguish a fire with water, but switch off the appliance and then cover flame e.g. with a lid or a fire blanket. • Do not store items on the cooking surfaces. • Do not use a steam cleaner to clean the appliance. -
Page 5: Electrical Connection
ENGLISH Electrical connection • Do not change the specification of this appliance. WARNING! • Do not let the appliance stay unatten- Risk of fire and electrical shock. ded during operation. • Do not operate the appliance with wet • All electrical connections must be hands or when it has contact with wa- made by a qualified electrician. -
Page 6: Product Description
• Do not put aluminium foil on the ap- • Clean regularly the appliance to pre- pliance. vent the deterioration of the surface material. • Cookware made of cast iron, alumini- um or with a damaged bottom can • Do not use water spray and steam to cause scratches on the glass or glass clean the appliance. -
Page 7: Control Panel Layout
ENGLISH 4.2 General overview Rear grilling zone 2800W Front grilling zone 2800W Glass bar Control panel 4.3 Control panel layout Use the sensor fields to operate the appliance. The displays, indicators and sounds tell which functions operate. Sensor field Function To activate and deactivate the appli- ance. -
Page 8: Daily Use
Sensor field Function To set the roasting zone. . To set the Timer functions. Control bar To set the heat temperature. 4.4 Heat setting displays Display Description The roasting zone is off. The roasting zone operates. There is a malfunction. -
Page 9: The Timer
ENGLISH Touch the control bar at the heat set- The Count up timer ting. Change to the left or the right, if it Use the Count up timer to monitor how is necessary. Do not release before you long the cooking zone operates. have a correct heat setting. -
Page 10: Helpful Hints And Tips
10 www.aeg.com/au 5.7 OffSound Control To stop this function touch . The heat setting that you set before comes on. (Deactivation and activation of When you stop the appliance, you also the sounds) stop this function. Deactivation of the sounds 5.6 The Child Safety Device... - Page 11 ENGLISH When the temperature is too high, the fat begins to produce smoke. This tem- perature is called the smoke point. Fats/Oils Max. temperature (°C) Smoke point (°C) Butter Pork fat Beef fat Olive oil Sunflower oil Groundnut oil Coconut oil Always preheat the appliance.
- Page 12 12 www.aeg.com/au Food to be cooked Temperature (°C) Time / Tips Beef steak blutig, rare 6 minutes, turn after 3 minutes. Beef steak rosa, medium 180 8 minutes, turn after 2 minutes. Beef steak durch, well 8 minutes, turn after 4 done minutes.
-
Page 13: Care And Cleaning
ENGLISH Food to be cooked Temperature (°C) Time / Tips Fried egg Preheat the appliance. Crepes/Omelettes 140-160 Preheat the appliance. Fruits 140-160 Preheat the appliance. Vegetables 140-160 10 – 20 minutes, turn several times. Vegetables 140-160 10 - 15 minutes, under a cooking lid (turn halfway through). -
Page 14: Troubleshooting
14 www.aeg.com/au Glass bar is attached to the ceramic • Make sure that the pans and pots do plate. not touch the glass bar. • Do not put the pots on the glass bar. 8. TROUBLESHOOTING Problem Possible cause and remedy You cannot activate the •... -
Page 15: Installation
ENGLISH 9. INSTALLATION WARNING! • Replace the damaged mains cable Refer to the Safety chapters. with a special cable (type H05BB-F Tmax 90°C; or higher). Speak to your Before the installation local Service Centre. 9.3 To attach the seal. Before the installation of the appliance, record the information below from the •... - Page 16 16 www.aeg.com/au min. 12 mm min. 2 mm min. 38 mm min. 2 mm • Seal the gap between the worktop • Pull off the excess silicone with the and glass ceramic with silicone. scraper. • Put some soapy water on the silicone.
- Page 17 ENGLISH The installation of more than one appli- ance Put down the dimension of the work- top cut out and saw it out. Put the appliances one at time on some soft surface, a blanket for ex- ample, with the bottom side up. Put the seal stripe around the lower edge of the appliance along the outer edge of the glass ceramic.
-
Page 18: Technical Information
New Zealand; conditions of the product warranties ‘major failure’ as referred to in for AEG Appliances. It is an important clause 10 of this warranty has the document. Please keep it with your same meaning referred to in the... - Page 19 AEG are governed tion, travel and delivery of the Appli- by the law applicable where the Ap- ance to and from AEG or its ASC. If pliance was purchased. Where the you reside outside of the service...
- Page 20 AEG in New Zealand, the exchange information in relation to Appliances come with a guarantee you to enable AEG to meet its obli- by AEG pursuant to the provisions of gations under this warranty. the Consumer Guarantees Act, the Sale of Goods Act and the Fair Trad- ing Act.
-
Page 21: Environment Concerns
ENGLISH FOR SPARE PARTS or to find the address of your nearest state spare parts centre in New Zealand FREE CALL 0800 10 66 20 OR EMAIL customercare@electrolux.co.nz (New Zealand only) 12. ENVIRONMENT CONCERNS Recycle the materials with the appliances. Do not dispose symbol . - Page 22 22 www.aeg.com/au...
- Page 23 ENGLISH...
- Page 24 www.aeg.com/au...