
Related Manuals for Honeywell T8131A


Summary of Contents for Honeywell T8131A
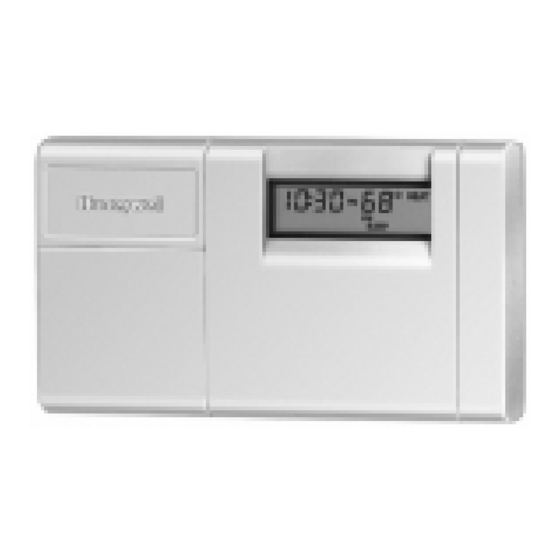
- Page 1 T8131A,B Programmable Thermostat OWNER’S GUIDE Weekday/Weekend (5-day/ 2-day) Programmable Heat and/or Cool Low Voltage (20 to 30 Vac) Thermostat and Mounting Plate 69-0887—1 69-0887-1...
- Page 2 Welcome to the world of comfort and energy savings with your new Honeywell program- mable thermostat. By following the programing instructions in this manual, your new thermostat will automatically control the temperature in your home, keeping you comfortable while saving energy.
-
Page 3: Table Of Contents
Table of Contents Page Prepare for Installation ... 5 Remove Old Thermostat ... 7 Replacing a Clock Thermostat that has C or C1 Clock Terminals ... 8 Install Batteries ... 9 Program the Thermostat ... 11 Adjust Fan Operation Switch ... 20 Adjust System On-Time, F/ C ... - Page 4 See Fig. 1. Contact your local waste management authority for instructions regarding recycling and the proper disposal of your old thermostat. If you have questions, call Honeywell Inc. at 1-800-468-1502. Fig. 1. Typical location of a mercury switch in a thermostat.
-
Page 5: Prepare For Installation
Heat Pumps/Multistage Equipment NOTE: Not compatible with any 120/240 volt circuit. Compatible with 2-wire Honeywell zone valves. Isolating relay required for 3-wire thermostats for zone valves. Not compatible with 2-wire White-Rodgers no. 1361 Valves. Compatible with hot water baseboard systems. Will not work efficiently on steam or gravity systems. - Page 6 KNIFE, IF NEEDED TO STRIP WIRES HAND OR POWER DRILL WITH 3/16 INCH DRILL BIT, IF NEEDED TO DRILL HOLES IN WALL MASKING TAPE, IF NEEDED TO LABEL WIRES AS DISCONNECTED FROM OLD THERMOSTAT LEVEL, IF NEEDED TO LEVEL THERMOSTAT FOR APPEARANCE M878B 69-0887—1...
-
Page 7: Remove Old Thermostat
If there are only two wires, they do not require labeling. If there is an extra wire that is not con- nected to your old thermostat, you also will not be connecting it to your new thermostat. Keep the wires from falling back into the wall by wrapping them around a pencil as shown. -
Page 8: Replacing A Clock Thermostat That Has C Or C1 Clock Terminals
Replacing a Clock Thermostat that has C or C1 Clock Terminals? If you are replacing a Honeywell Chronotherm® Thermostat, you may find one or two wires that go to the C or C1 clock terminals on the Chronotherm® Thermostat wiring wallplate. Do not allow them to touch, or you can damage your transformer. -
Page 9: Install Batteries
We recommend Energizer® batteries. Make sure the thermostat is set to the OFF position. Use a coin to remove the battery door. Install the fresh batteries as shown, making sure positive and negative terminals are oriented correctly. - Page 10 Lo stays on without flashing to indicate the thermostat and heating/cooling system have stopped working and the batteries are almost completely dead. After the batteries are completely dead, the bAt Lo indicator disappears, leaving a completely blank display.
-
Page 11: Program The Thermostat
When batteries are installed, your thermostat can be programmed in your hand, before it is mounted on the wall. If you would prefer to program the thermostat after it is mounted on the wall, go to page 22, and return later to this programming section. - Page 12 Fill in the times and temperatures you desire for weekdays and weekends. If you decide not to program the thermostat, it automatically controls heating at 68 F (20 C), and cooling at 78 F (26 C), 24 hours a day. Also, you do not...
- Page 13 it. For example, a house that is occupied during weekdays would only require programs for WAKE and SLEEP . Before programming, remove the clear plastic overlay covering the display. When pressing the keys, use the ball of your finger or a soft pencil eraser. NOTE: Using sharp fingernails or pencil points can damage the keypad.
-
Page 14: Program Schedule
Program Schedule Weekdays WAKE LEAVE RETURN SLEEP Weekends WAKE SLEEP WAKE and RETURN start times should include extra lead time, based on outside temperature and furnace response time, to give your furnace a head start to heat the house. The temperatures cannot be set any higher than 88 F (31 C) or any lower than 45 F (7 C). HEATING PROGRAM SCHEDULE Start Time Heating Temperature... - Page 15 The temperatures cannot be set any higher than 88 F (31 C) or any lower than 45 F (7 C). NOTE: If you decide not to program the thermostat, it automatically controls heating at 68 F (20 C), and cooling at 78 F (26 C), 24 hours a day.
- Page 16 NOTE: Batteries are required for operation and programming. When inserting batteries, set the system switch to OFF. Remove the battery door (on the thermostat left side) using a coin at the bottom. Follow the instructions on pages 9 and 10.
- Page 17 Time Ahead to program WAKE time and Back Repeat sequence for LEAVE, RETURN, and SLEEP. Press until SAT, SUN, WAKE and SET appear on the display. Use Schedule Temp Warmer WAKE time and to program WAKE temperature for SAT-SUN. Repeat sequence for SLEEP . Cooler Cooling Program With system switch at COOL, follow the same instructions as for the Heating Program.
- Page 18 A quick guide for operating or making changes follows: NOTE: Set system switch to Heat or Cool to perform the following: Temporarily Change temperature for current period only —press indicator shows on display; this is cancelled at next scheduled change, or to cancel sooner, press Program Hold a temperature indefinitely (such as when you are on vacation)—press...
- Page 19 17), as applicable. Return to normal program or start program—press repeatedly to see each time and temperature; then press Schedule until program to cancel shows; then press Schedule Program Time Ahead together. Back Questions? Call Honeywell Customer Assistance 1-800-468-1502. Program 69-0887—1...
-
Page 20: Adjust Fan Operation Switch
G terminal is connected. Adjust System On-Time, F/ C The thermostat on-time is factory-set for a warm air, gas or oil heating system. If you are installing it on another type of... - Page 21 • Electric Furnace—leave at the Warm Air Furnace setting (A— leave in, B—out one turn). NOTE: This thermostat does not have a setting for steam/ gravity air. Cycles would not be long enough for accurate temperature control. IMPORTANT When using a high...
-
Page 22: Mount Thermostat Mounting Plate
Mount Thermostat Mounting Plate Position mounting plate on the wall. Use a level to make sure mounting plate is level. Use a pencil to mark the two mounting holes. Remove mounting plate from the wall, and drill 3/16 in. holes in the wall (if drywall) as marked. - Page 23 Reposition the mounting plate over the LEVEL holes, pulling the wires through the wiring opening. Loosely insert the two mounting screws into the holes. Level for appearance only; thermostat functions properly even when not level. Tighten the mounting screws. M1714A 69-0887—1...
-
Page 24: Wire Thermostat Terminals
Refer to the masking tape labels you placed on the wires when you removed your old thermostat. Match the letter of your old thermostat wire with the terminal of the correspond- ing letter on the back of your new thermostat. - Page 25 See illustration (below) for proper wiring technique. Securely tighten the terminals. Plug the hole in the wall with insulation to help prevent drafts from adversely affecting thermostat operation. PROPER WIRING TECHNIQUE INSERT STRAIGHT 5/16 IN.
- Page 26 3-WIRE HEAT-ONLY HEATING RELAY OR VALVE COIL POWER SUPPLY. PROVIDE DISCONNECT MEANS AND OVERLOAD PROTECTION AS REQUIRED. (HOT) M9213 4-WIRE COOL-ONLY COOLING CONTACTOR COIL RELAY POWER SUPPLY. PROVIDE DISCONNECT MEANS AND OVERLOAD PROTECTION AS REQUIRED. (HOT) M9212 69-0887—1...
- Page 27 5-WIRE HEAT/COOL HEATING RELAY OR RELAY VALVE COIL COOLING CONTACTOR COIL POWER SUPPLY. PROVIDE DISCONNECT MEANS AND OVERLOAD PROTECTION AS REQUIRED. (HOT) M9214 69-0887—1...
-
Page 28: Mount Thermostat
M879 ENGAGE TABS AT TOP OF THERMOSTAT AND MOUNTING PLATE. PRESS LOWER EDGE OF CASE TO LATCH. SWING COVER OPEN TO CHECK OPERATION. 69-0887—1... -
Page 29: Check Thermostat Operation After Programming And Installing
Heating Do not check heating system operation such as the gas valve, zone valve or oil burner control by jumpering thermostat terminals at the primary control. This damages the thermo- stat. Instead, jumper R and W wires at the thermostat. - Page 30 NOTE: When cooling setting is changed, thermostat can delay up to five minutes before turning on the air conditioner. This delay protects the compressor. Move the system switch to COOL and the fan switch to AUTO. Press the key until the setting is about 10 F (6 C) below room temperature.
-
Page 31: Set Fan And System Switches
Exception: If Fan Operation Switch on the back of the thermostat is set to the E position (see page 21), the fan operates with furnace only. ON: The fan runs continuously. Use... -
Page 32: Troubleshooting Guide
Be sure that AM and PM indications are correct. Make sure the current day and time are correct. Reprogram if necessary. Check that the green LED is lit. Check that the switch on the thermostat is set to HEAT. 69-0887—1... - Page 33 Check for correct wiring and good connections. If temperature setting is higher than current temperature and displays HEAT, contact Honeywell Customer Assistance at 1-800-468-1502. Check that the green LED is lit. Check that the switch on the thermostat is set to COOL.
- Page 34 If the air conditioner does not come on after ten minutes and displays COOL, contact Honeywell Customer Assistance at 1-800-468-1502. Press Present Setting key to check the current temperature setting. If desired, change the temperature setting. See page 18.
- Page 35 Lo remains on display after fresh batteries are installed. Contact your heating or air conditioner contractor. If further assistance is needed, call Honeywell Customer Assistance at 1-800-468-1502. Check that the wiring hole in the wall behind the wallplate was plugged with insulation to prevent drafts that could adversely affect thermostat operation.
- Page 36 Toll-free Customer Assistance For all questions concerning this thermostat, please read and follow the instructions. If additional assistance is needed, call Honeywell Customer Assistance toll-free at 1-800-468-1502, Monday- Friday, 7:00 a.m.-5:30 p.m. Central time. Before you call, please have the following information available—thermostat model number and date code, type of heating/cooling system (for example, hot water, warm air, oil, or gas), and number of wires connected to the thermostat.
- Page 37 TYPICAL ENERGY SAVINGS FOR REPRESENTATIVE CITIES IN THE U.S. AND CANADA Savings for Once-A-Day 10°F (5°C) decrease Edmonton Calgary Minneapolis Halifax Vancouver St. Paul Regina Moncton Winnipeg North Bay Montreal Ottawa Quebec St. John's Toronto Savings for Twice-A-Day 10°F (5°C) decrease* Buffalo Louisville Denver...
- Page 38 69-0887—1...
-
Page 39: Limited One-Year Warranty
Plymouth, MN 55441-4437 This warranty does not cover removal or reinstallation costs. This warranty shall not apply if it is shown by Honeywell that the defect or malfunction was caused by damage which occurred while the product was in the possession of a consumer. - Page 40 Home and Building Control Honeywell Inc. 1985 Douglas Drive North Golden Valley, MN 55422 69-0887—1 Rev. 5-96 J.S. Printed in Mexico Copyright © 1996 Honeywell Inc. All Rights Reserved Home and Building Control Honeywell Limited-Honeywell Limitée 155 Gordon Baker Road...