Table of Contents
Advertisement
Advertisement
Chapters
Table of Contents

Related Manuals for Cisco CIVS-IPC-2600


Summary of Contents for Cisco CIVS-IPC-2600
- Page 1 Cisco Video Surveillance 2600 IP Camera User Guide Model CIVS-IPC-2600 Americas Headquarters Cisco Systems, Inc. 170 West Tasman Drive San Jose, CA 95134-1706 http://www.cisco.com Tel: 408 526-4000 800 553-NETS (6387) Fax: 408 527-0883 Text Part Number: OL-24127-02...
- Page 2 OR LIMITED WARRANTY, CONTACT YOUR CISCO REPRESENTATIVE FOR A COPY. The Cisco implementation of TCP header compression is an adaptation of a program developed by the University of California, Berkeley (UCB) as part of UCB’s public domain version of the UNIX operating system. All rights reserved. Copyright © 1981, Regents of the University of California.
-
Page 3: Overview
Obtaining Documentation, Obtaining Support, and Security Guidelines For information about obtaining documentation, submitting a service request, and gathering additional information, see the monthly What’s New in Cisco Product Documentation, which also lists all new and revised Cisco technical documentation, at: http://www.cisco.com/en/US/docs/general/whatsnew/whatsnew.html Subscribe to the What’s New in Cisco Product Documentation as a Really Simple Syndication (RSS) feed... - Page 4 Preface Cisco Video Surveillance 2600 IP Camera User Guide OL-24127-02...
-
Page 5: Table Of Contents
Navigating the Configuration Windows Setup Windows Basic Setup Window Advanced Setup Window IP Filter Window 3-10 EAPOL Window 3-11 Administration Windows 3-12 Users Window 3-12 Maintenance Window 3-14 Firmware Window 3-15 Cisco Video Surveillance 2600 IP Camera User Guide OL-24127-02... - Page 6 Viewing Video through Third-Party Devices or Software Troubleshooting C H A P T E R Using the IP Camera with Cisco VSM A P P E N D I X N D E X Cisco Video Surveillance 2600 IP Camera User Guide OL-24127-02...
-
Page 7: Chapter 1 Overview
C H A P T E R Overview This chapter provides an overview of the Cisco Video Surveillance IP Cameras and its features. It includes these topics: Features, page 1-1 • IP Camera Overview, page 1-2 • Features The Cisco Video Surveillance 2600 IP Camera offers a feature-rich digital camera solution for a video surveillance system. -
Page 8: Ip Camera Overview
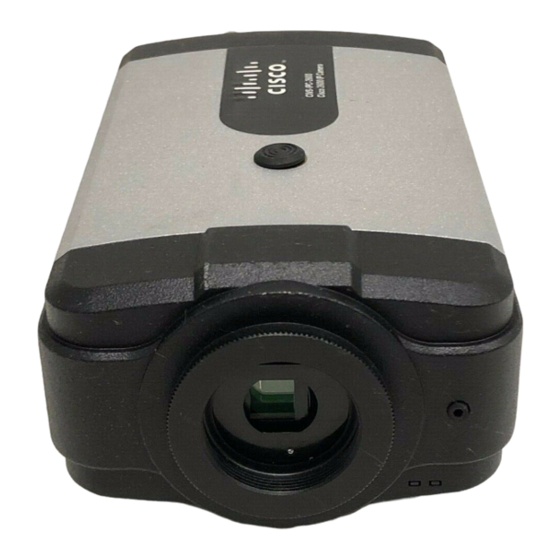
Camera access control—You can control access to IP camera configuration windows and live video • by configuring various user types and log in credentials. Cisco Media API—The IP camera supports the open, standards based, Cisco Media Application • Programming Interface. - Page 9 Lens opening The IP camera supports a variety of C and CS mount lenses, which attach here. For best performance, Cisco recommends that you use a DC auto iris lens. Focus ring Allows you to adjust the back focus of the IP camera.
- Page 10 • • Blinking—Data is being transmitted or received via the LAN connection LAN port Accepts a standard LAN cable to connect the IP camera to a 10/100BASET hub, router, or switch. Cisco Video Surveillance 2600 IP Camera User Guide OL-24127-02...
- Page 11 IP camera. Figure 1-3 Side of IP Camera DC auto iris lens connector Connection for cable from DC auto iris lens Lockdown cable slot Connection for Kensington-compatible lockdown equipment Cisco Video Surveillance 2600 IP Camera User Guide OL-24127-02...
-
Page 12: Dc Auto Iris Lens Connector Pinouts
Damp + Drive + Drive – Package Contents The the Cisco Video Surveillance IP Camera package includes these items: Cisco Video Surveillance 2600 IP Camera Quick Start Guide (qty. 1) • Regulatory Compliance and Safety Information document (qty. 1) •... -
Page 13: Getting Started
C H A P T E R Getting Started This chapter provides instructions for installing and performing the initial setup of the Cisco Video Surveillance IP Camera. It also describes how to access the IP camera through a web browser so that you can configure it or view video from it, and how to perform other important tasks. -
Page 14: Chapter 2 Getting Started
Step 2 If you are using a DC auto iris lens, connect its cable to For best performance, Cisco recommends that you use a the DC auto iris lens connector on the IP camera. DC auto iris lens. - Page 15 Connect a category 5 or higher network cable to the If your network provides PoE, the IP camera powers on. LAN port on the back of the camera and to a Skip to Step 10/100BaseT hub, router, or switch. Cisco Video Surveillance 2600 IP Camera User Guide OL-24127-02...
-
Page 16: Performing The Initial Setup Of The Ip Camera
These settings include administrator and root passwords, and whether the IP camera can be accessed through an HTTP connection in addition to the default HTTPS (HTTP secure) connection. Cisco Video Surveillance 2600 IP Camera User Guide OL-24127-02... - Page 17 Step 7 follow the on-screen prompts to do so. The Main window appears and video from the IP camera starts playing automatically. You can take these actions in the Main window: Cisco Video Surveillance 2600 IP Camera User Guide OL-24127-02...
-
Page 18: Accessing The Ip Camera Windows
HTTPS port 443 or the default HTTP port 80. For example, Enter the following for a secure connection if the IP address is 192.168.0.100 and the HTTPS port • number is 443: https://192.168.0.100 Cisco Video Surveillance 2600 IP Camera User Guide OL-24127-02... -
Page 19: Adjusting Back Focus On The Ip Camera
For a zoom lens, ensure that the object of interest remains in focus throughout the entire zoom range • of the lens. Use the Allen wrench to tighten the focus ring hex screw. Step 3 Cisco Video Surveillance 2600 IP Camera User Guide OL-24127-02... -
Page 20: Powering The Ip Camera On Or Off
Sets all IP camera options to least 10 seconds. their default values. After you perform this procedure, follow the steps in the “Performing the Initial Setup of the IP Camera” section on page 2-4. Cisco Video Surveillance 2600 IP Camera User Guide OL-24127-02... -
Page 21: Cleaning The Ip Camera
To clean the IP camera housing, use a clean, dry, soft cloth to gently wipe the surface of the housing • To clean the lens, use only tissue paper or solution that is designed for high quality optical lenses. • Cisco Video Surveillance 2600 IP Camera User Guide OL-24127-02... - Page 22 Chapter 2 Getting Started Cleaning the IP Camera Cisco Video Surveillance 2600 IP Camera User Guide 2-10 OL-24127-02...
- Page 23 C H A P T E R Configuring and Managing the IP Camera The Cisco Video Surveillance IP Camera provides configuration windows that you use to configure and manage the IP camera. This chapter explains how to access the configuration windows, describes each window, and provides detailed information about the options that are available in each window.
-
Page 24: Configuring And Managing The Ip Camera
3-16. video streams, streaming mode, picture appearance, whether video includes a time stamp or text overlay, and how the IP camera handles day and night vision modes. Cisco Video Surveillance 2600 IP Camera User Guide OL-24127-02... -
Page 25: Chapter 3 Configuring And Managing The Ip Camera
Define a preset position and Optional. See the “PTZ (RS-485) options patrol sequence for the IP Window” section on page 3-35 camera. and the “Preset Positions Window” section on page 3-36. Cisco Video Surveillance 2600 IP Camera User Guide OL-24127-02... -
Page 26: Advanced Setup Window
The configuration windows are organized as follows: • Setup Basic Setup – Advanced Setup – IP Filter – EAPOL – • Administration Users – Maintenance – Firmware – Audio/Video • – Video Audio – Privacy Region – Cisco Video Surveillance 2600 IP Camera User Guide OL-24127-02... -
Page 27: Setup Windows
To discard the changes, click Cancel before clicking Save. These buttons appear at the bottom of the window. You may need to scroll down to see them. Cisco Video Surveillance 2600 IP Camera User Guide OL-24127-02... -
Page 28: On Page
3-46.) The camera name can include any combination of up to 15 letters and numbers. Cisco recommends that you give each IP camera a unique name so that you can identify it easily. Description Enter a description of the IP camera. For example, enter the IP camera location, such as “North Entrance.”... - Page 29 If you change any options in the Advanced Setup window, you must click Save to save the changes. To discard the changes, click Cancel before clicking Save. These buttons appear at the bottom of the window. You may need to scroll down to see them. Cisco Video Surveillance 2600 IP Camera User Guide OL-24127-02...
- Page 30 RTP is a standard for transmitting real-time data, such as audio and video, to selected clients. Valid values are 1024 through 65535. The default value is 5000. The default value can be used for multicasting and typically does not need to be changed. Cisco Video Surveillance 2600 IP Camera User Guide OL-24127-02...
- Page 31 Appears if you enabled multicast. Enter the number of hops, which specifies the number of network devices that an audio-video stream can pass before arriving at its destination or being dropped. Valid values are 1 through 255. The default value is 16. Cisco Video Surveillance 2600 IP Camera User Guide OL-24127-02...
-
Page 32: Ip Filter Window
Enable and allow the following IP address—Lets you designate one • or more IP addresses or range of IP addresses that can access the IP camera. All other IP addresses cannot access the IP camera. Cisco Video Surveillance 2600 IP Camera User Guide 3-10 OL-24127-02... -
Page 33: Eapol Window
Check this check box if you want to allow authentication servers to establish Provisioning a secure connection with the IP camera so that they can provide the IP camera with new Protected Access Credentials (PACs). Cisco Video Surveillance 2600 IP Camera User Guide 3-11 OL-24127-02... -
Page 34: Administration Windows
To discard the changes before you click Change or Save, click Cancel. • The Save and Cancel buttons appear at the bottom of the window. You may need to scroll down to • see them. Cisco Video Surveillance 2600 IP Camera User Guide 3-12 OL-24127-02... -
Page 35: Window" Section On Page
Viewer—Allows the user to view video in the Home window and to access these controls in the Home window: resolution, digital zoom, snapshot, speaker on/off, speaker volume, microphone on/off, microphone volume. Cisco Video Surveillance 2600 IP Camera User Guide 3-13 OL-24127-02... -
Page 36: Section On Page
You can then upload this configuration information to any IP camera in the network. This feature is useful for creating a backup of this configuration and for configuring other IP cameras based on this configuration. Cisco Video Surveillance 2600 IP Camera User Guide 3-14 OL-24127-02... -
Page 37: Firmware Window
Do not power down the IP camera during the upgrade procedure. Note Recovery Firmware Display only. Firmware version of the recovery image. If an upgrade fails, Version the IP camera boots from the recovery image. Cisco Video Surveillance 2600 IP Camera User Guide 3-15 OL-24127-02... -
Page 38: Video Window
Cancel before clicking Save. These buttons appear at the bottom of the window. You may need to scroll down to see them. Table 3-9 describes the options in the Video window. Cisco Video Surveillance 2600 IP Camera User Guide 3-16 OL-24127-02... - Page 39 You can use these options to help manage bandwidth use in your network. For example, if the IP camera is focused on an area with little movement, such as an emergency exit, you can configure it with a low fixed quality. Cisco Video Surveillance 2600 IP Camera User Guide 3-17 OL-24127-02...
- Page 40 Choose the desired video resolution format for the primary video stream from the IP camera. The default resolution is 720 x 480 for NTSC or 720 x 576 for PAL. Cisco Video Surveillance 2600 IP Camera User Guide 3-18 OL-24127-02...
- Page 41 These MPJEG Settings 2 options appear if you choose the Single MJPEG Stream or the Dual Note Streams (H.264 + MJPEG or MPEG-4 + MJPEG) from the Streaming Mode drop-down list. Resolution Choose the resolution of the MJPEG video stream. Cisco Video Surveillance 2600 IP Camera User Guide 3-19 OL-24127-02...
- Page 42 High saturation provides a vivid, intense color for a video image. With less saturation, the video image appears more muted and gray. The default value is Normal, which is suitable for most conditions. Cisco Video Surveillance 2600 IP Camera User Guide 3-20 OL-24127-02...
- Page 43 Night Schedule—IP camera switches to and from Night mode based on the Start and End times. Note If you configure a night schedule, ensure that the time on the IP camera is set correctly. Cisco Video Surveillance 2600 IP Camera User Guide 3-21 OL-24127-02...
- Page 44 Night mode. End Time If the Switch Mode option is set to Night Schedule, enter the time (in 24 hour format) when camera exits Night mode. Cisco Video Surveillance 2600 IP Camera User Guide 3-22 OL-24127-02...
-
Page 45: Audio Window
IP camera is muted by default. To unmute the microphone, use the Microphone On toggle button in the Home window. For detailed information, see the “Home Window Controls” section on page 4-3. Cisco Video Surveillance 2600 IP Camera User Guide 3-23 OL-24127-02... -
Page 46: Privacy Region Window
Region Color Choose a color from the Region Color drop-down list to specify the color that will be used to mask the actual video in all enabled privacy regions. Cisco Video Surveillance 2600 IP Camera User Guide 3-24 OL-24127-02... -
Page 47: Product Process Window
The Initialization window lets you configure administrator and root passwords, whether the IP camera can be accessed through an HTTP connection in addition to the default HTTPS (HTTP secure) connection, and whether the IP camera can be accessed through a SSH connection. Cisco Video Surveillance 2600 IP Camera User Guide 3-25 OL-24127-02... -
Page 48: Complexity Window
Administrator password cannot include any character that occurs 3 or more times consecutively Password Check 3 Password cannot be the same as the user name either forward of reversed Password Check 4 Not used Cisco Video Surveillance 2600 IP Camera User Guide 3-26 OL-24127-02... -
Page 49: Applications Windows
By default, the video in a video file starts when an event starts and ends 5 seconds after the event ends. You can designate that additional video be included before and after an event as described in the “Event Window” section on page 3-30. Cisco Video Surveillance 2600 IP Camera User Guide 3-27 OL-24127-02... -
Page 50: Table
Enter the text to be shown in the Subject field for the e-mail messages that the IP camera sends when events occur. The subject can contain up to 48 characters, including spaces. Cisco Video Surveillance 2600 IP Camera User Guide 3-28 OL-24127-02... -
Page 51: Motion Detection Window
If you are prompted to install ActiveX controls when trying to access this window, follow the on-screen prompts to do so. ActiveX controls are required to see the video and the options. Cisco Video Surveillance 2600 IP Camera User Guide 3-29... -
Page 52: Event Window
A change of state from low to high or from high to low on an input port of the IP camera. For related information about input ports, see the “Alarm I/O Ports Window” section on page 3-34. Cisco Video Surveillance 2600 IP Camera User Guide 3-30 OL-24127-02... - Page 53 Trigger Events When option in the Alarm I/O Ports window. • Motion Detection—Event is triggered when the camera detects motion, as described in the “Motion Detection Window” section on page 3-29. Cisco Video Surveillance 2600 IP Camera User Guide 3-31 OL-24127-02...
- Page 54 Appears if you choose the Video option from the Attachment Type (MPSG-4) drop-down list. Choose the format (asf, mp4, or 3gp) for the video file of the event. If you choose mp4, or 3gp, video files do not include audio. Cisco Video Surveillance 2600 IP Camera User Guide 3-32 OL-24127-02...
-
Page 55: Snmp Window
Primary Trap Receiver Enter the IP address of primary trap receiver of the SNMP manager. Secondary Trap Enter the IP address of secondary trap receiver of the SNMP manager. Receiver Cisco Video Surveillance 2600 IP Camera User Guide 3-33 OL-24127-02... -
Page 56: Alarm I/O Ports Window
On button, and changes the state of the port to high when you click the Off button. For related information, see the descriptions of the On and Off button in Table 4-1 on page 4-3. Cisco Video Surveillance 2600 IP Camera User Guide 3-34 OL-24127-02... -
Page 57: Ptz (Rs-485) Window
Click the Set Preset Position button to define a preset position of the IP camera. When you click this button, the Set Pan/Tilt window appears. For detailed information about this window, see the “Preset Positions Window” section on page 3-36. Cisco Video Surveillance 2600 IP Camera User Guide 3-35 OL-24127-02... -
Page 58: Preset Positions Window
Preset Positions window. Table 3-21 Preset Positions Window Options Option Description Zoom In button Use these buttons to control optical zooming for the IP camera. Zoom Out button Cisco Video Surveillance 2600 IP Camera User Guide 3-36 OL-24127-02... - Page 59 Choose the relative speed for the IP camera panning action. Options range from 1 (slowest) to 10 (fastest). Tilt Speed Choose the relative speed for the IP camera tilting action. Options range from 1 (slowest) to 10 (fastest). Cisco Video Surveillance 2600 IP Camera User Guide 3-37 OL-24127-02...
-
Page 60: Status Windows
Current date and time of the IP camera. To set the date and time, see the “Basic Setup Window” section on page 3-5. Note The Unique Device Identifier (UDI) provides information about Cisco devices. Product Identifier Cisco product ID of the IP camera. Version Identifier Not used. -
Page 61: Audio/Video Window
Image quality of the MJPEG video stream. Frame Rate Frame rate of the MJPEG video stream. Audio Setting Audio Setting Displays whether audio is enabled or disabled for the IP camera. Cisco Video Surveillance 2600 IP Camera User Guide 3-39 OL-24127-02... -
Page 62: Network Window
To display the Syslog & Log window, access the configuration windows as described in the “Accessing the IP Camera Windows” section on page 2-6, click Status, then click Syslog & Log. Cisco Video Surveillance 2600 IP Camera User Guide 3-40 OL-24127-02... - Page 63 Enter the port number that receives the logs on the Syslog server. Valid values are 514 and 1024 through 65535. The default Syslog port is 514. Syslog Facility Enter the system facility that receives logs on the Syslog server. Cisco Video Surveillance 2600 IP Camera User Guide 3-41 OL-24127-02...
- Page 64 Note Alert: Detected motion Alert generated by the IP camera detecting motion in a configured video field. Alert: Input Port Port_Number triggered. Alert generated by the indicated port changing state. Cisco Video Surveillance 2600 IP Camera User Guide 3-42 OL-24127-02...
- Page 65 Provides information when you configure the IP NTP server. camera to obtains its time from an NTP server. NTP: No NTP server specified. NTP: Synchronization OK. NTP: The NTP server cannot be reached. Cisco Video Surveillance 2600 IP Camera User Guide 3-43 OL-24127-02...
- Page 66 Home window. Stream: HTTP stream stopped. [id: User, ip: Address] User is the IP camera user name of the user. Address is the IP address of the PC that was used. Cisco Video Surveillance 2600 IP Camera User Guide 3-44 OL-24127-02...
- Page 67 Address is the IP address of the FTP server. FTP: File uploaded successfully. [host: Address] FTP: Login failed. [host: Address] FTP: No such remote path. [host: Address] FTP: Unknown FTP server. [host: Address] Cisco Video Surveillance 2600 IP Camera User Guide 3-45 OL-24127-02...
-
Page 68: Video Log Window
To display the View Video Log window, access the configuration windows as described in the “Accessing the IP Camera Windows” section on page 2-6, click Status, then click View Video Log. Cisco Video Surveillance 2600 IP Camera User Guide 3-46 OL-24127-02... -
Page 69: Description
PC. You can then open the saved file in a media player. Delete button Deletes the corresponding video file. Delete All button Deletes all video files in the Video Log window. Cisco Video Surveillance 2600 IP Camera User Guide 3-47 OL-24127-02... - Page 70 Chapter 3 Configuring and Managing the IP Camera Status Windows Cisco Video Surveillance 2600 IP Camera User Guide 3-48 OL-24127-02...
-
Page 71: Chapter 4 Viewing Live Video
C H A P T E R Viewing Live Video After you install and set up the Cisco Video Surveillance IP Camera as described in Chapter 2, “Getting Started,” users can connect to the IP camera through Internet Explorer and access the Home window to view live video from the IP camera. -
Page 72: Basic Setup Window" Section On Page
Video from the IP camera. Number of users who are accessing the camera through web browsers. IP camera controls. For detailed information, see the “Home Window Controls” section on page 4-3. Cisco Video Surveillance 2600 IP Camera User Guide OL-24127-02... -
Page 73: Home Window Controls
IP camera. When the speaker is unmuted, use this slider to adjust the volume at which your PC speakers play the audio from the IP camera. For information about enabling audio, see the “Audio Window” section on page 3-23. Cisco Video Surveillance 2600 IP Camera User Guide OL-24127-02... -
Page 74: Home Window Controls
Changes the state of the designated IP camera output port (1 or 2) as defined by button the Definition Mappings option in the I/O Ports window. For information about the Definition Mappings option, see the “Alarm I/O Ports Window” section on page 3-34. Cisco Video Surveillance 2600 IP Camera User Guide OL-24127-02... - Page 75 Improves video quality when the IP camera captures video in bright conditions. This button appears only if you configure the Day/Night Vision Switch Mode to Day or Night. For more information, see the “Video Window” section on page 3-16. Cisco Video Surveillance 2600 IP Camera User Guide OL-24127-02...
-
Page 76: Viewing Video Through Third-Party Devices Or Software
For more information, see the “Video Window” section on page 3-16 This section provides examples for how to access various video streams. For related information, see Cisco Video Surveillance API Reference Guide. Cisco Video Surveillance 2600 IP Camera User Guide OL-24127-02... - Page 77 • rtsp://ip_address/img/video.sav To access the secondary MPEG-4 stream with video and audio, enter this command: • rtsp://ip_address/img/media2.sav To access the secondary MPEG-4 stream with video only, enter this command: • rtsp://ip_address/img/video2.sav Cisco Video Surveillance 2600 IP Camera User Guide OL-24127-02...
- Page 78 To access the MPEG-4 stream with video only, enter this command: • rtsp://ip_address/img/video.sav To access the MJPEG stream with video and audio, enter this command: • rtsp://ip_address/img/jpgmedia.sav To access the MJPEG stream with video only, enter this command: • rtsp://ip_address/img/jpgvideo.sav Cisco Video Surveillance 2600 IP Camera User Guide OL-24127-02...
-
Page 79: Chapter 5 Troubleshooting
You or another user recently exited the configuration windows by exiting a browser without first clicking the Logout button. In this case, it can take up to 2 minutes before the configuration windows become available. Recommended Action Wait 2 minutes and try again. Cisco Video Surveillance 2600 IP Camera User Guide OL-24127-02... - Page 80 Clean the lens on the IP camera. Adjust the back focus as described in the “Adjusting Back Focus on the IP Camera” section on page 2-7. Configure options for video as described in the “Video Window” section on page 3-16. Cisco Video Surveillance 2600 IP Camera User Guide OL-24127-02...
-
Page 81: Appendix
A P P E N D I X Using the IP Camera with Cisco VSM Cisco Video Surveillance Manager (VSM) is a suite of powerful and flexible video surveillance applications that interoperate with a wide range of devices and cameras to provide a complete, standards-based video surveillance solution. -
Page 82: Appendix A Using The Ip Camera With Cisco Vsm
Appendix A Using the IP Camera with Cisco VSM Cisco Video Surveillance 2600 IP Camera User Guide OL-24127-02... -
Page 83: I N D E X
CDP (Cisco Discovery Protocol), enabling on camera half duplex 3-23 Cisco Video Surveillance IP Camera overview 3-23 See IP camera simplex 3-23 Cisco Video Surveillance Manager (VSM), using IP camera with status 3-39 Cisco Video Surveillance 2600 IP Camera User Guide IN-1 OL-24127-02... - Page 84 Mail & FTP window 3-27 described 3-21 Maintenance window 3-14 night to day threshold 3-22 Motion Detection window 3-29 validation time 3-22 navigating day mode 3-21 Network window 3-40 night mode 3-21 Cisco Video Surveillance 2600 IP Camera User Guide IN-2 OL-24127-02...
- Page 85 3-45 secondary FTP server primary 3-29 3-29 Subject field secondary 3-28 3-29 video file attachment 3-27 full duplex 3-23 Enable Iris button end time, day/night vision night schedule mode 3-22 Cisco Video Surveillance 2600 IP Camera User Guide IN-3 OL-24127-02...
- Page 86 See input ports, and see output ports General purpose input/output (GPIO) port Image window home position 3-37 options 3-39 I/O ports on 3-34 overview 3-39 installation Initialization window IP address 3-7, 3-40 options 3-26 Cisco Video Surveillance 2600 IP Camera User Guide IN-4 OL-24127-02...
- Page 87 3-42 disable log file enable clearing 3-42 storage of 3-40 video 3-46 viewing 3-42 Kensington lockdown equipment logical address, for PTZ controller 3-35 Logout button, in Main window 2-6, 2-7 Cisco Video Surveillance 2600 IP Camera User Guide IN-5 OL-24127-02...
- Page 88 Motion Detection window changing state options 3-30 connecting devices to overview 3-29 on IP camera mounting, IP camera power on state 3-34 MPEG-4 state change 3-34 status 3-39 multicast audio address Cisco Video Surveillance 2600 IP Camera User Guide IN-6 OL-24127-02...
- Page 89 Quality of Service (QoS), enabling 3-10 connecting Power over Ethernet (PoE) 1-5, 2-1 preset list 3-36, 3-37 preset position Ready LED configuring 3-35 rebooting, IP camera moving IP camera to Cisco Video Surveillance 2600 IP Camera User Guide IN-7 OL-24127-02...
- Page 90 3-23 SMTP log time stamp, on video 3-21 description 3-46 time zone, of IP camera SMTP server trigger, for event 3-31 configuring for e-mail notification troubleshooting 3-28 Cisco Video Surveillance 2600 IP Camera User Guide IN-8 OL-24127-02...
- Page 91 Video window frame rate 3-18, 3-19 options 3-17 image, viewing information about 3-39 overview 3-16 of event 3-27 VLC media player, viewing video through primary stream 3-16, 3-17, 3-18, 4-6 volume Cisco Video Surveillance 2600 IP Camera User Guide IN-9 OL-24127-02...
- Page 92 Index of audio from camera of PC microphone of PC speaker white balance, preset modes 3-20 zoom digital optical 3-36, 4-5 Cisco Video Surveillance 2600 IP Camera User Guide IN-10 OL-24127-02...