
Related Manuals for Honda FG100


Summary of Contents for Honda FG100
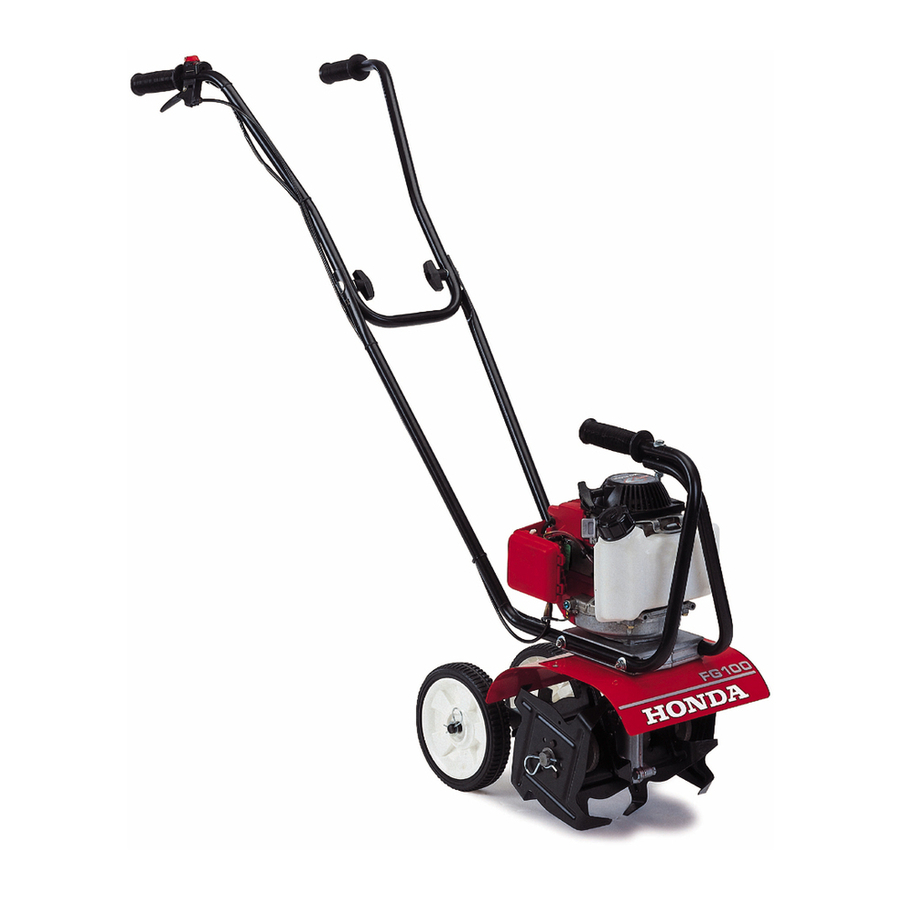
- Page 1 OWNER'S MANUAL Mini-Tiller FG100 See page 28 for instructions on assembling your FG100 Mini-Tiller. ¿Necesita un manual en Español? Vea a la página 44. © 1997, 2003 American Honda Motor Co., Inc. — All Rights Reserved...
- Page 2 B WARNING: B The engine exhaust from this product contains chemicals known to the State of California to cause cancer, birth defects, or other reproductive harm. Keep this owner’s manual handy, so you can refer to it any time, and make sure the manual stays with the tiller if you sell it.
- Page 3 FG100 TILLER INTRODUCTION Congratulations on your selection of a Honda Harmony FG100 Tiller. We are certain you will be pleased with your purchase of one of the finest tillers on the market. We want to help you get the best results from your new tiller and to operate it safely. This manual contains the information on how to do that;...
- Page 4 FG100 TILLER A FEW WORDS ABOUT SAFETY Your safety, and the safety of others, is very important. And using this tiller is an important responsibility. To help you make informed decisions about safety, we have provided operating procedures and other information on labels in this manual.
-
Page 5: Table Of Contents
FG100 TILLER CONTENTS TILLER SAFETY ..........4 ASSEMBLY............. 28 IMPORTANT SAFETY INFORMATION..4 THE IMPORTANCE OF PROPER ASSEMBLY ..........28 ATTACHMENTS AND MODIFICATIONS ..5 IMPORTANT SAFETY PRECAUTIONS..28 IMPORTANT MESSAGE TO EMPLOYERS. 5 UNPACKING ..........29 IMPORTANT MESSAGE TO PARENTS ..5 LOOSE PARTS .......... -
Page 6: Tiller Safety
Tie up or restrain long hair. Turn Engine Off When Not Tilling If you need to leave the tiller for any reason, even just to inspect the area ahead, always stop the engine. FG100 TILLER... -
Page 7: Attachments And Modifications
By always placing safety first, your youngster will acquire useful skills and a sense of accomplishment. And you’ll both get the best results from your tiller. FG100 TILLER... -
Page 8: Safety Label Locations
USE EXTREME CAUTION WHEN REVERSING OR PULLING THE MACHINE TOWARDS YOU. GASOLINE IS FLAMMABLE AND EXPLOSIVE. STOP ENGINE, AVOID HEAT, SPARKS, AND OPEN FLAME WHEN REFUELING. DANGER CONTACT WITH ROTATING TINES WILL CAUSE SERIOUS INJURY. KEEP HANDS, FEET, AND CLOTHING AWAY WHILE ENGINE IS RUNNING. FG100 TILLER... -
Page 9: Controls
KNOBS SPARK PLUG THROTTLE LEVER RECOIL STARTER GRIP CARRYING HANDLE FUEL CAP CHOKE LEVER TINE SHIELD PRIMING BULB AIR CLEANER ENGINE OIL FILLER CAP/ ENGINE OIL DRAIN TRANSPORT WHEEL OR DRAG BAR (Drag bar not shown) TILLING TINES FG100 TILLER... -
Page 10: Description Of Controls
(clear-plastic) engine that has run out of fuel. To ensure that fuel has reached the carburetor, press the priming bulb repeatedly until fuel can be seen in the clear-plastic fuel-return tube. CHOKE LEVER FG100 TILLER... -
Page 11: Transport Wheels
DRAG BAR Tine Spacers (included with tiller) The two outer tines can be removed to give you a narrower cultivating width. This will give you the ability to get between very closely spaced plants. TINE SPACERS FG100 TILLER... -
Page 12: Before Operation
Wear gloves, a long-sleeved shirt, and long pants made of heavy material. Clothing should fit closely but allow freedom of movement, and should have no strings, straps, etc. that could catch on brush or the tiller. Keep clothing fastened. Foot Protection Wear sturdy work boots with good toe protection and nonslip soles. FG100 TILLER... -
Page 13: Is Your Working Area Ready
Check throttle operation (see page 24). The throttle must operate smoothly for good throttle control. Check the fuel level (see page 25). Starting with a full tank will help to eliminate or reduce operating interruptions for refueling. FG100 TILLER... -
Page 14: Operation
To adjust the handlebar height, remove the two handlebar knobs, and the two 5/16-18 x 1 1/2 inch handlebar bolts. Move the upper handlebar hole to LOWER align with either the upper or lower holes in the HANDLEBAR lower handlebar assembly. ADJUSTING HOLES FG100 TILLER... -
Page 15: Starting/Stopping The Engine
If there is rotation at idle, adjust the idle speed correctly before using the tiller (see ENGINE SWITCH page 24). ENG. SW. Stopping The Engine 1. Release the throttle lever. 2. Move the engine switch to the OFF position. THROTTLE LEVER FG100 TILLER... -
Page 16: Tiller Operation
If the tiller still digs in, but will not move forward, raise the drag bar up a hole. • When turning, push down on the handlebars to bring the tiller’s weight to the rear; this will make turning easier. FG100 TILLER... -
Page 17: Tilling In Rocky Soil
This will require additional passes to till the area. When the tines are properly mounted, the angled portions of the tine blade should enter the soil first, not the straight portions. Angled portion should enter the soil first. FG100 TILLER... -
Page 18: Narrow Cultivating
Repeat LOCK this procedure for the other side. Secure the PIN (2) spacer with the lock pin in the outer hole. 6 inches TINE SPACER (2) FG100 TILLER... -
Page 19: Maintenance & Adjustments
Maintenance, replacement, or repair of the parts. Keep cigarettes, sparks, and flames away emission control devices and systems may be from all fuel-related parts. performed by any engine repair establishment or individual, using parts that are “certified” to EPA standards. FG100 TILLER... -
Page 20: Maintenance Schedule
(2) These items should be serviced by your authorized Honda servicing dealer, unless you have the proper tools and are mechanically proficient. Refer to the Honda shop manual for service procedures. (3) Log hours of operation to determine proper maintenance intervals. FG100 TILLER... -
Page 21: Engine Maintenance
(see page 20). Do not overfill. FILLER HOLE Engine oil capacity: 3.4 fl oz (100 cc) 4. Screw in the oil filler cap/dipstick securely. FG100 TILLER... -
Page 22: Air Filter
Make sure the air filter is properly installed and flush with the air cleaner base before installing the air cleaner cover. 5. Reinstall the air cleaner cover by hooking the retaining tabs and snapping the latch tab into place. CLEANER LATCH TAB AIR FILTER COVER FG100 TILLER... -
Page 23: Air Filter Cleaning
4. Wipe dirt from the air cleaner base and cover using a moist rag. Be careful to prevent dirt from entering the carburetor. ENGINE OIL 5. Reinstall the air filter and air filter cover (see page 20). 4. Squeeze out excess oil. FG100 TILLER... -
Page 24: Spark Plug
If installing a new spark plug, tighten 1/2 turn after the spark plug seats. NOTICE A loose spark plug can overheat and damage the engine. Overtightening the spark plug can damage the threads in the cylinder head. 7. Attach the spark plug cap. FG100 TILLER... -
Page 25: Spark Arrester
Replace the spark arrester if it is damaged. 8. Install the spark arrester, muffler cover, top cover, and recoil starter in the reverse order of disassembly. SPARK ARRESTER SCREEN SCREW, 5 mm (3) MUFFLER COVER SPECIAL SCREW SPECIAL SPARK EXHAUST SCREW DEFLECTOR ARRESTER FG100 TILLER... -
Page 26: Cooling Fins
2. Start the engine outdoors, and allow it to warm up to normal operating temperature. 3. Turn the throttle stop screw to obtain a stable idle, below the speed at which the tiller tines begin to turn. Standard Idle Speed: 3,100 ± 200 rpm FG100 TILLER... -
Page 27: Fuel System
Warranty does not cover parts damaged by misuse. Fuel can damage paint and plastic. Be careful not to spill fuel when filling your fuel tank. Damage caused by spilled fuel is not covered under the Distributor’s Limited Warranty . FG100 TILLER... - Page 28 5. Replace the filter if it is damaged or excessively dirty. 6. Rinse sediment from the fuel tank with nonflammable solvent. 7. Insert the fuel filter in the fuel tank, and install the fuel tank cap. WIRE FUEL SUPPLY TUBE (black) FUEL FILTER FUEL FILTER FG100 TILLER...
-
Page 29: Transmission Lubrication
9. Wear heavy gloves and reinstall the tines in the reverse order of removal. Install the lock pin through the round side of the tine shaft hole [a], then turn it over [b] to lock it in place. FG100 TILLER... -
Page 30: Assembly
To reduce the possibility of a fire or explosion, be careful when working around gasoline or batteries. Use only a nonflammable solvent, not gasoline, to clean parts. Keep all cigarettes, sparks, and flames away from all fuel-related parts. FG100 TILLER... -
Page 31: Unpacking
* The tine spacers are installed for narrow cultivating (see page 16). ** The drag bar is installed in place of the wheel assembly prior to tilling (see page 9). Place with Owner's Manual Genuine Oil 10W30 SJ Initial fill for the FG100 MINI-TILLER Not for Resale FG100 TILLER... -
Page 32: Tiller Assembly
2. Attach the left and right lower handlebars to the transmission mount with the one 1/4-20 x 6-inch bolt, and one 1/4-inch lock nut. Do not tighten the mounting bolt at this time. LEFT LOWER HANDLEBAR BOLT, 1/4-20 x 6 inch RIGHT LOWER HANDLEBAR TRANSMISSION MOUNT LOCK NUT, 1/4 inch FG100 TILLER... - Page 33 KNOB (2) SWITCH HARNESS THROTTLE CABLE 5. Install the handlebar grips on the upper handlebar. Use a small amount of liquid dish soap on the upper handlebar pipe to ease grip installation. HANDLEBAR BOLT, 5/16-18 x 1-1/2 in (2) FG100 TILLER...
- Page 34 Secure the green wire eyelet end to the engine block as shown. GREEN WIRE SMALL EYELET SCREW 11. Plug the male connector end of the black wire TERMINAL into the female connector hanging below the air cleaner cover. FG100 TILLER...
- Page 35 Genuine Oil LIMIT 10W30 SJ NOTICE Initial fill for the FG100 MINI-TILLER Not for Resale Running the engine with too little or too much oil can cause engine damage. 16. Screw in the oil filler cap/dipstick securely. 17. Temporarily place the tine spacers and drag bar in the owner’s manual bag.
-
Page 36: Transporting/Storage
Water in the air cleaner will soak the filter and can with a light film of oil. Lubricate the throttle cable enter the carburetor or engine, causing damage. core with a silicone spray lubricant. FG100 TILLER... - Page 37 This closes the valves so moisture cannot enter. After adding a fuel stabilizer, run the engine outdoors for 10 minutes to be sure that treated gasoline has replaced the untreated gasoline in the carburetor. FG100 TILLER...
-
Page 38: Storage Precautions
With the engine and exhaust system cool, cover the tiller to keep out dust. A hot engine and exhaust system can ignite or melt some materials. Do not use sheet plastic as a dust cover. A nonporous cover will trap moisture, promoting rust and corrosion. FG100 TILLER... -
Page 39: Taking Care Of Unexpected Problems
Check engine idle speed. Idle speed adjusted too high. Adjust idle speed. Contact an authorized Honda servicing Clutch springs worn or clutch system Replace clutch springs or replace or dealer, or refer to shop manual. faulty. repair other clutch system parts. FG100 TILLER... -
Page 40: Specifications
88 dBA at 3.4 ft (1 m) * Actual fuel consumption will vary depending on engine load conditions. TILLER Model FG100 A1 Description code FZCV Length x width x height 40.5 x 15.5 x 38.5 in (1080 x 395 x 980 mm) With drag bar 28.6 lb (13 kg) -
Page 41: Technical & Consumer Information
Engine Serial Number: GCAG _________________ CONSUMER INFORMATION Find an Authorized Honda Servicing Dealer in Your Area Call (800) 426-7701 or visit the Dealer Locator section of the Honda Power Equipment World Wide Web site: www.hondapowerequipment.com/dea.htm Honda Publications These publications will give you additional information for maintaining and repairing your tiller. You may order them from your Honda tiller dealer. -
Page 42: Warranty
To Obtain Warranty Service: You must take the Honda FG100 Tiller and proof of original retail purchase date, at your expense, to any Honda Power Equipment dealer in the United States, Puerto Rico, or the U.S. Virgin Islands who is authorized to service that product, during the dealer’s normal business hours. - Page 43 Apparel will be repaired or replaced under warranty without any charge. To Obtain Warranty Service: You must take the Honda Power Equipment accessory, replacement part, apparel or the power equipment on which the accessory or replacement part is installed, and proof of purchase, at your expense, to any Honda Power Equipment dealer in the United States, Puerto Rico, or the U.S.
-
Page 44: Emission Control System Warranty
You are responsible for presenting your power equipment engine to a Honda Power Equipment dealer as soon as a problem exists. The warranty repairs should be completed in a reasonable amount of time, not to exceed 30 days. - Page 45 To Obtain Warranty Service: You must take your Honda Power Equipment engine or the product on which it is installed, along with your warranty registration card or other proof of original purchase date, at your expense, to any Honda Power Equipment dealer who is authorized by American Honda Motor Co., Inc.
-
Page 46: Warranty Service Information
WARRANTY SERVICE INFORMATION Honda Power Equipment dealership personnel are trained professionals. They should be able to answer any question you may have. If you encounter a problem that your dealer does not solve to your satisfaction, please discuss it with the dealership’s management. -
Page 47: Oxygenated Fuels
Iow altitude use. Operation at altitudes below 5,000 feet (1,500 meters) with a modified carburetor may cause the engine to overheat and result in serious engine damage. For use at Iow altitudes, have your servicing dealer return the carburetor to original factory specifications. FG100 TILLER... -
Page 48: Emission Control System Information
Follow the maintenance schedule on page 18. Remember that this schedule is based on the assumption that your machine will be used for its designed purpose. Sustained high-load or high-temperature operation, or use in unusually wet or dusty conditions, will require more frequent service. FG100 TILLER... -
Page 49: The Air Index
Engine oil 08209-10W30 Tine “A” 72466-V06-003 Tine “B” 72465-V06-003 Tine “C” 72461-V06-003 Tine “D” 72462-V06-003 Silicone spray 08209-0001 Lubricates throttle cable core Fuel stabilizer 08732-0001 For long term storage Matte black touch-up paint 08707-NH105 For handlebar only (aerosol can) FG100 TILLER... - Page 50 INDEX Assembly ...............28 Maintenance: Air Filter................20 Air Filter ..............20 Cleaning ..............21 Cooling Fins ..............24 Inspection ..............20 Engine Oil..............19 Fuel System .............25 Idle Speed ..............24 Before Operation............10 Importance ..............17 Schedule ..............18 Spark Arrester ............23 Carburetor Adjustment...........24 Spark Plug..............22 Carrying Handle ...............9 Throttle Cable............24 Choke Lever..............8 Transmission .............27...
-
Page 51: Quick Reference
QUICK REFERENCE Maintenance Unleaded gasoline with a pump octane rating of 86 Type or higher Fuel See page 25. Capacity 0.75 US qt (.7l) Type SAE 10W-30, API SH or SJ See page 20. Engine oil Capacity 3.4 fl oz (100 cc) See page 19. - Page 52 POM52753G Printed on 45000.2003.10 31V06622 Recycled Paper PRINTED IN U.S.A.