Motorola DCT6400 User Manual
Dct6400 series phase iii high - definition dvr cable terminal
Hide thumbs
Also See for DCT6400:
- Installation manual (62 pages) ,
- User manual (43 pages) ,
- User manual (40 pages)
Table of Contents
Advertisement
Advertisement
Table of Contents

Related Manuals for Motorola DCT6400


Summary of Contents for Motorola DCT6400
- Page 1 User Guide DCT6400 Phase III High - Definition DVR Cable Terminal...
- Page 2 (servicing) instructions in the literature accompanying the appliance. REPAIRS If you find the unit in need of repair, call Motorola Support at 1-866-668-2271 or 1-866-MOT-BCS1. NOTE TO CATV SYSTEM INSTALLER This reminder is provided to call the CATV system installer’s attention to Article...
-
Page 3: Important Safety Instructions
IMPORTANT SAFETY INSTRUCTIONS Read these instructions. Keep these instructions. Heed all warnings. Follow all instructions. Do not use this apparatus near water. Clean only with dry cloth. Do not block any ventilation openings. Install in accordance with the manufacturers instructions. Do not install near any heat sources such as radiators, heat registers, stoves, or other apparatus (including amplifiers) that produce heat. -
Page 4: Regulatory Information
According to 47 CFR, Parts 2 and 15 for Class B Personal Computers and Peripherals; and/or CPU Boards and Power Supplies used with Class B Personal Computers, Motorola, Inc., 6450 Sequence Drive, San Diego, CA 92121, 1-800-225-9446, declares under sole responsibility that the product identifies with 47 CFR Part 2 and 15 of the FCC Rules as a Class B digital device. -
Page 5: Software License
TERMINATE AUTOMATICALLY if you fail to comply with the terms of this License. Motorola is not responsible for any third party software that is provided as a bundled application, or otherwise, with the Software or that is downloaded to, or otherwise installed on, the Product. - Page 6 (such as translation, transformation or adaptation) without written permission from Motorola, Inc. Motorola reserves the right to revise this publication and to make changes in content from time to time without obligation on the part of Motorola to provide notification of such revision or change. Motorola provides this guide without warranty of any kind, either implied or expressed, including but not limited to, the implied warranties of merchantability and fitness for a particular purpose.
-
Page 7: Table Of Contents
Connecting an A/V Receiver–Audio Only ........23 Connecting Your DCT6400 to a Stereo TV ......... 24 Connecting a Stereo TV ..............25 Connecting Your DCT6400 to a Stereo TV and Stereo VCR ..... 26 Connecting a Stereo TV and Stereo VCR........27... - Page 8 Connecting Your DCT6400 to an A/V Receiver, TV, and VCR ..28 Connecting an A/V Receiver, TV, and VCR........29 Recording Your Connections ..............30 Data Devices ..................31 Troubleshooting ..................32...
-
Page 9: Introduction
They will be happy to provide instructions for these optional services. In this guide, “DCT6400” refers to all DCT6400 Series Phase III cable terminals, including the DCT6412 and DCT6416. They function identically, but have different size hard drives. -
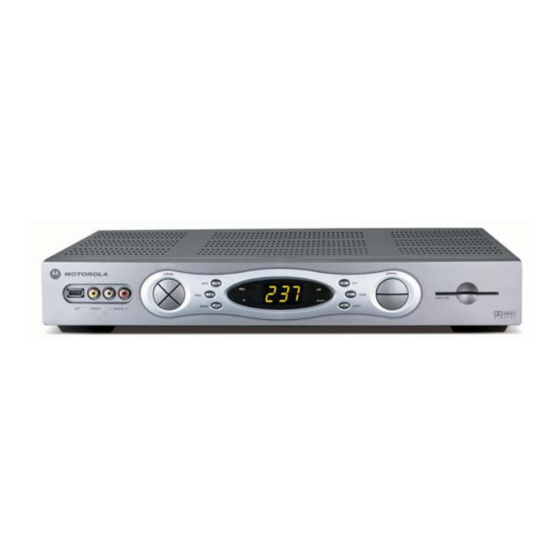
Page 10: Power Switch
Message indicator Lights when message is waiting POWER switch Turns unit on or off FRONT PANEL MENU switch Displays menu INFO switch Displays current channel and program information INFO MSGS. MENU POWER USB 2.0 VIDEO IN L AUDIO IN R Dual Tuner DVR / HDTV Capable USB 2.0 AUDIO IN (L/R)*... -
Page 11: Back Panel
500W MAX TV PASS CARD Y Pb Pr IEEE 1394 HDTV output HDTV video output HDMI SATA HDTV output Connects to external hard drive USB 2.0 connector * Your DCT6400 may not support all of the inputs and outputs shown. -
Page 12: Operation
MUTE For best audio quality, use the remote control to set the DCT6400 to approximately ¾ of the maximum volume level and then adjust the audio levels on external devices such as your TV or A/V receiver. -
Page 13: Digital Video Recorder
DCT6400 Phase III User Guide DIGITAL VIDEO RECORDER The DCT6400 contains a hard drive for the DVR to record standard- and high-definition programs. A standard VCR records and plays analog video. DVR records and plays digital video. Unlike an analog tape, the hard drive allows simultaneous recording and playback. -
Page 14: Optimizing Your Dct6400 For High-Definition Tv
OPTIMIZING YOUR DCT6400 FOR HIGH-DEFINITION TV The DCT6400 outputs HD video through its Y Pb Pr (component), HDMI, or IEEE 1394 connectors. This section describes how to optimize standard and HD video based on your HDTV and personal preferences. If you use the IEEE 1394 output, no adjustments to the settings are required. - Page 15 DCT6400 Phase III User Guide Use your remote control or the cursor keys on the front panel to navigate the on-screen display: • Press the ▲ and ▼ keys to highlight the setting you wish to change. • Press the ► key to select an option.
- Page 16 Setting Description Sets the display format for 4:3 standard-definition 4:3 Override programming. If the YPbPr Output is set to 1080i, 720p, or 480p, this setting defaults to 480i. If the YPbPr Output is set to 480i, this setting defaults to OFF and cannot be changed. Options are: •...
- Page 17 Restore All and press the ► key. Defaults For HDMI only, when you first connect a TV to the DCT6400 using the HDMI connection, the TV and the DCT6400 exchange information to automatically determine the best possible TV TYPE and HDMI/YPbPr OUTPUT settings. You can change these settings at any time: •...
-
Page 18: Additional Hdmi Settings
Additional HDMI Settings If an HDMI TV or home theater receiver is connected to the HDMI connector, the Additional HDMI Settings menu is available. It is not available if a DVI device is connected to the set-top using an HDMI-to-DVI adapter. ADDITIONAL HDMI SETTINGS NOTE: CHANGING THESE VALUES MAY RESULT... - Page 19 DCT6400 Phase III User Guide Setting Description Sets the audio mode for the HDMI connection: Audio Output • Auto— the set-top supplies audio in the format supported by the HDMI device • L-PCM— two-channel digital audio format similar to a compact disc •...
-
Page 20: On-Screen Graphics
ON-SCREEN GRAPHICS The DCT6400 can generate on-screen graphics that overlay the video programming or fill the entire television screen. The DCT6400 overlays these graphics whenever you display a menu, enable closed captions, or scroll through a program grid. On-screen graphics are available for all DCT6400 video outputs except... -
Page 21: Connecting Your Dct6400
DCT6400 Phase III User Guide CONNECTING YOUR DCT6400 This section describes connecting the DCT6400 to your home entertainment system. Instructions and diagrams are included for connections to: • HDTV • A/V Receiver–Audio • Stereo TV • Stereo TV and Stereo VCR •... -
Page 22: Important Safety Considerations
Dual Tuner DVR / HDTV Capable Follow these important safety guidelines when positioning and connecting your cable terminal: • Position the DCT6400 with at least two inches of space above and on all sides. • Do not block the slots and openings. -
Page 23: Video Connection Options
Composite video–standard only If your TV does not have an S-Video input, use the composite video ( ) output. VIDEO • RF coaxial–standard only If your TV only has a coaxial RF input, connect it to the DCT6400 connector. RF OUT... -
Page 24: Connecting Your Dct6400 To An Hdtv-Video Only
CONNECTING YOUR DCT6400 TO AN HDTV–VIDEO ONLY HDMI Component video IEEE 1394 connection connection connection DCT6400 Phase III OPTICAL AUDIO SPDIF SPDIF VIDEO ETHERNET RF OUT IEEE SWITCHED 1394 105-125V RF IN 2 CM IN HDMI RF IN 1 SATA... -
Page 25: Connecting Hdtv-Video Only
If your TV has a DVI input, you can use an HDMI-to-DVI converter cable to connect to the DCT6400 connector. HDMI For information on configuring your DCT6400 settings, see “Optimizing Your DCT6400 for High-Definition TV.” IEEE 1394 If your HDTV has an IEEE 1394 connector, you can connect an IEEE 1394 cable to the connector on your HDTV and the DCT6400. -
Page 26: Connecting Your Dct6400 To An Hdtv-Audio Only
CONNECTING YOUR DCT6400 TO AN HDTV–AUDIO ONLY Audio Optical SPDIF SPDIF audio connection connection connection DCT6400 Phase III OPTICAL AUDIO SPDIF SPDIF VIDEO ETHERNET RF OUT IEEE SWITCHED 1394 105-125V RF IN 2 CM IN HDMI RF IN 1 SATA... -
Page 27: Connecting Hdtv-Audio Only
SPDIF offers better audio quality, including support for Dolby 5.1 Surround Sound. HDMI and IEEE1394 carry video and audio. If you connect the DCT6400 to your HDTV using HDMI or IEEE1394, no additional audio connections to the TV are necessary. -
Page 28: Connecting Your Dct6400 To An A/V Receiver-Audio Only
CONNECTING YOUR DCT6400 TO AN A/V RECEIVER–AUDIO ONLY Audio SPDIF audio Optical SPDIF connection connection connection DCT6400 Phase III OPTICAL AUDIO SPDIF SPDIF VIDEO ETHERNET RF OUT IEEE SWITCHED 1394 105-125V RF IN 2 CM IN HDMI RF IN 1... -
Page 29: Connecting An A/V Receiver-Audio Only
SPDIF on the A/V receiver. • Coaxial SPDIF: Connect the digital audio cable to the SPDIF connector on the DCT6400 and the corresponding connector on the A/V receiver. • Stereo audio : Connect the stereo audio cable to the connectors on the DCT6400 and the corresponding AUDIO R connectors on the A/V receiver. -
Page 30: Connecting Your Dct6400 To A Stereo Tv
AUDIO If the TV has no S-Video input, use the composite VIDEO AUDIO connectors on the DCT6400. If the TV has an RF input only, use the connector on the RF OUT DCT6400. The RF connection carries video and audio. -
Page 31: Connecting A Stereo Tv
DCT6400. CABLE IN Connect the stereo audio cable to the connectors on AUDIO R the DCT6400 and the corresponding connectors on the stereo TV. Connect an S-video cable to the connectors on the VIDEO DCT6400 and the TV. -
Page 32: Connecting Your Dct6400 To A Stereo Tv And Stereo Vcr
CONNECTING YOUR DCT6400 TO A STEREO TV AND STEREO VCR RF (75 ohm) Video Audio connection connection connection DCT6400 Phase III OPTICAL AUDIO SPDIF SPDIF VIDEO ETHERNET RF OUT IEEE SWITCHED 1394 105-125V RF IN 2 CM IN HDMI RF IN 1... -
Page 33: Connecting A Stereo Tv And Stereo Vcr
Connect a video cable to the connector on the stereo OUTPUT VIDEO VCR and the connector on the stereo TV. INPUT VIDEO This video connection method does not support HD video. For more information, see “Connecting Your DCT6400 to an HDTV–Video Only.”... -
Page 34: Connecting Your Dct6400 To An A/V Receiver, Tv, And Vcr
CONNECTING YOUR DCT6400 TO AN A/V RECEIVER, TV, AND VCR RF (75 ohm) Video Audio Optical SPDIF connection connection connection connection DCT6400 Phase III OPTICAL AUDIO SPDIF SPDIF VIDEO ETHERNET RF OUT IEEE SWITCHED 1394 105-125V RF IN 2 CM IN... -
Page 35: Connecting An A/V Receiver, Tv, And Vcr
• Use the S-video connections instead of the standard RCA video connections. In most cases, S-video offers better video quality. This video connection method does not support HD video. For more information, see “Connecting Your DCT6400 to an HDTV–Video Only.”... -
Page 36: Recording Your Connections
Use this diagram to record connections between your home entertainment components. You can use this diagram to reconnect your system if you move the equipment or add new equipment. Disconnect the power from the DCT6400 before changing any connections. DCT6400 Phase III... -
Page 37: Data Devices
Do not attempt to connect data devices without contacting your service provider. Advanced data features require the proper application and network infrastructure to operate. In addition to high-quality audio and video, the DCT6400 can deliver high-speed data services such as Internet access, e-mail, IP telephony, e-commerce, and home banking. -
Page 38: Troubleshooting
DCT6400 front panel, not the TV or VCR. The angle between the remote control and the DCT6400 may be too large. Stand in front of the DCT6400 and not too far to either side. Press and release operation keys one at a time, firmly and deliberately. - Page 39 MUTE remote control to restore sound. channels If the DCT6400 audio output is connected to the TV, verify that the button on the TV was not pressed. MUTE If the DCT6400 audio output is connected to a home...
- Page 40 Verify that the TV is on and set to the appropriate input There is no video source for the DCT6400. on the TV screen Verify that the DCT6400 is on and tuned to an authorized cable channel. Verify that all video cables between the DCT6400 and the TV are firmly connected.
- Page 41 Turn on the 4:3 OVERRIDE feature in the User Settings menu. This enables most standard-screen TVs to display a full-screen picture when the DCT6400 is tuned to a 4:3 program. Set the TV TYPE to 4:3 Pan-Scan. This enables the DCT6400 to remove the black bars above and below the picture when possible.
- Page 42 The noise varies in volume occasionally when the speed of the internal fan adjusts to changes in the temperature around the DCT6400. Please note the hard drive will stay on even when the DCT6400 is turned off.