
Related Manuals for Casio DT-X30 R-50C


Summary of Contents for Casio DT-X30 R-50C
- Page 1 Handheld Terminal R-50C/R-50 User’s Guide Be sure to read “Safety Precautions” inside this guide before trying to use your Handheld Terminal.
- Page 2 Microsoft and Windows are either registered trademarks or trademarks of Microsoft Corporation in the United States and/or other countries. Information in this document is subject to change without advance notice. CASIO Computer Co., Ltd. makes no representations or warranties with respect to the contents or use of this manual and specifi...
-
Page 3: Table Of Contents
Contents Safety Precautions ..................E-3 Operating Precautions ..................E-8 Important ......................E-8 After Service ......................E-8 Regulatory Information .................E-9 Handheld Terminal System Confi guration ..........E-15 General Guide ....................E-17 Loading and Removing the Battery Pack ..........E-20 Loading ......................E-21 Removing ......................E-22 Charging the Battery Pack .................E-23 USB Cradle/Ethernet Cradle/Cradle-type Battery Charger ....... - Page 4 Using the Ethernet Cradle (HA-G62IO) ............E-40 General Guide ....................E-40 Specifi cations ..................... E-42 Using the Cradle-type Battery Charger (HA-G30CHG) ......E-43 General Guide ....................E-43 Specifi cations ..................... E-44 Using the Car Mounted-type Battery Charger (HA-G35CHG) ....E-45 General Guide ....................E-45 Specifi...
-
Page 5: Safety Precautions
Safety Precautions Congratulations upon your selection of this CASIO product. Be sure to read the following Safety Precautions before trying to use it for the fi rst time. Your neglect or avoidance of the warning and caution statements in the subsequent pages causes the danger of fi... -
Page 6: Lcd Screen
Warning Dust and Moisture Though the Handheld Terminal is dust and water splash resistant, its options including the battery pack are not. Keep loose metal objects and containers fi lled with liquid away from your Handheld Terminal and the options. Also, never handle the Handheld Terminal and the options while your hands are wet. - Page 7 Warning Avoiding Traffi c Accidents Never use your Car Mounted-type Battery Charger while operating a motor vehicle. Park your vehicle in a safe place before performing any operation. Never locate the Car Mounted-type Battery Charger where it might interfere with proper operation of the vehicle. Locate connecting cables as instructed by the manual, avoiding locations that can interfere with driving operations.
- Page 8 Immediately rinse it off with clean tap water and then consult a physician. Caution Replace only with the same type of battery pack recommended by CASIO. Dispose of used battery packs according to the local regulation. Keep the battery pack out of the reach of small children.
-
Page 9: Backup Copies Of All Important Data
Backup Copies of All Important Data Caution Note that CASIO Computer Co., Ltd. shall not be held liable to you or any third party for any damages or loss caused by deletion or corruption of data due to use of the Handheld Terminal, malfunction or repair of the Handheld Terminal or its peripherals, or due to the batteries going dead. -
Page 10: Operating Precautions
Operating Precautions Your Handheld Terminal and its options are precision. Improper operation or rough handling can cause problems with data storage and other problems. Note and observe the following precautions to ensure proper operation. Do not leave dead battery pack in the Handheld Terminal for a long period. Dead battery pack can leak, leading to malfunction and damage to the Handheld Terminal. -
Page 11: Regulatory Information
Regulatory Information DECLARATION OF CONFORMITY We, the under signed, CASIO Europe GmbH, hereby declare that the following equipment: Product: Handheld Terminal Models: DT-X30R Brand: CASIO are in conformity with all the provisions of the following EC directive with meeting the related test standards: Council Directive: 1999/5/EC (R&TTE Directive):... - Page 12 CASIO EUROPE GmbH Casio-Platz 1, 22848 Norderstedt, Germany Declaration of compliance with other relevant standards can be referred to at http://world.casio.com/system/pa/UsersGuide/sup85_e.html. The CASIO DT-X30 models are designed, tested and found to meet the relevant regulatory standards described below. DT-X30R International standards:...
- Page 13 ENGLISH Deutsch Français Disposal of Waste Electrical & Electronic Entsorgung von elektrischen & Traitement des appareils électriques et Equipment of products for Household use elektronischen Produkten für den électroniques en fin de vie par les (Applicable in the European Union only) Haushaltsgebrauch particuliers (anzuwenden nur in den Ländern der...
- Page 14 Svenska Bortskaffning av förbrukade elektriska & elektroniska produkter för hushållsbruk (Gäller enbart i den Europeiska Unionen) Denna symbol (en överkorsad soptunna) på produkten innebär att produkten ej ska blandas eller slängas med ditt hushållsavfall när den är förbrukad. Produkten ska lämnas till en lokal insamlingsplats för denna slags produkter för återvinning.
- Page 15 Suomi Sähkö- ja elektroniikkatuotteiden hävitysohjeet kotitalouksia varten (Vain Euroopan Unionia varten) Tuotteeseen merkitty symboli (ylitse ruksattu jätesäiliö) osoittaa, että tuotetta ei saa sekoittaa eikä hävittää talousjätteiden kanssa. Tuote on luovutettava sopivaan tällaisten laitteiden kierrätyksestä huolehtivaan keräyspisteeseen. Pyydä lisätietoja jäteasioista vastaavilta paikallisilta viranomaisilta.
- Page 16 E-14...
-
Page 17: Handheld Terminal System Confi Guration
Handheld Terminal System Confi guration Bundled Items Please check the contents in the box before using the Handheld Terminal for the fi rst time. DT-X30 Series DT-X30 Series Handheld Terminal Hand Belt Stylus The stylus is attached to the Handheld Terminal. User's Guide Options The illustration shows the... - Page 18 Options Battery Pack HA-G20BAT (Battery Pack) Soft Case Dual Battery Charger HA-G32DCHG AC Adaptor for USB Cradle/Ethernet Cradle/ Dual Battery Charger AD-S42120B-N Power Cord for Europe AC-CORD-EU Power Cord for North America AC-CORD-US Power Cord for Taiwan AC-CORD-TW Power Cord for Korea AC-CORD-KR Power Cord for Australia AC-CORD-AU...
-
Page 19: General Guide
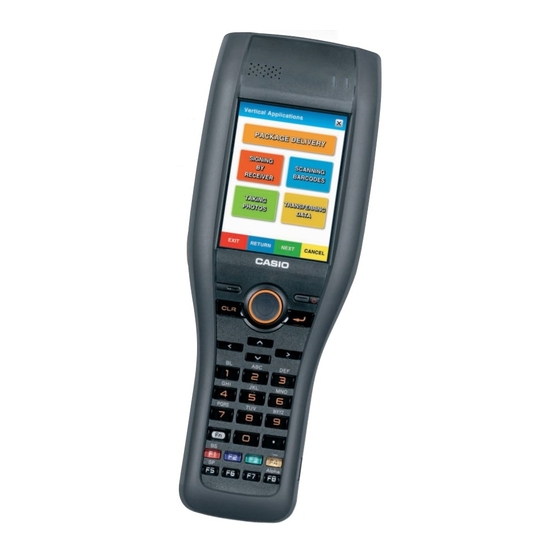
General Guide Left Front Right Back Bottom Battery compartment Speaker Generates audio and buzzer tones. Indicator 1 Orange: Charging Green: Charging complete Red: Battery pack error or the surrounding temperature is out of the charging temperature range. Indicator 2 Flashes blue when operating via Bluetooth or orange when operating via W-LAN. - Page 20 Screen Displays text and operating instructions. In addition, operations can be performed and data can be input using the stylus provided. Microphone Used for audio input (including voice). Power Key Turns the power on and off. CLR Key Used to clear one letter to the left of the cursor. Center Trigger Key Used to perform bar code reading.
- Page 21 25 Battery Pack Cover Used to cover the battery compartment that holds the battery pack inside. 26 Strap Holes Used to attach the hand strap. 27 Power Contacts Used to receive power provided by the USB Cradle or Ethernet Cradle. Also used for data communication. 28 microSD Card Slot microSD card slot.
-
Page 22: Loading And Removing The Battery Pack
Loading and Removing the Battery Pack Your Handheld Terminal uses two types of battery: a battery pack and a memory backup battery. The battery pack is used to power normal operations and to store data, while the memory backup battery (built-in) provides the power required to maintain memory contents when the battery pack power is unable to supply power for some reason. -
Page 23: Loading
Loading 1. Turn over the Handheld Terminal. 2. Remove the battery pack cover as follows: Slide the left and right lock switches for the battery pack cover to the “FREE” position. Hook your fi ngertips into the notches in the Handheld Terminal and lift the battery pack cover up in the direction indicated by the arrow. -
Page 24: Removing
Removing 1. Make sure that the Handheld Terminal is turned off. If the power is on, press the power key to turn it off. 2. Turn over the Handheld Terminal. 3. Refer to “Loading” on the previous page and remove the battery pack cover. 4. -
Page 25: Charging The Battery Pack
Charging the Battery Pack To charge the battery pack, use one of the cradles and the battery chargers following the procedure described below. Be sure to use the separately sold AC adaptor (AD- S42120B-N) to power the cradle or charger. Or, if you use the Car Mounted-type Battery Charger in a vehicle, use the accompanied Car Power Cable to power the charger. -
Page 26: Car Mounted-Type Battery Charger
Red Flashing: Battery pack problem Green: Charging complete Green Flashing: Standby due to the surrounding temperature being beyond the specifi ed temperature range (Approximately 0°- 40°C) (charging resumes when the temperature reaches the range.) Car Mounted-type Battery Charger Plug in the Car Power Cable accompanied in the box to the Car Mounted-type Battery Charger as illustrated below and the other end to the cigarette lighter socket in vehicle. -
Page 27: Attaching The Hand Belt
Attaching the Hand Belt The hand belt can be used to prevent the Handheld Terminal from fall when carrying it around. Attach the hand belt according to the procedure described below. To attach the hand belt 1. Thread the belt through the hand belt hole as shown in the fi gure. Then fold it back and secure using the hook-loop fastener. -
Page 28: Confi Guring Handheld Terminal Settings
Confi guring Handheld Terminal Settings Calibrating Touch Screen Alignment Whenever the response of the touch screen is poor, or the operations being executed do not match with the location you are tapping on the touch screen, please recalibrate the alignment of the touch screen using the following method. Press the “Fn”... -
Page 29: Using The Cmos Imager
Using the CMOS Imager 1. Turn on the Handheld Terminal, position its CMOS Imager reader port near the bar code or 2D code, and then press the Trigger Key. The aimer in a round shape is emitted onto barcode. 2. The Handheld Terminal reads the code by emitting laser and red lights. Indicator 2 (read operation indicator lamp) lights in green when the reading is successful. -
Page 30: Warning Label
Warning Label Laser Beam This label is a warning and caution label for Class 2 laser products that comply with IEC60825-1:2007. Although Class 2 laser light is only emitted momentarily, never look directly into the beam light. The laser light emitted by this laser scanner has a maximum output of less than 1 mW and a wavelength of 650 nm. -
Page 31: Performing Communications
Performing Communications IR Communication IR communication can be used to transfer data between two Handheld Terminals. When performing IR communication, orient the IR ports of both Handheld Terminals so they are pointing directly at each other. The ports can be in direct contact with each other, or they can be separated by up to 30cm ( ) (up to 20cm (7 ) for communication between units). -
Page 32: Bluetooth Communication
® Bluetooth Communication ® Bluetooth interface can also be used to transfer data between two Handheld Terminals. ® With Bluetooth the two Handheld Terminals should be located within about three meters ) from each other, as long as there is nothing blocking the path between them. '10 "... -
Page 33: Handling Microsd Cards
Handling microSD Cards The Handheld Terminal supports microSD card. Since the microSD card slot is located inside the battery pack compartment, fi rst remove the battery pack when installing or removing a microSD card. Refer to pages 20 to 22 for information on “Loading and Removing the battery pack”. Install (or replace) a microSD card according to the procedure described below. -
Page 34: Removing
Removing 1. Check that the power is turned off. If the power is on, always make sure to turn it off by pressing the Power Key. 2. Remove the battery pack. 3. Push in the card. Slowly remove the card after it slightly pops out. Press Press Press... -
Page 35: Resetting The Handheld Terminal
Resetting the Handheld Terminal Resetting the Handheld Terminal is the same as resetting a PC. Performing a reset causes all unsaved inputs and edits to be lost, but data that is already stored in the memory as well as all settings should be unaffected. Use reset to restore normal operation whenever the Handheld Terminal operates abnormally due to misoperation or some other reason. -
Page 36: Dt-X30 Specifi Cations
DT-X30 Specifi cations Model: DT-X30R-50C/R-50 ® CPU: Marvell PXA320 624MHz Memory: 128MB RAM, 128MB Flash ROM (user defi ned: 80MB) ® ® Microsoft Windows CE6.0R2 operating system, English Version Display: 3.5-inch, 320 240-dot 2-Way TFT color LCD CMOS Imager: Type: Long Range Imager Readable symbologies: 1D: UPC-A/UPC-E/EAN8 (JAN8)/EAN13 (JAN13)/Codabar... - Page 37 Battery Life: Battery pack: Approximately 18 hours* Approximately 10 hours** under the conditions that CPU speed is set to the auto power save mode, backlight is set to off, and the ratio of cyclic operation of “Standby, Key input, and Scanning” is set at 20:1:1.
- Page 38 Dimensional Drawing Approx. Approx. 49 mm (1 ") 87 mm (3 ") Approx. Approx. 59 mm (2 ") 46 mm (1 ") E-36...
-
Page 39: Using The Usb Cradle (Ha-G60Io
Using the USB Cradle (HA-G60IO) The optionally available USB Cradle (HA-G60IO) makes it possible to transmit system data and fi le data between the Handheld Terminal and a PC via a USB connection (download or upload). You can also use the USB Cradle to charge the battery pack installed in the Handheld Terminal. - Page 40 USB Client Port This port is used to transmit system data and fi le data (download, upload) by connecting the Cradle to a PC using a USB cable (DT-380USB). A dedicated driver must be installed in the PC before connecting the Cradle to the PC. USB Host Port This port is used to connect a corresponding USB peripheral device.
-
Page 41: Specifi Cations
Specifi cations 1. USB Protocol: USB Ver1.1 Standard Transfer Rate: 12Mbps (max.) 2. Charging Charging Method: Constant current/voltage Charge Period: Approximately 5 hours 3. Power Supply Power Source: AC adaptor (AD-S42120B) Consumption Current: 12V DC approximately 3.0A Output to Handheld Terminal: 9.5V DC 2.7A (max.) USB Host Output: 5V DC 0.5A (max.) 4. -
Page 42: Using The Ethernet Cradle (Ha-G62Io
Using the Ethernet Cradle (HA-G62IO) The optionally available Enthernet Cradle (HA-G62IO) makes it possible to transmit system data and fi le data between the Handheld Terminal and a PC via a USB or LAN connection (download or upload). You can also use the Ethernet Cradle to charge the battery pack installed in the Handheld Terminal. - Page 43 USB Client Port This port is used to transmit system data and fi le data (download, upload) by connecting the Ethernet Cradle to a PC using a USB cable (DT-380USB). The dedicated driver must be installed in the PC before connecting the Ethernet Cradle to the PC. USB Host Port This port is used to connect a corresponding USB peripheral device.
-
Page 44: Specifi Cations
Do not subject the Handheld Terminal and Ethernet Cradle to vibration or impact during communication. This can cause communication to be interrupted. When placing the DT-X30 into the cradle, make sure that it is seated properly and that the power LED at the front of the Ethernet Cradle is lit in green. Charging and communication will not proceed properly if the Handheld Terminal is not seated properly. -
Page 45: Using The Cradle-Type Battery Charger (Ha-G30Chg
Using the Cradle-type Battery Charger (HA-G30CHG) The optionally available Cradle-type Battery Charger (HA-G30CHG) lets you charge the Handheld Terminal’s battery simply by placing the Handheld Terminal onto the charger. General Guide Front Back AC Adaptor Jack Connect the AC adaptor (sold separately) here. Terminal Detect This switch detects when the DT-X30 is mounted correctly on the Switch... -
Page 46: Specifi Cations
Important ! Never short out the power contacts of the Cradle-type Battery Charger. This can damage the Cradle-type Battery Charger. Allowing the power contacts become wet can cause an electric shock or fi re. In addition, if the contacts become soiled, contact may be impaired resulting in poor charging. -
Page 47: Using The Car Mounted-Type Battery Charger (Ha-G35Chg
Using the Car Mounted-type Battery Charger (HA-G35CHG) The optionally available Car Mounted-type Battery Charger (HA-G35CHG) can be used to charge the battery installed in the Handheld Terminal using power from the cigarette lighter in your car. General Guide Left Front Back AC Adaptor Jack Connect the Car Power Cable (bundled) here. -
Page 48: Specifi Cations
Regarding the installation of HA-G35CHG in your car, no technical advice is available from CASIO. Consult with automotive parts store or specialized store regarding the installation method and mounting strength of the products installed in your car. -
Page 49: Using The Dual Battery Charger (Ha-G32Dchg
Using the Dual Battery Charger (HA-G32DCHG) The optionally available Dual Battery Charger (HA-G32DCHG) can be used to simultaneously charge two battery packs. General Guide Left Right Bottom Bundled Items Connection Bracket 2 screws E-47... - Page 50 Charge Indicator This LED indicates the charge status of the battery pack(s). Off: Not charging Red: Charging Red Flashing: Battery pack problem Green Flashing: Standby Green: Charging complete Power Contacts Power is supplied to the Handheld Terminal via these contacts. AC Adaptor Jack This is used to supply power by connecting the AC adaptor (sold separately).
-
Page 51: Connecting Multiple Dual Battery Chargers
Connecting Multiple Dual Battery Chargers You can connect up to three Dual Battery Chargers. Doing so makes it possible to supply power to all the Dual Battery Chargers using one dedicated AC adaptor. 1. As shown in the illustrations below, remove the connector covers of the Dual Battery Chargers you want to connect to each other. -
Page 52: Specifi Cations
Specifi cations 1. Charging Specifi cation Charging Method: Constant current/voltage Charge Period: Approx. 4 hours (1 standard battery pack, normal temperature) When charging two battery packs: Approx. 5.5 hours (2 standard battery packs, normal temperature) 2. Power Supply Power Source: AC adaptor (AD-S42120B*) Consumption Current: 12V DC 3.5A... -
Page 53: Using Rechargeable Battery Pack
Using Rechargeable Battery Pack HA-G20BAT Important! Store a battery pack in its special soft case whenever you are not using it. If the battery pack has been left over unused for a long period of time, the capacity remained decreases due to spontaneous discharge or chemical decomposition by the battery pack itself. - Page 54 CASIO COMPUTER CO., LTD. 6-2, Hon-machi 1-chome Shibuya-ku, Tokyo 151-8543, Japan...