TallyGenicom 9050N User Manual
9050n laser printer
Hide thumbs
Also See for 9050N:
- Quick start manual (208 pages) ,
- Datasheet (2 pages) ,
- Specifications (4 pages)
Table of Contents
Advertisement
Quick Links
Advertisement
Table of Contents
Troubleshooting

Related Manuals for TallyGenicom 9050N


Summary of Contents for TallyGenicom 9050N
- Page 1 9050N Laser Printer User Manual...
-
Page 2: Copyright Notice
EPA endorsement of any product or service. Copyright Notice This manual is Copyrighted © 2007 by TallyGenicom. All Rights Reserved. This manual may not be copied in whole or in part, nor transferred to any other media or language, without the express written permission of TallyGenicom. -
Page 3: Table Of Contents
Contents 1 About this Manual ....................1-1 Conventions ............................1-2 Safety Notes ............................1-2 Printer Orientation..........................1-2 2 Getting to Know Your Printer................. 2-1 Front view ............................2-1 Rear View............................2-2 Internal Components.......................... 2-3 Turning the Printer On and Off......................2-3 Turning the Printer On ........................ - Page 4 Loading and Printing in Tray 1 ..................... 3-11 Postcards ........................... 3-11 Loading and Printing in Tray 1 ..................... 3-12 Labels............................3-12 Loading and Printing ......................3-12 Custom Size Paper........................3-13 Tray Settings............................ 3-14 Source ............................3-14 Output Destination........................3-14 Input Tray Linking........................3-15 Output Bin linking........................
- Page 5 Click [Close] in the [Local Area Connection Status] dialogue box.......... 5-4 CONFIGURING AS A NETWORK PRINTER ................. 5-5 WINDOWS 95/98/ME ......................5-5 WINDOWS NT 4.0 ......................... 5-5 WINDOWS 2000........................5-6 WINDOWS XP AND VISTA ....................5-7 CREATING A SHARED PRINTER ....................5-8 Settings Windows NT 4.0/2000/XP/Server 2003 ..............
- Page 6 PRINTING FROM A MACINTOSH COMPUTER ................ 5-19 SYSTEM CONFIGURATION....................... 5-19 TARGET COMPUTERS ......................5-19 SET UP PROCEDURE ........................ 5-19 SNMP SUPPORT..........................5-19 PRECAUTIONS AND LIMITATIONS....................5-19 ON USING TCP/IP ........................5-19 Setting Up the Printer ......................5-19 Setting Up the Computer ....................5-20 PRINTING FROM WINDOWS....................
- Page 7 Paper Jam in MPF (Tray 1) ....................... 9-13 Paper Jams in Trays 2-5 ........................9-14 Paper Jam in Tray 6.......................... 9-16 10 Installing Accessories ..................10-1 Duplex Module..........................10-1 Two Tray or Tandem Tray Module ....................10-5 High Capacity Feeder (Tray 6) ......................10-9 Finisher............................
- Page 8 TOC-6 User Manual...
-
Page 9: About This Manual
Chapter 1: About this Manual Thank you for selecting the 9050N 50 ppm Laser printer. In this Chapter... This manual contains all of the information necessary to operate and care for your printer and accessories. It is • Conventions intended to be used with the pictorial unpacking •... -
Page 10: Conventions
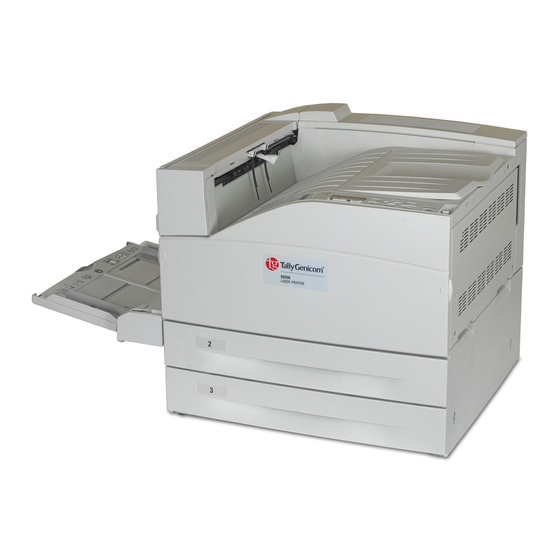
Conventions About this Manual The basic printer consists of the print engine main unit, consumables, Tray 1 (100 Sheet Multi Purpose Feeder (MPF)) as well as Trays 2 and 3 (500 sheet capacity each). Conventions This following conventions are used throughout this manual to emphasize certain procedures or information: NOTE: A note is a tip or extra information that may be helpful in installing or using the printer. -
Page 11: Getting To Know Your Printer
Chapter 2: Getting to Know Your Printer Front view In this Chapter... • Front view • Rear View • Internal Components • Turning the Printer On and Off • Available Printer Drivers • Understanding Printing Options • Operator Panel Features •... -
Page 12: Rear View
Rear View Getting to Know Your Printer Rear View Name Parallel Port, IEEE 1284 Ethernet 10/100 BaseT connection USB 2.0 connection Serial RS232 port Ground Fault Interrupt (GFI) reset Power cord connection Finisher power cord connection High Capacity Feeder (Tray 6) connection Finisher connection Tandem or Two Tray module (Trays 4 and 5) connection... -
Page 13: Internal Components
Internal Components Getting to Know Your Printer Internal Components Name Fuser Transfer Roll Drum Unit Toner Cartridge Turning the Printer On and Off Switch on the power before operating the printer. When you have finished using the printer for the day or you do not intend to use it for a long period of time, switch off the power. Turning the Printer On 1. -
Page 14: Turning The Printer Off
Available Printer Drivers Getting to Know Your Printer Turning the Printer Off 1. Make sure that the printer is not processing a print job. 2. Press the power switch to the < > position to turn the power off. Remember to turn off the printer at the end of day or when the printer will not be used for an extended period of time. -
Page 15: Operator Panel Features
Operator Panel Features Getting to Know Your Printer Operator Panel Features The Operator Panel is located on the front of the printer. It contains the display, indicators, and push buttons that allow you to view and change global printer settings. All features of the printer are accessible through the Operator Panel. -
Page 16: Push Buttons
Operator Panel Features Getting to Know Your Printer Push buttons The Operator Panel push buttons allow you to access and navigate menus, and also assist you in recovering from printer errors. The table below explains the functions of the eight push buttons. Button Name Function... -
Page 17: Navigating The Operator Panel Menus
Operator Panel Features Getting to Know Your Printer Navigating the Operator Panel Menus When you press the Menu button on the Operator Panel, you enter the printer’s menu system. At that point, the first line of the display contains the text “Menu”, indicating that you are in the menu system. -
Page 18: Embedded Web Server
Embedded Web Server Getting to Know Your Printer 2. Press the Next button until the text “Paper Menu” is shown on the second line of the display. 3. Press the Select button to enter the paper menu. 4. Press the Next button until the text “Copies” is shown on the second line of the display. 5. -
Page 19: Driver Printer Properties
Driver Printer Properties Getting to Know Your Printer Driver Printer Properties The Printer Properties window (the driver) can be accessed either from your application or through your Printer’s Printer and Faxes (Windows). To make changes that apply to all jobs, access Printer Properties via your Printers and Faxes Menu. - Page 20 Driver Printer Properties Getting to Know Your Printer The Printer’s configuration window appears. 3. On the General Tab, click Printing Preferences The Printer Properties window appears. 2-10 User Manual...
-
Page 21: Paper Usage
Paper Usage Getting to Know Your Printer Paper Usage This printer can print on paper that is commonly sold. Select paper suitable for use by referring to the table below. However, we recommend the use of the standard paper for clearer printing. NOTE: GSM indicates the weight of a 1 m sheet of paper. -
Page 22: Special Media Types
Paper Usage Getting to Know Your Printer Manufacturer Paper size Weight Xerox A5 80GSM Premier 80 GSM Xerox Recycled (Steinbeins) 80 GSM Stra Enso Multicopy 100 GSM Arjo Wiggins Conqueror High 90 GSM Speed Laser Laid Xerox Business 4-Hole 80 GSM Xerox 4-hole punched Nymolla 80 GSM Neusiedler ColorCopy... -
Page 23: Paper Tray Capacity
Paper Usage Getting to Know Your Printer Media Type Size Weight Manufacturer Transparency Xerox Type B Universal White Stripe Heavy media 160 GSM Premier 160 GSM Heavy media 200 GSM Premier 200 GSM Heavy media 160 GSM Premier A3 Paper Heavy media 120GSM Xerox Colotech+ (IP &... -
Page 24: Paper Weight By Tray
Paper Usage Getting to Know Your Printer Paper Weight by Tray Tray Number Weight 60-215 gsm 60 - 105 gsm 3, 4, 5 60-215 gsm Tandem and two tray feeders 60-215 gsm Duplex Unit 60- 215 gsm Available Paper Sizes All trays but MPF have paper size sensors to detect sizes. -
Page 25: Unusable Paper
Paper Usage Getting to Know Your Printer Paper Size Paper Tray Trays 2-5 Tray 6 and Tandem MPF (Tray 1) Tray Module Statement (5.5"x 8.5") Those listed below are categorized as “Irregular size paper” that cannot be detected automatically C5 Envelope (229x162mm) COM-10 (4.125"... -
Page 26: System Settings
System Settings Getting to Know Your Printer • Heat sensitive paper • Carbon paper • Paper with staples, paper clips, ribbons, or tape • Paper with rough surfaces such as pulp paper or fibrous paper • If acid paper is used, the characters might appear fuzzy. Replace it with alkaline paper. •... -
Page 27: Basic Printing Tasks
Chapter 3: Basic Printing Tasks Printing a Configuration Summary In this Chapter... Your printer can print a configuration summary that lists • Printing a the currently selected status of menu options, media Configuration selections in trays, options installed and other relevant Summary information about your printer. - Page 28 Loading Paper Basic Printing Tasks 2. Fan the paper to release sheets that may stick together. 3. Add paper to the tray without exceeding the maximum level. NOTE: Do not load paper exceeding the maximum fill line or the maximum capacity allowed. Align the right width guide with the paper width correctly.
-
Page 29: Loading Mpf (Tray 1)
Loading Paper Basic Printing Tasks 4. Insert the paper into the tray. If necessary, adjust the paper guides to the size of the paper. 5. Slide the paper tray back into the machine. 6. If custom sizes of paper are used, make the appropriate changes in your Printer Properties and at the Operator Panel as needed. - Page 30 Loading Paper Basic Printing Tasks 1. Lower the MPF tray. 2. Adjust the paper guides to the size of the paper. 3. Fan the paper to release sheets that may stick together. 4. Insert the paper into the tray. If necessary, adjust the paper guides to the size of the paper. 5.
-
Page 31: Loading Tray 6 Hcf
Loading Paper Basic Printing Tasks Loading Tray 6 HCF 1. Pull out the tray. 2. If loading paper with a different width or length, adjust the width and length guides. 3. Fan the paper to release sheets that may stick together. User Manual... -
Page 32: Printing A Test Page
Printing a Test Page Basic Printing Tasks 4. Insert the paper into the tray. 5. Push the tray completely into the printer. Printing a Test Page You can print a Demo (test) page to verify printer connectivity and operation. The most convenient way to enable this feature is by using your Printer Properties. You may also enable this feature at the Operator Panel or by using the EWS. -
Page 33: Selecting Paper Size
Basic Printing Basic Printing Tasks Selecting Paper Size You can select from a list of standard paper sizes. The most convenient way to enable this feature is by using your Printer Properties. You may also enable this feature at the Operator Panel or by using the EWS. To select the paper size through your Printer Properties: 1. -
Page 34: Skip Blank Pages
2-Sided Printing Basic Printing Tasks To select orientation through your Printer Properties: 1. Select the Paper tab within your Printer Properties. 2. Select the desired orientation. 3. Click OK. Skip Blank Pages If pages exist in your document that do not contain text, you may select not to print them. The most convenient way to enable this feature is by using your Printer Properties. -
Page 35: Binding Preferences
Printing on Special Media Basic Printing Tasks The most convenient way to enable this feature is by using your Printer Properties. You may also enable this feature at the Operator Panel or by using the EWS. To print on both sides of the paper from the your Printer Properties: 1. -
Page 36: Transparencies
Printing on Special Media Basic Printing Tasks Transparencies Transparencies can be printed from any tray. They should only be printed on one side. Before printing transparencies: • Remove all other media before loading transparencies into the tray. • Do not load transparencies above the fill line; this may cause the printer to jam •... -
Page 37: Envelopes
Printing on Special Media Basic Printing Tasks Envelopes Envelopes can printed using Tray 1. Read the following guidelines before printing envelopes. • Use envelopes specifically made for laser printers. • Make sure that envelopes are stored in a cool dry place and in their original packaging, if possible. -
Page 38: Loading And Printing In Tray 1
Printing on Special Media Basic Printing Tasks Loading and Printing in Tray 1 1. Insert the postcards in the tray with the following considerations: • Insert Large postcards long-edge feed and facedown. Place the top of the postcard to enter the printer first (left side of the printer) •... -
Page 39: Custom Size Paper
Printing on Special Media Basic Printing Tasks page toward the front of the printer. Trays 2-5 Tray 6 Tray 1 2. Adjust the paper guides to the size of the label sheets. 3. Change media type at Operator Panel via the Paper Menu’s Media Type selection. 4. -
Page 40: Tray Settings
Tray Settings Basic Printing Tasks 4. Select Custom Size. 5. Enter the paper parameters. 6. Name the custom size and add it. 7. Select the saved paper size from the paper size pulldown. 8. Click OK. 9. Click OK. 10. Click OK. Tray Settings You can configure a variety of settings for your input trays and output bins. -
Page 41: Input Tray Linking
Tray Settings Basic Printing Tasks 4. Click OK. Input Tray Linking When an input tray runs out of paper, auto tray changing enables the printer to switch to another available tray that contains the same size and paper type. You can select auto tray changing via the operator panel, Printer Properties, or web interface. -
Page 42: Job Offset
Job Offset Basic Printing Tasks driver requested media type and paper size. If the default input tray does not contain the requested media, the printer searches the other input trays to find one that has media matching the requirements. If none is found, the printer stops and asks you to load the requested media in the default input tray. -
Page 43: Using The Hole Puncher
Using the Hole Puncher Basic Printing Tasks To save a group of settings in your Printer Properties: 1. Set up your print job by choosing all options in the Printer Properties you wish to reuse. 2. Click the Save button located the Saved Settings pulldown in the Paper tab within your Printer Properties. -
Page 44: Using The Stapler
Using the Stapler Basic Printing Tasks 3. Place the Punch Waste Box back into the Finisher. 4. Close Door G. Using the Stapler Several stapling options are available in the layout tab within your Printer Properties. You can staple at different locations on the paper depending on whether one staple or two staples is used. The following table displays the location of the staple(s) based on the staple location selected. -
Page 45: Adding Staples
Using the Stapler Basic Printing Tasks Stapling Selection Orientation Staple Placement Dual Portrait Landscape The most convenient way to enable this feature is by using your Printer Properties. You may also enable this feature at the Operator Panel or by using the EWS. To turn stapling on through your Printer Properties: 1. -
Page 46: Cancelling/Checking Printing
Cancelling/Checking Printing Basic Printing Tasks 3. Remove the staple unit by lifting it up and out. 4. If present, remove the depleted staple cartridge. 5. Insert a new staple cartridge. 6. Insert the staple unit into the Finisher. 7. Close door G. Cancelling/Checking Printing Cancelling Printing To cancel printing, you can either cancel the print job at the printer or at the computer. - Page 47 Cancelling/Checking Printing Basic Printing Tasks From the displayed window, click the document name that you wish to delete and press the Delete key. User Manual 3-21...
- Page 48 Cancelling/Checking Printing Basic Printing Tasks 3-22 User Manual...
-
Page 49: Advanced Printing Tasks
Chapter 4: Advanced Printing Tasks Cover Pages In this Chapter... A cover page is the first page of the document. The printer • Cover Pages enables you to choose a different paper source for the cover page than for the rest of the document. You can then use a •... -
Page 50: Booklets
Booklets Advanced Printing Tasks 1. Select the Layout tab within your Printer Properties. 2. Click the Pages per Sheet checkbox. 3. Click Paper Layout Options. The Standard Nup window appears. 4. Enter the desired parameters. Select the desired numbers of pages per sheet. Check the box if a page border is desired. Select the page layout option and enter a bind margin. -
Page 51: Poster Print
Poster Print Advanced Printing Tasks Poster Print If you have a large page image that can not be printed on the available paper sizes, you can print the document in poster print. Poster Print prints the document to a full bleed (to the edges of paper) and breaks the document up into multiple pages. -
Page 52: Image Options
Image Options Advanced Printing Tasks Enable this feature is using your Printer Properties. Standard Copy, Draft, and Confidential watermarks are provided. You can view these by clicking on their name in the Watermark Pane of the Watermark Window. You can edit their settings or the settings of any configured watermark by clicking the Edit button. -
Page 53: Quality
Email Notifications Advanced Printing Tasks Quality For all Print driver versions, you can adjust quality settings. These include resolution (600 or 1200 dpi), toner saving (prints lighter text), and printing all text as black (darkens light text). Email Notifications You can choose to be notified by e-mail when your job has successfully printed. The most convenient way to enable this feature is by using your Printer Properties. -
Page 54: Direct Pdf Printing
Direct PDF Printing Advanced Printing Tasks 1. Select the Job Options tab within your Printer Properties. 2. Click Private Job 3. Enter the name of the job 4. Enter PIN number to be entered at the Operator Panel. 5. Click OK. To print a private job: 1. -
Page 55: Eforms
eForms Advanced Printing Tasks eForms eForms is a firmware-based feature which allows storing a print job up to 20 pages long. The job is stored as a compressed raster image in permanent storage. eForm enables the stored print job to be electronically merged with subsequent print jobs. Enable this feature is using your Printer Properties. -
Page 56: Job Accounting
Job Accounting Advanced Printing Tasks Enable this feature is using your Printer Properties. To create an overlay: 1. Access your printer’s properties from your application. 2. Select the Layout tab within your Printer Properties. 3. Click Overlay Options. The Overlay Window appears. 4. -
Page 57: Sending Files
Sending Files Advanced Printing Tasks Sending Files Accessed via the Send File menu in the EWS, this page allows you to select a file from the client computer (or any file-servers attached to the client computer) and send the file to the printer. - Page 58 Sending Files Advanced Printing Tasks 4-10 User Manual...
-
Page 59: Networking
Chapter 5: Networking SUPPORTED ENVIRONMENT In this Chapter... This printer can be connected to a network through the • Supported Ethernet interface. The printer supports multiple protocols. Environment As a result, one printer can be shared even from different • Configuration network environments. -
Page 60: Configuration
CONFIGURATION Networking CONFIGURATION The 9050 is a fast 100BASE-TX/10BASE-T network capable printer. It supports major protocols such as TCP/IP and Ethertalk. This section details configuring the printer's network interface and should be done prior to configuring your computer. IP ADDRESS The factory configuration is for the printer to obtain an IP address automatically from your networks’... -
Page 61: Printing From A Windows Computer
PRINTER SETUP USING THE EWS Networking PRINTING FROM A WINDOWS COMPUTER This chapter provides guidelines on how to print over the network from various Microsoft Windows platforms. There are numerous ways of printing from Windows and the exact set-up will vary depending upon your environment. There are also numerous versions of Windows, which can be configured as either a client, server or both. - Page 62 PRINTER SETUP USING THE EWS Networking 2. If not already configured, a suitable IP address, Subnet Mask and Gateway address should be configured. Please refer to the on-line help if necessary. It is vital that the IP address entered is unique and valid. Entering an incorrect IP address may cause severe network problems.
-
Page 63: Windows 95/98/Me
PRINTER SETUP USING THE EWS Networking 3. Double-click [Local Area Connection] and click [Properties] in the [Location Area Connection Status] dialogue box. 4. If the [Internet Protocol (TCP/IP)] is not listed, click [Install.]. 5. In the [Select Network Component Type] dialogue box, select [Protocol] then click [Add]. 6. -
Page 64: Windows Nt 4.0
PRINTER SETUP USING THE EWS Networking Insert the printer driver for Windows NT4.0. 1. Select [Start].[Settings].[Control Panel] and then double-click the [Network] icon. 2. In the Network dialogue box, click the [Services] tab. 3. If [Microsoft TCP/IP Printing] is not listed, click [Add]. 4. -
Page 65: Windows Xp And Vista
PRINTER SETUP USING THE EWS Networking 5. Select [Create a New Port] and select [Standard TCP/IP Port]. 6. Select [Next]. 7. The [Welcome to the Add Standard TCP/IP Printer Port Wizard] will appear. 8. Select [Next] and provide the following information. Enter [Printer name] or IP address, for example: 172.168.1.31. -
Page 66: Creating A Shared Printer
PRINTER SETUP USING THE EWS Networking 11. Ensure [Protocol] is set to [LPR]. 12. Ensure [Queue Name] is lp and [SNMP Status Enabled] is deselected. 13. Click [OK]. 14. Follow on screen instructions to finish installing the printer. Port 9100 1. -
Page 67: Settings Of Windows 95/98/Me
PRINTING FROM UNIX Networking Settings of Windows 95/98/Me 1. Click [Start], and then select [Settings], followed by [Printers]. The [Printers] window appears. 2. Double click [Add Printer]. The [Add Printer Wizard] dialog box appears. 3. Install the printer driver according to the on-screen instructions. Select [Network Printer] for the printer connection, then specify the shared printer created on Windows NT 4.0/ Windows 2000/Windows XP/Windows Server 2003 in the previous section. -
Page 68: Interface
PRINTING FROM UNIX Networking INTERFACE The printer LPD is available on the following interfaces: • Ethernet 100BaseTX • Ethernet 10Base-T The applicable frame types conform to Ethernet II. SET UP PROCEDURE The setting procedure is as follows: 1. Setting up the printer Set the IP address on the printer Operator Panel. -
Page 69: Examples Of Settings For Solaris 2.X
PRINTING FROM UNIX Networking EXAMPLES OF SETTINGS FOR SOLARIS 2.X The examples below show printer settings for Solaris 2.6 where the printer host name is printer1. 1. 1. Registering a printer (printer name: P001) supporting the PostScript language #lpadmin -p P001 -s printer1\!PS 2. -
Page 70: Precautions
PRINTING FROM UNIX Networking However, this option is effective when the printer is in the spool mode. In the non-spool mode, the client must be a Windows NT machine to use this option. Precautions • Among options not listed above (e.g. -m option), those not processed by the workstation which sends the print instructions will not be effective. -
Page 71: Job Number
PRINTING FROM UNIX Networking JOB NUMBER This option specifies the job number of the print data to be deleted. These numbers can be checked by issuing a “lpstat” command. This option is invalid in the non-spool mode. Precautions • Print data that consists of multiple files sent in one print instruction cannot be deleted file by file. -
Page 72: O [Printer Name]
PRINTING FROM UNIX Networking -o [Printer name] This option displays the print data received. The printer name is specified in the argument. This option displays all the information. -u [User name] This option displays received print data information on users of specified user names. -v [Printer name] This option displays the printer name and the device path name. -
Page 73: Selecting A Paper Tray
PRINTING FROM UNIX Networking Selecting a Paper Tray When selecting a paper tray, either the paper size or the tray itself is specified. If the paper size is specified, the printer automatically searches and selects the tray where the specified paper is loaded. -
Page 74: Specifying 2 Sided Printing
PRINTING FROM UNIX Networking Selecting a Paper Type The following parameters can be specified: Parameter Description PTS/pts Selects Plain paper. PT1/pt1 Selects Heavy weight paper 1. PT2/pt2 Selects Heavy weight paper 2. POH/poh Selects Transparency. PRC/prc Selects Recycled paper. Specifying 2 sided Printing The following parameters can be specified: Parameter Description... -
Page 75: Specifying Paper Size And 2 Sided Printing
PRINTING FROM UNIX Networking Specifying Paper Size and 2 sided Printing Select a paper size and a binding type. The following parameters can be specified: Parameter Description A4D/a4d 2 sided printing on A4 paper and long-side binding A4T/a4t 2 sided printing on A4 paper and short-side binding A5D/a5d 2 sided printing on A5 paper and... -
Page 76: Specifying Color And Print Modes
PRINTING FROM UNIX Networking Specifying Color and Print Modes The following color and print mode parameters can be specified: Parameter Description CC/cc Selects color for color mode and quality priority for print mode. CB/cb Selects color for color mode and speed priority for print mode. -
Page 77: Printing From A Macintosh Computer
PRINTING FROM A MACINTOSH COMPUTER Networking PRINTING FROM A MACINTOSH COMPUTER PRINTING FROM A MACINTOSH COMPUTER This section explains the installation procedure for printing from a Macintosh computer. SYSTEM CONFIGURATION As the printer supports EtherTalk and LPD protocol, you can print from Macintosh. NOTE > Printing using the LPD protocol is available only with the Mac OS X. -
Page 78: Setting Up The Computer
PRECAUTIONS AND LIMITATIONS Networking Setting Up the Computer • Be very careful in setting up IP addresses which are controlled as an entire system. Consult your network administrator before performing any setup on IP addresses. • Before performing any network setup (such as the IP address) to a host running under NIS (Network Information Service), consult the NIS administrator. -
Page 79: Delete
PRECAUTIONS AND LIMITATIONS Networking NOTE: Some client workstations may re-send immediately when the print data has exceeded the receiving capacity. When this occurs, the client workstation appears as if it has crashed. To rectify this situation, the client must be stopped from sending print data. NOTE: In the non-spool mode, multiple files can be printed by issuing one command. - Page 80 PRECAUTIONS AND LIMITATIONS Networking 5-22 User Manual...
-
Page 81: Installing Consumables
Chapter 6: Installing Consumables The Drum Unit and Toner Cartridge should be replaced In this Chapter... when they have reached the end of their print life. The Drum Unit prints up to 60,000 A4/letter images. The Toner • Installing the Drum Cartridge Cartridge prints up to 30,000 images. - Page 82 Installing the Drum Cartridge Installing Consumables 1. Open the printer front and side covers. 2. Remove the Drum Cartridge from the packing. 3. Remove the protective sheet from the Drum Cartridge. User Manual...
- Page 83 Installing the Drum Cartridge Installing Consumables 4. Avoid contact with internal surfaces and limit exposure to light for no longer than 5 minutes. Avoid contact with fingers. 5. Fold the handle down and slide the Drum Cartridge into the printer. 6.
-
Page 84: Installing The Toner Cartridge
Installing the Toner Cartridge Installing Consumables 7. Remove and discard the protective strip. 8. Close the printer covers. Installing the Toner Cartridge When installing the Toner Cartridge, take note of the following points: WARNING: Never throw a Toner Cartridge into an open flame. It could cause an explosion and you can get burned. - Page 85 Installing the Toner Cartridge Installing Consumables 1. Open the printer front and side covers. 2. Remove the Toner Cartridge from its packing. 3. Take the Toner Cartridge out of the box and shake it 8 to 10 times as shown in the diagram.
- Page 86 Installing the Toner Cartridge Installing Consumables 4. Slide the Toner Cartridge into the printer and seat firmly in place. 5. Close the printer covers. User Manual...
-
Page 87: Maintenance
Chapter 7: Maintenance Cleaning the Printer In this Chapter... This section describes how to clean the printer in order to • Cleaning the maintain the printer in good condition. Printer • When Not in Use CAUTION: Be sure to switch off and unplug the machine for a Long Time before accessing the interior of the machine for cleaning, •... -
Page 88: When Not In Use For A Long Time
When Not in Use for a Long Time Maintenance • Remove any remaining pieces of paper. • Remove any dust or stains with a dry clean cloth. When Not in Use for a Long Time Carry out the following procedure if you are not going to use the printer for a long period of time. - Page 89 Moving the Printer Maintenance If the optional paper trays have been installed, uninstall them before moving the printer. 1. Press the power switch to the < > position to turn the power off. 2. Remove all connection cords, such as the power cord and interface cables. WARNING: Never touch a power cord with wet hands.
- Page 90 Moving the Printer Maintenance 5. Open the front and side covers. NOTE: Do not touch any parts inside the printer. 6. Hold the Drum Cartridge by the grip to pull it out slowly. NOTE: It is necessary to remove the Toner Cartridge. If you move the printer with the Toner Cartridge installed, the toner may spill in the interior of the printer.
-
Page 91: Fuser Unit
Fuser Unit Maintenance NOTE: After removing the Toner Cartridge, put it into its original aluminum bag or wrap it with a thick cloth. 8. Close the front cover and side covers securely. 9. Lift the printer and move it gently. If the printer is to be moved over a long distance, pack it inside a box. -
Page 92: Transfer Roll Cartridge
Transfer Roll Cartridge Maintenance 2. Open the printer left side door. 3. Loosen the two knobs securing the Fuser to the frame. 4. Pull the Fuser toward you by holding the two handles. 5. Unpack the new from its container. Fuser 6. -
Page 93: Replacing The Transfer Roll Cartridge
Maintenance Kit Maintenance When handling the transfer roll cartridge, take note of the following points. WARNING: Never throw a transfer roll cartridge into an open flame. It can cause an explosion and you can get burned. Do not remove and reinsert the transfer roll cartridge in use. When the message to replace the transfer roll cartridge appears, replace the transfer roll cartridge. - Page 94 Maintenance Kit Maintenance • Paper Feed Rollers. Please contact your service department to install the kit when the printer panel requests this. User Manual...
-
Page 95: Troubleshooting
Chapter 8: Troubleshooting Your printer’s Operator Panel provides you with In this Chapter... information and troubleshooting help. When an error or warning condition occurs, the Operator Panel displays a • Poor Print Quality message informing you of the problem. • No Power •... - Page 96 Poor Print Quality Troubleshooting If the print quality does not improve after carrying out the appropriate action, contact our Printer Support Desk. Symptom CAUSES Solutions Light Prints -The overall image is 1. The paper may be damp. 1. Replace the paper. lighter than normal.
- Page 97 Poor Print Quality Troubleshooting Symptom CAUSES Solutions Vertical Line Deletions - There are 1. The paper may be defective 1. Replace the paper. areas of print deletions that form with creases, folds, etc. 2. Replace the drum cartridge. narrow lines. 2.
- Page 98 Poor Print Quality Troubleshooting Symptom CAUSES Solutions Unfused or Partially Fused Image - 1. The paper may be damp. 1. Replace the paper. The printed image is not fully fused to 2. Heavy or unusual paper may 2. Replace the paper with an approved the paper and easily rubs off.
-
Page 99: No Power
No Power Troubleshooting No Power Status Items to check Action There is no power. Is the power switched off? Press the printer switch to the <I> position to turn the power on. Is the power cord disconnected or not securely Switch off the power and connect the cord to the connected? power outlet and printer again. -
Page 100: Paper Incorrectly Fed
Paper Incorrectly Fed Troubleshooting Paper Incorrectly Fed Status Items to check Action Paper cannot be fed. Is the paper correctly set? Load the paper correctly. For Paper jams occur. transparencies, postcards or envelopes, Multiple sheets of paper are fed. fan them well first to allow air to enter Paper is fed at an angle. -
Page 101: When Using Windows 95/98/Me
Network Troubleshooting Troubleshooting WHEN USING WINDOWS 95/98/ME Cause Treatment The printer and the Status Display Unable to print (Network Error) computer are connected to Verification Check with the system administrator of the network different networks. verify that the network connecting the computer and that connecting the printer are linked by a router or a gateway. - Page 102 Network Troubleshooting Troubleshooting The Printer Is Not Printing Cause Verification Action Incorrect IP address. Ask the network Set up the correct IP address for the printer. administrator to check if the IP address is correct If LPD spool is set to [On], Check the remaining 1.
-
Page 103: When Using Unix
Network Troubleshooting Troubleshooting When Using Unix The printer is not Printing Cause Verification Action Incorrect IP address. Ask the network Set up the correct IP address for the printer. administrator to check if the IP address is correct Error occurs on the Activate the network As the network administrator to look into the network network connecting the... -
Page 104: Using Ethertalk
Network Troubleshooting Troubleshooting Cause Verification Action The data format of the Specify PSBIN on the client side for the printer name print job does not on the remote host to print a binary file in the con-form to the printing PostScript language. - Page 105 Network Troubleshooting Troubleshooting Cause Treatment Unable to obtain Cause 1 The print language of the printer and that of the print desired print results. drawer are different. Verification 1 Check the print language set up for the printer and that for the printer driver for Macintosh.
- Page 106 Network Troubleshooting Troubleshooting Cause Treatment Although it is connected, Cause 1 The printer is in the offline status. the printer Verification 1 Check whether Off-line is displayed on the printer does not print. Operator Panel. Action 1 Press the <ON LINE> button. Cause 2 The print language of the printer and that of the printer driver are different.
-
Page 107: Error And Warning Messages
Error and Warning Messages Troubleshooting Error and Warning Messages Message Description Action 0-1 Main Motor System Error Call Service 1-1 Main Motor Main Motor Error Call Service 1-4 Drum Motor Drum Motor Error Call Service 3-3 and 3-5 ROS Error Raster Output Scanner Error Call Service 4-1 through 4-9 Fuser Error... - Page 108 Error and Warning Messages Troubleshooting Message Description Action 2-1 Feed Error Paper Tray Area - Misfeed Jam Area B/Tray 2 2-2 Feed Error Paper Tray Area - Misfeed Jam Area B/Tray 3 2-3 Feed Error Paper Tray Area - Misfeed Jam Clear Area A 3-0 Feed Error Paper Tray Area - Misfeed Jam...
- Page 109 Error and Warning Messages Troubleshooting Message Description Action 9-3 Feed Error Paper Tray Area - Misfeed Jam Clear Area A 4-12 through 4-26 Finish Jam Finisher Jam (H-X'port Ent. sensor) Clear Area F 4-32 through 4-43 Finish Jam Finisher Jam (X’port Ent. sensor) Clear Area G 4-46 Finish Jam Finisher Jam (Buffer Path sensor)
- Page 110 Error and Warning Messages Troubleshooting Message Description Action 1-3 Tray Error Tray 3 Faulty Check Tray 3 1-2 Tray Error Tray 2 Faulty Check Tray 2 1-1 Tray Error Tray 1 Faulty Check Tray 1 Paper Out Tray 1 Paper Out Tray 2 Paper Out Tray 3 Paper Out Tray 4 Paper Out Tray 5...
- Page 111 Error and Warning Messages Troubleshooting Message Description Action 5-13 FIN Error Mechanical failure in Stacker Tray Call Service 5-21 FIN Error Mechanical failure in Tamper Call Service 5-22 - 5-23 FIN Error Mechanical failure in Tamper Call Service 5-31 - 5-34 FIN Error Mechanical failure in Punching Part Call Service 5-81 - 5-86 FIN Error...
- Page 112 Error and Warning Messages Troubleshooting Message Description Action No Punch Waste No punch scraps box Install Box 7-2 Drum NV Err DRUM NV Read/Write Error Replace Drum 3-1 Drum Missing DRUM cartridge not installed. Replace Drum 7-1 Drum Comm DRUM Communication failure Replace Drum 6-1 Drum EOL DRUM cartridge end of life...
- Page 113 Firmware is for wrong printer printer type Filter Error Intellifilter problem Contact the administrator ID Mismatch Incompatible toner Use TallyGenicom toner. Initializing Second stage of printer boot cycle None Normal Printer Operation IPADDR Collision The IP address in the printer is...
- Page 114 Error and Warning Messages Troubleshooting Message Description Action JOBLIB Error 03 JobLibrary private mode datastream Ensure the PIN is entered Press Start missing PIN. JOBLIB Error 04 JobLibrary datastream attempted to Ensure the PIN matches or Press Start overwrite a Private job, but PIN did change the Job Name not match.
- Page 115 Error and Warning Messages Troubleshooting Message Description Action Power Saver Mode Printer is in power save mode None Normal Printer Operation Printer automatically returns to normal mode when data is received or a key is pressed. Printing Job printing None Normal Printer Operation Processing Data received...
- Page 116 Error and Warning Messages Troubleshooting 8-22 User Manual...
-
Page 117: Clearing Paper Jams
Chapter 9: Clearing Paper Jams When there is a paper jam, refer to the following In this Chapter... procedures and follow the instructions. • Jam Area Locations CAUTION: Never touch areas labeled as “High Voltage.” • Jam at A You can get an electric shock. Never touch a labeled area found on or near the heat roller. -
Page 118: Jam At B
Jam at B Clearing Paper Jams 1. Open Door A. 2. Pull the jammed paper out of the printer. If necessary, press the green handle to move the paper to make it easier to remove. Confirm that all paper fragments are removed. 3. - Page 119 Jam at B Clearing Paper Jams 4. If the printer has the High Capacity Feeder (Tray 6), slide the feeder away from the printer. 5. Open Door B. 6. Pull the jammed paper out of the printer. Confirm that all paper fragments are removed. User Manual...
-
Page 120: Jam At C
Jam at C Clearing Paper Jams 7. Close Door B. 8. If the printer has the High Capacity Feeder (Tray 6), slide the feeder firmly against the printer. Jam at C Follow these steps to clear the jam. 1. If the printer has the High Capacity Feeder (Tray 6), slide the feeder away from the printer. - Page 121 Jam at C Clearing Paper Jams 2. Open Door C. 3. Pull the jammed paper out of the printer. Confirm that all paper fragments are removed. 4. Close Door C. User Manual...
-
Page 122: Jam At D
Jam at D Clearing Paper Jams 5. If the printer has the High Capacity Feeder (Tray 6), slide the feeder firmly against the printer. Jam at D Follow these steps to clear the jam. 1. Open Door D. 2. Pull the jammed paper out of the printer. Confirm that all paper fragments are removed. User Manual... -
Page 123: Jam At E
Jam at E Clearing Paper Jams 3. Close Door D. Jam at E Follow these steps to clear the jam. Use caution; some components inside Door A may be hot. 1. Open Door A. 2. Open Door E. User Manual... -
Page 124: Jam At F
Jam at F Clearing Paper Jams 3. Pull the jammed paper out of the printer. Confirm that all paper fragments are removed. 4. Close Door E. 5. Close Door A. Jam at F Follow these steps to clear the jam. User Manual... -
Page 125: Jam At G
Jam at G Clearing Paper Jams 1. Open Door F. 2. Pull the jammed paper out of the printer. Confirm that all paper fragments are removed. 3. Close Door F. Jam at G Follow these steps to clear the jam. User Manual... - Page 126 Jam at G Clearing Paper Jams 1. If visible, pull the jammed paper out of the stacker upper tray. 2. Open Door G. 3. Depending on the instructions shown on the Operator Panel, open handle 2a, handle 2b, or handle 3 as shown on the instruction labels. NOTE: If the stapler is in the way, slide the stapler toward you then to the right.
-
Page 127: Jam At H
Jam at H Clearing Paper Jams 7. Close Door G. Jam at H Follow these steps to clear the jam. 1. Lift Door H. 2. Pull the jammed paper out of the printer. Confirm that all paper fragments are removed. User Manual 9-11... -
Page 128: Jam At The Stacker Upper Tray
Jam at the Stacker Upper Tray Clearing Paper Jams 3. Close Door H. Jam at the Stacker Upper Tray Follow these steps to clear the jam. 1. Pull the jammed paper out of the stacker upper tray. 2. Open Door G. 3. -
Page 129: Paper Jam In Mpf (Tray 1)
Paper Jam in MPF (Tray 1) Clearing Paper Jams Paper Jam in MPF (Tray 1) Follow these steps to clear the paper jam in Tray 1. 1. Verify that the width guides are pressed against the paper. 2. If the paper size and type shown on the Operator Panel match the size and type of the paper in the tray, press the OK button. -
Page 130: Paper Jams In Trays 2-5
Paper Jams in Trays 2-5 Clearing Paper Jams 6. Close Door A. Paper Jams in Trays 2-5 Follow these steps to clear the paper jam in Trays 2-5. 1. Pull out the tray specified on the Operator Panel. 2. Verify that the length and width guides are pressed against the paper. 9-14 User Manual... - Page 131 Paper Jams in Trays 2-5 Clearing Paper Jams 3. Push the tray completely into the printer. 4. Specify the size of the paper in the Operator Panel. 5. Open Door A. 6. Pull the jammed paper out of the printer. If necessary, press the green handle to move the paper to make it easier to remove.
-
Page 132: Paper Jam In Tray 6
Paper Jam in Tray 6 Clearing Paper Jams 7. Close Door A. Paper Jam in Tray 6 Follow these steps to clear the paper jam in Tray 6. 1. Pull out Tray 6. 2. Verify that the length and width guides are set correctly NOTE: The default setting is for 8.5 x 11 in. - Page 133 Paper Jam in Tray 6 Clearing Paper Jams 3. Push the tray completely into the printer. 4. Specify the size of the paper in the Operator Panel. 5. Open Door A. 6. Pull the jammed paper out of the printer. If necessary, press the green handle to move the paper to make it easier to remove.
- Page 134 Paper Jam in Tray 6 Clearing Paper Jams 7. Close Door A. 9-18 User Manual...
-
Page 135: Installing Accessories
Chapter 10: Installing Accessories In this Chapter... • Duplex Module CAUTION! Be sure to switch off the power and unplug the • 1000 Sheet Feeder power cord from the outlet before carrying out the operations. or Tandem Tray Module • 2000 Sheet High Duplex Module Capacity Feeder •... - Page 136 Duplex Module Installing Accessories 3. Remove cover and save for possible reuse. 4. Slide the Exit 2 Module into position. 5. Close printer door A. 10-2 User Manual...
- Page 137 Duplex Module Installing Accessories 6. Place the Duplex Unit in position while inserting the 2 hooks on the bottom of the unit into the shown locations in the receptors of the printer. 7. Lift the Duplex Unit until the upper hooks are latched in the printer. 8.
- Page 138 Duplex Module Installing Accessories 9. Twist the 2 locking screws clockwise to secure the Duplex Unit to the printer. 10. Close the Duplex Unit cover. 10-4 User Manual...
-
Page 139: Two Tray Or Tandem Tray Module
Two Tray or Tandem Tray Module Installing Accessories 11. Remove the printer access cover (1), connect the Duplex Unit interface cable (2) and replace the printer access cover (3). 12. Connect the power cord. 13. Turn on the power switch of the laser printer. 14. - Page 140 Two Tray or Tandem Tray Module Installing Accessories 3. Unpack the Paper Feeder and remove cushioning materials, and confirm that all attachments are available. 4. Place the Paper Feeder in an installation location. 5. Fit the holes on the bottom of the laser printer with the four positioning bosses of the Paper Feeder, and place the laser printer on the Paper Feeder.
- Page 141 Two Tray or Tandem Tray Module Installing Accessories 7. Slide out the 2 drawers. 8. Remove all packing materials from both drawers. 9. Slide both drawers back into the Paper Feeder. User Manual 10-7...
- Page 142 Two Tray or Tandem Tray Module Installing Accessories 10. Remove printer drawer 3. 11. Insert the 2 locking screws, turning clockwise to secure the printer to the Feeder. 12. Replace drawer 3 back in the printer. 10-8 User Manual...
-
Page 143: High Capacity Feeder (Tray 6)
High Capacity Feeder (Tray 6) Installing Accessories 13. Remove the printer Interface Panel Cover (1), connect the Feeder Interface Connector (2) and replace the printer Interface Panel Cover (3). 14. Connect the power cord. 15. Turn on the power switch of the laser printer. High Capacity Feeder (Tray 6) 1. - Page 144 High Capacity Feeder (Tray 6) Installing Accessories 2. Remove the power cord from the printer. 3. Unpack the Paper Feeder and remove cushioning materials. 4. Slide the drawer out of the Paper Feeder. 10-10 User Manual...
- Page 145 High Capacity Feeder (Tray 6) Installing Accessories 5. Remove the packing material from the feeder drawer. 6. Slide the drawer back into the feeder. 7. Install the mounting bracket. 8. Slide the High Capacity Feeder to the mounting plate guiding it on the locating pin until it latches.
- Page 146 High Capacity Feeder (Tray 6) Installing Accessories 9. Remove the shipping hardware and discard. 10. Adjust the feet on the feeder assembly to set the feeder position parallel to the printer. 11. Connect the feeder power cord into the printer accessory outlet. 12.
-
Page 147: Finisher
Finisher Installing Accessories 13. Remove the shipping screws. 14. Adjust the feeder paper size guides. 15. Load the paper tray. 16. Connect the power cord. 17. Turn on the power switch of the laser printer. Finisher User Manual 10-13... - Page 148 Finisher Installing Accessories The finisher provides a main 3000 sheet lower stacker and a top 500 sheet stacker. It also provides a stapler for up to 50 sheets of standard paper and a hole punch. In Europe the punch has a 2 hole and a 4 hole capability while in the Americas, the punch is a 3 hole punch. 1.
- Page 149 Finisher Installing Accessories 5. Place the mounting bracket in position. 6. Insert the 2 mounting screws to secure the bracket. 7. Move the guides from the printer to the Exit 2 module. The guides are a two pieces of rubber and plastic that assist in stacking to the top of the printer.
- Page 150 Finisher Installing Accessories 9. Slide the Finisher into position engaging the latching hardware 10. Insert the Stacker Lower catch tray. 11. Remove the access cover and plug in the Finisher interface cable. 10-16 User Manual...
- Page 151 Finisher Installing Accessories 12. Remove the printer interface cover. 13. Connect the interface connector and replace the cover. 14. Connect Finisher power cord to the printer accessory power connection. 15. Level the Finisher making it parallel to the printer. User Manual 10-17...
- Page 152 Finisher Installing Accessories 16. Open the Finisher door. 17. Remove the internal tags and shipping brackets. 18. Move the catch to the right. 10-18 User Manual...
- Page 153 Finisher Installing Accessories 19. Insert the staple module 20. Unpack the paper punch waste container. 21. Insert the punch waste Dust container User Manual 10-19...
-
Page 154: Hard Disk Option
Hard Disk Option Installing Accessories 22. Fully seat into position. 23. Close the Finisher door. Hard Disk Option 1. Carefully review the safety precautions in the front of this guide before starting this installation procedure. 2. Ensure that the printer power switch is set to the OFF [O] position. 3. - Page 155 Hard Disk Option Installing Accessories 5. Turn screws on controller assembly counterclockwise until loose and gently pull cover towards you to remove from printer. 6. Carefully insert the Hard Drive into the socket, being careful not to damage the fragile pins.
-
Page 156: Memory Option And Compact Flash
Memory Option and Compact Flash Installing Accessories Memory Option and Compact Flash 1. Ensure that the printer power switch is set to the OFF [O] position. 2. Disconnect the power cord from the printer. 3. Remove side cover from printer. 4. - Page 157 Memory Option and Compact Flash Installing Accessories 6. Reinstall the side covers in reverse order. 7. Connect the power cord to the wall outlet. 8. Turn the printer power switch to the ON [I] position. User Manual 10-23...
- Page 158 Memory Option and Compact Flash Installing Accessories 10-24 User Manual...
-
Page 159: A Operator Panel
Appendix A: Operator Panel This Appendix provides a description of Operator Panel Menu and menu item. Navigate to items as described in “Navigating the Operator Panel Menus” on page 2-7. Paper Menu The Paper Menu provides access to the printer settings for various paper-handling functions. -
Page 160: Interface Menu
Interface Menu Operator Panel Submenus Default Setting Hole Punch Enables hole punching Custom Size Unit Inches This menu is used to set the unit of measurement for the Custom Paper Size feature. Interface Menu The Interface Menu provides access to the printer interface settings: Submenus Default Setting Port... - Page 161 Interface Menu Operator Panel Submenus Default Setting RTS Error XON ReadyBusy XON On1/Off1 XON Error DTR Polarity High RTS Polarity High Robust XON Delay Out Close Binary PS ETX/ACK Network 1 Setup This submenu allows you to set up the Network interface. Interpreter Auto Switch Format...
-
Page 162: Ps Menu
PS Menu Operator Panel Submenus Default Setting AppleTalk Current Zone Preferred Zone Binary PS Connection Speed Auto-Sense Bidirectional Wait-timeout SNMP On/Off Netware Setup Netware Netware Frame Auto-sense Netware Mode PSERVER Print Server Name DNS Tree Name NDS Context Job Poll Interval Print Server SAP Name Remote Print Number USB Setup... -
Page 163: Pcl Menu
PCL Menu Operator Panel PCL Menu The PCL Menu provides access to the PCL settings. Submenus Default Setting Orientation Portrait This submenu allows you to choose the orientation of the page. Font Source Internal This submenu allows you to choose a font source. Font Number This submenu allows you to set the font number. -
Page 164: System Menu
System Menu Operator Panel System Menu The system menu provides access to system settings Submenus Default Setting Display Language English This submenu allows you to change the language of the display messages. Wait Timeout 00020 This submenu allows you to increase or decrease the length of time (in seconds) that the printer will remain in the waiting state—a job is being processed, no end-of-file has been detected, and there is no more data to process. -
Page 165: Functions Menu
Functions Menu Operator Panel Functions Menu The following submenus are a series of executable commands . Command Definition Print Usage Rep Prints the usage report. Reset Reboots the printer Print Demo Prints a demo page. Print Summary Prints the configuration summary (same as pressing the Info button) Print Test Prints a test page. -
Page 166: Information Menu
Information Menu Operator Panel Information Menu The information menu provides data about the printer such as the product version, PostScript version and images printed. Options Menu The Options menu tells you which options are installed on the printer. User Manual... - Page 167 Index Numerics Configuration Summary 3-1 10/100 BaseT 2-2 Consumables 6-1 1000 Sheet Feeder 10-5 Contrast 4-4 1000-Sheet Feeder 2-2 Control Panel A-1 2000 Sheet Feeder 10-9 control panel 2-5 2000-Sheet Feeder 2-1, 2-2 conventions 1-2 2-Sided Printing 3-8 Copies 3-7 3500 Sheet Finisher 10-13 cover page 4-1 3500-Sheet Finisher 2-1...
- Page 168 Front Door 2-1 moving the printer 7-2 front view 2-1 Multiple Pages to Single Sheet 4-1 full-color transparencies 2-15 Multi-purpose feeder 2-1 Fuser 2-3, 7-5 NETWORK PRINTER 5-5 GFI 2-2 network trouble 8-6 Ground Fault Interrupt 2-2 Networking 2-16, 5-1 Next 2-6 Hard Disk Option 10-20 no power 8-1, 8-5...
- Page 169 Private Jobs 4-5 system settings 2-16 pulp paper 2-16 Punch Waste Basket 3-17 Tandem 2-1 tape 2-16 Quality 4-5, 8-1 TCP/IP 5-3 Test Page 3-6 RAM Option 10-22 Toner Cartridge 2-3, 6-4 Random or Spot Deletions 8-4 too thick 2-15 rear view 2-2 too thin 2-15 Repetitive Vertical Dark Streaks 8-3...
- Page 170 User Manual...
- Page 172 #08-22, Lam Soon Industrial Building No 14 Jalan 19/1 Singapore 669569 46300 Petaling Jaya Phone: +65 6760 8833 Selangor Darul Ehsan Fax: +65 6760 1066 Malaysia http://www.tallygenicom.com.sg Phone: +3 7625 1988 Fax: +3 7625 2688 http://www.tallygenicom.com.my © January 2008 TallyGenicom AG 255067-001A...