Table of Contents
Advertisement
Quick Links
Advertisement
Table of Contents

Related Manuals for Motorola M Series


Summary of Contents for Motorola M Series
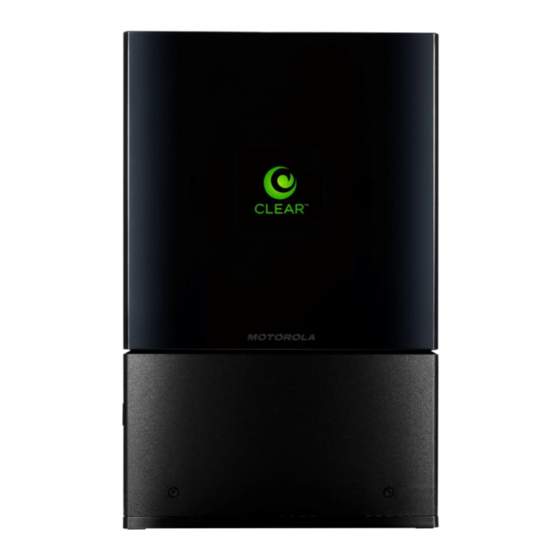
- Page 1 CLEAR MODEM (SERIES M) USER GUIDE...
- Page 2 GET TO KNOW YOUR CLEAR MODEM – SERIES M ’ S IN THE LED I NFORMATIVE NDICATORS SE WITH SET UP THE MODEM LACE THE ODEM ON A TABLE URFACE LUG IN THE ABLES CLEAR 4G ONNECT TO ONNECT TO THE...
- Page 3 NABLE TO BROWSE THE INTERNET ONNECT TO YOUR IRELESS ETWORK CLEAR MPORTANT ESSAGE FROM IMPORTANT INFORMATION ECHNICAL PECIFICATIONS STILL NEED HELP? S AND UPPORT ELEPHONE UPPORT UESTIONS ABOUT YOUR BILL MPORTANT NFORMATION OCUMENT ARRANTY NFORMATION EGAL ISCLOSURES...
-
Page 4: Informative Led Indicators
The LED indicators are located on the side of the CLEAR Modem – Series M (Modem). Signal Strength The Signal Strength LEDs indicate the strength of the CLEAR 4G signal (five LEDS lit indicates an excellent signal). Use with Care ... -
Page 5: Set Up The Modem
Set up the Modem Place the Modem on a Flat, Stable Surface Rotate the foot of the Modem and place it upright on a flat, stable surface. Do not place the Modem on its side or block the top air vents. The preferred location is near a window and away from obstructions. - Page 6 Set up the Modem (continued) Connect to CLEAR 4G After you’ve plugged in the cables, the Modem automatically will search for a CLEAR 4G signal. As the Modem is searching for the CLEAR 4G signal, five LED lights, located on the front of the Modem, will blink sequentially and then in unison.
-
Page 7: Connect To The Internet
Connect to the Internet The first time you connect to the internet with your Modem, you’ll be directed to a page to review your rate plan information, complete your CLEAR online account, and read / accept the CLEAR Terms of Service. -
Page 8: Manage Your Modem
Manage Your Modem CLEAR Modem Home Page Overview It’s easy to manage your Modem with the CLEAR Modem Home Page. Set up your Modem. Change security settings. View signal strength. View and upgrade the Modem firmware. - Page 9 Manage Your Modem (continued) CLEAR Modem Home Page / Wizard After you’ve logged in to the CLEAR Modem Home Page, you’ll see the Wizard application, which will guide you through the first time configuration of your Modem. Click “OK” to continue.
- Page 10 CLEAR Modem Home Page / Wizard / Device Time Next, set the time zone for your current location, and enable or disable “Auto Adjust” for Daylight Savings Time. Click “Apply” when you’re ready to change the time zone settings for your Modem.
- Page 11 WiMAX Service Provider: Displays the service provider with whom the Modem is activated. WiMAX Network State: Displays the operational state of the Modem. WiMAX Network Status: Displays the status of the Modem on the CLEAR 4G network. WiMAX Provisioning State: Displays the provisioning state of the Modem.
- Page 12 Manage Your Modem (continued) CLEAR Modem Home Page / Status / Network (continued) Lease Expires: Displays the time your Modem's Internet Address from CLEAR 4G network will expire and be renewed. DNS Servers: Displays the server(s) your Modem will query about Internet domain names (e.g.
- Page 13 Manage Your Modem (continued) CLEAR Modem Home Page / Status / Telephony Note: Telephony services are not available with the Modem. This screen can be opened, but no information will be presented, since telephony services are not available. The other links (Personalize, Internet, Status, Port Forwarding, Local Address, and Control Panel) appear on the top of all screens of the Modem Home Page.
- Page 14 Manage Your Modem (continued) CLEAR Modem Home Page / Personalize / Password Using a password may help prevent unauthorized access to your Modem. CLEAR recommends enabling password protection. Use this screen to enable and disable login password protection. Change the default password required to log in and manage your Modem. To log in to the Modem Home Page, you’ll need to enter a password.
- Page 15 Manage Your Modem (continued) CLEAR Modem Home Page / Personalize / Device Time Set the time zone for your current location, and enable or disable “Auto Adjust” for Daylight Savings Time. Click “Apply” when you’re ready to change the time zone settings for your Modem.
- Page 16 Manage Your Modem (continued) CLEAR Modem Home Page / Personalize / Device Name Change the device name of the Modem. The default device name is “mywimax.” The device name is the name you enter in an internet browser address bar to access your Modem.
- Page 17 Manage Your Modem (continued) CLEAR Modem Home Page / Personalize / Restore Factory Settings Use this screen to reset the Modem to the default factory settings. Note: It is important to note that many device settings will be reset to the factory default settings. For example, the password required to login and manage your Modem will be reset to “CLEAR123”, the...
- Page 18 CLEAR Modem Home Page / Internet / WiMAX Security Warning: This screen includes settings that could negatively impact the performance of the Modem, if set incorrectly. These settings should be modified only by advanced users or if directed by CLEAR Customer Care.
- Page 19 CLEAR Modem Home Page / Internet / Internet Protocol Warning: This screen includes settings that could negatively impact the performance of the Modem, if set incorrectly. These settings should be modified only by advanced users or if directed by CLEAR Customer Care.
- Page 20 CLEAR Modem Home Page / Advanced / Firewall Warning: This screen includes settings that could negatively impact the performance of the Modem, if set incorrectly. These settings should be modified only by advanced users or if directed by CLEAR Customer Care.
- Page 21 CLEAR Modem Home Page / Internet / Dynamic DNS Warning: This screen includes settings that could negatively impact the performance of the Modem, if set incorrectly. These settings should be modified only by advanced users or if directed by CLEAR Customer Care.
- Page 22 CLEAR Modem Home Page / Port Forwarding / Basic Warning: This screen includes settings that could negatively impact the performance of the Modem, if set incorrectly. These settings should be modified only by advanced users or if directed by CLEAR Customer Care.
- Page 23 CLEAR Modem Home Page / Port Forwarding / Forwarding Warning: This screen includes settings that could negatively impact the performance of the Modem, if set incorrectly. These settings should be modified only by advanced users or if directed by CLEAR Customer Care.
- Page 24 CLEAR Modem Home Page / Local Address / DHCP Server Warning: This tab includes settings that could negatively impact the performance of the Modem, if set incorrectly. These settings should be modified only by advanced users or if directed by CLEAR Customer Care.
- Page 25 Manage Your Modem (continued) CLEAR Modem Home Page / Local Address / Lease Status This screen displays the active DHCP lease, since the last reboot. For each active lease, the following information is displayed: Client Host Name: Displays the client host name. The name field is limited to 20 characters.
- Page 26 CLEAR Modem Home Page / Local Address / Lease Reservation Warning: This screen includes settings that could negatively impact the performance of the Modem, if set incorrectly. These settings should be modified only by advanced users or if directed by CLEAR Customer Care.
- Page 27 Manage Your Modem (continued) CLEAR Modem Home Page / Control Panel / Software This screen allows you to view/update your software information. Browse: Use the browse button to browse your computer for additional software packages. Once you have located the software package/ update you would like to add, click “Upgrade”.
- Page 28 Manage Your Modem (continued) CLEAR Modem Home Page / Control Panel / Certificate This screen allows you to manage the certificates that are stored on the computer. Browse: Use to locate the certificate file on your computer. Import: Use to import the certificate once you’ve located it on your computer.
- Page 29 CLEAR Modem Home Page / Control Panel / System This screen allows you to manage additional features on your Modem. Language Used in User Interface: Select the language for the User Interface (CLEAR Modem Home Page) – the default language is English.
- Page 30 Manage Your Modem (continued) CLEAR Modem Home Page / Control Panel / About This screen displays basic properties of your Modem: Port Number: Shows the port number being used by the Modem. Model ID: Shows the Model ID of the Modem.
- Page 31 Manage Your Modem (continued) CLEAR Modem Home Page / Telephony / Account Note: Telephony services are not available with the Modem. This Telephony screens (Account, Ring Tone, Caller ID, Call Forwarding, Voice Mail, and Special Numbers) can be opened, but cannot be changed since telephony services are not available.
-
Page 32: Quick Tips
When you find the strongest CLEAR 4G signal, reconnect the Modem to your computer. o If, for some reason, the room with the strongest CLEAR 4G signal is not where you want to put the Modem, consider using a longer Ethernet Cable or ordering a wireless router by logging in to your CLEAR online account. -
Page 33: Technical Specifications
Important Message from CLEAR If your browser is stuck on a message from CLEAR, follow the on-screen instructions in order to view the message and provide any requested information. If your account is past due, click the option to make a payment. You also can make a payment through our automated payment system, by calling 888-888-3113 and selecting option 2. -
Page 34: Warranty Information
Warranty Information See Section 6(d) of our Terms of Service (at www.clear.com/legal/terms) for warranty details. Legal Disclosures CLEAR coverage areas are limited. Actual CLEAR network performance may vary and is not guaranteed. See Device, Support, and other pages at www.clear.com...