Table of Contents
Advertisement
Quick Links
Advertisement
Chapters
Table of Contents

Related Manuals for NEC 910i


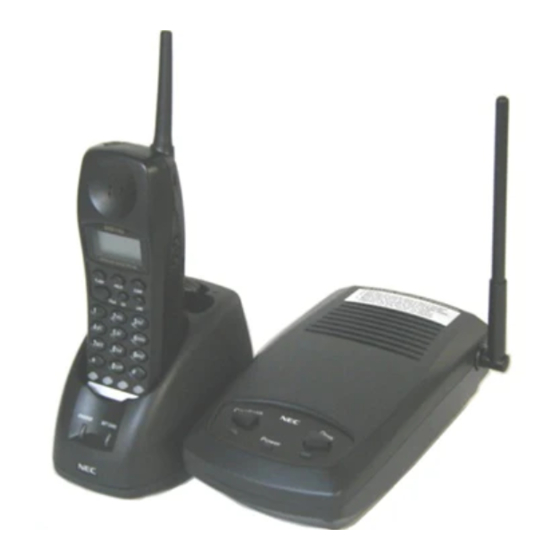
Summary of Contents for NEC 910i
- Page 1 910i Cordless Telephone Installation and User Guide...
- Page 2 No representation is made that this guide is complete or accurate in all respects and NEC America shall not be liable for any errors or omissions. In no event shall NEC America be liable for any incidental or consequential damages in connection with the use of this guide.
-
Page 3: Table Of Contents
Section 1 Installation In this section Page Precautions ......1-2 Installation ......1-6 Selecting the Installation Location . -
Page 4: Precautions
Before you read anything else, please observe the following: WARNING! NEC America Inc. DOES NOT represent this unit to be waterproof. To reduce the risk of fire, electrical shock, or damage to the unit, DO NOT expose this unit to rain or moisture. - Page 5 This phone is no exception. Caution: Changes or modifications to this product not expressly approved by NEC America, Inc. or operation of this product in any way other than as detailed by this Operating Guide, could void your authority to operate this product.
-
Page 6: Important Safety Instructions
Precautions Important Safety Instructions When using your telephone equipment, basic safety precautions should always be followed to reduce the risk of fire, electrical shock, and injury to persons, including the following: Read and understand all instructions. Follow all warnings and instructions marked on the product. Unplug this product from the wall outlet before cleaning. -
Page 7: Save These Instructions
Precautions CAUTION: To reduce the risk of fire or injury to persons by the battery, read and follow these instructions: Use only the appropriate type and size battery pack specified in this Operating Guide. Do not dispose of the battery pack in a fire. The cell may explode. Do not open or mutilate the battery pack. -
Page 8: Installation
Wall Mount Adaptor. If the phone is to be paired with a keyset, place both phones in the same area. Keep the base unit and handset away from sources of electrical noise (motors, fluorescent lighting, computers). Each 910i Cordless Telephone unit should be at least 5 feet away from any other 910i Cordless Telephone to avoid interference. -
Page 9: Applying Power To The Base Unit
Installation Applying Power to the Base Unit Use the supplied 10V adaptor. Applying Power to the Desktop Charger Use the supplied 9V AC adaptor. Wrap the power cord around the convenient notch on the bottom. IMPORTANT! Route the power cord where it will not create a trip hazard, or where it could become chafed and create a fire or other electrical hazard. -
Page 10: Wall Installation
4. Plug one end of the short telephone cord into the LINE jack on the Base Unit. Optionally, plug one end of an NEC keyset desk phone into the phone jack. Then place the telephone cord(s) inside the molded channel(s) on the bottom of the Wall Mount stand 5. -
Page 11: Attaching The Belt Clip To The Handset
Installation Desktop Charger Wall Mounting The Desktop Charger is also designed to be wall mounted. You can mount your phone directly on a wall. Before mounting your charging unit, consider the following: • Select a location away from electrical cables, pipes, or other items behind the mounting location that could cause a hazard when inserting screws into the wall. -
Page 12: Installing The Handset Battery
Installation Installing the Handset Battery 1. Remove the battery cover from the handset by pressing the latch and sliding the cover down until it comes off the handset. 2. Slide the top of the battery into position, then lower the bottom portion into place. Note that the battery has positive and negative indications. -
Page 13: Cleaning The Battery Contacts
Installation Cleaning the Battery Contacts To maintain a good charge, it is important to clean all charging contacts on the handset, desktop charger, and spare battery pack about once a month. Use a pencil eraser or soft dry cloth. Do not use any liquids or solvents. Contacts Contacts 1-11... -
Page 14: Upgrading The Firmware
Use these instructions when upgrading the Firmware ROM in your Cordless Telephone Base Unit. The 910i new ROM in your upgrade kit is a static-sensitive component. Be sure to follow the instructions below carefully. Failure to follow proper anti-static precautions could damage your new firmware. -
Page 15: Optional Equipment
The cordless phone allows for the connection of an optional keyset phone. The system can be programmed so that the keyset and/or the 910i Cordless Telephone rings. If there is no answer, it can then transfer to voice mail. This allows you to have a key- set phone to use while at your desk, and when you need to be away from your desk, you can carry the cordless phone with you. -
Page 16: System Programming
System Programming The following system programming is suggested for the best operation of your cordless phone: Programming - i-Series System In program 0004 - Automatic Extension Circuit Type Setup: 1. Have the system automatically set the circuit type for each extension (the cordless phone is identified as circuit type 1). In program 1006 - Programming Functions Keys (or SC 851): 1. -
Page 17: Troubleshooting
Troubleshooting Troubleshooting Procedures If your phone is not performing to your expectations, please try these simple steps. If you are still unable to resolve the problem, contact your communications manager. Problem Suggestion Charge light won’t come • Make sure the AC Adaptor is plugged into the desktop charger on when the handset is and wall outlet. - Page 18 Troubleshooting - For Your Notes - 1-16...
- Page 19 Section 2 Features In this section Page Basic Operation .....2-5 Using the Handset ....2-5 i-Series Features .
-
Page 20: In This Section
In this section Page Paging ......2-30 Park ......2-31 Park and Page (VAU) . - Page 21 In this section Page Park ......2-60 Personal Greeting ....2-60 Prime Line Selection .
- Page 22 - For Your Notes -...
-
Page 23: Basic Operation
Basic Operation Basic Operation Operation of the phone is performed using the handset out of the desktop charger. The exceptions are charging the handset bat- tery and transferring a call to your desk phone. For a Quick Reference Chart of feature operations, refer to pages 2-101 (i-Series system) or 2-103 (Onyx VSi system). Using the Handset When you pick up the handset and press TALK, you will see: When communication is made between the base unit and the handset, you will see:... - Page 24 - For Your Notes -...
-
Page 25: I-Series Features
i-Series Features... - Page 26 - For Your Notes -...
-
Page 27: Basic Feature Operation
i-Series System Outside Calls ☞ Function keys are normally line keys, but you can program them for other features. In this user guide, the feature assigned to a function key appears in parentheses next to the words FUNCTION KEY. For example, FUNCTION KEY (Hotline) means press the function key set for Hotline. - Page 28 Outside Calls i-Series System Converting from Pulse to Tone Dialing If your company is in a Dial Pulse area, you may need to change the dialing mode of your phone to tone (DTMF) after you place your initial call. This allows you to use dial-up services like electronic banking or a client’s Voice Mail. To change your dialing mode to DTMF: 1.
-
Page 29: Hold
i-Series System Hold Hold Hold places your call in a temporary waiting state until you can get back to it. While the call waits, you can process calls or use other features. And don’t worry if you forget about the call and leave it on Hold too long -- it will recall back to you. Your telephone system provides four types of Hold (see the chart below). -
Page 30: Intercom Calls
1. If your telephone rings, TALK. The Autotalk feature of the 910i Cordless Telephone allows a call to be answered without pressing TALK if the handset is lifted out of the Desktop Charger. To hang up, either press TALK or place the phone back into the charger. - Page 31 i-Series System Transfer Transferring Outside Calls To Transfer a call to a co-worker’s extension: 1. HOLD. You hear Transfer dial tone. 2. Dial co-worker’s extension number. If the extension is busy or doesn’t answer, you can dial another extension number or press the flashing line key to return to the call.
- Page 32 Transfer i-Series System Meet Me Internal Paging Transfer To make a Meet Me Internal Paging Transfer: 1. HOLD. 2. Dial 801 + Internal Paging code (00-64). 2. FUNCTION KEY (Internal Paging Zone). 2. Combined Paging Zone code (*1 + 0-8). 3.
-
Page 33: System Features
i-Series System Abbreviated Dialing System Features Abbreviated Dialing Abbreviated Dialing gives you quick access to numbers you call frequently. This saves time, for example, when calling a client with whom you deal often. Instead of dialing a long telephone number, you just use Abbreviated Dialing. There are three types of Abbreviated Dialing: Common, Group and Personal. -
Page 34: Account Codes
Account Codes i-Series System Account Codes Account Codes are codes you enter that help keep track of outside calls. There are three types of Account Codes: Optional, Forced and Verifiable. Optional Account Codes With optional codes, the Account Codes you enter are solely for categorizing your calls. For example, if you work in an account- ing firm that must bill back customers for time on the phone, Optional Account Codes are for you. -
Page 35: Automated Attendant (Vau)
i-Series System Call Forwarding Automated Attendant (VAU) This feature requires a Voice Announce Unit (VAU). Automated Attendant automatically answers your system’s outside calls, plays a prerecorded greeting and then lets callers direct- ly dial you or your co-workers. This gives your system immediate answering and routing of calls without an operator or dispatch- er. -
Page 36: Call Forwarding Off-Premise
Call Forwarding i-Series System 1. TALK + FUNCTION KEY (Call Forward to Station). With Call Forwarding activated, the FUNCTION KEY will flash. 2. Dial Call Forwarding condition: 2 = Forward calls when extension is busy or not answered 4 = Forward calls immediately 6 = Forward calls when your extension is not answered 7 = Forward calls immediately to the destination with simultaneous ringing at both extensions (not for Voice Mail) -
Page 37: Call Forward Follow Me
i-Series System Call Waiting (Camp On) Call Forward Follow Me While you are at a co-worker’s desk, you can direct your calls to your co-worker’s extension. Use Call Forward Follow Me if you get detained with your co-worker longer than expected. Instead of ringing your own phone unanswered, your calls will ring you where you are. -
Page 38: Callback
Callback i-Series System Callback When you call a busy extension, you can leave a Callback request for a return call. You do not have to repeatedly call the busy extension back, hoping to find it idle. When you leave a Callback, the system handles your request as follows: ●... -
Page 39: Conference
i-Series System Department Calling Conference Conference lets you add additional inside and outside callers to your conversation. With Conference, you can set up a multiple- party telephone meeting without leaving the office. The system allows either four or eight parties maximum per Conference. To set up a Conference: 1. -
Page 40: Department Step Calling
Department Calling i-Series System Priority Routing Call Call Call With Circular Routing, each call rings a new extension. Circular Routing Call 1 Call 2 Call 3 Call 4 To call a Department Group: 1. TALK + Department Group pilot number. To log out of your Department Group: 1. -
Page 41: Directed Call Pickup
i-Series System Door Box Directed Call Pickup Use Directed Call Pickup when you need to answer a call ringing another extension without leaving your phone. This lets you easily cover a co-worker’s calls when they have to be away from their desk. To intercept calls ringing a co-worker’s phone: 1. -
Page 42: Flash
Flash i-Series System Flash Flash allows you to access certain features of the telephone company or PBX to which your phone system is connected. This lets you take full advantage of whatever features the connected telephone company or PBX offers. To flash the outside line you are on: 1. -
Page 43: Headset
i-Series System Last Number Redial Headset If you have a Headset, you can use it instead of the handset. Using the headset frees up your hands for other work. To install the Headset: 1. Lift the rubber cover on the headset jack on the phone. 2. -
Page 44: Line Preference
Line Preference i-Series System Line Preference Line Preference determines how you place and answer calls. There are two types of Line Preference: Incoming Line Preference and Outgoing Line Preference. Ask your Communications Manager which type you have. Incoming Line Preference Incoming Line Preference sets how you answer calls. -
Page 45: Meet Me Paging
Don’t keep recalling a busy or unanswered co-worker. Leave them a Message Waiting request for a return call instead. The request is a ENVELOPE icon (on the 910i Cordless Telephone) or a flashing MW lamp (on a keyset) at the extension you call and a MSG icon on your phone. -
Page 46: Microphone Cutoff
Message Waiting i-Series System To cancel all your Messages Waiting: This includes messages you have left for other extensions and messages other extensions left for you. 1. TALK + 873. 2. TALK to hang up. To cancel messages you left at an extension: 1. -
Page 47: Off Hook Signaling
i-Series System Off Hook Signaling There are two types of Night Service ringing for outside calls: Assigned Night Answer (ANA) and Universal Night Answer (UNA). With ANA, specific telephones are programmed to ring at night (like the security desk in the example above). UNA caus- es incoming calls to ring over the External Paging speakers. -
Page 48: One-Touch Calling
Off Hook Signaling i-Series System If the extension you call has Handsfree . . . When your Off Hook signal voice-announces, your co-worker can respond by just speaking toward their phone. Their telephone’s Handsfree microphone picks up their voice. Your co-worker’s initial call continues uninterrupted. If the extension you call does not have Handsfree . -
Page 49: Park
i-Series System Park External Paging If you have your own external speaker system installed, you may be able to use it for External Paging. This is particularly helpful in large or noisy areas where the Internal Paging speakers in the telephones are not loud enough. Your system can have All Call External Paging and up to 8 zones of External Zone Paging. -
Page 50: Park And Page (Vau)
Park i-Series System To pick up a call parked at an extension (yours or a co-worker’s): If parked at your extension: 1. TALK + 857. If parked at a co-worker’s extension: 1. TALK + ** + Co-worker’s extension. Park and Page (VAU) This feature requires a Voice Announce Unit (VAU). -
Page 51: Programmable Function Keys
i-Series System Programmable Function Keys To activate Personal Greeting for your phone: 1. TALK + *4. 1. TALK + FUNCTION KEY (Call Forward to Device). 2. Press 7 + When you hear, ”Please start recording,” record your Personal Greeting. If you already have Personal Greeting or Park and Page set up, you can dial: 7 to re-record 5 to listen (then # to listen again) 3 to erase (then optionally HOLD to cancel the erase) - Page 52 Programmable Function Keys i-Series System Programmable Function Key Codes For this feature Use key When you are Or dial code Abbreviated Dialing 1037 Dialing a stored Common Abbreviated Dialing number #2 + bin 1038 Dialing a stored Group Abbreviated Dialing number #4 + bin Barge In 1019...
-
Page 53: Reverse Voice Over
i-Series System Reverse Voice Over Programmable Function Key Codes For this feature Use key When you are Or dial code Paging, External 1004 + zone Making an external zone page 803 + zone 1005 Making an external All Call page 803 + 0 Paging, Internal 1006 + zone Broadcasting to an Internal Paging Zone... -
Page 54: Ringdown
Reverse Voice Over i-Series System When You’re On a Call To place a Reverse Voice Over Call: 1. Press and hold FUNCTION KEY (Reverse Voice Over). To return to your initial caller: 1. Release FUNCTION KEY (Reverse Voice Over). When Your Phone is Idle To place a call to your Reverse Voice Over destination: 1. -
Page 55: Secretary Call
i-Series System Selectable Display Messages To clear your saved number: 1. TALK + 885 + TALK to hang up. Secretary Call Secretary Call Buzzer Secretary Call Buzzer lets you alert a co-worker without disturbing their work. They can then call you on the Intercom when it’s convenient. -
Page 56: Serial Call
Selectable Display Messages i-Series System Message Appended with . . . IN MEETING UNTIL Time (when meeting done) OUT UNTIL Time (when returning) OUT-PLEASE CALL 8 digits (phone number) PLEASE CALL ME ON 8 digits (phone number) BUSY CALL AFTER 8 digits OUT FOR LUNCH BACK AT Time (when returning) -
Page 57: Tandem Trunking
i-Series System Trunk Queuing Tandem Trunking Tandem Trunking lets you set up a Conference with two outside callers and then drop out of the call -- leaving the callers talking in an Unsupervised Conference. Once you drop out you are not part of the conversation. The Unsupervised Conference continues until either outside caller hangs up. -
Page 58: Voice Announce Unit (Vau) Messages
Trunk Queuing i-Series System To queue for a busy line: 1. Try to access outside line. Listen for busy tone. 2. Press 2 or FUNCTION KEY (Trunk Queuing). 3. Hang up to leave a Trunk Queuing request. 3. Wait without hanging up for the line to become free. To answer when Trunk Queuing calls you back: 1. -
Page 59: Voice Over
i-Series System Voice Over Calling Your Mailbox To call your mailbox: 1. TALK + FUNCTION KEY (Voice Mail). 1. TALK + *8. 2. (Optional) After answer, dial security code. Ask your Communications Manager for your security code. Leaving a Message To leave a message in the mailbox of an unanswered extension: The extension you call can be busy, in DND or unanswered. -
Page 60: Voice Prompting Messages
Voice Over i-Series System Your Voice Over key shows the feature’s status: When the key is . . . You are . . . Not using Voice Over Flashing Listening to the interrupting party Responding to the interrupting party To initiate a Voice Over to a busy co-worker: You can only leave a Voice Over if you hear two Off Hook Signaling tones. -
Page 61: Volume Controls
i-Series System Volume Controls Volume Controls Your telephone has several volume adjustments. While the phone is idle, you can turn the ringer to high, medium, low, or vibrate alert. The vibrate setting will turn off the ringer but, instead, will vibrate when you have an incoming call. This allows you to be in a meeting and not interrupt the meeting with the ringing phone, but you don’t have to miss any calls either. - Page 62 - For Your Notes - 2-44...
-
Page 63: Onyx Vsi Features
Onyx VSi Features 2-45... - Page 64 - For Your Notes - 2-46...
-
Page 65: Basic Feature Operation
Onyx VSi System Outside Calls Basic Feature Operation Outside Calls You can place an outside call by dialing a code or by pressing a line key. To answer an outside call, you can use either a line or a loop key. To place an outside call: 1. -
Page 66: Intercom Calls
Hold Onyx VSi System For a line you placed on Hold that does not appear on your phone: 1. Press TALK. 2. Press HOLD. For a line somebody else placed on System Hold that does not appear on your phone: 1. - Page 67 Onyx VSi System Outside Calls To Transfer a call to your desk phone: 1. Press the DESK button on the base unit. The DESK button flashes. 2. Hang up cordless phone. 3. From your desk phone, pick up the handset and press the Pickup key. The Pickup key must be assigned in system programming.
- Page 68 - For Your Notes - 2-50...
-
Page 69: System Features
Onyx VSi System Account Codes System Features Account Codes For billing or other purposes, you can enter an Account Code (a number up to 10 digits long) to categorize your outside call. This Account Code is included in a report that the system generates. You can enter an Account Code manually as described below, or you can program a Function key for Account Code entry (refer to “Speed Dial”). -
Page 70: Callback
Call Forwarding Onyx VSi System Off-Premise Call Forwarding You can reroute your calls to an outside (off-premise) telephone number. For example, you can forward your calls to your cellular car phone if you have to be on the road. To forward calls to an outside number: 1. -
Page 71: Camp-On
Onyx VSi System Camp-On Under certain conditions, you may see one of the following messages in place of the normal Caller ID information. When you see ... It means ... PRIVATE Your caller has blocked Caller ID. OUT OF AREA Your caller has dialed from an area that does not support Caller ID. -
Page 72: Conference
Conference Onyx VSi System Conference This feature is always available. Conference allows you to converse jointly with two inside parties, two outside parties or one of each. To set up a Conference: 1. Place first call. 2. Press CONF. 3. Place next call. 4. -
Page 73: Display Messages
Onyx VSi System Group Ring Display Messages Messages appear in the display window to provide helpful information at a glance. Then you use your phone, messages display to explain what is happening or to help you remember what to do next. If you have a question about the displays, check with your communications manager. -
Page 74: Headset
Headset Onyx VSi System Headset If you have a Headset, you can use it instead of the handset. Using the headset frees up your hands for other work. To install the Headset: 1. Lift the rubber cover on the headset jack on the phone. 2. -
Page 75: Last Number Redial
Onyx VSi System Meet-Me Conference Last Number Redial This feature is always available. With Last Number Redial, you can easily call the last outside number you dialed. Each time you place an outside call, the system saves the number you dialed (up to 24 digits). You can redial the call whether it was answered, unanswered or busy. Redial uses the same line to dial out unless you select a different line. -
Page 76: Message Waiting
You can leave a Message Waiting indication at a busy or unanswered extension requesting a return call. The indication is a ENVE- LOPE icon (on a 910i Cordless Telephone phone) or a flashing MW LED (on a keyset). Also refer to the Voice Mail feature. -
Page 77: Operator Assistance
Onyx VSi System Page Zone To monitor a call: 1. Press TALK and then #. 2. Dial the extension number. 3. Dial M. You hear the conversation. Operator Assistance Operator Assistance (OPA) automatically answers outside calls and provides dialing options to the outside callers. OPA lets an outside caller dial an extension or hunt group directly. -
Page 78: Park
Page Zone Onyx VSi System To make an All Call Page or a Zone Page: (You can program this on a Feature key. Refer to “Speed Dial” for further information.) 1. Press TALK. 2. Dial Page Zone access code, as follows: Page Zone Access Code All Call... -
Page 79: Prime Line Selection
Onyx VSi System Room Monitor 4. After you hear the beep, speak clearly and directly into the handset. 5. (Optional) Enter three-digit extension where calls will be transferred. Intercom dial tone will be heard. 6. Press TALK when you are through. The MSG icon displays. -
Page 80: Selectable Display Messages
Room Monitor Onyx VSi System To activate Room Monitor: 1. Press TALK and dial #. 2. Dial the extension number to be monitored. 3. Press 7. SPK flashes on a monitored keyset phone. To cancel Room Monitor: 1. From the monitoring extension, press TALK. Selectable Display Messages You can choose preprogrammed Selectable Display Messages for your extension. - Page 81 Onyx VSi System Speed Dial Storing a Pause or Flash You can store a Pause in a Personal or System Speed Dial bin by pressing HOLD where you want the Pause to occur. When you use the stored number, the system stops dialing when it encounters the pause and waits for a second dial tone. If the second dial tone occurs, dialing continues.
-
Page 82: Station Call Coverage
Speed Dial Onyx VSi System Using System Speed Dial To call a System Speed Dial number: 1. Press TALK. You can preselect a line by then pressing a line key + CONF. 2. Dial System Speed Dial bin number. -If the number includes a pause, you can press * to force dialing to continue. -If you hear busy tone, press an idle line key. -
Page 83: Voice Mail
Onyx VSi System Voice Mail To Transfer a call to a covered extension: 1. Press CONF. 2. Press Call Coverage key. 3. If you hear two beeps, announce call. 3. If you hear ringing, wait for called party to answer before announcing call. 3. -
Page 84: Voice Prompting Messages
Voice Mail Onyx VSi System To forward calls to your mailbox: 1. Press TALK and dial #. 2. Press FLASH. 3. Dial Call Forwarding option. -Dial 1 to forward calls not answered. -Dial 2 to forward calls not answered or when busy. -Dial 3 to forward all calls. -
Page 85: Volume Controls
Onyx VSi System Voice Mail Voice Prompt Description The number you have dialed is not in service. Plays when calling a valid, but inoperative extension. Your call cannot go through. Please call the Plays when trying to place a restricted call. operator Your calls have been forwarded. -
Page 86: Walking Class Of Service
Walking Class of Service Onyx VSi System Walking Class of Service If you try to place a call from a co-worker’s phone and the system prevents it, you can use Walking Class of Service. Walking Class of Service allows you to temporarily override dialing restrictions when you use someone else’s extension. Walking Class of Service lets you make the call as you would at your own extension. -
Page 87: Charts And Illustrations
Charts and Illustrations This section contains handy charts and illustrations for your reference. You’ll find: • The dialing plan (the numbers you dial) -- for i-Seriessee below, for Onyx VSi see page 2-96. • Telephone key layout -- see page 2-97. •... -
Page 88: Base Layout
Telephone Layout Base Layout Power Jack Tone Pulse Power Tone/Pulse Cordless Desk Switch 2-70... -
Page 89: Handset Layout
Telephone Layout Handset Layout R/VOL MUTE pqrs wxyz oper 1. Ringer ON/OFF switch 8. Head Set Jack 2. Message Display 9. Volume (r/vol) Key 3. Flash Key 10. Mute (mute) Key 4. Talk Key 11. Hold (HOLD) Key 5. Numeric Keypad 12. - Page 90 Flash Rates i-SERIES SYSTEM - Telephone LED Flash Rates Your phone is idle (not on a call) All LEDs out (dark) (phone), Status LED ON (base) Outside Calls An outside line is busy The line key is On An outside call is ringing your phone The line key flashes Slowly And then you answer it The line key is On...
-
Page 91: Quick Reference
Quick Reference i-SERIES SYSTEM - Quick Reference Outside Calls Placing: TALK + Line key + Dial number Answering: TALK (if not connected, press flashing key) Answering ringing over TALK + # + 0 paging speakers: Intercom Calls Placing: TALK + Dial extension (if you hear ring-busy, you may be able to dial 7 to get through) Press TALK or lift handset out of charger Answering:... - Page 92 Quick Reference ONYX VSi SYSTEM - Quick Reference Outside Calls Placing: TALK + Line key + Dial number Answering: TALK (if not connected, press flashing key) Answering ringing over TALK + * + 0 paging speakers: Intercom Calls Placing: TALK + Dial extension (if you hear ring-busy, you may be able to dial 1 to get through) Press TALK or lift handset out of charger Answering:...
- Page 93 Specifications Section 3 Specifications / Parts List In this section Page Specifications ..... .3-3 Parts List ......3-5...
- Page 94 Specifications - For Your Notes -...
- Page 95 513 11490 A (Refer to the label on the Base Unit for the Registration Number.) The 910i Cordless Telephone complies with FCC and IC parts 15 and 68. An Amended Grant of Equipment Authorization has been received from the FCC for this equipment. The equipment has been tested for the...
- Page 96 Specifications Cabling Requirements 1. Do not run station cable in parallel with the AC source, telex or computer, etc. If the cables are near cable runs to those devices, use shielded cable with grounded shields or install the cable in conduit. 2.
- Page 97 Specifications Parts List Description Part Number NEC 910i Cordless Telephone 85457D To be used with NEC’s phone system. includes: Base Unit Handset Charging Stand AC Adaptors (9V and 10V) 500mAh Battery Wall Plate Adapter Belt Clip AC Adaptor - Base Unit...
- Page 98 Specifications - For Your Notes -...
- Page 99 Index Section 4 Index In this section Page Index ......4-3...
- Page 100 Index...
- Page 101 Index Calling a Message Center, Onyx VSi ... . .2-65 Calling Your Mailbox, i-Series ....2-41 Abbreviated Dialing, i-Series .
- Page 102 Index Forced Account Codes, i-Series ....2-16 Forced Account Codes, Onyx VSi. Last Number Redial, i-Series ....2-25 See Forced Account Codes, Onyx VSi Last Number Redial, Onyx VSi .
- Page 103 Index Placing Outside Calls, Onyx VSi ....2-47 Power Requirements ......3-3 Tandem Trunking, i-Series .
- Page 104 Index Volume Controls, i-Series ..... .2-43 Volume Controls, Onyx VSi ....2-67 Walking Class of Service, Onyx VSi .
- Page 105 NEC America, Inc., Corporate Networks Group 4 Forest Parkway, Shelton, CT 06484 Tel: 800-365-1928 Fax: 203-926-5458 cng.nec.com Other Important Telephone Numbers Sales: ........203-926-5450 Customer Service: .
- Page 106 NEC America, Inc., Corporate Networks Group 4 Forest Parkway, Shelton, CT 06484 *85457DINS02* 203-926-5400 203-929-0535 TEL: FAX: May 2002 cng.nec.com 85457DINS02 Printed in U.S.A.