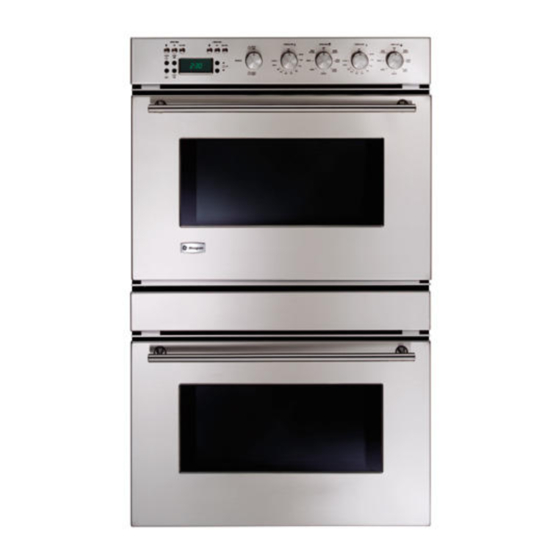
GE Monogram ZET1038 Owner's Manual
30″ convection wall oven
Hide thumbs
Also See for Monogram ZET1038:
- Owner's manual (38 pages) ,
- Installation instructions manual (16 pages) ,
- Installation instructions manual (16 pages)
Table of Contents
Advertisement
Quick Links
Advertisement
Table of Contents

Related Manuals for GE Monogram ZET1038


Summary of Contents for GE Monogram ZET1038
- Page 1 Owner’s Manual 30″ Convection Wall Oven ZET1038 ZET1058...
-
Page 2: Table Of Contents
Your new Monogram wall oven makes an eloquent statement of style, convenience and kitchen Introduction planning flexibility. Whether you chose it for its purity of design, assiduous attention to detail— or for both of these reasons—you’ll find that your Monogram wall oven’s superior blend of form and function will delight you for years to come. - Page 3 Before Read this manual carefully. It is intended to help you operate and maintain your new wall using your oven properly. wall oven Keep it handy for answers to your questions. Write You’ll find them on a label on the front trim behind the oven door.
-
Page 4: Important Safety Instructions
IMPORTANT SAFETY NOTICE • The California Safe Drinking Water and Toxic Enforcement Act requires the Governor of California to publish a list of substances known to the state to cause cancer, birth defects or other reproductive harm, and requires businesses to warn customers of potential exposure to such substances. - Page 5 AVIS IMPORTANT EN MATIÈRE DE SÉCURITÉ • Le California Safe Drinking Water and Toxic Enforcement Act exige que le gouverneur de Californie publie une liste de substances que l’on sait occasionner le cancer, des anomalies congénitales ou d’autres anomalies de reproduction, et exige que les entreprises avertissent leurs clients des dangers que leur font courir une exposition à...
- Page 6 SAFETY PRECAUTIONS • Do not use aluminum foil to line oven bottoms, except as suggested in this manual. Improper installation of aluminum foil may result in a risk of electric shock or fire. • Cook meat and poultry thoroughly—meat to at least an INTERNAL temperature of 160°F and poultry to at least an INTERNAL temperature of 180°F.
- Page 7 MESURES DE SÉCURITÉ • N’utilisez pas de papier d’aluminium pour couvrir la sole du four, sauf de la façon indiquée dans le présent manuel. Une utilisation inadéquate du papier d’aluminium peut présenter des risques de chocs électriques ou d’incendie. • Faites cuire la viande et la volaille à fond—la température INTERNE de la viande doit être d’au moins 160 °F, et celle de la volaille d’au moins 180 °F.
-
Page 8: Save These Instructions
SAFETY PRECAUTIONS • Children in walkers, or children crawling, can be attracted to the round oven door handle and may grab and open the oven door. This can result in injury from the door being pulled open on a child, or severe burns if the oven is in use and hot. - Page 9 MESURES DE SÉCURITÉ • Les enfants en marchette ou les enfants qui rampent peuvent être attirés par la poignée ronde de porte du four et peuvent la saisir, et ainsi ouvrir la porte. Cela peut occasionner une ouverture de la porte sur l’enfant ou des brûlures sérieuses si le four est en fonctionnement et chaud.
-
Page 10: Oven Door
Appearance may vary.) CLOCK COOK TIME START TIMER TIME ZET1038—shown with Euro style knobs Feature Index Oven Rack (4 each oven), Broiler Pan, Grid and Convection Roasting Rack (1 each oven) Oven Door Gasket Model and Serial Numbers Halogen Oven Lights... -
Page 11: Clock And Timer
Double oven clock and timer (Pro style knob shown) Single oven clock and timer (Euro style knob shown) Using the When you first turn on the power to your oven, or after a power failure, the display will show clock and all 8’s, then dashes and the set clock symbol. - Page 12 Oven air An internal cooling fan operates during all oven modes. The warm air from inside the oven flow will be exhausted out through vents located between the door and control panel. Do not allow this air flow to be obstructed such as by draping kitchen towels over the front of the oven in undercounter applications.
-
Page 13: Aluminum Foil
Convection When using the convection oven, a fan circulates hot air over, under and around the food. This circulating hot air is evenly distributed throughout the oven cavity. -
Page 14: Controls
CONVECTION BROIL – Good for broiling fish or smaller cuts of meat. PROOF – Maintains a warm environment useful for rising yeast-leavened products. BAKE – Use for standard, non-convection oven baking. BROIL – Use for standard, non-convection broiling. -
Page 15: Convection Baking
How to set the oven for convection baking Mode Selector Knob Single oven controls shown. Convection Baking is ideal for evenly browned baked foods cooked on single or multiple shelves. Preheating is not necessary with foods having a bake time of over 15 minutes. When set on Convection Bake, the rear bake element operates whenever heating. - Page 16 3 racks plus the floor rack. Adapting You can use your favorite recipes in the convection oven. recipes When convection baking, reduce baking temperature by 25°F. No temperature adjustment is necessary when convection roasting.
-
Page 17: Convection Roasting
How to set the oven for convection roasting Mode Selector Knob Single oven controls shown. Convection Roasting is good for roasting large tender cuts of meat, uncovered. Meat and poultry are browned on all sides as if they were cooked on a rotisserie. When set on Convection Roast, the top element and the bake element operate whenever heating. - Page 18 Convection Meats roasting Beef Rib, Boneless Rib, guide Top Sirloin (3 to 5 lbs.) Beef Tenderloin Pork Bone-in, Boneless (3 to 5 lbs.) Chops (1/2 to 1″ thick) Canned, Butt, Shank (3 to 5 lbs.) (fully cooked) Lamb Bone-in, Boneless (3 to 5 lbs.) Seafood Fish, whole (3 to 5 lbs.) Lobster Tails (6 to 8 oz.
-
Page 19: Convection Broiling
How to set the oven for convection broiling Mode Selector Knob Single oven controls shown. Convection Broil is good for broiling fish or smaller cuts of meat. The door must be closed when Convection Broiling. When set on Convection Broil, both top elements operate whenever heating. - Page 20 How to set the oven for baking Mode Selector Knob Single oven controls shown. Turn the Mode Selector Knob to NORMAL. Using the Temperature Control Knob, set the desired temperature, up to 500°F. Turn the Oven Control Knob to BAKE. Check the food for doneness at the minimum time on the recipe.
-
Page 21: Proofing
How to set the oven for proofing Mode Selector Knob Single oven controls shown. The proofing feature maintains a warm environment useful for rising yeast-leavened products. Place the covered dough in a dish in the oven on rack A. Turn the Mode Selector Knob to NORMAL. NOTE: For best results, cover the dough with a cloth or with greased plastic wrap (the plastic may need to be anchored underneath the front... - Page 22 How to set the oven for broiling Mode Selector Knob Single oven controls shown. If the meat has fat or gristle around the edge, cut vertical slashes through both about 2″ apart. If desired, the fat may be trimmed, leaving a layer about 1/8″ thick. Place the meat or fish on the broiler grid in the broiler pan.
- Page 23 Broiling Food guide Bacon Ground Beef Well Done The size, weight, thickness, starting temperature and your preference for doneness will affect broiling times. Beef Steaks This guide is based on meats Rare at refrigerator temperature. Medium Well Done † The U.S. Department of Rare †...
-
Page 24: Timed Cooking
Timed cooking CLOCK COOK TIME (immediate start and START automatic TIME TIMER stop) Single oven controls shown set for convection baking. Timed cooking allows you to set the oven to cook for a selected length of time and turn off automatically. On double oven models, you will not be able to set a timed cooking or cleaning function in both ovens at the same time. - Page 25 Timed Timed cooking allows you to set the oven to cook for a selected length of time and turn off cooking automatically. On double oven models, you (delayed will not be able to set a timed cooking or start and cleaning function in both ovens at the same automatic time.
-
Page 26: Adjust The Oven Thermostat
Do it You may feel that your new oven cooks differently than the one it replaced. We yourself! recommend that you use your new oven for a few weeks to become more familiar with it, following the times given in your recipes as a guide. - Page 27 Before a The oven must be completely cool in order to set the self-clean cycle. clean cycle We recommend venting with an open window or using a ventilation fan or hood during the first self-clean cycle. Clean soil from the frame around the oven door and outside the door gasket.
- Page 28 You can set the oven to delay the start of How to cleaning, clean for a selected length of time delay the and turn off automatically. On double oven start of models, you will not be able to set a timed cleaning cooking or cleaning function in both ovens at the same time...
-
Page 29: Convection Roasting Rack
Control Clean up spatters with a damp cloth. Remove heavier soil with warm, soapy water. panel and knobs Do not use abrasives of any kind on the control panel or knobs. The control knobs may be removed for easier cleaning. To remove a knob, pull it straight off the stem. - Page 30 Oven lights Each oven is equipped with two halogen lights located on the back wall of the oven. The lights come on when the door is opened or when the oven is in a cooking cycle. The oven lights do not come on during self-cleaning.
- Page 31 To clean Inside of the door: the door • Because the area inside the gasket is cleaned during the self-clean cycle, you do not need to clean this by hand. Any soap left on the liner causes additional stains when the oven is heated so be sure to rinse thoroughly.
- Page 32 Questions? PROBLEM Use this OVEN WILL NOT WORK problem solver! OVEN LIGHT(S) DO NOT WORK FOOD DOES NOT BAKE OR ROAST PROPERLY FOOD DOES NOT BROIL PROPERLY OVEN WILL NOT SELF CLEAN “CRACKING” OR “POPPING” SOUND DURING CLEANING EXCESSIVE SMOKING OCCURS DURING CLEANING OVEN NOT CLEAN...
- Page 33 Notes Wall Oven...
- Page 34 Notes Wall Oven...
- Page 35 With the purchase of your new Monogram appliance, receive the assurance that if you ever need information or assistance from GE, we will be there. All you have to do is call—toll- free! Whatever your question about any Monogram major appliance, GE Answer Center GE Answer information service is available to help.
- Page 36 YOUR MONOGRAM WALL OVEN WARRANTY Staple sales slip or cancelled check here. Proof of original purchase date is needed to obtain service under warranty. WHAT IS FULL ONE-YEAR WARRANTY For one year from date of original purchase, we will provide, free of charge, parts and COVERED service labor in your home to repair or replace any part of the oven that fails because of a manufacturing defect.