Table of Contents
Advertisement
Advertisement
Table of Contents

Related Manuals for Asus ASMB4-IKVM


Summary of Contents for Asus ASMB4-IKVM
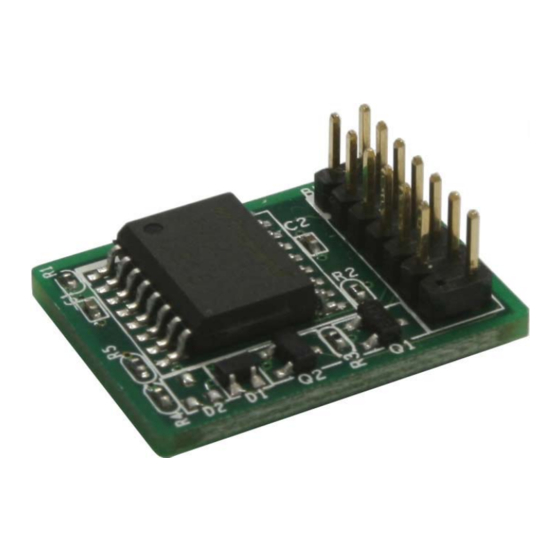
- Page 1 ASMB4-iKVM/ ASMB4-SOL PLUS Server Management Board...
- Page 2 Product warranty or service will not be extended if: (1) the product is repaired, modified or altered, unless such repair, modification of alteration is authorized in writing by ASUS; or (2) the serial number of the product is defaced or missing.
-
Page 3: Table Of Contents
Contents Notices ......................vi Safety information ..................viii About this guide ..................ix ASMB4-iKVM/ASMB4-SOL PLUS specifications summary ....xi Chapter 1: Product introduction Welcome! ..................1-2 Package contents ................. 1-2 Features ..................1-3 System requirements ..............1-4 Network setup ................1-5... - Page 4 Adjusting the monitoring settings ........3-14 3.1.9 Controlling the remote server power ......3-16 3.1.10 Viewing PET information ..........3-17 ASUS Host Management Controller Setup ........3-20 3.2.1 Installing and launching the ASUS Host Management Controller Setup utility ....3-20 3.2.2...
- Page 5 Contents 4.5.4 Chassis Identify Command ........... 4-13 Maintenance ................4-13 Languages .................. 4-14 Appendix: Reference information BMC connector ................A-2 LAN ports for server management ..........A-3 Troubleshooting ................A-4 BMC Sensor Codes Table ............A-5...
-
Page 6: Notices
Notices Federal Communications Commission Statement This device complies with Part 15 of the FCC Rules. Operation is subject to the following two conditions: • This device may not cause harmful interference, and • This device must accept any interference received including interference that may cause undesired operation. - Page 7 REACH.htm. ASUS Recycling/Takeback Services ASUS recycling and takeback programs come from our commitment to the highest standards for protecting our environment. We believe in providing solutions for you to be able to responsibly recycle our products, batteries, other components as well as the packaging materials.
-
Page 8: Safety Information
Safety information Electrical safety • To prevent electrical shock hazard, disconnect the power cable from the electrical outlet before relocating the server. • When adding or removing devices to or from the server, ensure that the power cables for the devices are unplugged before the signal cables are connected. If possible, disconnect all power cables from the existing server before you add a device. -
Page 9: About This Guide
• Chapter 3: ASUS Remote Console This chapter tells you how to use the ASUS Remote Console (ARC) that the server management board supports. • Chapter 4: Web-based user interface (ASMB4-iKVM only) This chapter tells you how to use the web-based user interface that the server management board supports. - Page 10 Conventions used in this guide To make sure that you perform certain tasks properly, take note of the following symbols used throughout this manual. DANGER/WARNING: Information to prevent injury to yourself when trying to complete a task. CAUTION: Information to prevent damage to the components when trying to complete a task.
-
Page 11: Asmb4-Ikvm/Asmb4-Sol Plus Specifications Summary
ASMB4-iKVM/ASMB4-SOL PLUS specifications summary Chipset Aspeed 2050 Internal RAM 56 Mb for system 8 Mb for video Internal ROM 16 Mb Timers 32-bit Watchdog Timer Main features IPMI 2.0-compliant and supports KVM over LAN Web-based user interface (remote management) Virtual media... -
Page 13: Chapter 1: Product Introduction
This chapter describes the server management board features and the new technologies it supports. Chapter 1: Product introduction... -
Page 14: Welcome
Management Interface (IPMI) 2.0-compliant board that allows you to monitor, control, and manage a remote server from the local or central server in your local area network (LAN). With ASMB4-iKVM/ASMB4-SOL PLUS plugging in a server motherboard, you can completely and efficiently monitor your server in real- time. -
Page 15: Features
Monitor Sensor, show SDR, SEL, FRU, configure BMC, LAN • Support SSL (HTTPS) • Multiple user permission level • Upgrade BMC firmware Update Firmware • DOS Tool • Web GUI (Windows XP/Vista/2003/2008, RHEL5.2, SLES10SP2 ® Notification • • SNMP Trap • e-Mail ASUS ASMB4-iKVM/ASMB4-SOL PLUS... -
Page 16: System Requirements
* A power supply supported PMBus and PSMI is necessary. ** Specifications are subject to change without notice. System requirements Before you install the ASMB4-iKVM/ASMB4-SOL PLUS board, check if the remote server system meets the following requirements: • ASUS server motherboard with Baseboard Management Controller (BMC) connector* •... -
Page 17: Network Setup
Network setup The ASMB4-iKVM/ASMB4-SOL PLUS server management board installed on the remote server connects to a local/central server via direct LAN connection or through a network hub. Below are the supported server management configurations. Direct LAN connection RJ-45 cable Remote server... - Page 18 Chapter 1: Product introduction...
-
Page 19: Chapter 2: Installation
This chapter provides instructions on how to install the board to the server system and install the utilities that the board supports. Chapter 2: Installation... -
Page 20: Before You Proceed
Before you proceed Take note of the following precautions before you install the server management board to the remote server system. • Unplug the server system power cord from the wall socket before touching any component. • Use a grounded wrist strap or touch a safely grounded object or to a metal object, such as the power supply case, before handling components to avoid damaging them due to static electricity. - Page 21 For direct LAN configuration, connect the other end of the LAN cable to the local/central server LAN port. For connection to a network hub or router, connect the other end of the LAN cable to the network hub or router. ASUS ASMB4-iKVM/ASMB4-SOL PLUS...
-
Page 22: Firmware Update And Ip Configuration
Firmware update and IP configuration You need to update the ASMB4-iKVM/ASMB4-SOL PLUS firmware and configure IP source before you start using the ASMB4-iKVM/ASMB4-SOL PLUS board. 2.3.1 Firmware update To update the firmware: Insert the support CD into the optical drive. - Page 23 Device Firmware has been upgraded successfully. The device will be reset within 10 seconds for the new firmware to take effectt. Press any key to continue ... You may update firmware from the web-based user interface. Refer to page 4-13 for details. ASUS ASMB4-iKVM/ASMB4-SOL PLUS...
-
Page 24: Configure Bmc Ip Source Static Ip
Configure BMC IP Source Static IP for LAN3 Configure BMC IP Source DHCP for LAN3 ASMB4-iKVM Firmware Update for Preserve Configuration ASMB4-iKVM Firmware Update for Clear Configuration A confirmation message appears, asking if you want to configure the BMC IP source static IP now. -
Page 25: Configure Bmc Ip Source Dhcp
Configure BMC IP Source Static IP for for LAN3 Configure BMC IP Source DHCP for for LAN3 ASMB4-iKVM Firmware Update for Preserve Configuration ASMB4-iKVM Firmware Update for Clear Configuration A confirmation message appears, asking if you want to configure the BMC IP source DHCP now. -
Page 26: Bios Configuration
• Update the remote server BIOS file following the instructions in the motherboard/system user guide. Visit the ASUS website (www.asus.com) to download the latest BIOS file for the motherboard. • The BIOS setup screens shown in this section are for reference purposes only, and may not exactly match what you see on your screen. - Page 27 Subnet Mask you have specified on the operating system network for the used network card. Gateway Address Allows you to set the gateway address. We recommend that you use the same gateway address you have specified on the operating system network for the used network card. ASUS ASMB4-iKVM/ASMB4-SOL PLUS...
- Page 28 Allows the BMC to reset or power down the system when the operating system crashes or hangs. Configuration options: [Disabled] [Reset System] [Power Down] [Power Cycle] It is necessary to install ASWM (ASUS System Web-based Management) for using this function. 2-10...
-
Page 29: Running The Asmc4 Utility
Running the ASMC4 utility The ASMC4 utility allows you to update the ASMB4-iKVM/ASMB4-SOL PLUS firmware, configure the LAN setting for the remote server and change the user name/ password in DOS environment. This utility is available from the support CD that came with the package. - Page 30 ASMC4 Help Menu options Options Description -kcs[smic/bt/pci_smic] NetFn command data..Send IPMI command -bmc_ip_source source[1: Static, 2: DHCP] Set the IP source -bmc_ip [ip_addr] Write the BMC IP address for (e.g., bmc_ip 10.10.10.20) dedicated LAN -bmc_mask [ip_mask] Write the subnet mask for dedicated (e.g., bmc_mask 255.255.255.0) -bmc_gateway [ip_addr] Write the gateway address for...
-
Page 31: Configuring The Lan Controller
2.5.1 Configuring the LAN controller Before you can establish connection to the ASMB4-iKVM/ASMB4-SOL PLUS board, you must configure the LAN port for server management used by the remote server to connect to the local/central server. To configure the LAN port of the remote server: Run the ASMC4 utility from the support CD following the instructions in the previous section. -
Page 32: Configuring The User Name And Password
2.5.2 Configuring the user name and password You may change your user name and password from the ASMC4 utility. To change the user name and password: Follow steps 1-5 on page 2-11. When the When the C:> prompt appears, type type asmc4 -user_name xxxxx, then press <Enter>... -
Page 33: Software Installation
Software installation You can monitor, control, or manage the remote server from the local/central server using the ASUS Remote Console (ARC). The ARC is a web-based application available from the support CD that came with theASMB4-iKVM/ASMB4-SOL PLUS package. You must install the ARC on the local/central server to access the remote server. -
Page 34: Launching Arc
Follow the installation wizard instructions to install the utility. 2.6.2 Launching ARC To launch the ARC utility, click Start > All Programs > ASUS Remote Console > ASUS Remote Console from the Windows desktop. ® Double-click the ASUS Remote Console icon on the Windows ®... -
Page 35: Chapter 3: Asus Remote Console
This chapter tells you how to use the ASUS Remote Console (ARC) that the server management board supports. Chapter 3: ASUS Remote Console... -
Page 36: Asus Remote Console (Arc)
ASUS Remote Console (ARC) The ASUS Remote Console (ARC) is a web-based utility, designed for ASMB4-SOL PLUS, that allows you to monitor the remote host’s hardware information including temperatures, fan rotations, voltages, and power. This application also lets you instantly power on/off or reset the remote server. -
Page 37: Arc Sections
Click before the server connection to display available remote server information including the SDR (Sensor Data Record), FRU (Field Replaceable Unit), SEL (System Event Log), and Remote Console. ASUS ASMB4-iKVM/ASMB4-SOL PLUS... - Page 38 For example, clicking the IP button displays the remote server IP address instead of the remote server name (N). Selecting ID displays the remote server ID instead of the server name or IP address. Chapter 3: ASUS Remote Console...
-
Page 39: Detail/Sel Window
SNMP Trap format and is used for IPMI alerting. Status bar The Status bar located at the bottom of the ARC window displays the connection status to the remote server, connection duration, IP address of the remote server, and the progress of SDR/SEL/FRU information download. ASUS ASMB4-iKVM/ASMB4-SOL PLUS... -
Page 40: Connecting To The Remote Server
Otherwise, click OK to continue or Cancel to close the window. The default server connection name and IP address are automatically displayed everytime you add a new server connection. When prompted, select IPMI Server, then click Continue. Chapter 3: ASUS Remote Console... - Page 41 The default connection request level authentication is HMAC-SHA1 with Administrator privileges. You may change these configuration according to your network settings or preference. Check the box before Enable Payload Encryption if you want to use • Advanced Encryption Standard (AES). ASUS ASMB4-iKVM/ASMB4-SOL PLUS...
-
Page 42: Retrieving Sensor Information
(e.g. CPU1 Temperature) to display its values in the Detail/SEL window. The Detail/SEL window displays the sensor data attributes, values, and meanings. From this window, you can adjust the sensor threshold values by clicking the up/down arrow button after each value. Chapter 3: ASUS Remote Console... - Page 43 The tab also displays the sensor record ID and SDR version. Click the Settings tab to adjust the sensor threshold values. Click on the up/down arrow button after each threshold value to adjust. Click OK to close the window. ASUS ASMB4-iKVM/ASMB4-SOL PLUS...
-
Page 44: Displaying Fru Information
FRU to display available FRU information, then click Click before the module/component. Select a module or component from the list to display the FRU information in the Detail/SEL window. 3-10 Chapter 3: ASUS Remote Console... -
Page 45: Displaying System Event Logs
Double-click an event to display an Event Information window. This window displays the sensor type and record ID, event message, current and threshold values, and other system event information. Click OK to close the window. ASUS ASMB4-iKVM/ASMB4-SOL PLUS 3-11... -
Page 46: Using Remote Console
To display the remote server console, press the Remote Console item from the navigation window. The remote server screen appears in the Detail/SEL window. Delete key F1–F10 keyboard function keys ARC function keys Reboot to enter BIOS setup menu (used in combination with other keys) 3-12 Chapter 3: ASUS Remote Console... -
Page 47: Displaying All Remote Server Sensors
Click All Sensors value. All remote server sensors are displayed on the Information window in graphical format. The color bar represents the upper/lower threshold values of each sensor. The green pointer indicates the current value of the sensor. ASUS ASMB4-iKVM/ASMB4-SOL PLUS 3-13... -
Page 48: Adjusting The Monitoring Settings
A Server Settings window appears. Click on the up/down arrow button after each setting to adjust the value. Click OK to save your changes and close the window; otherwise, click Cancel to ignore your changes. 3-14 Chapter 3: ASUS Remote Console... - Page 49 Enabling the Short Message Service (SMS) feature The Short Message Service or SMS feature allows you to receive Platform Event Trap (PET) information on your smart phone (ASUS P505). You must install Microsoft ActiveSync before you enable the SMS feature.
-
Page 50: Controlling The Remote Server Power
Click Yes when the Confirm power down window appears. The remote server is turned off. Click OK to close the window. Use the same instructions as reference when powering up or resetting the remote server. 3-16 Chapter 3: ASUS Remote Console... -
Page 51: Viewing Pet Information
You need to install an SNMP service to the remote server to receive PET information. To install an SNMP service to the remote service: On the Windows taskbar, click ® Start > All Programs > Control Panel. Double-click Add/Remove Programs. Double-click Add Windows Components. ASUS ASMB4-iKVM/ASMB4-SOL PLUS 3-17... - Page 52 Double-click Management and Monitoring Tools. Select Simple Network Management Protocol (SNMP). Click OK. 3-18 Chapter 3: ASUS Remote Console...
- Page 53 On the Services tab, click the Add button to display a Service Settings window. Type a name on the Description of service field (i.e. ASUS ARC). Type the IP address of the local/central server, then set the External and Internal Port number to 162.
-
Page 54: Asus Host Management Controller Setup
ASUS Host Management Controller Setup The ASUS Host Management Controller Setup utility provides precise configuration and basic functions including System Event Log (SEL) generation and System Data Record (SDR) reading in DOS mode. This utility also supplies configuration sequences for the type of host interface as well as direct real-time monitoring of system information including CPU temperature(s), fan speeds and system voltages. -
Page 55: Command Fields
Select Exit to close the utility and return to the DOS prompt. 3.2.4 View The View command displays the Baseboard Management Controller (BMC) data record including the System Event Log (SEL), the System Data Record (SDR), and general BMC information. ASUS ASMB4-iKVM/ASMB4-SOL PLUS 3-21... - Page 56 Use the down arrow key to display the next sensor data record. Press <Esc> to return to the main screen. 3-22 Chapter 3: ASUS Remote Console...
- Page 57 Select BMC Info from the View command option, then press <Enter>. A list of BMC information appears on the left pane. Use the down arrow button to select a BMC information. The BMC information is displayed in the right pane. Press <Esc> to return to the main screen. ASUS ASMB4-iKVM/ASMB4-SOL PLUS 3-23...
-
Page 58: Set
To set the BMC Timer: Select BMC Timer from the Set command option, then press <Enter>. Set the BMC IPMI timer to the current system time. When finished, press <Esc> to return to the main screen. 3-24 Chapter 3: ASUS Remote Console... -
Page 59: Monitor
Use the down arrow button to select a monitor information. The selected monitor information details are displayed in the right pane. Press <Esc> to return to the main screen. ASUS ASMB4-iKVM/ASMB4-SOL PLUS 3-25... -
Page 60: Help
3.2.7 Help The Help command displays the available utility options, utility version, and copyright information. 3-26 Chapter 3: ASUS Remote Console... -
Page 61: Chapter 4: Web-Based User Interface
This chapter tells you how to use the web-based user interface that the server management board supports. Web-based user interface... -
Page 62: Loging In The Utility
This application also lets you instantly power on/off or reset the remote server. You should install JRE on remote console first before using web-based management. You can find JRE from the folder JAVA of the ASMB4-iKVM support CD. You can also download JRE from http://java.sun.com/javase/ downloads. -
Page 63: Using The Utility
Menu bar: Click a menu to display available function lists. Function list: Click each function key to start using its specific functions. Function title: Displays the function title. Section information: Displays the section information. Help menu: Click to display the brief description of the selected function. ASUS ASMB4-iKVM/ASMB4-SOL PLUS... -
Page 64: System Information
System Information This section contains the general information about the system, such as firmware version and detected FRUs. Server Health This section contains the data related to the server health, such as the sensor readings and event log. Click each function key to start using its specific functions Chapter 4: Web-based user interface... -
Page 65: Sensor Readings (With Thresholds)
The Event Log page displays a table of system event log. Select an event log category: Allows you to select the type of events to be displayed in the list. Refresh: Click to clear the event log. ASUS ASMB4-iKVM/ASMB4-SOL PLUS... -
Page 66: Configuration
Configuration This section allows you to configure the system settings. Click each function key to start using its specific functions 4.4.1 Alerts The Alert page allows you to configure the alert settings. Click to select the alert item that you want to modify, delete or send a test alert. Modify: Click Modify button to redirect the alert modification page. -
Page 67: Pef
Modify: Click to select the PEF item that you want to modify. Click Modify button to redirect the PEF modification page. 4.4.3 Mouse Mode The Mouse Mode page allows you to select the mouse mode. Save: Select the desired mouse mode, and then click Save to apply the setting. ASUS ASMB4-iKVM/ASMB4-SOL PLUS... -
Page 68: Network
4.4.4 Network The Network page allows you to configure the network settings. MAC Address: Select whether to obtain the IP address automatically or manually configure one. IP Address/Subnet Mask/Default Gateway: If you configure a static IP, enter the requested address, subnet mask and gateway in the given field. -
Page 69: Ssl
8 characters. Modify User: Select a user in the list, and then click this button to modify the settings. Delete User: Select a user in the list, and then click this button to delete the user. ASUS ASMB4-iKVM/ASMB4-SOL PLUS... -
Page 70: Configure Ldap
4.4.8 Configure LDAP The Configure LDAP page allows you to authenticate and access the LDAP server. Complete the settings in the given field, and then click Save to apply the settings. 4.4.9 Date/Time/NTP Settings The Date/Time/NTP Settings page allows you to set up specific date/time or synchronize the date/time with NTP server. -
Page 71: Remote Control
4.5.1 Console Redirection The Console Redirection page allows you to launch the redirection console and manage the server remotely. Click Java Console to open the java redirection window. ASUS ASMB4-iKVM/ASMB4-SOL PLUS 4-11... -
Page 72: Server Power Control
4.5.2 Server Power Control The Server Power Control page displays the current server power status and allows you to change the current settings. Select the desired option, and then click Perform Action to execute the selected action. 4.5.3 Capture Screen Video The Capture Screen Video page allows you to view the latest redirection screenshot. -
Page 73: Chassis Identify Command
Enter identify interval in seconds, and then click Perform Action to start the command. Maintenance This section allows you to perform the firmware update for the remote server. Click Enter Update Mode to open the firmware update window. ASUS ASMB4-iKVM/ASMB4-SOL PLUS 4-13... -
Page 74: Languages
Languages This section allows you to select the language for the web-based application. Select the available language from the list, and then click Apply to perform the setting. 4-14 Chapter 4: Web-based user interface... - Page 75 The Appendix shows the location of the LAN ports for server management and BMC connector on server motherboards. This section also presents common problems that you may encounter when installing or using the server management board. Appendix: Reference information...
-
Page 76: Appendix: Reference Information
BMC connector The ASUS server motherboards that support the ASMB4-iKVM/ASMB4-SOL PLUS comes with a Baseboard Management Controller (BMC) connector. Refer to the illustration below to locate the BMC connector on different server motherboards. Appendix: Reference information... -
Page 77: Lan Ports For Server Management
LAN ports for server management The ASUS server motherboards that support the ASMB4-iKVM/ASMB4-SOL PLUS comes with three LAN (RJ-45) ports: one for network connection and the other two for server management. For easy identification, the LAN ports for server management are LAN1 and LAN3 ports. You must use the LAN1 and LAN3 ports for server management to connect the remote server to the local/central host (direct LAN connection) or to the network hub or router. -
Page 78: Troubleshooting
Troubleshooting This troubleshooting guide provides answers to some common problems that you may encounter while installing and/or using ASUS ASMB4-iKVM/ASMB4-SOL PLUS. These problems require simple troubleshooting that you can perform by yourself. Contact the Technical Support if you encounter problems not mentioned in this section. -
Page 79: Bmc Sensor Codes Table
0x00: DIMM_A1, 0x01: DIMM_A2, (For Intel DP platform only 0x01: Read ECC error 0x02: DIMM_A3, 0x03:DIMM_A4, -- ASUS Z8 series server 0x02: ECC Error occurred on a scrub 0x04: DIMM_B1, 0x05: DIMM_B2, MB; -E6 server system) 0x04: Write Parity Error... - Page 80 Category 2: HDD / Backplane related Sensor No. Sensor Name Sensor Type Sensor Type Code Sensor Value or Event Type 0x68 Backplane1 HD1 Drive Slot 0x0D Discrete(0x6F) 0x01: Drive Presence 0x02: Drive Fault 0x80: Rebuild 0x69 Backplane1 HD2 Drive Slot 0x0D Discrete(0x6F) 0x01: Drive Presence...
- Page 81 0x9E PSU2 Slow FAN2 0x04 Discrete(0x07) 0x01: Transition to OK 0x10: Transition to Non-Critical from more severe 0x40: Transition to Non-Recoverable 0x9F PSU2 PWR Detect Power Supply 0x08 Discrete(0x6F) 0x01: Presence Detected 0x02: Power Supply Failure Detected ASUS ASMB4-iKVM/ASMB4-SOL PLUS...
- Page 82 Upper Critical - going high 0x39 +1.5V_ICH Voltage 0x02 Threshold(0x01) (For Intel DP platform only -- ASUS Z8 Lower Non-critical - going low series server MB; -E6 server system) Lower Critical - going low Upper Non-critical - going high Upper Critical - going high 0x3A +1.1V_IOH...
- Page 83 0x3F P2VTT Voltage 0x02 Threshold(0x01) (For Intel DP platform only -- ASUS Z8 Lower Non-critical - going low series server MB; -E6 server system) Lower Critical - going low Upper Non-critical - going high Upper Critical - going high 0x40 +3.3VSB...
- Page 84 0xA2 FRNT_FAN1 0x04 Threshold(0x01) Lower Non-critical - going low Lower Critital - going low 0xA3 FRNT_FAN2 0x04 Threshold(0x01) Lower Non-critical - going low Lower Critital - going low 0xA4 FRNT_FAN3 0x04 Threshold(0x01) Lower Non-critical - going low Lower Critital - going low 0xA5 FRNT_FAN4 0x04...