Table of Contents
Advertisement
Advertisement
Table of Contents

Related Manuals for Casio LD-50


Summary of Contents for Casio LD-50
- Page 1 USER’S GUIDE LD50-E-1 Page 1 02.10.28, 11:19...
- Page 2 GUIDELINES LAID DOWN BY FCC RULES FOR USE OF THE UNIT IN THE U.S.A. (not applicable to other areas). NOTICE This equipment has been tested and found to comply with the limits for a Class B digital device, pursuant to Part 15 of the FCC Rules.
-
Page 3: Welcome
Welcome... To the happy family of satisfied CASIO electronic musical instrument owners! To get the most out of the many features and functions of the instrument, be sure to carefully read this manual and keep it on hand for future reference. -
Page 4: Main Features
Main Features LIGHTING GUIDE SYSTEM teaches you to play by following the drum pad lights. A circle of light around each drum pad illuminates to let you know when it’s time to strike the pad. You can select from a variety of “play levels” that let you control the number of pads that light, so you can practice at a pace that suits your skill level. -
Page 5: Safety Precautions
• Should the electric cord or plug become formed. (The example at left indicates that damaged, contact your original retailer the power plug must be unplugged from or authorized CASIO Service Provider. the electrical socket.) 272A-E-005A Page 3 02.10.28, 11:19... - Page 6 • At least once a year, unplug the AC adap- your original retailer or authorized CASIO tor from the wall outlet and wipe away Service Provider. any dust that is built up in the area around the prongs of the plug.
- Page 7 Cleaning Sound Volume Before cleaning the product, always unplug Do not listen to music at very loud vol- the AC adaptor from the wall outlet first. umes for long periods. Particular care con- Leaving the AC adaptor plugged in creates cerning this precaution is required when the risk of damage to the AC adaptor, fire, using headphones.
-
Page 8: Care Of Your Instrument
Care of your Instrument Avoid heat, humidity or direct sunlight. Do not overexpose the instrument to direct sunlight, or place it near an air conditioner, or in any extremely hot place. Do not use near a TV or radio. This instrument can cause video or audio interference with TV and radio reception. If this happens, move the instrument away from the TV or radio. -
Page 9: Table Of Contents
Contents Welcome......... E-1 Other Settings...... E-18 Using the LIGHTING GUIDE SYSTEM ..E-18 Main Features ......E-2 Selecting a Play Level ......E-19 Selecting a Sound Effect Set ....E-20 Safety Precautions ....E-3 Selecting a Drum Set ......E-20 Care of your Instrument .. -
Page 10: General Guide
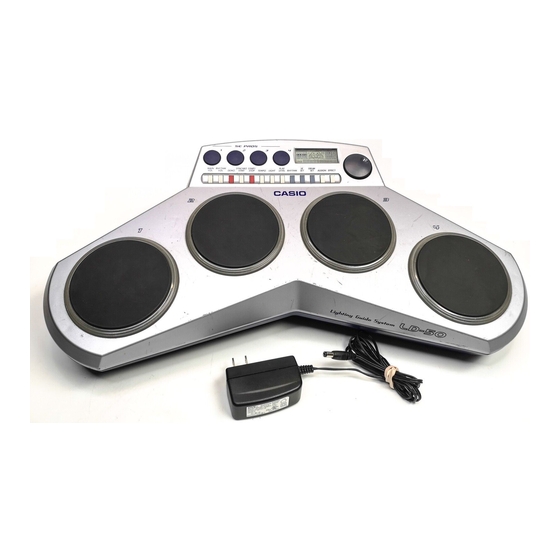
General Guide • Key, button, and other names are indicated in the text of this manual using bold type. Control Panel SE PADS Display Dial MAIN VOL. button EFFECT button RHYTHM VOL. button ASSIGN button DEMO button DRUM SET button SYNCHRO START SE SET button button... -
Page 11: Top
Drum Pads Back Rear Panel POWER switch DC 9V jack PHONES/OUTPUT jack 272A-E-011A Page 9 02.10.28, 11:19... -
Page 12: Display
Display 1 MAIN VOL., RHYTHM VOL., TEMPO, LIGHT, PLAY LEVEL, RHYTHM, SE SET, DRUM SET, ASSIGN, and EFFECT are screen indicators that appear whenever you are using one of the applicable functions. 2 • Icons appear in this area to indicate demo play, rhythm play, muting, and low battery warning. -
Page 13: Connections
Connections Phones/Output Jack Before connecting headphones or other external equipment, be sure to first turn down the volume settings of the digital drum and the connected equipment. You can then adjust volume to the desired level after connections are complete. Rear Panel PHONES/OUTPUT Jack Standard plug... -
Page 14: Power Supply
Power Supply This digital drum can be powered by current from a standard household wall outlet (using the specified AC adaptor) or by batteries. Always make sure you turn the digital drum off whenever you are not using it. Using Batteries Always make sure you turn off the digital drum before loading or replacing batteries. -
Page 15: Using The Ac Adaptor
Using the AC Adaptor Make sure that you use only the AC adaptor specified for this digital drum. Specified AC Adaptor: AD-5 Also note the following important warnings and precau- tions when using the AC adaptor. DC 9V jack AC adaptor AD-5 AC outlet Warning! •... -
Page 16: Basic Operations
Basic Operations This section provides the most basic information you need to get your Digital Drum running. Getting Ready To turn power on and off Slide the POWER switch to turn power on and off. Adjusting the Main Volume The main volume controls overall volume, including non-drum sounds, background drum sounds, the sounds of the four pads, and sound effects. -
Page 17: Using Rhythms
Rhythm selection screen indicator Current rhythm setting • Note that the rhythm selection screen always appears first whenever you turn on LD-50 power. Rotate the dial left or right to cycle through the available rhythms until the one you want is displayed. -
Page 18: Starting And Stopping Rhythm Play
Starting and Stopping Rhythm Play Perform the following steps to start and stop rhythm play. To start and stop rhythm play Select the rhythm you want to play (page E-15). Press the START/STOP button to start rhythm play. Mode when you pressed START/STOP Note icon Flashing dial icon Rhythm number... -
Page 19: Adjusting The Rhythm Tempo
Strike any of the drum pads to start rhythm play. Note icon • The rhythm starts to play and the note icon stops flashing. Adjusting the Rhythm Tempo Perform the following steps to change the tempo of the rhythm. This setting also affects demo play (page E-14). To adjust the rhythm tempo Press the TEMPO button. -
Page 20: Other Settings
Other Settings This section describes more advanced setting you can use to make drum pad play more enjoyable. Using the LIGHTING GUIDE SYSTEM The LIGHTING GUIDE SYSTEM of your Digital Drum lets you select from among various modes that make drum pad play more enjoyable. -
Page 21: Selecting A Play Level
Selecting a Play Level The play level lets you control how many pads light during LIGHTING GUIDE SYSTEM lesson and dual light mode play. This means you set up the Digital Drum to allow practice that suits your own particular skill level. To select a play level While a rhythm is playing, press PLAY LEVEL. -
Page 22: Selecting A Sound Effect Set
Selecting a Sound Effect Set The four sounds that make up the sound effect set you select are assigned to the four sound effect pads. See “Sound Effect List” on page A-2 for a list of available sound effect sets and their contents. To select a sound effect set Press the SE SET button. -
Page 23: Configuring A User Drum Set
To select a drum set Press the DRUM SET button. Flashing dial icon Drum set selection screen indicator Current drum set setting Rotate the dial left or right to cycle through the available drum sets until the one you want is displayed. After you are finished, you can press another button to change to another mode. -
Page 24: Selecting An Effect
Rotate the dial left or right to scroll through the available percussion sounds and sound effects on the display. • See “Percussion Sound List” on page A-1 and “Sound Effect List” on page A-2 for information on the sounds you can assign to a drum pad. •... -
Page 25: Troubleshooting
Troubleshooting If this happens: It could mean this: So you should do this: See page No sound is produced when I The Drum Set is not being supplied Check that batteries are loaded cor- Pages strike a pad. power. rectly, or that the AC adaptor is con- E-12,13 nected properly and plugged into an electrical outlet. -
Page 26: Specifications
Specifications Model: LD-50 Percussion Pads: 4 (with touch response) Lighting Guide System: Lesson, Dual Light, Synchro Sounds: 47 assignable percussion sounds + 20 assignable sound effects Display: MAIN VOL., RHYTHM VOL., TEMPO, LIGHT, PLAY LEVEL, RHYTHM, SE SET, DRUM SET, ASSIGN, EFFECT, U1/U2 indictors; note icon; mute icon; low battery icon;... -
Page 27: Appendix
Appendix Percussion Sound List Type Percussion Sound No. Display Name Bass Drums BassDrum 2 BassDrum 1 Snare Drums SnareDrum2 SnareDrum1 Tom Toms High Tom Low Tom HighMidTom LowMidTom HiFloorTom LoFloorTom Hi-Hats CloseHiHat Open HiHat PedalHiHat Cymbals Ride Cym. 1 Ride Cym. 2 CrashCym. -
Page 28: Sound Effect List
Sound Effect List Sound Effect Sound Effect Name Sound Effect No. SE PADS Assignment Set No. Display Name Beat Three Four Arena Stadium Sing Whistle Yeah-Ha Sci-Fic Laser Gun Punch Comedy Slide Laugh Band Hit Animal Crow Tiger Horse Drum Set List Drum Display Name... -
Page 29: Rhythm And Auto Drum Kit List
Rhythm and Auto Drum Kit List Bass Snare Perc. Tom Toms Hi-Hats Cymbals Percussion Drums Drums 01 TECHNO 02 EUROBEAT 03 FLASH 04 HIENERGY 05 TECHNOPOP 06 HIPHOP 07 TRIPHOP 08 GROOVYBOX 09 DJ SAM 10 RAVE 11 POP 12 BACKSTREET SOUND 13 LEISURE 14 DANCE FLOOR 15 ELECTRO... - Page 30 Perc. Percussion 01 TECHNO 02 EUROBEAT 03 FLASH 04 HIENERGY 05 TECHNOPOP 06 HIPHOP 07 TRIPHOP 08 GROOVYBOX 09 DJ SAM 10 RAVE 11 POP 12 BACKSTREET SOUND 13 LEISURE 14 DANCE FLOOR 15 ELECTRO 16 DRUM N BASS 17 TRANCE 18 PSYCHO 19 AMBIENT 20 HOUSE...
- Page 31 272A-E-031A Page 5 02.10.28, 11:20...
- Page 32 This recycle mark indicates that the packaging conforms to the environmental protection legislation in Germany. CASIO COMPUTER CO.,LTD. 6-2, Hon-machi 1-chome MA0106-A Printed in China Shibuya-ku, Tokyo 151-8543, Japan LD50-E-1 Page 3 02.10.28, 11:19...