Epson Stylus Pro 4000 Reference Manual
Color ink jet printer
Hide thumbs
Also See for Stylus Pro 4000:
- Field repair manual (231 pages) ,
- Printer manual (149 pages) ,
- User manual (64 pages)
Table of Contents
Advertisement
Advertisement
Table of Contents
Troubleshooting

Related Manuals for Epson Stylus Pro 4000


Summary of Contents for Epson Stylus Pro 4000
-
Page 1: Reference Guide
® Reference Guide... - Page 2 Neither Seiko Epson Corporation nor its affiliates shall be liable to the purchaser of this product or third parties for damages, losses, costs, or expenses incurred by purchaser or third parties as a result of: accident, misuse, or abuse of this product or unauthorized modifications, repairs, or alterations to this product, or (excluding the U.S.) failure to strictly comply with...
-
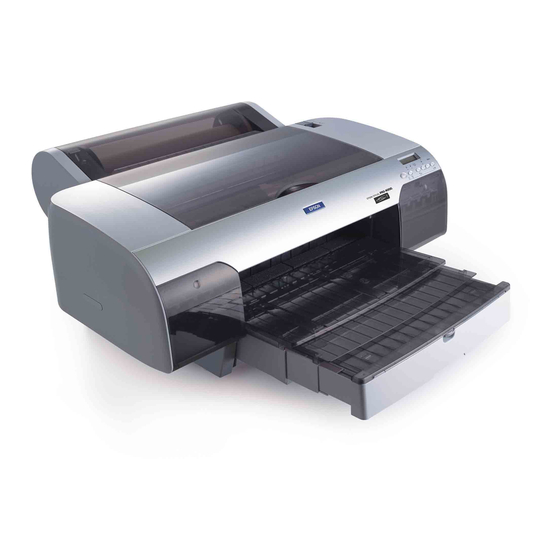
Page 3: Printer Parts
Printer Parts Front view Roll paper cover Paper lever Rear manual Top cover feed slot Control panel Roll paper support Ink lever Maintenance tank Paper tray cover Paper tray Front manual feed slot ink compartment Ink cartridge slot Rear view Knobs Rear cover AC inlet... -
Page 4: Table Of Contents
Contents Chapter 1 The Control Panel Buttons, Lights, and Messages ......12 Buttons . - Page 5 Using the EPSON Spool Manager ..... .114 Using EPSON Status Monitor 3 ......115 Increasing the Print Speed .
- Page 6 Sharing Your Printer ........118 For Windows XP .
- Page 7 Making Configuration Settings ......188 Using EPSON Monitor IV ......189 Accessing EPSON Monitor IV .
- Page 8 Notes for Epson Special Media and Other Media ... . . 235 Using Epson special media ......235 Using paper other than Epson special media .
- Page 9 The Printer Prints Nothing....... . .296 The printer is not correctly connected to the computer ..296 Your Epson printer is not selected as the default printer . . .297 Printer port setting does not match the printer connection port (for Windows only) .
- Page 10 Horizontal banding ........307 Vertical misalignment or banding ..... 308 Faint printout or gaps .
- Page 11 Epson Special Media ........340...
-
Page 12: Chapter 1 The Control Panel
Chapter 1 The Control Panel Buttons, Lights, and Messages The control panel of the printer consists of 6 buttons, 3 lights, and a 32-character liquid crystal display (LCD). 1 2 3 4 5 6 7 8 Menu 3sec. Buttons This section describes the function of the buttons on the control panel. - Page 13 Paper Source Selects the paper source (Roll Auto Cut On button /Roll Auto Cut Off /Sheet Cuts the roll paper automatically after printing if pressed and held for 3 seconds when Roll Auto Cut On is selected. Returns to the previous level when pressed in SelecType mode.
-
Page 14: Lights
Menu button Enters SelecType mode. Enters PRINT STATUS MENU if pressed during printing. Selects a desired menu in forward order if pressed in SelecType mode. Sets the selected parameter in the selected item in SelecType mode. Executes the item if the selected item is for execution only. -
Page 15: Combination Of Buttons
Paper check light (red) No paper is loaded in the paper tray when Sheet is selected as the paper source. Roll paper is out when Roll Auto Cut On Roll Auto Cut Off is selected as the paper source. Selected paper source (Roll Auto Cut On /Roll Auto Cut Off /Sheet ) does not match... -
Page 16: Messages
Messages This section describes the meaning of the messages displayed on the LCD. The messages displayed on the LCD are divided to status messages and error messages. For error messages, see “An error has occurred” on page 289. Message Description READY The printer is ready to print data. -
Page 17: Selectype Settings
SelecType Settings When to use SelecType The SelecType mode enables you to make printer settings similar to those you would normally make in the driver or software, as well as other additional settings — directly through the control panel. Note: ❏... -
Page 18: Selectype Menu List
SelecType menu list Menu Item Parameter “PRINTER “PLATEN GAP” on page 22 NARROW, STANDARD, SETUP” on WIDE, WIDER page 22 “PAGE LINE” on page 22 ON, OFF “INTERFACE” on page 23 AUTO, USB, IEEE1394, OPTION “CODE PAGE” on page 23 PC437, PC850 “PAPER MARGIN”... - Page 19 “PRINTER “VERSION” on page 27 Ixxxxx P STATUS” “PRINTABLE PG” on page 27 MK xxxxxxxPG on page C xxxxxxxPG M xxxxxxxPG Y xxxxxxxPG PK (MK-2) xxxxxxxPG LC (C-2) xxxxxxxPG LM (M-2) xxxxxxxPG LK (Y-2) xxxxxxxPG “INK LEFT” on page 28 MK E*****F, E****F, E***F, E**F, E*F, nn% C E*****F, E****F, E***F,...
-
Page 20: The Control Panel
“USE COUNT CLR” on page 29 PAPER “JOB HISTORY” on page 29 No. 0-No. 10 “JOB HSTRY CLR” on page 29 EXEC “TOTAL PRINTS” on page 29 nnnnnn “SERVICE LIFE” on page 29 CUTTER E*****F, E****F, E***F, E**F, E*F, EF CR MOTOR E*****F, E****F, E***F, E**F, E*F, EF... -
Page 21: Basic Selectype Setting Procedure
“MAINTEN “CUTTER REPL” on page 32 EXEC ANCE” on “CHNG INK SET” on page 32 EXEC page 32 “PWR CLEANING” on page 32 EXEC “CLOCK SETTING” on page 32 YY/MM/DD HH:MM MM/DD/YY HH:MM “HEAD “PAPER THKNS” on page 33 STD, 0.1 mm - 1.6 mm ALIGNME “ALIGNMENT”... -
Page 22: Details Of Selectype
5. Set the item Press the Menu button to enter the selected item. The first parameter is displayed on the LCD. 6. Select a parameter Press the Paper Feed or Paper Feed button to select a parameter for the item. 7. -
Page 23: Code Page
This operation changes according to the Auto Cut settings. Paper Source Print Page Line Printer’s Operation Roll Auto Cut On Prints page line on the right side only, and cuts paper automatically after the print job. Roll Auto Cut On Does not print page lines, and cuts paper automatically after the print job. -
Page 24: Paper Margin
PAPER MARGIN You can select margins for roll paper from T/B 15mm, 15mm, and 3mm. Margin settings Top/Bottom Left/Right T/B 15 mm 15 mm 3 mm 15 mm 15 mm 15 mm 3 mm 3 mm 3 mm Note: The combination of “Top/Bottom = 3 mm, Left/Right = 15 mm” is not selectable. - Page 25 PPR ALIGN CHK When you select ON, if the paper is not straight, PAPER NOT STRAIGHT is displayed on the LCD and the printer stops printing. When you select OFF, a paper align error does not occur even if the printed data is out of range of the paper and the printer continues to print.
- Page 26 Note: Do not select ON if you are using non-Epson special media, or if the width of paper you are using is less than 210 mm. AUTO CLEANING When you select ON and perform a nozzle check from the printer driver or the control panel, the printer does not only check the clogging nozzles, but also performs head cleaning automatically.
- Page 27 Note: You can print a nozzle check pattern using the Utility in the printer software. For Windows, see “Checking the print head nozzles” on page 102. For Mac OS 8.6 to 9.x , see “Checking the print head nozzles” on page 183.
- Page 28 INK LEFT You can see the amount of ink left in the each ink cartridge. E ✽✽✽✽✽ (100-81%) E ✽✽✽✽ (80-61%) E ✽✽✽ (60-41%) E ✽✽ (40-21%) E ✽ (20-11%) (less than 10%) MAINT TANK You can see the free capacity of Maintenance tank. E ✽✽✽✽✽...
- Page 29 USE COUNT CLR You can clear the values set in USAGE COUNT. JOB HISTORY You can see ink consumption (INK) in ml, paper consumption (PAPER) in m , and the time required for the print job (PRINT TIME) in seconds for each print job saved in the printer. The latest job is saved as No.
-
Page 30: Drying Time
CUSTOM PAPER This menu contains the following items. PAPER NUMBER When you select STD, the printer determines paper thickness automatically. You can also select No. X (X can be any number between 1 to 10) to register the following settings or to recall the following settings you made. - Page 31 THICKNESS NUM If you use Epson special media, you should normally select AUTO. If you use non-Epson special media, confirm the paper thickness detection pattern, and enter the number for the print pattern with the smallest gap. CUT METHOD You can specify the cutting method. There are four ways to cut paper, STANDARD, THIN PAPER, THICK, FAST, and THICK, SLOW.
- Page 32 DRYING TIME You can set the ink drying time per print head pass. The range is 0 to 10 seconds. SUCTION You can set the suction pressure for feeding the printed-paper. Select STANDARD, -1, -2, -3, or -4. M/W ADJ You can adjust the MicroWeave mode.
-
Page 33: Checking The Print Head Nozzles
PAPER THKNS You can adjust the paper thickness of the paper that you are going to use. If you use Epson special media and its paper thickness is 0.2mm or 1.2mm, select STD. If you use non-Epson special media, enter the paper thickness in the range of 0.0 to 1.6mm. -
Page 34: Aligning The Print Head
6. Press the Menu button again to start printing a nozzle check pattern. After printing a nozzle check pattern, the printer exits the SelecType mode and returns to the READY status. Nozzle check pattern examples: good head cleaning necessary If you find that any dots are missing from the test lines in the pattern, you need to clean the print heads. - Page 35 Paper Feed button to select STD or paper thickness value between 0.0mm and 1.6mm.When you want to print on Epson special media, select STD. When you want to print on non-Epson special media, enter the thickness value of the paper.
- Page 36 STD or paper thickness value between 0.1 mm and 1.6 mm.When you want to print on Epson special media, select STD. When you want to print on non-Epson special media, enter the thickness value of the paper.
-
Page 37: Making The Paper Settings
9. After printing, the pattern number and current set number are displayed. Select the set that has the smallest gaps, then press the Paper Feed or Paper Feed button to display the number for that set. 10. Press the Menu button to register the set number. - Page 38 STANDARD or the number (No. 1 to No. 10) you want to register as the setting. If you use Epson special media, select STANDARD, and skip to the step 9. You do not have to make paper thickness setting because STANDARD automatically determines paper thickness.
- Page 39 10. After printing the pattern, THICKNESS NUM is displayed. Press Paper Feed or Paper Feed button to select the number noted in step 9. 11. Press the Menu button to save the selected value. 12. CUT METHOD is displayed. Press the Paper Feed or Paper Feed button to select STANDARD, THICK, SLOW, THICK,...
-
Page 40: Printing A Status Sheet
3. Press the Paper Feed or Paper Feed button to display PAPER NUMBER, and press the Menu button. 4. Press the Paper Feed or Paper Feed button to select the number registered that you want to use. If you select STANDARD, the printer prints data according to the driver settings. -
Page 41: Chapter 2 Maintenance Mode
Chapter 2 Maintenance Mode Maintenance Mode Maintenance mode setting procedure This section describes how to enter the maintenance mode and how to make settings with the buttons on the control panel. To make the maintenance mode settings, follow these steps. Note: Press the Paper Source button to return to the previous step. -
Page 42: Maintenance Mode List
Note: If second parameter is displayed on the LCD, repeat the steps 4 and 5 to select and set the second parameter. 6. Exit the maintenance mode Press the Power button to turn off the printer, and turn it on again. Maintenance mode list Item First parameters... -
Page 43: Details Of Maintenance Mode Items
Details of maintenance mode items HEX DUMP Data received from the host computer can be printed out in hexadecimal numbers. To print it out, follow these steps. 1. Make sure that paper is loaded in the printer. 2. In maintenance mode, press the Paper Feed or Paper Feed button to display HEX DUMP. - Page 44 Note: It takes a while until READY (or similar word in the language selected) is displayed. UNITS You can select the units for displaying length. To select the units, follow these steps. Note: This item is available only when you choose ENGLISH in LANGUAGE. 1.
-
Page 45: Chapter 3 Printing With Windows
Layout Reduce/Enlarge, Double-Sided Printing, Multi-Page Utilities EPSON Status Monitor 3, Nozzle Check, Head Cleaning, Print Head Alignment, Printer and Option Information For information on making printer driver settings, see “Making Settings on the Main Menu” on page 53, “Making Settings on the Paper Menu”... -
Page 46: Accessing The Printer Software
Note: The specific features available in the printer software vary depending on the version of Windows you are using. Online help provides more information about the printer software. See “Getting Information Through Online Help” on page 111. Accessing the Printer Software To access the printer software installed in your computer, follow these steps. -
Page 47: From Windows Me And 98
From Windows Me and 98 1. Double-click the My Computer icon, and double-click the Printers. 2. Right-click your printer icon, and click Properties. The printer software window appears. From Windows 2000 1. Double-click the My Computer icon, the Control Panel icon, and the Printers. -
Page 48: Basic Settings
Basic Settings Making the printer driver settings This section describes the basic printer driver settings to print your data. To make the basic printer driver settings, follow these steps. 1. Click Print on the File menu of your application. The Print dialog box appears. - Page 49 4. Select the media that matches the paper loaded in the printer from the Media Type. See “Media Type setting list” on page Note: ❏ Check the media type and its paper path. See “Paper path list” on page 247. ❏...
- Page 50 8. Click the Paper tab. The Paper menu appears. 9. Select the type of paper loaded in the printer from the Paper Source. 10. Select Borderless to print your data with no margin. See “Making the Borderless setting” on page 75. 11.
- Page 51 13. Make settings for Orientation, Copies, and Printable Area as necessary. 14. Click the Layout tab. The Layout menu appears. 15. Select Reduce/Enlarge and adjust the size of printed data, if necessary. See “Making the Reduce/Enlarge setting” on page 89. Note: This function is not available when Roll Paper (Banner) is selected from the Paper Source.
-
Page 52: Canceling Printing
While printing, the EPSON Progress Meter appears, showing the printing progress and the status of your printer. Canceling printing To cancel the printing in progress, click Stop on the EPSON Progress Meter. You can also pause or restart printing. To pause printing, click Pause. -
Page 53: Making Settings On The Main Menu
Making Settings on the Main Menu You can make Media Type, Ink, and Mode settings, and check the remaining ink of the installed ink cartridges on this menu. Making the Media Type setting The Media Type setting determines what other settings are available, so you should always make this setting first. -
Page 54: Printing With Windows
❏ When using paper other than Epson special media, see “Notes for Epson Special Media and Other Media” on page 235. ❏ For the latest information on media available in your area, contact Epson customer support web site. See “Contacting Customer Support”... -
Page 55: Making The Ink Setting
Making the Ink setting You can select ink mode. Select Color/B&W Photo to print color or monotone photos, or Black to print a draft or black text only. Note: When printing on any media other than tracing paper, we recommend Color/B&W Photo even if the data to be printed is black. - Page 56 Depending on the media you choose in the Media Type while Automatic is selected, a slider appears in the Mode box that lets you choose Quality or Speed. Select Quality when print quality is more important than print speed. Select Speed when print speed is more important than print quality.
- Page 57 Note: ❏ This mode is only available when printing 8-, 16-, 24, or 32-bit color data. ❏ Printing with PhotoEnhance selected may increase the time required for printing, depending on your computer system and the amount of data. You can select from the following settings. Standard This setting provides standard image correction for most photos.
- Page 58 Custom mode lets you make a wide range of changes with a single click of the mouse. In the Custom Settings pull-down menu, you will find ready-made settings provided by Epson. They are designed to match particular kinds of printouts, such as graphs and charts for a presentation.
-
Page 59: Making Advanced Setting
Making Advanced setting The Advanced setting gives you complete control over your printing environment. Use these settings to experiment with new printing ideas, or to fine-tune a range of print settings to meet your individual needs. Once you are satisfied with your new settings, you can give them a name and add them to the Custom Settings pull-down menu. - Page 60 Color/B&W Photo even if the data to be printed is black. 4. Select a Print Quality setting. 5. If you are using non-Epson special media, click the Paper Config, and make settings as needed. For details, see “Paper Configuration” on page 61.
-
Page 61: Paper Configuration
+50) in the box next to the slider. Use this function when you print on paper other than Epson special media. Set the slider to the 0 position when you print on Epson special media. Note: The color of printout cannot be deepened depends on the printing mode. - Page 62 Paper This value automatically appears according to the media Thickness for the Media Type setting. If you use non-Epson media, modifying this value for your media is recommended. Refer to the paper specifications or print "Thickness Pattern" to find out the paper thickness.
- Page 63 When you use Epson special media, usually select this setting. Starwheel-Sheet: If you want to print on cut sheet which is non-Epson special media, select this setting. Starwheel-Roll Curled: If you want to print on strongly curled roll paper which is non-Epson special media, select this setting.
- Page 64 Printer Color Management Color Controls This setting provides the color matching and image-enhancement methods. When you select this setting, additional settings appear under the Printer Color Management box where you can select a Mode setting and adjust Color Enhancement sliders. For the details of additional settings, see online help.
- Page 65 PhotoEnhance This settings provides a variety of image-correction settings that you can apply to your photo images before printing. PhotoEnhance does not affect your original data. When you select this setting, you will need to make Tone, Effect, and Digital Camera Correction settings.
- Page 66 Tone Normal This setting provides standard image correction for most photos. Try this first. Hard This setting provides modulate image correction for your print data. Vivid This setting provides chromatic and vivid image correction for your print data. Sepia This setting applies a sepia tone to your photos.
- Page 67 Off (No Color Adjustment) This setting turns off printer driver color management. Use this setting when using the color management of the application to apply ICC profile. sRGB This setting is useful for color matching with other sRGB devices. Printing with Windows...
- Page 68 This setting uses the Windows color matching method to automatically adjust printout colors to match colors on your screen. Select this setting when printing scanned photographs or computer graphics. Note: Be aware that the ambient light and the age, quality, and settings of the monitor can affect the quality of your color matching.
- Page 69 Intent Select rendering intent or color mapping preference. Saturation: This setting is the best option for presentation graphics to accurately reproduce vivid colors. Use this setting is not recommended for printing photo data. Perceptual: This setting renders images so that colors appear natural. This setting is often used to render the wide color range of the original image.
- Page 70 If this happens, reselect your saved settings and try printing again. Note: The names of the ready-made settings provided by Epson cannot be applied to your new settings. Deleting the Advanced settings To delete your Advanced setting, follow these steps.
-
Page 71: Checking The Ink Levels
You can check the amount of the remaining ink of each ink cartridge. Note: ❏ If the printer is not connected properly or EPSON Status Monitor 3 is not installed, Cartridge Option is displayed instead. ❏ For High Speed Ink Set users:... -
Page 72: Previewing Your Printout
If you select the Print Preview check box, you can see how your data will look before printing. When you send a print job to the printer, the EPSON Print Preview window opens, allowing you to make changes before printing. - Page 73 Printable area Click this button to display a rectangle on/off indicating the printable area on the page being previewed. The printer cannot print anything which is outside of this rectangle. Click the button again to turn this feature off. Previous page Click this button to display the page previous to the one currently being previewed.
-
Page 74: Making Settings On The Paper Menu
Making Settings on the Paper Menu You can make Paper Source, Borderless, Paper Size, Roll Paper Option, Orientation, Copies, and Printable Area or Roll Paper Option settings on this menu. Note: When Paper Tray or Manual Feed is selected as the Paper Source, Printable Area is displayed on the menu, and this is the default.When Roll Paper or Roll Paper Banner is selected as the Paper Source, Roll Paper Option is displayed on the menu. -
Page 75: Making The Borderless Setting
Making the Borderless setting You can print your data without margins on the paper. For this printing mode, Epson recommends the following media conditions. Accommodate media width: ❏ 8 inch, 203.2 mm ❏ 210 mm (A4) ❏ Letter (8.5 in), 215.9 mm ❏... - Page 76 ❏ Printing with this feature takes longer than for normal printing. ❏ When printing on the following media, the bottom margin is always 14 mm. EPSON Premium Glossy Photo Paper EPSON Premium Semigloss Photo Paper EPSON Premium Luster Photo Paper...
-
Page 77: Making The Auto Cut Setting
2. Choose Auto Expand or Retain Size from the pull-down menu next to the Borderless check box. Auto Select this setting if you want to enlarge the size of print Expand data automatically and print with no margins. Note: Enlarged areas that exceed the paper size will not be printed on the paper. - Page 78 Single Cut Select this setting if you want to save paper. If you select this setting, the boundary of a picture and a picture, or boundary of a page and page is cut. However, the cut position may shift slightly. Double Cut Select this setting to avoid the slight gap that occurs with the Single Cut setting.
- Page 79 Normal Cut Select this setting to keep margins at the top and bottom of the printed data. Select this setting to cut the printouts manually. To cut the printouts manually, follow these steps. 1. Press the Paper Feed or Paper Feed button, and match the cutting position with the scissors mark on the left side of the print head.
-
Page 80: Making The Paper Size Setting
2. Press the Paper Source button to select Roll Auto Cut On 3. Press and hold the Paper Source button for 3 seconds. The paper cutter cuts the printout at the cutting position. Making the Paper Size setting You can select the paper size that you want to use. Select the proper paper size in the Paper Size. -
Page 81: Making The Printable Area Setting
Making the Printable Area setting This setting is available when you select Paper Tray or Manual Feed as the Paper Source. You can make the following settings. Standard Select this setting to use the standard printable area. Printing with Windows... - Page 82 Select this setting to increase the printable area at the bottom edge. Note: ❏ This setting is not available for the following media. EPSON Premium Glossy Photo Paper EPSON Premium Semigloss Photo Paper EPSON Premium Luster Photo Paper EPSON Proofing Paper Semimatte...
-
Page 83: Making The Roll Paper Option Settings
Making the Roll Paper Option settings This option is available when you select Roll Paper or Roll Paper (Banner) as the Paper Source. You can make the following settings. Printing with Windows... - Page 84 Auto Rotate Note: This function is not available when Roll Paper (Banner) is selected as the Paper Source. This function is effective only when the print data length is shorter than the printable width of the roll paper. The print data will automatically be turned 90 degrees to print crosswise, saving roll paper.
-
Page 85: Print Page Line
Print Page Line This function lets you to specify whether to print a page line on the right side, and also below the document for manual cutting. To enable this function, select Print Page Line. The Print Page Line operation changes according to the Auto Cut setting. -
Page 86: Making The Orientation Settings
Making the Orientation settings You can specify the direction of printing on the page. Portrait Print direction is short edge first, like most magazines. Landscape Print direction is long edge first, like many spreadsheets. Rotated by 180° Prints your document upside down. Note: This function is not available when Roll Paper (Banner) is selected as the Paper Source. -
Page 87: Making The Copies Setting
Making the Copies setting You can specify the number of copies. Type the number you want in the Copies box, or click the arrow next to the box. You can enter any number from 1 to 9999. Printing with Windows... -
Page 88: Making Settings On The Layout Menu
Making Settings on the Layout Menu You can make Reduce/Enlarge, Double-Sided Printing, and Multi-Page settings on this menu. Printing with Windows... -
Page 89: Making The Reduce/Enlarge Setting
Making the Reduce/Enlarge setting You can fit the size of your data to the size of paper you will print on. To enable this function, select Reduce/Enlarge. When this function is enabled, you can make the following settings Fit to Page Proportionally enlarges or reduces the size of your data to make it fit the paper size you select in the Output Paper Size. -
Page 90: Making Double-Sided Printing Setting
Making Double-sided Printing setting You can perform double-sided printing. There are two types of double-sided printing available. Standard double-sided printing lets you to print the odd-numbered pages first. Once these pages are printed, they can be reloaded to print the even-numbered pages onto the opposite side of the paper. - Page 91 Standard double-sided printing To print odd and even numbered pages onto opposite sides of the sheet, follow these steps. 1. Select Double-Sided Printing. 2. Click Margins. The following dialog box appears. 3. Specify the edge of the paper where the binding will be placed.
- Page 92 4. Specify the width of the binding margin using the Binding Margin text box. You can specify any width from 3 mm to 30 Note: The actual binding margin may vary from the specified settings depending on your application. Experiment with a few sheets to examine actual results prior to printing the entire job.
- Page 93 Folded Booklet double-sided printing You can also make single-fold booklets using the double-sided printing feature. To create a single-fold booklet, the pages that appear on the outside (after the booklet is folded) are printed first. The pages that will appear inside the booklet can then be printed after the paper is reloaded into the printer.
- Page 94 1. Select Double-Sided Printing, and select Folded Booklet. 2. Click Margins. The Margins dialog box appears. Printing with Windows...
- Page 95 3. Specify the edge of the paper where the binding will be placed. You can choose from Left, Top, and Right. Note: When Portrait is selected as the Orientation setting on the Main menu, Left or Right binding positions are available. The Top binding position is supported when Landscape is selected as the Orientation setting.
- Page 96 7. Instructions for printing the inside pages will be displayed while the outside pages are output. Follow the on-screen instructions for reloading the paper. Note: ❏ The paper may curl during printing due to the amount of ink used. Should this occur, slightly curl the sheets in the opposite direction prior to reloading them into the printer.
-
Page 97: Making Multi-Page Settings
Making Multi-Page settings Selecting Multi-Page lets you choose between the N-up and Poster settings. Printing with Windows... - Page 98 Making N-up settings Select N-up as the Multi-Page setting to print two or four pages of your document on one sheet of paper. When N-up is selected, you can make the following settings: 2 Pages Prints two or four pages of your data on a single 4 Pages piece of paper.
- Page 99 Making Poster settings A single page can be enlarged to cover 4, 9, or 16 printed sheets of paper. Select Poster as the Multi-Page setting to print a poster-size image. Click Settings to adjust the way your poster will print. The Poster Settings dialog box opens.
-
Page 100: Using The Printer Utilities
OK to close the Poster Settings dialog box. Using the Printer Utilities EPSON printer utilities let you to check the current printer status and do some printer maintenance from your screen. Printing with Windows... - Page 101 ❏ Do not use Nozzle Check, Head Cleaning, or Print Head Alignment utilities while printing is in progress. Otherwise, your printout may be marred. EPSON Status Monitor 3 This utility provides you with printer status information, such as the amount of ink remaining, and checks for printer error.
-
Page 102: Checking The Print Head Nozzles
Head Cleaning This utility cleans the print head. You may need to clean the print head if you notice print quality has declined. Use this utility to perform the head cleaning. See “Cleaning the print head” on page 104. Head Alignment This utility can be used to improve the print quality of your printed data. - Page 103 Print has been selected, the Nozzle Check utility does not only check the clogging nozzles, but also performs head cleaning automatically. If you are using non-Epson special media, or if the width of paper you are using is less than 210 mm, turn off AUTO CLEANING from the control panel on the printer.
-
Page 104: Cleaning The Print Head
Cleaning the print head If you find that the printed data is unexpectedly faint or dots in the printed data are missing, you may be able to solve these problems by cleaning the print head, which ensures that the nozzles are delivering ink properly, by using the Head Cleaning utility. -
Page 105: Aligning The Print Head
❏ Repeat this procedure four or five times, turn the printer off and leave it alone overnight, and try head cleaning again. ❏ Replace some of ink cartridges as they may be old or damaged. If the print quality remains a problem after you have tried these solutions, contact your dealer. -
Page 106: Using Printer And Option Information
Using Printer and Option Information This utility lets the printer driver to confirm printer configuration information. It also provides specific information regarding certain characteristics of the printer. If message appears in the Current Setting box prompting you to enter settings, or if you change the printer’s configuration, make the necessary settings manually. - Page 107 Printer ID Depending on the configuration of your system, the information displayed in the Printer and Option Information dialog box may be updated automatically, or may need to be updated manually. To make the Printer ID setting, follow these steps. 1.
-
Page 108: Making The Speed & Progress Settings
Making the Speed & Progress settings You can make settings related to print speed and progress. To make the Speed & Progress settings, click Speed & Progress on the Utility menu. The Speed & Progress dialog box appears. Note: The specific features available in the printer software vary depending on the printer model and version of Windows that you are using. - Page 109 Progress Meter may differ from actual printing progress. Monitoring Preferences This function lets you to specify the monitoring feature of the EPSON Status Monitor 3. To make settings for the EPSON Status Monitor 3, follow these steps. Printing with Windows...
- Page 110 Select the Shortcut Icon to have a shortcut icon placed in your Windows taskbar. Clicking the shortcut icon in the taskbar will open EPSON Status Monitor 3. To select which icon will be displayed, click the icon you prefer from the choices given;...
-
Page 111: Getting Information Through Online Help
2. For Windows XP users, click All Programs. For Windows Me, 98, 2000, or NT 4.0 users, click Programs. 3. For Windows XP, 2000, or NT 4.0 users, click EPSON Printers. For Windows Me or 98 users, click EPSON. 4. Click EPSON Stylus Pro 4000 Help. The help contents appears. -
Page 112: Checking Printer Status And Managing Print Jobs
Checking Printer Status and Managing Print Jobs Using the Progress Meter When you send a print job to the printer, the Progress Meter opens. The Progress Meter indicates the progress of the current print job and provides printer status information when bi-directional communication between the printer and computer is established. - Page 113 EPSON Printing Tips Tips for getting the most out of your Epson printer driver appear at the bottom of the Progress Meter window. A new tip appears every 30 seconds. For more details on a displayed tip, click Details. Error messages If a problem occurs during printing, an error message appears on the text box at the top of the Progress Meter dialog box.
-
Page 114: Using The Epson Spool Manager
Using the EPSON Spool Manager Note: EPSON Spool Manager is not available for Windows XP, 2000, and NT 4.0. EPSON Spool Manager is similar to Windows Print Manager. If it receives two or more print jobs at one time, it puts them in a line (or print queue) in the order received. -
Page 115: Using Epson Status Monitor 3
To add a shortcut icon to the taskbar, see “Monitoring Preferences” on page 109. Accessing EPSON Status Monitor 3 from the printer driver To access EPSON Status Monitor 3 from the printer driver, follow these steps. 1. Access the printer driver. See “Accessing the Printer Software”... - Page 116 EPSON Status Monitor 3 provides you with detailed printer status information, a graphic display, and status messages. If the ink runs low or out, How to appears in the EPSON Status Monitor 3 window. Click How to to display cartridge replacement instructions.
-
Page 117: Increasing The Print Speed
Increasing the Print Speed General tips Printing color data using higher print quality settings takes longer than printing black-and-white data in standard print quality, as the volume of high quality color data is much greater. For this reason, it is important to be selective in your use of color and print quality settings if you also require a faster print speed. -
Page 118: Using Speed & Progress
Print speed Faster Slower Data Variety of Grayscale Full color characteristics colors Hardware System Fast Slow resources speed HDD free Large Small space Memory free Large Small space Software status Running Many applications Virtual Not in use In use memory Using Speed &... -
Page 119: For Windows Xp
Note: To connect your printer directly to a network without setting it up as a shared printer, consult your network administrator. For Windows XP Setting up your printer as a shared printer To share a printer that is connected directly to your computer with others on a network, follow these steps. - Page 120 3. Select Share this printer, and type the name in the Share name box. 4. Click OK. Note: Do not choose any drivers from the Additional Drivers list. Accessing the shared printer To access the shared printer from another computer on a network, follow these steps.
- Page 121 2. Click the Start button, and open Printers and Faxes. Right-click your printer's icon, and open the Properties for your printer. 3. Click the Ports tab, and click Add Port. 4. Select Local Port, then click New Port. 5. In the text box, type the following information: \\name of computer that is connected to the printer\name of the shared printer Printing with Windows...
-
Page 122: For Windows Me And 98
Then click OK. 6. Close the Printer Ports dialog box to return to the Ports menu. 7. On the Ports menu, make sure that the new port is added and the check box is selected. Click OK to close the Properties. For Windows Me and 98 Setting up your printer as a shared printer To share a printer connected directly to your computer with other... - Page 123 2. Double-click Network. 3. Click File and Print Sharing. 4. Click the I want to be able to allow others to print to my printer(s), and click OK. 5. In the Network window, click OK. Printing with Windows...
- Page 124 6. In the Control Panel, double-click Printers. Note: ❏ If a dialog box requesting the Windows Me or 98 CD-ROM appears, insert the CD-ROM in the CD-ROM drive, then follow the on-screen instructions. ❏ If a dialog box appears requesting you to restart your computer, do so.
- Page 125 Note: Your printer must be setup as a shared resource on the computer to which it is directly connected before you can access it from another computer. 1. On the computer you want to access the printer from, click the Start button, point to Settings, and click Printers. 2.
- Page 126 5. Click Browse. 6. Double-click the icon of the computer that is directly connected to the printer. Then click the printer’s icon. 7. Click OK and follow the on-screen instructions. Printing with Windows...
-
Page 127: For Windows 2000 And Nt 4.0
For Windows 2000 and NT 4.0 Setting up your printer as a shared printer To share a printer that is connected directly to your computer with others on a network, follow these steps. 1. Click the Start button, point to Settings, and click Printers. 2. - Page 128 Accessing the shared printer To access the shared printer from another computer on a network, follow these steps. Note: Your printer must be set up as a shared resource on the computer to which it is directly connected before you can access it from another computer.
- Page 129 4. Select Local Port, and click New Port. 5. In the text box, type the following information: \\name of computer that is connected to the printer\name of the shared printer Then click OK. 6. When you enter the information, the Cancel button on the Printer Ports dialog box changes to the Close button.
-
Page 130: Updating And Uninstalling The Printer Software
7. On the Ports menu, make sure that the new port is added and the check box is selected. Click OK to close the printer driver. Updating and Uninstalling the Printer Software This section describes how to upgrade your Windows operating system, update the printer software in Windows XP, 2000, or Me, and uninstall the printer driver from your computer. -
Page 131: Updating The Driver In Windows Xp, 2000, And Nt 4.0
3. For Windows XP users, double-click Add or Remove Programs. For Windows Me, 98, 2000, and NT 4.0 users, double-click Add/Remove Programs. 4. Select EPSON Printer Software to uninstall the printer driver from the software list. 5. For Windows XP and 2000 users, click Change/Remove. -
Page 132: Uninstalling The Usb Host Device Driver
2. Double-click Add/Remove Programs. 3. Select the EPSON USB Printer Devices, and click Add/Remove. Note: If EPSON USB Printer Devices does not appear in the Add/Remove Program list, double-click EPUSBUN.EXE on the printer software CD-ROM. 4. Follow the on-screen instructions. -
Page 133: Chapter 4 Printing With Mac Os 8.6 To
Roll Paper Option Layout Fit to Page, Multi-Page, Print Order Utility EPSON Status Monitor, Nozzle Check, Head Cleaning, Print Head Alignment, Configuration For information on making printer driver settings, see “Making Settings in the Print Dialog Box” on page 139, “Making Settings in the Page Setup Dialog Box”... -
Page 134: Accessing The Printer Software
Accessing the Printer Software To access the printer software installed in your computer, follow these steps. Accessing the Print dialog box To access the Print dialog box, click Print on the File menu of your application, or click Options in the Page Setup dialog box. Accessing the Page Setup dialog box To access the Page Setup dialog box, click Page Setup on the File menu of your application. -
Page 135: Basic Settings
Basic Settings Making the printer driver settings This section describes the basic printer driver settings to print your data. To make the basic printer driver settings, follow these steps. Note: While many Macintosh applications override the settings made in the printer driver, some do not, so you must verify the settings to get the results you expect. - Page 136 4. Select Borderless if you want to print your data with no margin. See “Making the Borderless setting” on page 160. 5. Make settings for Orientation and Reduce or Enlarge as necessary. 6. When Paper Tray or Manual Feed is selected as the Paper Source, make the Printable Area setting as needed.
-
Page 137: Canceling Printing
11. Make the Ink setting. Select Color/B&W Photo to print color or monotone photos, or Black to print a draft or black text only. Note: When printing on any media other than tracing paper, we recommend Color/B&W Photo even if the data to be printed is black. 12. - Page 138 When background printing is on 1. Select EPSON Monitor IV from the Application menu at the right end of the menu bar. 2. Turn off the printer. 3. Click the name of data which is in print process on the screen, Stop to cancel the print job.
-
Page 139: Making Settings In The Print Dialog Box
Note: ❏ The availability of special media varies by country. ❏ When you are using paper other than Epson special media, see “Notes for Epson Special Media and Other Media” on page 235. ❏ For the latest information on media available in your area, contact Epson customer web site. - Page 140 EPOSN Premium Glossy Photo Paper Premium Semigloss Photo Paper EPSON Premium Semigloss Photo Paper Premium Luster Photo Paper EPSON Premium Luster Photo Paper Premium Luster Photo Paper (250) EPSON Premium Luster Photo Paper (Roll) (250) Premium Glossy Photo Paper (250)
-
Page 141: Making The Ink Setting
Making the Ink setting You can select ink mode. Select Color/B&W Photo to print color or monotone photos, or Black to print a draft or black text only. Note: When printing on any media other than tracing paper, we recommend Color/B&W Photo even if the data to be printed is black. - Page 142 PhotoEnhance PhotoEnhance mode lets you choose from a variety of image-correction settings specially designed for photos. PhotoEnhance does not affect your original data. Note: ❏ This mode is only available when printing 8-, 16-, 24, or 32-bit color data. ❏ Printing with PhotoEnhance selected may increase the time required for printing, depending on your computer system and the amount of data contained in your data.
- Page 143 Custom mode lets you make a wide range of changes with a single click of the mouse. In the Custom Settings pull-down menu, you will find ready-made settings provided by Epson. They are designed to match particular kinds of printouts, such as graphs and charts for a presentation.
-
Page 144: Making Advanced Setting
Making Advanced setting The Advanced setting gives you complete control over your printing environment. Use these settings to experiment with new printing ideas, or to fine-tune a range of print settings to meet your individual needs. Once you are satisfied with your new settings, you can give them a name and add them to the Custom Settings list. - Page 145 Color/B&W Photo even if the data to be printed is black. 4. Select a Print Quality setting. 5. If you are using non-Epson special media, click Paper Config, and make settings as needed. For details, see “Paper Configuration” on page 146.
- Page 146 (-50 to +50) in the box next to the slider. Use this function when you print on paper other than Epson special media. Set the scroll bar to the 0 position when you print on Epson special media. Note: The color of printout cannot be deepened depends on the printint mode.
- Page 147 Paper This value automatically appears according to the media Thickness for the Media Type setting. If you use non-Epson media, modifying this value for your media is recommended. Refer to the paper specifications or print "Thickness Pattern" to find out the paper thickness.
- Page 148 When you use Epson special media, usually select this setting. Starwheel-Sheet: If you want to print on cut sheet which is non-Epson special media, select this setting. Starwheel-Roll Curled: If you want to print on strongly curled roll paper which is non-Epson special media, select this setting.
- Page 149 Printer Color Management Color Controls This setting provides the color matching and image-enhancement methods. When you select this setting, additional settings appear under the Printer Color Management box where you can select a Mode setting and adjust Color Enhancement sliders. For the details of additional settings, see online help.
- Page 150 PhotoEnhance This setting provides a variety of image-correction settings that you can apply to your photo images before printing. PhotoEnhance does not affect your original data. When you select this setting, you will need to make Tone, Effect, and Digital Camera Correction settings.
- Page 151 Tone Normal Applies Epson standard tone adjustment to your printed data. Try this first. Hard Prints in high contrast, which sharpens the printed data. Vivid Intensifies the colors, and lightens the midtones and highlights of printed data. Use this setting for presentation graphics, such as charts and graphs.
- Page 152 ColorSync This setting automatically adjusts printout colors to match colors on your screen. Select this setting when printing scanned photographs or computer graphics. Note: Be aware that the ambient light and the age, quality, and settings of the monitor can affect the quality of your color matching. Printing with Mac OS 8.6 to 9.x...
- Page 153 Off (No Color Adjustment) This setting is generally not recommended, because it does not allow the printer driver to enhance or adjust the color in any way. Only use this setting when you create a new color profile or if the other Mode settings do not produce satisfactory results.
- Page 154 If this happens, reselect your saved settings and try printing again. Note: The names of the ready-made settings provided by Epson cannot be applied to your new settings. Deleting the Advanced settings To delete your Advanced settings, follow these steps.
-
Page 155: Making The Copies Setting
Making the Copies setting You can specify the number of copies. Type the number you want in the Copies box, or click the arrows next to the box. You can enter any number from 1 to 9999. Making the Pages setting You can specify the range or printed pages. -
Page 156: Previewing Your Printout
To set the print time, follow these steps. 1. Click Background Printing, if necessary. 2. Select On as the Background Printing, if necessary. 3. Select Urgent, Normal, Print at, or Hold as the Print Time. If you select Print at, use the arrows beside the date and time boxes to specify the date and time that you want to print the data. - Page 157 3. Click Preview. The Preview dialog box appears, and displays a preview of your data. The Preview dialog box contains several icon buttons that you can use to perform the following functions. Zoom Click this button to enlarge or reduce the size of the previewed page.
-
Page 158: Making Settings In The Page Setup Dialog Box
4. If you are satisfied with the previewed data, click Print. If you are not satisfied with the appearance of the data, click Cancel. The Preview and Print dialog boxes close with the current print settings preserved. Open the Print dialog box again to make additional changes to the print settings. - Page 159 1. Click Customize. The following dialog box appears. 2. To define a new paper size, click New. 3. Type a unique name for the paper size in the paper size list. 4. Specify the measurement unit as either cm or inch. 5.
-
Page 160: Making The Paper Source Setting
Paper Source pull-down menu. Select one that matches the paper loaded in the printer. Making the Borderless setting You can print your data without margins on the paper. For this printing mode, Epson recommends the following media conditions. Accommodate media width: ❏ 8 inch, 203.2 mm ❏... - Page 161 ❏ Printing with this feature takes longer than for normal printing. ❏ When printing on the following media, the bottom margin is always 14mm. EPSON Premium Glossy Photo Paper EPSON Premium Semigloss Photo Paper EPSON Premium Luster Photo Paper EPSON Proofing Paper Semimatte...
-
Page 162: Making The Auto Cut Setting
2. Choose Auto Expand or Retain Size from the pull-down menu next to the Borderless check box. Auto Select this setting if you want to enlarge the size of print Expand data automatically and print with no margins. Note: Enlarged areas that exceed the paper size will not be printed on the paper. - Page 163 Single Cut Select this setting if you want to save paper. If you select this setting, the boundary of a picture and a picture, or boundary of a page and page is cut. However, the cut position may shift slightly. Double Cut Select this setting to avoid the slight gap that occurs with the Single Cut setting.
- Page 164 Normal Cut Select this setting to keep margins at the top and bottom of the printed data. Select this setting to cut the printouts manually. To cut the printouts manually, follow these steps. 1. Press the Paper Feed or Paper Feed button, and match the cutting position with the scissors mark on the left side of the print head.
-
Page 165: Making The Orientation Setting
2. Press the Paper Source button to select Auto Cut On 3. Press and hold the Paper Source button for 3 seconds. The paper cutter cuts the printout at the cutting position. Making the Orientation setting You can specify the direction of printing on the page. Portrait Print direction is short edge first, like most magazines. -
Page 166: Making Double-Sided Printing Setting
Making Double-sided Printing Setting You can perform double-sided printing. There are two types of double-sided printing available. Standard double-sided printing allows you to print the odd-numbered pages first. Once these pages are printed, they can then be reloaded to print the even-numbered pages onto the opposite side of the paper. - Page 167 Standard double-sided printing To print odd and even numbered pages onto opposite sides of the sheet, follow these steps. 1. Select the Double-Sided Printing. 2. Click Margins. The following dialog box appears. 3. Specify the edge of the paper where the binding will be placed.
- Page 168 4. Specify the width of the binding margin using the Binding Margin text box. You can specify any width from 3 mm to 30 Note: The actual binding margin may vary from specified settings depending on your application. Experiment with a few sheets to examine actual results prior to printing the entire job.
- Page 169 Folded Booklet double-sided printing You can also make single-fold booklets using the double-sided printing feature. To create a single-fold booklet, the pages that appear on the outside (after the booklet is folded) are printed first. The pages that will appear inside the booklet can then be printed after the paper is reloaded into the printer.
- Page 170 1. Select Double-Sided Printing, and select the Folded Booklet. 2. Click Margins. The Margins dialog box appears. 3. Specify the edge of the paper where the binding will be placed. You can choose from Left, Top, and Right. Note: When Portrait is selected as the Orientation setting in the printer driver, Left or Right binding positions are available.
- Page 171 4. Specify the width of the binding margin using the Binding Margin text box. You can specify any width from 3 mm to 30 mm. The specified margin width will be used on both sides of the fold. For example, if a 10-mm margin is specified, a 20-mm margin will be inserted (a margin of 10 mm will be placed on each side of the fold).
-
Page 172: Making The Reduce Or Enlarge Setting
❏ Align the sheet stack by tapping its edges against a hard, flat surface prior to reloading the stack into the printer. ❏ Follow the instructions provided when reloading the printouts. Paper jams or improperly placed binding margins may occur if the printouts are not reloaded correctly. -
Page 173: Making The Printable Area Settings
Select this setting to increase the printable area at the bottom edge. Note: ❏ This setting is not available for the following media. EPSON Premium Glossy Photo Paper EPSON Premium Semigloss Photo Paper EPSON Premium Luster Photo Paper EPSON Proofing Paper Semimatte... -
Page 174: Making The Roll Paper Option Settings
Centered Select this setting to center the print out. Making the Roll Paper Option settings This option is available when you select Roll Paper or Roll Paper (Banner) as the Paper Source. You can make the following settings. Auto Rotate Note: This function is not available when Roll Paper (Banner) is selected as the Paper Source. - Page 175 This function is effective only when the print data length is shorter than the printable width of the roll paper. The print data will automatically be turned 90 degrees to print crosswise, saving roll paper. Original Auto Rotate off Auto Rotate on To enable this function, select Auto Rotate.
-
Page 176: Making Settings In The Layout Dialog Box
Save Roll Paper Note: This function is available only when Roll Paper (Banner) is selected as the Paper Source. This function is effective if you wish to save roll paper because blank portion of the last page or your printed data is not fed through the printer.To enable this function, select Save Roll Paper. -
Page 177: Making The Fit To Page Setting
Making the Fit to Page setting You can enlarge or reduce the size of the data proportionally to make it fit the paper size you selected in the Paper Size pull-down menu. To use this function, select Fit to Page, and select the paper size you loaded in the printer in the Output Paper Size pull-down menu. - Page 178 Making Pages Per Sheet settings Select Pages Per Sheet as the Multi-Page setting to print two or four pages of your document on one sheet of paper. When Pages Per Sheet is selected, you can make the following settings: 2 Pages Prints two or four pages of your document on a 4 Pages single piece of paper.
- Page 179 Making Poster settings A single document page can be enlarged to cover 4, 9, or 16 printed sheets of paper. Select Poster as the Multi-Page setting to print a poster-size image. You can make the following settings. 1 page covers xx sheets Specifies how many printed sheets of paper the enlarged document page is to cover.
-
Page 180: Making Print Order Settings
Making Print Order settings You can specify the printing order for your print job. When printing multiple copies of your document, select Collate to print one complete document set at a time. Select Reverse Order to print your documents in reverse order, starting with the last page. Printing with Mac OS 8.6 to 9.x... -
Page 181: Using The Printer Utilities
Using the Printer Utilities EPSON printer utilities let you to check the current printer status and do some printer maintenance from your screen. Note: ❏ Do not use Nozzle Check, Head Cleaning, or Print Head Alignment utilities if your printer is connected to your computer through a network. - Page 182 185. Configuration Clicking this button opens the Configuration Settings dialog box, where you can change the way the EPSON Status Monitor utility notifies you when the printer status changes. See “Making Configuration Settings” on page 188. Printing with Mac OS 8.6 to 9.x...
-
Page 183: Checking The Print Head Nozzles
2. Click Nozzle Check. 3. Click Print if you want to visually check if any print head nozzles are clogged, if you are using non-Epson special media, or if the width of paper you are using is less than 210 mm. -
Page 184: Cleaning The Print Head
Print has been selected, the Nozzle Check utility does not only check the clogging nozzles, but also performs head cleaning automatically. If you are using non-Epson special media, or if the width of paper you are using is less than 210 mm, turn off AUTO CLEANING from the control panel on the printer. -
Page 185: Aligning The Print Head
2. Click Head Cleaning. 3. Follow the on-screen instructions. 4. Click Print Nozzle Check Pattern in the Head Cleaning dialog box to confirm that the head is cleaned and to reset the cleaning cycle. If you still find missing dots after cleaning, try these solutions. ❏... -
Page 186: Getting Information Through Online Help
Checking Printer Status and Managing Print Jobs Using the EPSON StatusMonitor EPSON StatusMonitor regularly monitors the printer status. If a printer error is detected, you will be informed with an error message. You can also use this utility to check ink levels before printing. - Page 187 2. Click StatusMonitor, or click Utility. If you click Utility, click EPSON StatusMonitor in the Utility dialog box. The EPSON StatusMonitor dialog box appears. EPSON StatusMonitor informs you of the amount of ink remaining as of the time the StatusMonitor was opened. To update ink-level information, click Update.
-
Page 188: Making Configuration Settings
Making Configuration Settings You can select the way the EPSON StatusMonitor utility monitors your printer, and the way you will be notified of information. To make Configuration settings, click Configuration in the Utility dialog box. The Configuration Settings dialog box appears. -
Page 189: Using Epson Monitor Iv
Using EPSON Monitor IV After you send a print job to the printer, you can use the EPSON Monitor IV utility to check, cancel, or change the priority of print job that are queued for printing. This utility also shows the status of the job currently being printed. - Page 190 Background Printing dialog box. 2. Send a print job to the printer. 3. Select EPSON Monitor IV from the Application menu at the right end of the menu bar. The EPSON Monitor IV dialog box appears. Note: You can also open EPSON Monitor IV dialog box by double-clicking the EPSON Monitor IV icon in the Extensions folder.
-
Page 191: Managing Print Jobs Using Epson Monitor Iv
Managing print jobs using EPSON Monitor IV You can manage the print jobs in the following ways. ❏ Use the following buttons to hold, resume, and delete print jobs. Select the print job that you want to manage, and click the appropriate button. - Page 192 ❏ Click the Show details arrow to open an extension at the bottom of the EPSON Monitor IV dialog box. The extension displays detailed information on the selected data’s printer software settings. Changing print job priority To change the priority of print jobs in a print queue, follow these steps.
-
Page 193: Sharing Your Printer
2. Click the Show details arrow to open an extension at the bottom of the EPSON Monitor IV dialog box. 3. Select Urgent, Normal, Hold, or Print Time from the Priority pull-down menu. Sharing Your Printer This section describes how to share your printer so that other computers on a network can use it. -
Page 194: Setting Up Your Printer As A Shared Printer
Setting up your printer as a shared printer To share a printer connected directly to your computer with other computers on an AppleTalk network, follow these steps. 1. Turn on the printer. 2. Select Chooser from the Apple menu and click the printer’s icon. -
Page 195: Accessing The Shared Printer
Accessing the shared printer To access the shared printer from another computer on the network, follow these steps. 1. Turn on your printer. 2. On each computer from which you want to access the printer, select Chooser from the Apple menu. Click your printer's icon and select the printer port you want to use from the Select a printer port box on the right. -
Page 196: Uninstalling The Printer Software
Uninstalling the Printer Software To uninstall the printer driver, follow these steps. 1. Turn on your computer and insert the printer software CD-ROM into the CD-ROM drive. The Epson printer software disk opens automatically. 2. Find the English folder, and double-click it. -
Page 197: Printer Software Introduction
Adjustment, Paper Thickness, Paper Suction, Cut Method, Platen Gap, Eject Roller Type Roll Paper Option: Auto Cut, Print Page Line, Save Roll Paper Summary option: Summary of current settings Utility EPSON Status Monitor, Nozzle Check, Head Cleaning, Print Head Alignment Printing with Mac OS X... -
Page 198: Accessing The Printer Software
To access the Print dialog box, click Print on the File menu of your application. Accessing the Utility dialog box To access the Utility dialog box, double-click the EPSON Printer Utility icon in the Applications folder in Macintosh HD (by default setting). -
Page 199: Page Setup Dialog Settings
Page Setup dialog settings You can make appropriate Settings, Format for, Paper Size, Orientation, and Scale settings that you want to use for printing. Note: Page Setup dialog box is a standard feature of Mac OS X. See your operating system’s documentation for details. Settings You can select Page Attributes or Summary. -
Page 200: Format For
Format for Select a printer with the desired paper and margins. Printer Description SPro 4000: Borderless Select this setting when printing on a cut sheet. (Auto Expand) Prints your data with no margins enlarging the size of print data automatically. SPro 4000: Borderless Select this setting when printing on a cut sheet. -
Page 201: Paper Size
Note: Always match the Format for setting in the Page Setup dialog box and the Printer setting in the Print dialog box. Otherwise the data may not be printed correctly. Paper Size Select the paper size that you want to use. Orientation Select the printing orientation. -
Page 202: Print Dialog Box Settings
Print dialog box settings You can make appropriate Printer and Presets settings that you want to use for printing. Note: Print dialog box is the standard feature of Mac OS X. See your operating system’s documentation for details. Printer Select a printer with the desired paper and margins. Printer Description SPro 4000: Borderless... -
Page 203: Presets
SPro 4000: Roll Paper Select this setting when printing on a roll paper. Prints your data with using the standard printable area. SPro 4000: Roll Paper - Select this setting when printing on a banner. Banner SPro 4000: Roll Paper - Select this setting when printing on roll paper. -
Page 204: Copies & Pages
Copies & Pages You can make the appropriate Copies, Collated, Pages settings that you want to use for printing. Copies To make the Copies setting, enter the number of copies that you want to print in the Copies text box. Collated To make print order setting, select Collated to print one complete document set at a time when printing multiple copies. -
Page 205: Layout
Layout You can make the appropriate Pages per Sheet, Layout Direction, and Border settings that you want to use for printing. Note: Layout is the standard feature of Mac OS X. See your operating system’s documentation for details. Pages per Sheet You can print multiple pages of your data on a single piece of paper. -
Page 206: Output Options
Border You can print a border around the pages printed on each sheet. You can select from None, Single hairline, Single thin line, Double hairline, or Double thin line. Output Options You can print your data as a file if you click the Save as file check box, and select its format from the Format pull down menu. -
Page 207: Print Settings
Print Settings You can make Media Type, Ink, and Mode settings. Page Setup Page Setup shows the printer driver that is selected. If one of the choices listed below is selected as the Format for in the Page Setup dialog box and as the Printer setting in the Print dialog box, a pop-up menu appears. - Page 208 Note: ❏ The availability of special media varies by country. ❏ When you are using paper other than Epson special media, see “Notes for Epson Special Media and Other Media” on page 235. ❏ For the latest information on media available in your area, contact Epson customer web site.
- Page 209 EPOSN Premium Glossy Photo Paper Premium Semigloss Photo Paper EPSON Premium Semigloss Photo Paper Premium Luster Photo Paper EPSON Premium Luster Photo Paper Premium Luster Photo Paper (250) EPSON Premium Luster Photo Paper (Roll) (250) Premium Glossy Photo Paper (250)
- Page 210 Mode You can select Automatic, Custom, or Advanced settings. Automatic Automatic is the quickest and easiest way to start printing. When Automatic is selected, the printer driver takes care of all detailed settings based on the current Media Type and Ink settings. Note: Depending on the media you choose in the Media Type list while Automatic is selected, a slider appears in the Mode box that lets you...
- Page 211 Custom lets you make a wide range of changes with a single click of the mouse. In the Custom Settings pull-down menu, you will find ready-made settings provided by Epson. They are designed to match particular kinds of printouts, such as graphs and charts for a presentation.
-
Page 212: Advanced Settings
Advanced Settings Advanced Setting gives you complete control over your printing environment. Use these settings to experiment with new printing ideas, or to fine-tune a range of print settings to meet your individual needs. Once you are satisfied with your new settings, you can give them a name and add them to the Custom Settings list. -
Page 213: Printer Color Management
Printer Color Management This option gives you control over the color matching and adjustment methods provided with the printer driver. Use these settings to experiment with new printing ideas or to fine-tune a range of printer settings to meet your individual needs. - Page 214 Color Controls Select this setting to use the color matching and adjustment methods provided with the printer. Gamma Controls image contrast by modifying the midtones and mid-level grays Mode Photo -realistic Increases the contrast in an image. Use this setting for color photographs.
- Page 215 Sliders The color enhancement slide bars adjust the indicated options in a range of -25% to +25%. Drag the slide bar to the right or left with your mouse to adjust the settings. You can also type a value from -25% to +25% in the boxes next to the slide bars.
- Page 216 Off (No Color Adjustment) This setting is generally not recommended, because it does not allow the printer driver to enhance or adjust the color in any way. Only use this setting when you create a new color profile or if the other Mode settings do not produce satisfactory results.
-
Page 217: Paper Configuration
(-50 to +50) in the box next to the slider. Use this function when you print on paper other than Epson special media. Set the scroll bar to the 0 position when you print on Epson special media. Note: The color of printout cannot be deepened depends on the printint mode. -
Page 218: Printing With Mac Os X
Paper This value automatically appears according to the media Thickness for the Media Type setting. If you use non-Epson media, modifying this value for your media is recommended. Refer to the paper specifications or print "Thickness Pattern" to find out the paper thickness. - Page 219 When you use Epson special media, usually select this setting. Starwheel-Sheet: If you want to print on cut sheet which is non-Epson special media, select this setting. Starwheel-Roll Curled: If you want to print on strongly curled roll paper which is non-Epson special media, select this setting.
-
Page 220: Roll Paper Option
Roll Paper Option You can make Auto Cut, Print Page Line, and Save Roll Paper settings. Auto Cut You can select the following cutting methods. Single Cut Select this setting if you want to save paper. If you select this setting, the boundary of a picture and a picture, or boundary of a page and page is cut. - Page 221 Double Cut Select this setting to avoid the slight gap that occurs with the Single Cut setting. A margin is created between the pictures, and 1mm along the inside of each picture is cut. Normal Cut Select this setting to keep margins at the top and bottom of the printed data.
- Page 222 Select this setting to cut the printouts manually. To cut the printouts manually, follow these steps. 1. Press the Paper Feed or Paper Feed button, and match the cutting position with the scissors mark on the left side of the print head. 2.
- Page 223 Print Page Line You can specify whether to print a page line on the right side and also below the printed data for manual cutting. The Print Page Line operation changes according to the Auto Cut setting. Check these settings as necessary by referring the printer’s operation.
-
Page 224: Summary
Summary You can confirm the current settings in the Print dialog box. Note: The Summary option is a standard feature of Mac OS X. Saving your settings in the Print dialog box To save your settings in the Print dialog box, follow these steps. 1. -
Page 225: Using Your Saved Settings In The Print Dialog Box
Using your saved settings in the Print dialog box To use your saved settings, select the name of your custom setting from the Presets pull-down menu. If you change the Media Type or Ink settings while your customized setting is selected in the Saved Settings list, your saved setting is not affected by the change. -
Page 226: Performing Borderless Printing
Performing borderless printing When selecting Spro 4000: Borderless (Auto Expand) or Spro4000: Borderless (Retain Size) as Format for in the Page Setup dialog box and Printer in the Print dialog box, Epson recommends the following media conditions. Accommodate media width: ❏... -
Page 227: Canceling Printing
❏ Printing with this feature takes longer than for normal printing. ❏ When printing on the following media, the bottom margin is always 14mm. EPSON Premium Glossy Photo Paper EPSON Premium Semigloss Photo Paper EPSON Premium Luster Photo Paper EPSON Proofing Paper Semimatte... -
Page 228: Printer Utility Dialog Box
1. Double-click Macintosh HD (by default setting). 2. Double-click Applications folder. 3. Double-click the EPSON Printer Utility icon. Mac OS X 10.2 or later users can also access the EPSON Printer Utility dialog box in the following way. 1. Double-click Macintosh HD (by default setting). -
Page 229: Using The Printer Utilities
Using the Printer Utilities EPSON printer utilities let you to check the current printer status and to perform printer maintenance from your computer. Note: ❏ Do not use Nozzle Check, Head Cleaning, or Print Head Alignment utilities if your printer is connected to your computer through a network. -
Page 230: Checking The Print Head Nozzles
Nozzle Check This utility checks the print head nozzles for clogging. Check the nozzles when you notice print quality has declined and after cleaning to confirm that the print head nozzles have been cleared. See “Checking the print head nozzles” on page 230. If you click Auto in the Nozzle Check dialog box, or turn on AUTO CLEANING from the control panel on the printer, this utility does not only check the clogging nozzles, but also performs head... - Page 231 3. Click Print if you want to visually check to see if any print head nozzles are clogged, if you are using non-Epson special media, or if the width of paper you are using is less than 210 mm. Click Auto if you want to perform an automatic nozzle check and, if the nozzle check indicates it is necessary, an automatic head cleaning.
-
Page 232: Cleaning The Print Head
Cleaning the print head If you find that the printed data is unexpectedly faint or dots in the printed image are missing, you may be able to solve these problems by cleaning the print head, which ensures that the nozzles are delivering ink properly, by using the Head Cleaning utility. -
Page 233: Aligning The Print Head
❏ Repeat this procedure four or five times, turn the printer off and leave it alone overnight, and try head cleaning again. ❏ Replace some of ink cartridges as they may be old or damaged. If the print quality remains a problem after you have tried these solutions, contact your dealer. -
Page 234: Uninstalling The Printer Software
Uninstalling the Printer Software To uninstall the printer driver, follow these steps. 1. Open the Print Center. 2. Select the printer name you want to uninstall from Printer List. 3. Click Delete. Printing with Mac OS X... -
Page 235: Chapter 5 Paper Handling
Whenever possible, use gloves to handle media. Using Epson special media Epson provides special media that can enrich the usage and expressive power of the printing results. When using Epson special media, make sure the appropriate settings are made in the printer driver. -
Page 236: Using Paper Other Than Epson Special Media
Using paper other than Epson special media When you use paper other than Epson special media, or print using the RIP (Raster Images Processor), see the instructions included with the paper or RIP system, or contact your supplier for more information. - Page 237 2. When attaching roll paper with 2-inch core, remove the gray attachments. Note: Keep the gray attachments in a safe place for future use. When attaching roll paper with 3-inch core, slide the gray attachments to the black and white ones, matching the four arrows.
-
Page 238: Attaching The Spacer To The Spindle
4. Slide the black movable flange (removed in step 1) onto the spindle and into the end of the roll paper until it fixes into place. Attaching the spacer to the spindle When you perform borderless printing on roll paper with a width of 8 inches or 420mm (A2), you need to attach a spacer to the spindle. -
Page 239: Removing The Roll Paper From The Spindle
Removing the roll paper from the spindle To remove the roll paper from the spindle, follow these steps. 1. Place the paper loaded spindle down on a flat surface. 2. Slide the black movable flange off the end of the spindle by tapping the same end of the spindle with your hand to loosen it. -
Page 240: Loading The Roll Paper
Loading the roll paper To load roll paper, follow these steps. 1. Open the roll paper cover. 2. Move the paper lever to the released position. Paper Handling... - Page 241 3. Raise the roll paper support. 4. Make sure that the black movable flange is fixed into the end of the roll paper properly. 5. Hold the roll paper spindle so that the black movable flange is on the left side. 6.
- Page 242 7. Hold the both sides of the paper, and load the paper into the paper insertion slot. Pull the paper until it hangs down over the paper tray. Note: If you load thin paper, press the Paper Feed button to decrease the value of paper suction.
- Page 243 9. Move the paper lever to the secured position. The printer automatically feeds the paper to the printing position. 10. Extend the paper tray and paper tray cover according to the paper size. 11. Close the roll paper cover. 12. Press the Paper Source button to select Roll Auto Cut On or Roll Auto Cut Off Paper Handling...
-
Page 244: Using The Roll Paper Belt
Now the printer is ready to print. While the printer is printing, do not open the top cover. If the top cover is opened while printing, the printer stops printing, and then restarts printing when the top cover is closed. Stopping and restarting printing may reduce the print quality. - Page 245 Cutting the roll paper automatically To cut the roll paper automatically after printing, follow these steps. 1. Before printing, press the Paper Source button to select Roll Auto Cut On 2. Print your data. To make the auto cut setting using the printer driver, see “Making the Auto Cut setting”...
- Page 246 3. Press the Paper Feed button or Paper Feed button to match the cutting position on the paper with the cutting position on the left side of the print head. 4. Press the Paper Source button to select Roll Auto Cut On 5.
-
Page 247: Using Cut Sheet Media
Paper Path Media Name Paper Tray EPSON Semigloss Photo Paper EPSON Premium Luster Photo Paper EPSON New Photo Quality Ink Jet Paper EPSON Proofing Paper Semimatte EPSON Archival Matte Paper EPSON Watercolor Paper - Radiant White Plain paper Front Manual Feed Slot... -
Page 248: Loading Cut Sheet Media
The paper tray can hold up to 250 sheets of 17 lb. or 64 g/m² plain paper. Do not load paper above the arrow mark on the inside surface of the right edge guide. For information on the loaded capacity of Epson special media, see the following table. Epson special media... - Page 249 Loading A3 or larger paper in a paper tray 1. Make sure that the printer is on and in the READY status. 2. Extend the paper tray and paper tray cover. 3. Lift up the paper tray cover. Paper Handling...
- Page 250 4. Pull the paper guide roller up, and slide the edge guide to the left as far as it will go. 5. Clean the inside of the paper tray to remove any dust. Dust may affect printout quality. 6. Thumb through a stack of paper, then tap it on a flat surface to even the edges.
- Page 251 7. Load the sheets with the printable face down and the right edge of the paper resting against the right side of the paper tray. Make sure the sheets lie flat on the bottom of the tray. Note: ❏ Always set the paper in portrait. ❏...
- Page 252 9. Put the paper guide roller down. Confirm that the paper guide roller is on the edge of the paper. 10. Adjust the length of paper tray cover, and attach it back. Note: Make sure that roll paper support is not raised. Paper Handling...
- Page 253 11. If you have extended the paper tray and cover fully, pull the paper tray cover extension to support the large size of printout. 12. Press the Paper Source button to select Sheet Note: Before printing on cut sheet media, check if the paper in the paper tray is curled.
- Page 254 Loading paper smaller than A3 in a paper tray 1. Make sure that the printer is on and in the READY status. 2. Lift up the paper tray cover, and pull the paper guide roller. 3. Pull the paper guide, and slide the edge guide to the left as far as it will go.
- Page 255 5. Thumb through a stack of paper, then tap it on a flat surface to even the edges. If your paper is curled, flatten it before you load it. If it curls excessively and jams frequently, stop using it. 6. Load the sheets with the printable face down and the right edge of the paper resting against the right side of the paper tray.
- Page 256 7. Adjust the paper guide and edge guide according to the paper size. 8. Put the paper guide roller down, and attach the paper tray cover back. Note: Make sure that roll paper support is not raised. 9. Press the Paper Source button to select Sheet Note: Before printing on cut sheet media, check if the paper in the paper tray...
- Page 257 Now the printer is ready to print. While the printer is printing, do not open the top cover. If the top cover is opened while printing, the printer stops printing, and then restarts printing when the top cover is closed. Stopping and restarting printing may reduce the print quality.
- Page 258 1. Make sure that the printer is on and in the READY status. 2. Move the paper lever to the released position. 3. Open the top cover. Paper Handling...
- Page 259 4. Insert a sheet to where paper is usually ejected. 5. Pass the paper under the feed roller. 6. Adjust the right side of the paper with the line marked with arrow mark, and also adjust the bottom edge of the paper with the line marked with A4/B4 on the paper tray.
- Page 260 7. Close the top cover. 8. Move the paper lever to the secured position. The printer automatically feeds the paper to the printing position. Paper Handling...
- Page 261 9. Extend the paper tray and paper tray cover according to the paper size. If you do not extend them, the printout may fall. Note: Make sure the roll paper support is not raised. 10. Press the Paper Source button to select Sheet Now the printer is ready to print.
- Page 262 1. Make sure that the printer is on and in the READY status. 2. Align the right edge of the paper with the right edge of the rear manual feed slot until it meets resistance. The printer automatically feeds the paper to the printing position.
- Page 263 4. Press the Paper Source button to select Sheet Now the printer is ready to print. While the printer is printing, do not open the top cover. If the top cover is opened while printing, the printer stops printing, and then restarts printing when the top cover is closed.
-
Page 264: Chapter 6 Maintenance And Transportation
Epson recommends the use of genuine Epson ink cartridges. Other products not manufactured by Epson may cause damage to your printer not covered by Epson’s warranties. See “Ink cartridges” on page 332. To confirm the product codes of ink cartridges, see “Consumable Products”... - Page 265 2. Open the ink compartment cover by pushing it. 3. Raise the ink levers to the released position. 4. Carefully pull the empty cartridge straight out of the printer. Maintenance and Transportation...
- Page 266 Warning: If ink gets on your hands, wash them thoroughly with soap and water. If ink gets into your eyes, flush them immediately with water. 5. Make sure the replacement ink cartridge is the correct color, and remove it from the package. Caution: Do not shake cartridges that have been installed previously.
- Page 267 6. Hold the ink cartridge with the arrow on the left side and pointing to the rear of the printer, and insert it into the slot. Do not force the cartridge in further by hand. Note: If the Ink check light remains on, the ink cartridge may not be installed correctly.
-
Page 268: Changing The Ink Set
8. Close the ink compartment cover. The printer returns to the previous status. Note: If you have installed 220 ml ink cartridge, do not close the ink compartment cover. Changing the Ink Set You can change the ink set according to your purpose. If you give priority to print quality over print speed, select Photo Quality Ink Set. - Page 269 Caution: To avoid interrupting ink set change, observe the following: ❏ Do not turn off the printer. ❏ Do not open the top cover. ❏ Do not remove the rear cover. ❏ Do not move the paper lever to the released position. ❏...
- Page 270 5. Press the Menu button again to execute. Note: If MNT TK NEAR FULL or MNT TNK FULL is displayed on the LCD, you need to replace the maintenance tank. See “Replacing the Maintenance Tank” on page 277. 6. Confirming that RAISE BOTH INK LEVERS is displayed on the LCD, raise the ink levers on the right and left ink compartments.
- Page 271 8. After removing the ink cartridges from the right ink compartment, LOWER THE RIGHT INK LEVER is displayed on the LCD. Lower the ink lever on the right. 9. The printer starts draining ink, and DRAINING XX% is displayed on the LCD. Wait until draining is complete. 10.
- Page 272 11. After confirming that INSERT CLEANING CRTG is displayed on the LCD, insert a cleaning cartridge into the slots on the right ink compartment. 12. After confirming that LOWER THE RIGHT INK LEVER is displayed on the LCD, lower the ink lever on the right. 13.
- Page 273 14. When cleaning is complete, RAISE THE RIGHT INK LEVER is displayed on the LCD. Raise the ink lever on the right. 15. After confirming that REMOVE CLEANING CRTG is displayed on the LCD, remove the cleaning cartridges. 16. After confirming that LOWER THE RIGHT INK LEVER is displayed on the LCD, lower the ink lever on the right.
- Page 274 17. The printer starts draining cleaning liquid. Wait until draining is complete. 18. When draining is complete, RAISE THE RIGHT INK LEVER is displayed on the LCD. Raise the ink lever on the right. 19. After confirming that INSERT INK CRTG is displayed on the LCD, insert the new ink cartridges.
-
Page 275: Updating The Printer Driver Information
20. After confirming the LOWER BOTH INK LEVERS is displayed on the LCD, lower the ink levers on the right and left. 21. The printer starts charging ink. After approximately 2 minutes, ink lever messages appear on the LCD. When a message appears on the LCD, raise or lower the ink levers accordingly until READY appears on the LCD. - Page 276 For Windows Click the Main tab and make sure that the correct ink set is displayed. If not, set the information manually by clicking the Utility tab, then the Printer and Option Information button. For Mac OS 8.6 to 9.x Select Chooser from the Apple menu and click the printer's icon and printer port.
-
Page 277: Replacing The Maintenance Tank
Replacing the Maintenance Tank If MNT TNK FULL or MNT TK NEAR FULL is displayed on the LCD while changing the ink mode or other time, replace the maintenance tank. The maintenance tank should be replaced after the ink set has been changed twice. - Page 278 4. Put your hand on the handle under the right ink compartment, then gently pull the maintenance tank outward. 5. Put the used maintenance tank in the plastic bag provided. Note: Do not tilt the used maintenance tank until after it is sealed in the plastic bag.
-
Page 279: Replacing The Paper Cutter
Replacing the Paper Cutter When the paper cutter does not cut cleanly, it may be blunt and require replacement. Warning: Be careful not to cut yourself while replacing the paper cutter. To confirm the product code of the Auto Cutter Spare Blade, see “Consumable Products”... - Page 280 6. When the print head stops at the replacement position, OPEN TOP COVER is displayed. Open the top cover. 7. When REPLACE CUTTER is displayed on the LCD, push in the side pin and turn the paper cutter cover to the right to open the casing.
- Page 281 8. Slowly take your finger off the side pin, and carefully remove the old cutter from the printer. 9. Remove the new paper cutter from its package. 10. Fully insert the new cutter into the paper cutter holder. Make sure the cutter slide pin is set to the left. Maintenance and Transportation...
-
Page 282: Cleaning The Printer
11. While pushing in the side pin, turn the paper cutter cover to the left to close the casing. Note: Make sure that the paper cutter cover is set correctly. Otherwise, the paper may not be cut. 12. Make sure that CLOSE TOP COVER is displayed, then close the top cover. - Page 283 3. Make sure that the ink compartment covers are closed. Then use a soft brush to carefully clean away any dust or dirt inside the printer. 4. Close the roll paper cover. 5. Open the top cover and use a soft brush to carefully clean away any dust or dirt inside the top cover.
-
Page 284: If You Have Not Used Your Printer For A Long Time
If you have not used your printer for a long time If you have not used your printer for a long time, the print head nozzles may be clogged. Perform a nozzle check and clean the print head. To perform a nozzle check using the control panel, see “Checking the print head nozzles”... -
Page 285: Transporting The Printer
Transporting the Printer A long distance When you need to transport your printer a long distance, the printer should be repacked using the original box and packing materials. To prepare repacking the printer, follow these steps. 1. Make sure that the printer is turned on. 2. -
Page 286: A Short Distance
5. Push the green tab on the left side of the print head to the right to lock the print head. 6. Make sure the ink levers are raised, and turn off the printer. Note: 7. Make sure the printer is turned off, and then unplug the power cord. -
Page 287: Setting Up The Printer After Transporting It
❏ The first time you start printing after transporting the printer, or if you have not turned on the printer for a long time, the print head nozzles may be clogged. Epson recommends you perform a nozzle check and clean the print heads, and also realign the print heads to ensure print quality. - Page 288 To clean the print head using the printer software, see “Cleaning the print head” on page 104 for Windows, “Cleaning the print head” on page 184 for Mac OS 8.6 to 9.x, or “Cleaning the print head” on page 232 for Mac OS X. To realign the print head using the control panel, see “Aligning the print head”...
-
Page 289: Chapter 7 Troubleshooting
Chapter 7 Troubleshooting Printer Stops Printing Unexpectedly Head cleaning, ink charging, or ink drying is in progress Check to see if the Pause light is flashing. If so, the printer is in the process of head cleaning, ink charging or ink drying. During head cleaning and ink charging, PLEASE WAIT is displayed on the LCD. -
Page 290: Error Messages
Error messages Message Description What to do UNABLE TO PRINT An error may be End the TEST PRINT occurring when you try MENU first, and solve to print patterns such as the error displayed on nozzle checker head the LCD. Then try to alignment. -
Page 291: Troubleshooting
NOZZLES STILL The nozzles are still Run the Head Cleaning CLOGGED clogged. utility. For Windows, see “Cleaning the print head” on page 104. For Mac OS 8.6 to 9.x, see “Cleaning the print head” on page 184. For Mac OS X, see “Cleaning the print head”... - Page 292 RELOAD PAPER Cut sheet media Insert the paper INSERT DEEPLY inserted from the front deeper. See “Loading manual feed slot is not into the front manual inserted deep enough. feed slot” on page 257. NOT STRAIGHT Cut sheet media is not Load the cut sheet RELOAD loaded straight, and...
- Page 293 LOAD SHEET PAPER The cut sheet media is Set the cut sheet media IN P. TRAY not set correctly in the in the paper tray paper tray. correctly, and select Sheet . See “Loading cut sheet media” on page 248. FEED SHEET PAPER The cut sheet media Load the cut sheet...
- Page 294 SET INK CRTG CSIC error has occurred. Remove the ink cartridge and reinstall it. If this message is displayed after reinstalling the ink cartridge, replace it. See “Replacing Ink Cartridges” on page 264. NO INK CRTG Ink cartridge is not Install ink cartridge, or installed, or ink lever is lower the ink lever to...
- Page 295 PAPER JAM Paper is jammed in the Open the top cover printer. and remove the jammed paper. If TURN PRINTER PWR OFF AND THEN ON is displayed on the LCD, turn the printer off, leave it for a while, and turn it on again. See “Clearing Paper Jams”...
-
Page 296: The Printer Does Not Turn On Or Stay On
The Printer does not Turn on or Stay on When the Pause light does not come on and mechanism initialization does not start even when the Power button is pressed to turn on the printer, try the following solutions for the problem. -
Page 297: Your Epson Printer Is Not Selected As The Default Printer
For Mac OS 8.6 to 9.x: 1. Click Apple menu and select Chooser. If the EPSON Stylus Pro 4000 printer icon can be seen, the printer driver is correctly installed. 2. Make sure the EPSON Stylus Pro 4000 is selected for the printer port. Troubleshooting... -
Page 298: Printer Port Setting Does Not Match The Printer Connection
4. Make sure that your printer port is selected. For Windows Me or 98 1. Click the Start button, point to Settings and select Printers. 2. Right-click EPSON Stylus Pro 4000 in the Printers window, then select Properties. 3. Click the Details tab. -
Page 299: The Usb Printer Device Driver Or The Printer Software May Be Incorrectly Installed (Windows Me And 98 Only)
For Windows 2000 or NT 4.0 1. Click the Start button, point to Settings and select Printers. 2. Right-click EPSON Stylus Pro 4000 in the Printers window, then select Properties. 3. Click the Ports tab. 4. Make sure that your printer port is selected. - Page 300 2. Select the icon of your printer, and click Properties on the File menu. 3. Click the Details tab. Troubleshooting...
- Page 301 If EPUSBX: (EPSON Stylus Pro 4000) is displayed in the Print to the following port list, then the USB printer device driver and printer software are installed correctly. If the correct port is not displayed, proceed to the next step.
- Page 302 If neither USB Printer nor EPSON Stylus Pro 4000 appears under Other devices, click Refresh or unplug the USB cable from the printer, and then plug it into the printer again. Once you have confirmed that these items appear, proceed to step 5.
-
Page 303: The Printer Driver Does Not Have Enough Available Memory (For Mac Os 8.6 To 9.X And Mac Os X Only)
Printouts are Not What You Expected Incorrect, garbled characters, or blank pages print Try one or more of these solutions: ❏ For Windows, clear any stalled print jobs from the Progress Meter. See “Using the EPSON Spool Manager” on page 114. Troubleshooting... -
Page 304: Incorrect Margins
For Mac OS 8.6 to 9.x, clear any stalled print jobs from the EPSON Monitor IV. See “Managing print jobs using EPSON Monitor IV” on page 191. If the problem persists, turn off the printer and computer. Make sure the printer’s interface cable is plugged in securely. -
Page 305: Printed Color Differs From The Color On The Screen
For Mac OS X, turn off the Flip Horizontal setting in the Advanced Settings selected in the Print Settings selected in the Print dialog box. See “Advanced Settings” on page 212. Printed color differs from the color on the screen Try one or more of these solutions: ❏... -
Page 306: A Ruled Line Shifts
For Mac OS 8.6 to 9.x, select PhotoEnhance in the Advanced dialog box. See “Making Advanced setting” on page 144. ❏ For Windows, select Color Controls in the Advanced menu, and adjust color, brightness, etc. as required. See “Making Advanced setting” on page 59. Mac OS 8.6 to 9.x, select Color Controls in the Advanced dialog box, and adjust color, brightness, etc. -
Page 307: Printout Has Smears On The Bottom Edge
Media Type setting in the Main menu. See “Making Settings on the Main Menu” on page 53. Mac OS 8.6 to 9.x, if you use Epson special media, check the Media Type setting in the Print dialog box. See “Making Settings in the Print Dialog Box”... -
Page 308: Vertical Misalignment Or Banding
For Mac OS 8.6 to 9.x, check the Media Type setting in the Print dialog box. Make sure it is correct for the paper you are using. See “Making Settings in the Print Dialog Box” on page 139. For Mac OS X, check the Media Type setting in the Print Settings selected in the Print dialog box. -
Page 309: Faint Printout Or Gaps
For Mac OS 8.6 to 9.x, turn off the High Speed setting in the Advanced dialog box. See “Making Advanced setting” on page 144. For Mac OS X, turn off the High Speed setting in the Advanced Settings is selected in the Print Settings selected in the Print dialog box. -
Page 310: Blurry Or Smeared Printout
❏ Run the Head Cleaning utility to clear any clogged ink nozzles. For Windows, see “Cleaning the print head” on page 104. For Mac OS 8.6 to 9.x, see “Cleaning the print head” on page 184. For Mac OS X, see “Cleaning the print head” on page 232. -
Page 311: Color Documents Print In Black Only
❏ Make sure your paper is dry and the printable side is face-up. Also, make sure you are using the correct type of paper. See “Paper” on page 330 for specifications. ❏ Ink may have leaked inside the printer; wipe the inside of the printer with a soft, clean cloth. -
Page 312: Printing Could Be Faster
Printing Could be Faster Try one or more of these solutions: ❏ Select High Speed on the Advanced dialog box. For Windows, see “Making Advanced setting” on page 59. For Mac OS 8.6 to 9.x, see “Making Advanced setting” on page 144. -
Page 313: Roll Paper Cannot Be Cut
(see “Paper” on page 330). If so, the paper cutter may be blunt and require replacement. See “Replacing the Paper Cutter” on page 279. Note: If you use roll paper other than Epson special media, see the user documentation included with the paper, or contact your supplier. Troubleshooting... -
Page 314: Paper Feed Or Paper Jam Problems Occur Frequently
Paper Feed or Paper Jam Problems Occur Frequently Try one or more of these solutions: ❏ Before loading paper and guiding it through the paper insertion slot, adjust paper suction. To adjust the paper suction using the printer driver, see “Paper Configuration”... -
Page 315: Roll Paper Does Not Eject Properly
You can change the platen gap setting in the PRINTER SETUP of the SelecType mode. See “PLATEN GAP” on page 22. ❏ For non-Epson special media, check the paper type selected in the CUSTOM PAPER of the SelecType mode. See “Making the paper settings”... -
Page 316: Clearing Paper Jams
Clearing Paper Jams When roll paper is jammed To remove jammed roll paper, follow these steps: 1. Turn off the printer. 2. Open the roll paper cover, and move the paper lever to the release position. 3. Cut the paper at the paper insertion slot, and remove the roll paper. - Page 317 4. Remove the jammed paper from the front or rear side of the printer. If necessary, open the top cover, and remove the jammed paper. Troubleshooting...
-
Page 318: When Paper Loaded From The Paper Tray Is Jammed
When paper loaded from the paper tray is jammed To remove jammed paper, follow these steps. 1. Turn off the printer. 2. Move the paper lever to the release position. 3. Remove the paper tray from the printer. Troubleshooting... - Page 319 4. Carefully pull down the jammed paper. If necessary, open the top cover, and remove the jammed paper. Troubleshooting...
- Page 320 If the paper is jammed around the rear cover, remove the rear cover by squeezing the knobs, and remove the jammed paper. Troubleshooting...
- Page 321 When paper loaded from the front manual feed slot is jammed To remove jammed paper, follow these steps: 1. Turn off the printer. 2. Move the paper lever to the released position. 3. Remove the jammed paper from the front or rear side of the printer.
-
Page 322: When Paper Loaded From The Rear Manual Feed Slot Is
Rear When paper loaded from the rear manual feed slot is jammed To remove jammed paper, follow these steps: 1. Turn off the printer. 2. Move the paper lever to release position. Troubleshooting... - Page 323 3. Remove the jammed paper from the front. If necessary, open the top cover and remove the jammed paper. Troubleshooting...
-
Page 324: Chapter 8 Product Information
Chapter 8 Product Information Printer Specifications Printing Printing On-demand ink jet method × Nozzle Photo Quality Black: 180 nozzles configuration Ink Set Mode (Photo Black, Matte Black, Light Black) × Color: 180 nozzles (Cyan, Magenta, Light Cyan, Light Magenta, Yellow) ×... -
Page 325: Product Information
1/6 inch or programmable in 1440 inch increments Paper feed speed 215 ± 10 mm seconds per 1/6 inch line 32 MB Character tables PC 437 (US, Standard Europe), PC 850 (Multilingual) Character sets EPSON Courier 10 cpi Product Information... -
Page 326: Printable Area
Printable area Roll paper The minimum top margin is 3.0 mm (0.12") Cut sheets The minimum top margin is 3.0 mm (0.12") Roll paper The minimum top margin is 3.0 mm (0.12") Cut sheets The minimum top margin is 3.0 mm (0.12") Roll paper The minimum top margin is 3.0 mm (0.12") Cut sheets... -
Page 327: Mechanical
Mechanical Paper feed method Friction Paper path Roll paper Cut sheets (paper tray/front manual insertion/rear manual insertion) Dimensions Width: 848 mm (33.92 inches) Depth: 762 mm (30.48 inches) Height: 369 mm (14.76 inches) Weight Approx. 40kg (88.2 lb) without consumables Electrical Rated voltage: 100 V to 240 V... -
Page 328: Environmental
Environmental Temperature Operation 10 to 35°C (50 to 95°F) Print Quality Guarantee 15 to 25°C (59 to 77°F) Storage -20 to 40°C (-4 to 104°F) -20 to 60°C (-4 to 140°F)* Transit 1 month at 40°C (104°F) 120 hours at 60°C (140°F) Humidity Operation 20 to 80% RH**... -
Page 329: Initialization
Initialization Hardware initialization at power on The printer mechanism is set to its initial state. The input data buffer and print buffer are cleared. The printer returns to the default condition last set. Software initialization when the The print buffer is cleared. ESC@ (initialize the printer) The printer returns to the default command is received... -
Page 330: Standards And Approvals
150 mm (5.90 inches) maximum when 2/3 dual roll feed spindle is set as 3 inch roll paper spindle. Paper types Plain paper, special papers distributed by Epson Thickness 0.08 mm to 0.11 mm (0.003 inches to 0.004 inches) (for plain paper) Weight 64 gf/m²... - Page 331 ❏ Since the quality of any particular brand or type of paper may be changed by the manufacturer at any time, Epson cannot attest to the quality of any non-Epson brand or type of paper. Always test samples of paper before purchasing large quantities or printing large jobs.
-
Page 332: Ink Cartridges
110 ml: Approx. 200g (0.44 lb) 220 ml: Approx. 385g (0.85 lb) Caution: Epson recommends the use of original Epson ink cartridges only. Other products not manufactured by Epson may cause damage to your printer not covered by Epson's warranties. -
Page 333: System Requirements
System Requirements To use your printer with Windows Your computer should also meet the following system requirements: Minimum system Recommended system Pentium 330 MHz for Windows XP Pentium 4.1.4 GHz or Pentium 150 MHz for Windows Me higher processor Pentium 133 MHz for Windows 2000 Pentium for Windows 98 and NT 4.0 128 MB RAM for Windows XP 256 MB RAM or more... - Page 334 128 MB available memory 256 MB or more available memory 60 MB free disk space 2 GB or more free disk space Note: The amount of available memory varies according to the number and kind of applications that are open. To see how much memory is available, choose About This Computer from the Apple menu and refer to the memory size (listed in kilobytes) under “Largest Unused Block”...
-
Page 335: Interface Specifications
Interface Specifications Your printer is equipped with a USB interface, an IEEE1394 interface and an Ethernet interface. USB interface The printer’s built-in USB interface is based on the standards specified in the Universal Serial Bus Specifications Revision 2.0, the Universal Serial Bus Specification Revision 1.1, and the Universal Serial Bus Device Class Definition for Printing Devices Version 1.1. -
Page 336: Basic Specifications
Basic specifications Data transfer method Half-duplex Data/Strobe differential serial Synchronization DS-Link bit level encoding method Encoding/decoding DS-Link bit level encoding Compatible IEEE 1394-1995 compliant plug (6 contact) connectors Connector pin signal layout Signal Function number name Cable power supply Cable ground TPB* Strobe during receipt, data during transmission (differential pair) -
Page 337: Chapter 9 Options And Consumable Products
Chapter 9 Options and Consumable Products Options The following options are available for use with your printer. Note: The availability of options and consumable products varies by location. Roll paper spindle To use optional spindles, see “Using Roll Paper” on page 236. 2/3 inch Dual Roll Feed Spindle C12C811171 2/3 inch Dual Roll Feed Spindle (High Tension) -
Page 338: Borderless Print Spacer
“Attaching the spacer to the spindle” on page 238. Borderless Print Spacer for 420 mm and C12C811201 8 inch Roll Paper Reference Chart EPSON Gray Balancer Reference Chart C12C890091 Consumable Products The following consumable products are available for use with your printer. Paper cutter If you notice the edge of the paper is not cut cleanly, you can replace the cutter blade. -
Page 339: Maintenance Tank
Maintenance Tank This tank absorbs discharged liquid. If it becomes full, you need to replace it. See “Replacing the Maintenance Tank” on page 277. Maintenance Tank C12C890071 Note: The Maintenance Tank for this printer is the same as the one for Stylus Pro 7600/9600. -
Page 340: Cleaning Cartridge
“Changing the Ink Set” on page 268. Cleaning Cartridge (1 set : 4 cartridges) C13T5540A0 Epson Special Media Most plain paper works well in your printer. In addition, Epson offers specially designed media for ink jet printers to meet most high-quality printing needs. Note: ❏... -
Page 341: Roll Paper
Roll paper Media Name Size Product Code 8" × 10’ (3 m) EPSON Premium Glossy S041465 Photo Paper 11" × 14’ (4.3 m) S041466 16" × 100’ (30.5 m) EPSON Premium Glossy S041742 Photo Paper (250) 10" × 100’ (30.5 m) -
Page 342: Cut Sheets
17" × 50’ (15 m) EPSON Smooth Fine Art S041715 Paper 17" × 50’ (15 m) EPSON Textured Fine S041745 Art Paper Cut sheets Media Name Size Product Code EPSON Premium Glossy S041286 Photo Paper S041667 S041285 S041287 S041297 S041624... - Page 343 S041768 S041748 S041759 EPSON Archival Matte S041341 Paper S041342 EPSON Enhanced Matte S041344 Paper S041340 EPSON Photo Quality Ink S041029 Jet Paper S041062 S041061 EPSON Bright White Ink S041442 Jet Paper EPSON Proofing Paper S041668 Semimatte EPSON Velvet Fine Art...
-
Page 344: Contacting Customer Support
Contacting Customer Support If your Epson product is not operating properly and you cannot solve the problem using the troubleshooting information in your product documentation, contact customer support services for assistance. If customer support for your area is not listed below, contact the dealer where you purchased your product. - Page 345 Select your country: “Germany” on “Hungary” on “France” on “Norway” on page 346 page 367 page 346 page 368 “Yugoslavia” “Austria” on “Slovac “Spain” on on page 368 page 363 Republic” on page 355 page 367 “Sweden” on “Greece” on “Netherlands”...
- Page 346 Saturday to Sunday: 10 a.m. to 4 p.m. Public holidays: 10 a.m. to 4 p.m. (0,12 E per minute) www.epson.de/support/ France Support Technique EPSON France, 0 892 899 999 (0,34 E/minute) Ouvert du lundi au samedi de 9h00 à 20h00 sans interruption http://www.epson.fr/support/selfhelp/french.htm pour accéder à...
- Page 347 Centres de maintenance AJACCIO CIM Tél : 04.95.23.73.73 Le Stiletto - Lot N° 5 Fax : 04.95.23.73.70 20090 AJACCIO AMIENS Tél : 03.22.22.05.04 Fax : 03.22.22.05.01 13, rue Marc Sangnier 8000 AMIENS ANNECY (td) Tél : 04.50.10.21.30 MAINTRONIC Fax : 04.50.10.21.31 Parc des Glaisins Immeuble Prosalp 14, rue Pré...
- Page 348 BOURGES (td) Tél : 02.48.67.00.38 BEGELEC Fax : 02.48.67.98.88 18, avenue du 11 Novembre 18000 BOURGES BREST Tél : 02.98.42.01.29 Fax : 02.98.02.17.24 8, rue Fernand Forest 29850 GOUESNOU CAEN Tél : 02.31.84.80.82 Fax : 02.31.84.80.83 17, rue des Métiers 14123 CORMELLES LE ROYAL CLERMONT Tél : 04.73.28.59.60...
- Page 349 GRENOBLE Tél : 04.76.25.87.87 MAINTRONIC Fax : 04.76.25.88.10 Les Akhesades Bât B. Rue Irène Joliot Curie 38320 EYBENS HEROUVILLE ST CLAIR Tél : 02 31 53 66 83 BEGELEC Fax : 02 31 53 66 84 ZI de la Sphère 558 rue Léon Foucault 14200 HEROUVILLE ST CLAIR LE HAVRE...
- Page 350 LYON Tél : 04.78.35.38.65 Fax : 04.78.35.24.99 136, chemin Moulin Carron 69130 ECULLY LYON Tél : 04.72.14.95.00 MAINTRONIC Fax : 04.78.41.81.96 9, allée du Général Benoist ZAC du Chêne 69500 BRON LYON Centre Tél : 04.72.56.94.85 MAINTRONIC Fax : 04.72.56.94.89 4, quai Jules Courmont 69002 LYON MARSEILLE...
- Page 351 MONTPELLIER Tél : 04.67.15.66.80 MAINTRONIC Fax : 04.67.22.50.91 Parc Ateliers Technologiques 2, avenue Einstein 34000 MONTPELLIER MULHOUSE Tél : 03.89.61.77.88 Fax : 03.89.31.05.25 106, rue des Bains 68390 SAUSHEIM NANCY Tél : 03.83.44.44.00 Fax : 03.83.44.10.20 3 rue du Bois Chêne le Loup 54500 VANDOEUVRE CEDEX NANTES Tél : 02.28.03.10.73...
- Page 352 NIORT Tél : 05 49 24 18 71 MAINTRONIC 49 rue du Fief d'Amourettes Fax : 05 49 24 15 85 79000 NIORT ORLEANS Tél : 02 38 73 16 00 Fax : 02 38 43 85 77 ZA des Vallées 45770 SARAN ème PARIS 11...
- Page 353 PARIS SUD Tél : 01.64.46.44.01 BEGELEC Fax : 01.69.28.83.22 Immeuble Femto 1, avenue de Norvège 91953 LES ULIS Tél : 05.59.40.24.00 MAINTRONIC Fax : 05.59.40.24.25 375, bd Cami Sallié 64000 PAU REIMS Tél : 03.26.97.80.07 Fax : 03.26.49.00.95 Parc technologique H. Farman 12, allée Fonck 51100 REIMS RENNES...
- Page 354 STRASBOURG Tél : 03 90 22 79 40 MAINTRONIC Fax : 03 90 20 89 14 ESPACE EUROPEEN DE L'ENTREPRISE 13 avenue de l'Europe 67300 SCHILTIGHEIM TOULON (td) Tél : 04.94.63.02.87 Fax : 04.94.63.42.55 64 route de Capelane ZA la Capelane Parc Burotel 83140 SIX FOURS TOULOUSE...
- Page 355 Avda. Roma 18-26, 08290 Cerdanyola, Barcelona, España Tel.: 34.93.5821500 Fax: 34.93.5821555 CENTRO DE ATENCIÓN AL CLIENTE Tel.: 902 40 41 42 Fax: 93 582 15 16 E-mail: soporte@epson.es www.epson.es www.epson.es/support/ SERVICIOS OFICIALES DE ASISTENCIA TÉCNICA EPSON Provincia Localidad Empresa Dirección Teléfono ALBACETE 02004 DEP. TÉCNICO Francisco Pizarro, 967.50.69.10...
- Page 356 BALEARES 07006 BIM S. L. Manacor, 82 A 971.24.64.55 Palma de M. bajos 07707 INFORMÁTICA Sant Clemente, 78 971.35.33.23 Mahón MAHÓN, S.L. (Ses Vinyes) BARCELONA 08027 BS MICROTEC Palencia, 45 93.243.13.23 Barcelona MANT. INF., S.L. 08031 MICROVIDEO, S.A. Av. Diagonal, 296 93.265.15.75 Barcelona 08036...
- Page 357 GRANADA 18008 INTELCO ASISTEN. Primavera, 20 958.13.21.79 Granada TÉCNICA., S.L. GUIPÚZCOA 20011 ELECTRÓNICA Balleneros, 4 bajos 943.46.86.40 San Sebastián GUIPUZCOANA HUELVA 21006 INTERDATA Conde de López 959.54.38.82 Huelva Muñoz, 32 LA CORUÑA 15007 HARDTEC GALICIA Av. Los Mallos, 87 981.23.79.54 La Coruña bajos B LEÓN...
- Page 358 976.01.33.00 Zaragoza ACIÓN Y COMPO- Zaragoza, Ctra NENTES Madrid s/n Km 315 United Kingdom EPSON (UK) Ltd. Campus 100, Maylands Avenue, Hemel Hempstead, Hertfordshire HP2 7TJ United Kingdom Tel.: +44 (0) 1442 261144 Fax: +44 (0) 1422 227227 www.epson.co.uk Stylus Products Warranty & Support...
- Page 359 01 679 9016 Other Products Warranty & Support 01 679 9015 Sales 1 800 409 132 www.epson.co.uk Italy EPSON Italia S.p.a. Via M. Viganò de Vizzi, 93/95 20092 Cinisello Balsamo (MI) Tel. 02.660.321 Fax. 02.612.36.22 Assistenza e Servizio Clienti TECHNICAL HELPDESK 02.268.300.58...
- Page 360 ELENCO CENTRI ASSISTENZA AUTORIZZATI EPSON AEM SERVICE S.R.L. ELECTRONIC QUAIZ S.N.C. ASSISTANCE CENTRE Via Verolengo, 20 Via San Paolo, 5/h Via Bazzini, 17 Loc. Badia a Settimo 00167 ROMA 20131 MILANO 50018 SCANDICCI (FI) Tel : 06-66018020 Tel : 02-70631407...
- Page 361 COMPUTER INFORMAINT S.N.C. S.T.E. S.N.C. di ASSISTANCE S.A.S. Ciarrocchi A.& C. Filiale di Olbia 1a Traversa Via del Via Settimo Torinese, 5 Via Monte Pasubio, 22 Gallitello 65016 MONTESILVANO 07026 OLBIA 85100 POTENZA (PE) Tel: 0789-23786 Tel: 0971-489973 Tel : 085-4453664 Fax: 0789-203891 Fax: 0971-476892 Fax : 085-4456860...
- Page 362 COMPUTER SERVICE 2 MEDIEL S.N.C. filiale di TECNO STAFF S.R.L. S.N.C. Catania Via Vivaldi, 19 Via V.Guindani, 10 Via Novara, 9 00199 ROMA 26100 CREMONA 95125 CATANIA (CT) Tel : 06-8606173 Tel/Fax : 0372-435861 Tel : 095-7169125 Fax : 06-86200117 Fax : 095-7160889 COMPUTER SERVICE 2 MEDIEL S.R.L.
- Page 363 Portugal EPSON Portugal, S.A. Rua Gregório Lopes Lote 1514 Restelo 1400 - 197 Lisboa Tel.: 21 303 54 00 Fax: 21 303 54 90 Serviço de Apoio a Clientes 707 222 000 www.epson.pt Austria EPSON Deutschland GmbH Service & Support 0810-200113 Monday to Friday: 9 a.m.
- Page 364 Saturday to Sunday: 10 a.m. to 4 p.m. Public holidays: 10 a.m. to 4 p.m. www.epson.nl/support/ Belgium EPSON Deutschland GmbH Service & Support 070-222082 Monday to Friday: 9 a.m. to 9 p.m. Saturday to Sunday: 10 a.m. to 4 p.m.
- Page 365 Finland Warranty & Support 0800 523 010 Sales (09) 8171 0083 www.epson.fi Croatia RECRO d.d. Trg Sportova 11 10000 Zagreb Tel.: 00385 1 3091090 Fax: 00385 1 3091095 Email: servis@recro.hr www.epson@recro.hr Macedonia DIGIT COMPUTER ENGINEERING 3 Makedonska brigada b.b upravna zgrada R. Konkar - 91000 Skopje Tel.: 00389 91 463896 oppure...
- Page 366 1000 Ljubljana Tel.: 00386 1 5853417 Fax: 00386 1 5400130 E-mail: bojan.zabnikar@repro.si Luxemburg EPSON Deutschland GmbH Service & Support 0352-26483302 Monday to Friday: 9 a.m. to 9 p.m. Saturday to Sunday: 10 a.m. to 4 p.m. Public holidays: 10 a.m. to 4 p.m.
- Page 367 Switzerland EPSON Deutschland GmbH Service & Support 0848-448820 Monday to Friday: 9 a.m. to 9 p.m. Saturday to Sunday: 10 a.m. to 4 p.m. Public holidays: 10 a.m. to 4 p.m. (CH local tariff) www.epson.ch/support/ www.epson.ch/fr/support/ Hungary EPSON Deutschland GmbH Service &...
- Page 368 Czek. Republic EPSON Deutschland GmbH Service & Support 00420-800142052 Monday to Friday: 9 a.m. to 5.30 p.m www.epson.cz/support/ Norway Warranty & Support 800 11 828 Sales 23 16 21 24 www.epson.no Sweden Warranty & Support 08 445 12 58 Sales 08 519 92 082 www.epson.se...
- Page 369 E-mail: vule@bsprocesor.com; www.goran@bsprocesor.com www.gorangalic@sezampro.yu Greece Pouliadis Associates Corp. 142 Sygrou Avenue 17671 Kalithea, Athens - GREECE Tel.: +30 210 9242072 Fax: +30 210 9241066 E-mail: info@pouliadis.gr www.pouliadis.gr Info-Quest SA 25-27 Pantou Street 17671 Kalithea, Athens - GREECE Tel: +30 210 9299300 Fax: +30 210 9299399 E-mail: sales@info.quest.gr www.quest.gr...
- Page 370 Tel: +30 210 4899000 Fax: +30 210 4836849 E-mail: sales@despec.gr www.despec.gr ISTANBUL Bilgisayar Hastanesi Inönü Cad. No:72 Teknik Han Kat:3 80090 Gümüssuyu-Taksim/Istanbul Tel : 0 212 252 17 67 Fax : 0 212 244 54 79 E-Mail : epson@bilgisayarhastanesi.com www.bilgisayarhastanesi.com.tr...
- Page 371 Datapro Alemdag cad. Bayir Sok. No:5/3 Kisikli/Istanbul Tel : 0 216 461 77 75 Fax : 0 216 344 77 35 E-Mail : epson@datapro.com.tr www.datapro.com.tr Romar Rihtim Cad. 201 Tahir Han Karaköy 80030 Istanbul Tel : 0 212 252 08 09 Fax : 0 212 252 08 04 E-Mail : romar@romar.com.tr...
- Page 372 Baraj yolu 2 , 5 durak yeniçeri apt. 615 .sok 2 /b Adana Tel : 0 322 459 30 16 Fax : 0 322 459 94 93 E-Mail : epson@datapro.com.tr Bilgisayar Hastanesi (Türkah) Toros Cd. Doktorlar Sitesi Asma Kat No:39 Seyhan/Adana...
- Page 373 Datapro Çetin Emeç Bulvari - 2.Cad. 28/1 Asagiöveçler/Ankara Tel : 0 312 482 03 28 Fax : 0 312 4823754 E-Mail : epson@datapro.com.tr Romar Osmanli Caddesi No:29 Balgat /Ankara Tel: 0 312 2874676 (PBX) Fax: 0 312 2874588 E-Mail : romar@romar.com.tr Ufotek Tunus Cad.
- Page 374 Fax : 0 224 271 15 79 E-mail: bursa2@bhtemsilcilik.net Datapro Fevzi Çakmak Caddesi Burçin III. Is merkezi No: 54 Kat: 4 Daire: 412 Fomara / BURSA Tel: 0 224 225 29 47 Fax : 0 224 225 29 48 E-Mail : epson@datapro.com.tr...
- Page 375 DENIZLI Bilgisayar Hastanesi (Aybil) Murat dede mahellesi, 357. sokak No 8/b 4 Çesme mevkii Denizli Tel : 0 258 241 97 41 Fax : 0 258 242 1148 E-Mail : denizli@bhtemsilcilik.net DIYARBAKIR Bilgisayar Hastanesi (Tmt) Ekinciler Cad. Azc Plaza K:3 No:7 Diyarbakir Tel : 0 412 223 60 60 Fax : 0 412 222 50 96 E-Mail : diyarbakir@bhtemsilcilik.net...
- Page 376 Ragip Sanli Is Merkezi Izmir Tel : 0 232 4413244 Fax : 0 232 4413245 E-Mail : epson@datapro.com.tr Romar Isçiler Cad. Key Plaza No:147/D Alsancak 35220 Izmir Tel : 0 232 463 39 74 Fax: 0 232 463 39 75 E-Mail : romar@romar.com.tr...
- Page 377 KOCAELI Bilgisayar Hastanesi (Gistas) Güzeller Mahellesi, Bagdat Caddesi No 195 Gebze/Kocaeli Tel : 0 262 643 65 66 Fax : 0 262 643 65 67 E-Mail : kocaeli@bhtemsilcilik.net KONYA Bilgisayar Hastanesi (Baran) Nisantasi Mah. Tamer Sk. Bulus Sit. C Blok 9/A 42060 Selçuklu/Konya Tel : 0 332 238 91 31 Fax : 0 332 238 91 32...
- Page 378 SAKARYA Bilgisayar Hastanesi (Elit) Semerciler Mh.Çark Cd.Aldinç Pasaji No:54/14 Sakarya Tel: 0 264 277 56 08 Fax: 0 264 277 03 72 E-Mail: sakarya@bhtemsilcilik.net SAMSUN Bilgisayar Hastanesi (Intelsan) Çiftlik Mah Sefa Sok. Ayazoglu Apt. 17/1 Samsun Tel : 0 362 231 77 12 Fax : 0 362 234 46 74 E-Mail : samsun@bhtemsilcilik.net Ufotek...
- Page 379 TRABZON Bilgisayar Hastanesi (Prokom) Kahramanmaras Cad. Ticaret Mektep Sok. No:7/A Trabzon Tel : 0 462 326 6642 Fax : 0 462 321 7014 E-Mail : trabzon@bhtemsilcilik.net ZONGULDAK Bilgisayar Hastanesi (Ebil) Erdemir Cad.Abdi Ipekçi Sk.No:4/F K.Eregli/Zonguldak Tel: 0 372 323 38 64 Fax: 0 372 323 38 64 E-mail: zonguldak@bhtemsilcilik.net Cyprus...
- Page 380 Pouliadis Associated Cyprus Ltd 75, Limassol Avenue 2121 Nicosia Tel. +357 2 490209 Fax +357 2 490240 Poland EPSON Deutschland GmbH Service & Support 00800-4911299 Monday to Friday: 9 a.m. to 5.30 p.m www.epson.pl/support/ Bulgaria EPSON Deutschland GmbH Service & Support www.epson.bg/support/...
- Page 381 Estonia EPSON Deutschland GmbH Service & Support +372 6 718 166 Monday to Friday: 9 a.m. to 6 p.m. http://www.epson.ee/support/ Latvia EPSON Deutschland GmbH Service & Support +371 7286496 Monday to Friday: 9 a.m. to 6 p.m. http://www.epson.lv/support/ Lithuania EPSON Deutschland GmbH Service &...
- Page 382 Email Warranty & Support: epson-support@compubase.co.ae South Africa Warranty & Support (011) 444 8278 / 91 or 0800 600 578 For details of EPSON Express centres and Service Repair centres http://www.epson.co.za/support/index.htm Sales (011) 262 9200 or 0800 00 5956 www.epson.co.za/ Bosnia Herzgovina RECOS d.o.o.
- Page 383 EPSON ARGENTINA S.A. Avenida Belgrano 964/970 (1092), Buenos Aires Tel.: (54 11) 4346-0300 Fax: (54 11) 4346-0333 www.epson.com.ar Brazil EPSON DO BRASIL LTDA. Av. Tucunaré, 720 Tamboré Barueri, São Paulo, SP 06460-020 Tel.: (55 11) 7296-6100 Fax: (55 11) 7295-5624 www.epson.com.br Chile EPSON CHILE, S.A.
- Page 384 Embajada Americana, 200 Sur y 300 Oeste San José, Costa Rica Tel.: (50 6) 296-6222 Fax: (50 6) 296-6046 www.epsoncr.com Mexico EPSON MÉXICO, S.A. de C.V. Av. Sonora #150 México, 06100, DF Tel.: (52 5) 211-1736 Fax: (52 5) 533-1177 www.epson.com.mx...
- Page 385 Peru EPSON PERÚ, S.A. Av. Del Parque Sur #400 San Isidro, Lima, Perú Tel.: (51 1) 224-2336 Fax: (51 1) 476-4049 www.epson.com Venezuela EPSON VENEZUELA, S.A. Calle 4 con Calle 11-1 La Urbina Sur Caracas, Venezuela Tel.: (58 2) 240-1111 Fax: (58 2) 240-1128 www.epson.com.ve...
- Page 386 EPSON AMERICA, INC 3840 Kilroy Airport Way Long Beach, CA 90806 Tel.: (1 562) 981-3840 Fax: (1 562) 290-5051 www.epson.com...
-
Page 387: Glossary
Glossary The following definitions apply specifically to printers. application A software program that helps you carry out a particular task, such as word processing or financial planning. ASCII American Standard Code for Information Interchange. A standardized coding system for assigning numerical codes to letters and symbols. banding The horizontal lines that sometimes appear when printing graphics. - Page 388 ColorSync Macintosh software that is designed so you get WYSIWYG (What You See Is What You Get) color output. This software prints colors as you see them on your screen. See characters per inch. default A value or setting that takes effect when the equipment is turned on, reset, or initialized.
- Page 389 ESC/P Abbreviation for Epson Standard Code for Printers. This system of commands gives you control of your printer from your computer. It is standard for all Epson printers and supported by most application programs for personal computers. ESC/P Raster A command language that gives you control of your printer from your computer.
- Page 390 interface The connection between the computer and the printer. A serial interface transmits data one bit at a time. interface cable The cable that connects between the computer and the printer. Liquid Crystal Display. Shows various messages according to status of the printer.
- Page 391 PhotoEnhance4 The Epson software to change the shade of tone, to correct image data and to change the sharpness of the image data. port An interface channel through which data is transmitted between devices. printable area The area of a page on which the printer can print. It is smaller than the physical size of the page due to margins.
- Page 392 SelecType settings Settings made using the printer’s control panel. In SelecType mode, various printer settings that are not available using the printer driver, such as test print settings, can be made. serial interface interface spool The first step in printing, in which the printer driver converts the print data into codes that your printer understands.
- Page 393 Contacting EPSON, 344 Customer support, 344 Custom mode Macintosh, 143 Windows, 58 Cut sheet media media type, 340 using, 249, 254 Dual roll feed spindle, 237 EPSON Monitor3, 190 EPSON special media, 235, 340 EPSON Spool Manager, 114 EPSON StatusMonitor Index...
- Page 394 Macintosh, 181, 186, 229 Windows, 115 Error indication, 289 Head Alignment, 34 Ink cartridges, 264, 339 Ink options Macintosh, 145 Windows, 60 Layout menu (Windows), 88 to 100 Loading roll paper, 240 Maintenance Mode, 41 Maintenance tank, 277 Media Type setting Macintosh, 139 Windows, 53 Multi-page printing...
- Page 395 Page line, 246 Paper cutter, 279 Paper Thickness, 38 PhotoEnhance settings Windows, 65 Preview feature Macintosh (Mac OS X), 225 Printer driver Macintosh, 139 Windows, 53 Printer Software uninstalling (Windows only), 131 updating, 130 Printer Software for Macintosh (Mac OS X) utilities, 228 to 233 Printer utilities Macintosh, 181...
- Page 396 printer setting, 22 Specifications electrical, 327 interface, 335 Standards and Approvals, 330 Spindle attaching the roll paper, 236 removing the roll paper, 239 sRGB setting, 58 Status Message, 16 Status Sheet, 40 System requirements Macintosh, 333 Technical support, 344 Text/Graph setting Macintosh, 143, 211 Windows, 58 Transport the printer, 285...