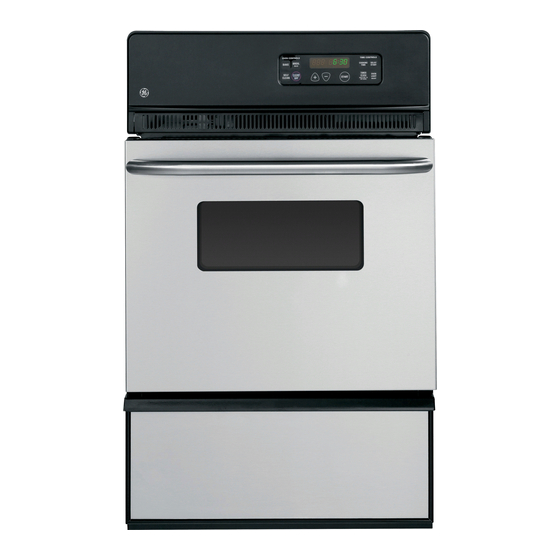
GE JGRP20 Owner's Manual
Built-in gas wall oven
Hide thumbs
Also See for JGRP20:
- Owner's manual (40 pages) ,
- Installation instructions manual (21 pages) ,
- Installation instruction (21 pages)
Table of Contents
Advertisement
Quick Links
www.GEAppliances.com
Safety Instructions
. . . . . .2–6
Operating Instructions, Tips
Aluminum foil . . . . . . . . .14, 19
Baking feature . . . . . . . . .14, 15
Broiling feature . . . . . . . .21, 22
Clock and timer . . . . . . . . . . . .8
Control features and settings . .7
Door latch . . . . . . . . . . . . . . .23
Ignition . . . . . . . . . . . . . . . . .12
Light . . . . . . . . . . . . . . . . . . . .12
Preheating . . . . . . . . . . . . . . .14
Roasting feature . . . . . . . .19, 20
Self-cleaning
instructions . . . . . . . . . . . .23, 24
Shelves . . . . . . . . . . . . . . . . . .13
Special features of your
oven control . . . . . . . . . . .10, 11
Timed baking . . . . . . . . . .16, 17
Type of margarine . . . . . . . . .18
Vent . . . . . . . . . . . . . . . . . . . .12
Care and Cleaning
Broiler pan and grid . . . . . . .25
Burner air adjustment
shutters . . . . . . . . . . . . . . . . . .28
Control panel . . . . . . . . . . . . .27
Door removal . . . . . . . . . . . . .27
Light replacement . . . . . . . . .26
Orifice hood adjustment . . . .28
Oven bottom . . . . . . . . . . . . .26
Oven vents . . . . . . . . . . . . . . .25
Self-cleaning
instructions . . . . . . . . . . . .23, 24
Shelves . . . . . . . . . . . . . . . . . .26
Storage drawer . . . . . . . . . . . .25
Write the model and serial
numbers here:
Model # ______________________
Serial # ______________________
You can find them on a label on the
front of the oven behind the door.
Before You Call For
Service
Thermostat adjustment —
do it yourself . . . . . . . . . . . . .18
Troubleshooting tips . . . . .29–31
Consumer Support
Consumer Support . .Back Cover
Product registration . . . . .33, 34
Warranty . . . . . . . . . . . . . . . . .35
164D4290P383
Owner's Manual
JGRP20
49-80231
12-03 JR
Advertisement
Table of Contents

Related Manuals for GE JGRP20

Summary of Contents for GE JGRP20
- Page 1 Orifice hood adjustment ..28 Oven bottom ... . .26 Oven vents ....25 Self-cleaning instructions .
-
Page 2: Important Safety Information
IMPORTANT SAFETY INFORMATION. READ ALL INSTRUCTIONS BEFORE USING. WARNING: If the information in this manual is not followed exactly, a fire or explosion may result causing property damage, personal injury or death. — Do not store or use gasoline or other flammable vapors and liquids in the vicinity of this or any other appliance. -
Page 3: Safety Precautions
SAFETY PRECAUTIONS Have the installer show you the location of the oven gas shut-off valve and how to shut it off if necessary. Have your oven installed and properly grounded by a qualified installer, in accordance with the Installation Instructions. - Page 4 Always keep wooden and plastic utensils and canned food a safe distance away from your oven. Do not leave paper products, cooking utensils or food in the oven when not in use.
- Page 5 OVEN Stand away from the oven when opening the door of a hot oven. The hot air and steam that escape can cause burns to hands, face and eyes. Do not use the oven for a storage area. Items stored in the oven can ignite.
-
Page 6: Save These Instructions
Manual. READ AND FOLLOW THIS SAFETY INFORMATION CAREFULLY. SAVE THESE INSTRUCTIONS If the self-cleaning mode malfunctions, turn the oven off and disconnect the power supply. Have it serviced by a qualified technician. Do not use oven cleaners. No commercial oven cleaner or oven liner of any kind should be used in or around any part of the oven. -
Page 7: Using The Oven Controls
If “F– and a number or letter” flash in the display and the oven control signals, this indicates a function error code. Touch the CLEAR/OFF pad. Allow the oven to cool for one hour. Put the oven back into operation. - Page 8 Not all features are on all models. To Set the Clock The clock must be set to the correct time of day for the automatic oven timing functions to work properly. The time of day cannot be changed during a delayed cooking or a delayed self-cleaning cycle.
- Page 9 The control has a series of tones that will sound at different times. These tones may sound while you set the control for an oven function or at the end of the oven function. They will also alert you when an incorrect time or temperature has been entered or if there is a problem with the oven.
-
Page 10: Special Features Of Your Oven Control
To cancel the 6-second beep: 12-Hour Shut-Off With this feature, should you forget and leave the oven on, the control will automatically turn off the oven after 12 hours during baking functions or after 3 hours during a broil function. - Page 11 Touch the SELF CLEAN pad again. The display will show LOC. Fahrenheit or Centigrade Temperature Selection Your oven control is set to use the Fahrenheit temperature selections but you may change this to use the Centigrade selections. Touch the BAKE and BROIL HI/LO pads at the same time for 2 seconds until the display shows SF.
-
Page 12: Light
The vent area could get hot during oven use. Power Outage The oven burner will not light in the event of an electrical power outage. CAUTION: Do not attempt to light it manually with a match. - Page 13 Tilt up the front and push the shelf toward the back of the oven until it goes past the bump on the shelf support. Then lower the front of the shelf and push it all the way back.
-
Page 14: Preheating
Your oven temperature is controlled very accurately using an oven control system. It is recommended that you operate the oven for a number of weeks using the time given on recipes as a guide to become familiar with your new oven’s performance. - Page 15 Pans should not touch each other or the walls of the oven. Allow 1- to 1 ⁄...
-
Page 16: Timed Baking
Using the timed baking feature. How to Set Your Oven for Time Bake The oven control allows you to turn the oven on or off automatically at specific times that you set. Examples of Immediate Start (oven turns on now and you set it to turn off automatically at... - Page 17 Touch the BAKE pad. Touch the + or – pad to set the oven temperature. Touch the COOKING TIME pad. NOTE: If your recipe requires preheating, you may need to add additional time to the length of the cooking time.
- Page 18 You may find that your new oven cooks differently than the one it replaced. Use your new oven for a few weeks to become more familiar with it. If you still think your new oven is too hot or too cold, you can adjust the thermostat yourself.
- Page 19 Using the roasting feature. Roasting is cooking by dry heat. Tender meat or poultry can be roasted uncovered in your oven. Roasting temperatures, which should be low and steady, keep spattering to a minimum. Before You Begin Roasting… Roasting is really a baking procedure used for meats.
- Page 20 10 to 20 minutes after removing them from the oven. Be sure to cut across the grain of the meat. Q. Do I need to preheat my oven each time I cook a roast or poultry? A. It is not necessary to preheat your oven.
-
Page 21: Broiling Feature
Broiling Guide. Place the sump area of the broiler pan to the front of the door. NOTE: Always broil with the oven door closed. How to Set Your Oven for Broiling Touch the BROIL HI/LO pad. -
Page 22: Broiling Feature
Using the broiling feature. Always use the broiler pan and grid that comes with your oven. It is designed to minimize smoking and spattering by trapping the juices in the shielded lower part of the pan. NOTE: Always broil with the oven door closed. -
Page 23: Using The Self-Cleaning Oven
Using the self-cleaning oven. The oven door must be closed and all controls set correctly for the cycle to work properly. Before a Clean Cycle For the first self-clean cycle, we recommend venting your kitchen with an open window or using a ventilation fan or hood. - Page 24 If the oven is not clean after one clean cycle, repeat the cycle. Questions and Answers Q. If my oven clock is not set to the correct time of day, can I still self-clean my oven? A. If the clock is not set to the correct...
-
Page 25: Broiler Pan And Grid
Care and cleaning of the oven. Be sure electrical power is off and all surfaces are cool before cleaning any part of the oven. How to Remove Packaging Tape To remove the adhesive residue left from packaging tape, use household dishwashing liquid, mineral oil or cooking oil. -
Page 26: Light Replacement
Lift off the cover. Removable Oven Bottom The oven bottom can be removed to clean large spills, and to enable you to reach the oven burner. Oven bottom must be replaced before using Unlock Lock the self-clean cycle. -
Page 27: Control Panel
Lift-Off Oven Door The oven door is removable, but it is heavy. You may need help removing and replacing the door. Do not lift the door by the handle. This can cause the glass to break or can cause damage to the door. -
Page 28: Shutters
Broil and Oven Burner Air Adjustment Shutters Loosen Air adjustment shutters for the broil and adjustment oven burners regulate the flow of air to shutter the flame. All ovens are factory adjusted for use with the natural gas used in most areas. -
Page 29: Before You Call For Service
• Use the broiling pan and grid that came with your oven. Make sure they are cool. • Use the broiling pan and grid that came with your oven. • See the Broiling section. • See the Care and cleaning section. - Page 30 • Close the oven door. • Touch the CLEAR/OFF pad. Allow the oven to cool. • Touch the CLEAR/OFF pad. Allow the oven to cool for one hour. Put the oven back into operation. • Disconnect all power to the oven for 5 minutes and then reconnect power.
- Page 31 • The BAKE and BROIL HI/LO pads must be touched at the same time and held for 2 seconds. • Reset the clock. If the oven was in use, you must reset it by touching the CLEAR/OFF pad, setting the clock and resetting any cooking function.
- Page 32 Notes.
- Page 33 You can rest easy, knowing that all your valuable household products are protected against expensive repairs. Place your confidence in GE and call us in the U.S. toll-free at for more information. *All brands covered, up to 20 years old, in the continental U.S.
-
Page 34: Serial Number
Year * Please provide your e-mail address to receive, via e-mail, discounts, special offers and other important communications from GE Appliances (GEA). Check here if you do not want to receive communications from GEA’s carefully selected partners. FAILURE TO COMPLETE AND RETURN THIS CARD DOES NOT DIMINISH YOUR WARRANTY RIGHTS. - Page 35 Any part of the oven which fails due to a defect in materials or workmanship. From the date of the During this full one-year warranty, GE will also provide, free of charge, all labor original purchase and in-home service to replace the defective part.
-
Page 36: Consumer Support
Caution must be exercised, since improper servicing may cause unsafe operation. Contact Us If you are not satisfied with the service you receive from GE, contact us on our Website with all the details including your phone number, or write to: General Manager, Customer Relations Register Your Appliance Register your new appliance on-line—at your convenience! Timely product registration will allow for...