Sony HDR-AS30V Handbook
Digital hd video camera recorder
Hide thumbs
Also See for HDR-AS30V:
- Quick manual (3 pages) ,
- Update manual (2 pages) ,
- Operating manual (2 pages)

Related Manuals for Sony HDR-AS30V


Summary of Contents for Sony HDR-AS30V
- Page 1 Handbook Digital HD Video Camera Recorder HDR-AS30/AS30V © 2013 Sony Corporation 4-477-527-12(1)
-
Page 2: How To Use This Handbook
How to use this handbook Click on a button on the right to jump to the corresponding page. This is convenient when searching for a function you want to view. Search for information by function. Search for information by operation. Search for information in a listing of Settings items. -
Page 3: Notes On Using The Camera
Recording Mode change accordingly. Settings content or recording failure values for both [NTSC] and [PAL] are shown in Sony cannot compensate for failure to record or this manual. loss or damage of recorded content due to a malfunction of the camera or memory card, etc. - Page 4 For details, check your wireless LAN administrator and/or service provider. • Sony makes no guarantees whatsoever in the provision of a network service. Sony bears absolutely no responsibility for damages that may arise from the use of a network service even in the case of claims made by a third-party.
-
Page 5: How To Enjoy The Camera
How to enjoy the camera Enjoy more using the accessories Handlebar Mount & Waterproof Case Wrist Mount Strap & Waterproof Case Handheld Grip with LCD Screen Continued r... - Page 6 You can directly upload images and share them by using the wireless network function of this camera (page 45). Record GPS information (HDR-AS30V only) You can view location information and movement speed while viewing movies using “PlayMemories Home” (page 25).
-
Page 7: Table Of Contents
Recording Mode·················································· 20 SteadyShot·························································· 21 Field Angle ·························································· 22 Scene ·································································· 23 Interval Photo Recording····································· 24 GPS Log (HDR-AS30V only) ······························ 25 Airplane Mode ····················································· 27 Auto Power Off···················································· 28 Beep···································································· 29 Date & Time Setting ············································ 30 USB Power Supply·············································· 31 Switching NTSC/PAL ··········································... - Page 8 Shooting Shooting ······························································ 41 Viewing Viewing images on a TV ····································· 43 Wireless Network (Wi-Fi) Preparation for setting Wi-Fi ······························· 45 Setting Wi-Fi························································ 46 Smart Remote Control ········································ 49 Copy···································································· 51 Computer Useful functions when connecting the camera to your computer ····················································· 52 Preparing a computer··········································...
- Page 9 Index Index ··································································· 72...
-
Page 10: Operation Search
Viewing on TVs Viewing images on a TV ···································· 43 Operating using a Smart Remote Control ······································· 49 smartphone or tablet Uploading images to a Setting Wi-Fi ························································· 46 network service Recording the location GPS Log (HDR-AS30V only) ··························· 25 information... -
Page 11: Settings Search
Scene SCENE NORML Interval Photo Recording LAPSE 5sec Smart Remote Control Wi-Fi Copy* SHARE — GPS Log (HDR-AS30V only) Airplane Mode PLANE Auto Power Off A.OFF 60sec Beep BEEP Date & Time Setting DATE 2013/1/1 00:00 GMT+0 USB Power Supply... - Page 12 1 Press the NEXT or PREV button to turn on the power. To power off, select [PwOFF] and press the ENTER button. 2 Press the NEXT button to display [SETUP], then press the ENTER button. 3 Press the NEXT button to display the setting item, then press the ENTER button.
-
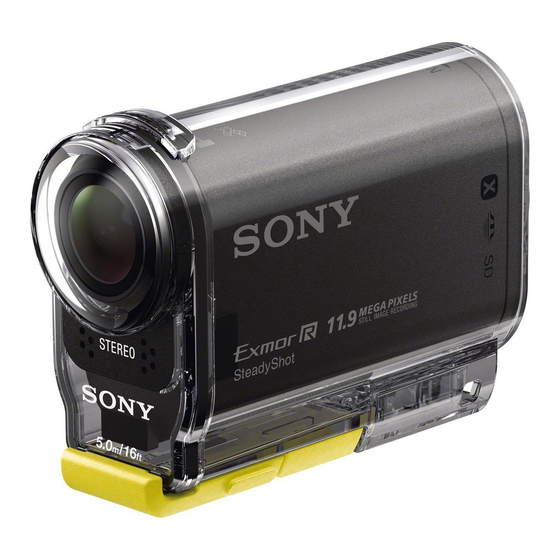
Page 13: Identifying Parts
E Display panel F Speaker G PREV button H NEXT button I Microphones J Lens K GPS sensor (HDR-AS30V only) L Connector cover M m (Mic) jack* N Expansion connector* O CHG (Charge) lamp P HDMI OUT jack Q Multi/Micro USB Terminal*... -
Page 14: Checking The Bundled Items
Checking the bundled items Make sure that you have following bundled items. The number in parentheses indicates the quantity of that item bundled. • Camera (1) • Micro USB cable (1) • Rechargeable battery pack (NP-BX1) (1) • Waterproof Case (SPK-AS2) (1) •... -
Page 15: Inserting The Battery Pack
Inserting the battery pack 1 Slide the battery pack/memory card cover in the direction of the arrow, then open the cover. 2 Insert the battery pack. Make sure the direction of the battery pack is correct, then insert it pushing against the battery ejection lever, until the lever locks. -
Page 16: Charging The Battery Pack
Charging the battery pack 1 Turn off the power of the camera. Charging is not possible when the camera is turned 2 Connect the camera to the computer that CHG (Charge) lamp is turned on with the micro USB cable (supplied). - Page 17 Checking the remaining battery charge A remaining charge indicator appears on the upper right of the display panel. High • The displayed remaining charge indicator may not be correct under certain circumstances. • It takes about one minute until the correct remaining charge indicator appears.
-
Page 18: Inserting A Memory Card
Inserting a memory card 1 Slide the Battery pack/memory card cover in the direction of the arrow, then open the cover. 2 Insert the memory card until it clicks. microSD card: Insert in the direction of A. “Memory Stick Micro (M2)” media: Insert in the direction of B. - Page 19 Notes • In order to stabilize memory card operation, it is recommended that you format the memory card when you use it with the camera for the first time (page 34). All data recorded on the memory card will be erased by formatting, and cannot be recovered. •...
-
Page 20: Recording Mode
Recording Mode Setting display You can set the image resolution and frame rate for shooting movies. To make the setting, select [SETUP] first. 1 Press the NEXT button to display [SETUP], then press the ENTER button. 2 While [VIDEO] (Recording Mode) is displayed, press the ENTER button. 3 Press the NEXT button to select the Recording Mode, then press the ENTER button. -
Page 21: Steadyshot
SteadyShot Setting display You can activate the camera-shake reduction when shooting. To make the setting, select [SETUP] first. 1 Press the NEXT button to display [SETUP], then press the ENTER button. 2 Press the NEXT button to display [STEDY] (SteadyShot), then press the ENTER button. -
Page 22: Field Angle
Field Angle Setting display You can change the field angle for recording. To make the setting, select [SETUP] first. 1 Press the NEXT button to display [SETUP], then press the ENTER button. 2 Press the NEXT button to display [ANGLE] (Angle), then press the ENTER button. -
Page 23: Scene
Scene Setting display You can select suitable image quality according to the shooting scene. To make the setting, select [SETUP] first. 1 Press the NEXT button to display [SETUP], then press the ENTER button. 2 Press the NEXT button to display [SCENE] (Scene), then press the ENTER button. -
Page 24: Interval Photo Recording
Interval Photo Setting display Recording You can set the interval period of the interval photo recording. To make the setting, select [SETUP] first. 1 Press the NEXT button to display [SETUP], then press the ENTER button. 2 Press the NEXT button to display [LAPSE] (Interval), then press the ENTER button. -
Page 25: Gps Log (Hdr-As30V Only)
This decreases the sensitivity of the GPS sensor and triangulation may fail (page 13). • Sony does not collect location information and routing information. • To display location information and routing information as a map on a computer, Sony provides data of location information and routing information to Google Inc. - Page 26 Checking triangulating status The indicator changes according to the strength of GPS signal reception when GPS is activated. Triangulating GPS reception status Indicators status The GPS log is set to [OFF] or an error occurred. indicator Searching for GPS satellites. It may take several minutes to start Searching/Difficult triangulating.
-
Page 27: Airplane Mode
Airplane Mode Setting display When you are in an airplane or another restricted place, you can set the camera to disable all functions related to the wireless applications such as Wi-Fi, etc. If you set the airplane mode to [ON], an airplane mark will be displayed on the display panel. 1 Press the NEXT button to display [SETUP], then press the ENTER button. -
Page 28: Auto Power Off
Auto Power Off Setting display You can change the setting of the Auto Power Off function. To make the setting, select [SETUP] first. 1 Press the NEXT button to display [SETUP], then press the ENTER button. 2 Press the NEXT button to display [A.OFF] (Auto Power Off), then press the ENTER button. -
Page 29: Beep
Beep Setting display You can set the audible notification of operations to ON/OFF. To make the setting, select [SETUP] first. 1 Press the NEXT button to display [SETUP], then press the ENTER button. 2 Press the NEXT button to display [BEEP] (Beep), then press the ENTER button. -
Page 30: Date & Time Setting
Notes • When you set the GPS log to [ON], the camera adjusts date, time and region automatically during shooting mode (HDR-AS30V only). Setting the region You can set the clock to the local time of a country you visit by selecting the region. -
Page 31: Usb Power Supply
USB Power Supply Setting display When connecting the camera to a computer or USB device with the micro USB cable (supplied), the camera can be set so the connected device supplies power to it. To make the setting, select [SETUP] first. 1 Press the NEXT button to display [SETUP], then press the ENTER button. -
Page 32: Switching Ntsc/Pal
Switching NTSC/PAL Setting display You can select NTSC/PAL, depending on the TV system of the country or region where you use this camera. To make the setting, select [SETUP] first. 1 Press the NEXT button to display [SETUP], then press the ENTER button. 2 Press the NEXT button to display [V.SYS] (Video System), then press the ENTER button. -
Page 33: Resetting The Settings
Resetting the Settings Setting display You can reset the settings to their defaults. If you activate [RESET], images are not deleted. 1 Press the NEXT button to display [SETUP], then press the ENTER button. 2 Press the NEXT button to display [RESET] (Reset), then press the ENTER button. -
Page 34: Format
Format Setting display Formatting is the process of deleting all images in the memory card, and restoring the memory card to its initial state. To make the setting, select [SETUP] first. 1 Press the NEXT button to display [SETUP], then press the ENTER button. 2 Press the NEXT button to display [FORMT] (Format), then press the ENTER button. -
Page 35: Using Accessories
Using accessories Refer to the website of this camera for the latest information on accessories. Waterproof Case (SPK-AS2) By inserting the camera in the Waterproof Case, you can shoot movies in the rain or at a beach. HOLD lever Case body REC button NEXT button PREV button... - Page 36 4 Insert the tab of the case body into the slot of the case cover. 5 Hook the buckle over the tab on the lower part of the case cover 1, then close the buckle in the direction of 2, until it clicks into place. •...
-
Page 37: Notes On Use
Water leakage If water happens to leak in, stop exposing the Waterproof Case to water immediately. • If the camera gets wet, take it to the nearest Sony dealer immediately. Repair costs must be borne by the customer. • In the unlikely event that a malfunction of the Waterproof Case causes damage due to water leakage, Sony does not guarantee against damages to the equipment contained in it (camera, battery pack, etc.) - Page 38 Maintenance • After recording in a location with a sea breeze, wash this unit thoroughly in fresh water with the buckle fastened to remove salt and sand, then wipe with a soft dry cloth. It is recommended that you submerge the Waterproof Case in fresh water for about 30 minutes.
- Page 39 Adhesive Mount (VCT-AM1) The Adhesive Mount is used for fixing the Waterproof Case to an item you intend to use. The Adhesive Mount is a general term for the Attachment Buckle, Flat Adhesive Mount, and Curved Adhesive Mount. Insert the camera in the Waterproof Case before attaching. Attachment Buckle Flat Adhesive Mount Curved Adhesive Mount...
- Page 40 Notes • The Flat Adhesive Mount and Curved Adhesive Mount cannot be used again once they are detached from the location surface. • When detaching, peel off slowly. If peeled off forcibly, the surface on which the mount is fixed might be damaged.
-
Page 41: Shooting
Shooting Display About the b REC HOLD switch The b REC HOLD switch can prevent accidental operation. Slide the b REC HOLD switch in the direction of b to lock. To release the lock, slide it in the opposite direction of b. •... - Page 42 Notes on long-time recording • When you continue to shoot for a long time, the temperature of the camera rises. If the temperature reaches above a certain level, shooting stops automatically. Leave the camera for 10 minutes or longer to allow the temperature inside the camera to decrease to a safe level.
-
Page 43: Viewing Images On A Tv
• Some devices may not work properly. Image and sound may not be output. • Use a micro HDMI cable (sold separately) with the HDMI logo. • It is recommended that you use an authorized cable with HDMI logo or a Sony HDMI cable. Continued r... - Page 44 To control a content being played back • Viewing the previous/next image: Press the PREV/NEXT button. • Fast-rewind/fast-forward (movies only): Press and hold the PREV/NEXT button. • Pause (movies only): Press the PREV and NEXT buttons simultaneously. If you press and hold the PREV or NEXT button during pause, slow rewind or slow forward can be performed.
-
Page 45: Preparation For Setting Wi-Fi
Install the “PlayMemories Mobile” on your smartphone. Update “PlayMemories Mobile” to the latest version if you have already installed it on your smartphone. For more information, refer to the following website. http://www.sony.net/pmm/ Android 2.3 or later (Android 4.0 or later is required to use One-touch functions (NFC)) Search for “PlayMemories Mobile”... -
Page 46: Setting Wi-Fi
Setting Wi-Fi Setting display Android supporting NFC 1 Turn on the power of the camera, then press the NEXT button and select a shooting mode. MOVIE: Movie mode PHOTO: Photo mode INTVL: Interval photo recording mode 2 Select [Settings] on the smartphone, then select [More...] and check that [NFC] is enabled (First time only). - Page 47 Android/iPhone not supporting NFC Turn on the power of the camera, then press the NEXT button and select a shooting mode. MOVIE: Movie mode PHOTO: Photo mode INTVL: Interval photo recording mode Android 1 Start “PlayMemories Mobile.” 2 Select the SSID, as printed on the sticker attached to the Operating Guide.
- Page 48 iPhone 1 Select [Settings] on the smartphone, then select [Wi-Fi] and the SSID of the camera. 2 Input the password, as printed on the sticker attached to the Operating Guide (First time only). 3 Confirm the connection to the SSID, as printed on the sticker attached to the Operating Guide.
-
Page 49: Smart Remote Control
Smart Remote Setting display Control By connecting the camera and a smartphone through Wi-Fi, you can operate the camera by the smartphone. To make the setting, select [SETUP] first. 1 Press the NEXT button to display [SETUP], then press the ENTER button. 2 Press the NEXT button to display [Wi-Fi] (Wi-Fi), then press the ENTER button. - Page 50 Notes • The smart remote control function allows you to perform the following using a smartphone: – Checking the field angle – Recording start/stop – Changing the shooting mode (movie mode/photo mode/interval photo recording mode) – Copy mode (copy movies and photos shot by the camera) –...
-
Page 51: Copy
Copy Setting display You can copy movies and photos shot by the camera by operating a smartphone. 1 Turn on the power of the camera, then press the NEXT button and select a shooting mode. MOVIE: Movie mode PHOTO: Photo mode INTVL: Interval photo recording mode 2 Start “PlayMemories Mobile”... -
Page 52: Computer
• Use the micro USB cable (supplied) when connecting the camera to your computer. • Functions of “PlayMemories Home” that can be used differ for Windows and for Mac. • For details on other applications, visit the following URL. Windows: http://www.sony.co.jp/imsoft/Win/ Mac: http://www.sony.co.jp/imsoft/Mac/... -
Page 53: Preparing A Computer
Preparing a computer Step 1 Checking the computer system Windows: Windows Vista SP2/Windows 7 SP1/Windows 8 CPU* Intel Core Duo 1.66 GHz or faster, or Intel Core 2 Duo 1.66 GHz or faster Memory 1 GB or more Hard disk Disk space required for installation: Approximately 600 MB Display Minimum 1,024×768 dots... - Page 54 • For details on “PlayMemories Home” select (“PlayMemories Home” Help Guide) on the software or visit the PlayMemories Home support page (http://www.sony.co.jp/pmh-se/). • You can play movies recorded with the camera on the screen of the computer, when the camera is connected to a computer which has “PlayMemories Home”...
- Page 55 To delete the USB connection Windows7/Windows8 1 Click on the task tray. 2 Click the disconnect icon in Customize. 3 Click the device to remove. Disconnect icon Windows Vista Perform the procedure from step 1 to 3 below before: • Disconnecting the micro USB cable (supplied). •...
-
Page 56: Starting The "Playmemories Home" Software
2 For how to use “PlayMemories Home,” refer to the help of the “PlayMemories Home.” Please register your product • Sony asks you to register your product for enhanced support. • For Mac users, use the Mac application “Product registration software.”... -
Page 57: Troubleshooting
If you experience trouble with the camera, try the following solutions. 1 Check the items on pages 58 to 62. 2 Turn the power off and then on again. 3 Consult your Sony dealer or local authorized Sony service facility. Continued r... -
Page 58: Memory Card
• When usable battery life becomes half the usual time, even after charging the battery pack fully, the battery pack may need to be replaced. Consult your nearest Sony dealer. Cannot charge the camera. -
Page 59: Viewing Images
• Connect a micro HDMI cable (sold separately). The image does not appear on the TV. • Check whether the connection is correct (page 43). GPS (HDR-AS30V only) The camera is not receiving a GPS signal. • Set the GPS log to [ON]. - Page 60 Cannot import images. • Connect the camera and your computer correctly making a USB connection (page 53). “PlayMemories Home” cannot be installed. • Check the computer environment or installation procedure required to install “PlayMemories Home.” “PlayMemories Home” does not work correctly. •...
-
Page 61: Warning Indicators And Messages
Warning indicators and messages If the following messages appear, follow the instructions. • The battery level is low. Charge the battery pack immediately. ERROR • Turn the power off and then on again. HEAT • The camera temperature has risen. The power may turn off automatically, or you may be unable to record images. - Page 62 PLANE • When the airplane mode is set to [ON], GPS and Wi-Fi cannot be used (page 27).
-
Page 63: Recordable Time
MP4AVC 2ch Average (Units: minutes) Recording 16GB 32GB Mode SSLOW SLOW 1205 • In the SLOW/SSLOW setting, the above figure indicates the recordable time when shooting and differs from actual playback time. • When using a Sony memory card. Continued r... -
Page 64: Estimated Number Of Recordable Photos
2650 5300 • When using a Sony memory card. • The number of recordable photos for the memory card shown is for the maximum image size for your camera. The actual number of recordable photos is displayed on the LCD screen during shooting. -
Page 65: Battery Pack
Battery pack On charging the battery pack • Charge the battery pack before using the camera for the first time. • We recommend charging the battery pack in an ambient temperature of between 10°C to 30°C (50°F to 86°F) until the CHG (Charge) lamp turns off. The battery pack may not be effectively charged in temperatures outside this range. -
Page 66: Using The Camera Abroad
Using the camera abroad On TV color systems To view images shot by the camera on a TV, you need a TV (or monitor) with an HDMI jack and a micro HDMI cable (sold separately). Before shooting, be sure to set [V.SYS] to the TV system of the country and region where you will view recordings. -
Page 67: Precautions
Precautions Do not use/store the camera in the following places • In an extremely hot, cold or humid place In places such as in a car parked in the sun, the camera body may become deformed and this may cause a malfunction. -
Page 68: Notes On Optional Accessories
(after about 1 hour). Notes on optional accessories • Genuine Sony accessories may not be available in some countries/regions. Note on disposal/transfer of the memory card Even if you delete data in the memory card or format the memory card on the camera or a computer, you may not delete data from the memory card completely. -
Page 69: Specifications
Specifications Camera Charging time: Via a computer NP-BX1 (supplied): Approx. 245 min [System] Via a AC-UD20 (sold separately) Video signal NP-BX1 (supplied): Approx. 175 min NTSC color, EIA standards Power consumption: 1.9 W (when the movie HDTV 1080/60i, 1080/60p specification image size is [1920×1080/30p]) PAL color, CCIR standards Operating temperature: –10°C to 40°C (14°F to... - Page 70 Dimensions: Approx. 50.0 mm × 12.5 mm × 58.5 mm (2 in. × 1/2 in. × 2 3/8 in.) (W/H/D, excluding protrusions) Mass: Approx. 14 g (0.5 oz) Curved Adhesive Mount Dimensions: Approx. 50.0 mm × 16.0 mm × 58.5 mm (2 in. × 21/32 in. × 2 3/8 in.) (W/H/D, excluding protrusions) Mass: Approx.
- Page 71 GPL/LGPL. Source code is provided on the web. Use the following URL to download it. When downloading the source code, select HDR-AS30V as the model for your camera. http://www.sony.net/Products/Linux/ We would prefer you do not contact us about the contents of source code.
- Page 72 Index A.OFF MOVIE ..................28 .................41 Airplane mode Multi/Micro USB Terminal ..............27 .........54 ANGLE .................22 Auto power off ..............28 NEXT button ..............11 ..................46 Battery pack Number of recordable photos ................65 ........64 BEEP ..................29 Beep ..................29 PHOTO .................41 PLANE ..................27 Charging PLAY ................16 ..................43 CHG (Charge) lamp...
- Page 73 V.SYS ..................32 VIDEO ..................20 View Movies ................43 Still image ..............43 Warning messages ............61 Wi-Fi ..................46...