Table of Contents
Advertisement
Quick Links
Digital 4K Video Camera Recorder/Digital HD Video Camera Recorder
X3000/HDR-AS300/HDR-AS50
Read This First
Identifying the parts
Identifying the parts (FDR-X3000/HDR-AS300) [1]
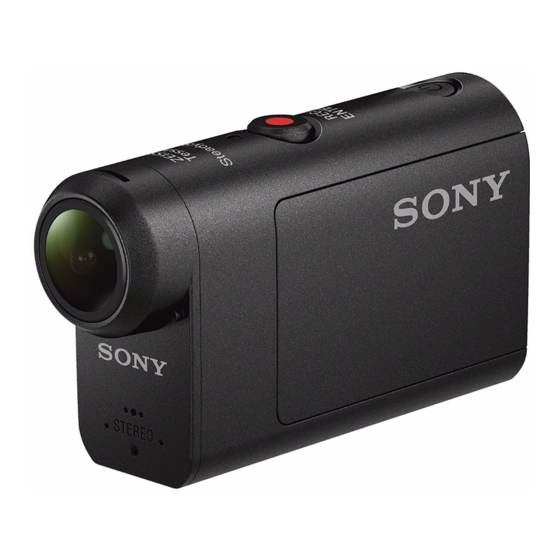
Identifying the parts (HDR-AS50) [2]
Screen display [3]
Getting Started
Checking the bundled items [4]
Inserting the battery pack [5]
Charging the battery pack [6]
Inserting a memory card
Inserting a memory card [7]
The memory cards that can be used with the camera [8]
Setting the date and time [9]
Using the Underwater Housing
Identifying the parts (Underwater Housing) [10]
FDR-
Advertisement
Table of Contents

Related Manuals for Sony HDR-AS50R


Summary of Contents for Sony HDR-AS50R
- Page 1 FDR- Digital 4K Video Camera Recorder/Digital HD Video Camera Recorder X3000/HDR-AS300/HDR-AS50 Read This First Identifying the parts Identifying the parts (FDR-X3000/HDR-AS300) [1] Identifying the parts (HDR-AS50) [2] Screen display [3] Getting Started Checking the bundled items [4] Inserting the battery pack [5] Charging the battery pack [6] Inserting a memory card Inserting a memory card [7]...
-
Page 2: Changing The Settings
Using the Underwater Housing [11] On waterproof performance of the Underwater Housing [12] Notes on use for the Underwater Housing [13] Water leakage [14] Waterproof packing [15] How to check for water leaks [16] Maintenance [17] Using accessories Using the attachment buckle [18] Notes on using the adhesive mount (sold separately) [19] Shooting Shooting movies and still images... -
Page 3: Camera Settings
Image quality setting [28] Movie format [29] Time-lapse capture image size [30] Loop recording time [31] Still image mode switching [32] Still image shooting interval [33] Self-timer [34] Time-lapse shooting interval [35] Time-lapse shot number [36] SteadyShot (Movie) [37] SteadyShot (Still) (FDR-X3000/HDR-AS300) [38] Angle setting [39] Zoom setting [40] Flip [41]... - Page 4 One touch recording [63] Auto power off [64] Switching NTSC/PAL [65] Date & time setting [66] Area setting [67] Daylight saving time (summer time) setting [68] Version [69] Resetting the settings [70] Viewing Viewing images on a TV (FDR-X3000/HDR-AS300) [71] Viewing using the Live-View Remote [72] Delete [73] Create your movie...
- Page 5 Using the camera connected to other devices via Wi-Fi Connecting to your smartphone Preparation for connecting to your smartphone [80] Sample smartphone screen display [81] Using One-touch Functions to Connect to an NFC-enabled Android Smartphone (FDR-X3000/HDR- AS300) [82] Connecting a smartphone to Wi-Fi via QR Code (Android device) [83] Performing the Wi-Fi setting on a smartphone via QR Code (iPhone/iPad) [84] Connecting to a smartphone using ID/password (Android device) [85] Connecting to a smartphone using ID/password (iPhone/iPad) [86]...
- Page 6 Editing images imported to your smartphone/tablet Using the Action Cam App Useful functions of Action Cam App [93] Installing Action Cam App [94] Information Recordable time Estimated duration of recording and playback for supplied battery pack [95] Estimated recording time of movies [96] Estimated number of recordable still images [97] Battery pack On charging the battery pack [98]...
- Page 7 Do not use/store the camera in the following places [108] On carrying [109] Care and storage of the lens [110] On cleaning [111] On operating temperatures [112] On moisture condensation [113] Notes on optional accessories [114] On using the camera in close proximity to vibrating motors and engines (FDR-X3000/HDR-AS300) [115] Note on disposal/transfer of the memory card [116] On GPS (FDR-X3000/HDR-AS300) [117]...
-
Page 8: Memory Card
The remaining charge indicator is incorrect. [129] Memory card Operations using the memory card cannot be performed. [130] Shooting images Cannot record images. [131] Cannot insert dates on images. [132] Viewing images Cannot playback images. [133] The image does not appear on the TV. (FDR-X3000/HDR-AS300) [134] The camera is not receiving a GPS signal. - Page 9 It takes too much time to transfer an image. [144] Others The lens gets fogged. [145] The camera becomes warm when you use it for a long time. [146] The date or time is incorrect. [147] Warning indicators and messages Warning indicators and error messages [148] [1] Read This First Identifying the parts...
- Page 10 (on/standby) button GPS sensor IR remote receiver (FDR-X3000) MENU button Display panel UP button/DOWN button REC lamp REC (Movie/still image) button/ENTER (Menu execute) button REC/LIVE lamp (N Mark) Lens Speaker Microphones HDMI OUT jack Multi/Micro USB terminal Mic jack CHG (Charge) lamp Battery cover Battery housing Battery ejection lever...
- Page 11 (on/standby) button MENU button Display panel UP button/DOWN button REC lamp REC (Movie/still image) button/ENTER (Menu execute) button REC/LIVE lamp Lens Speaker Microphones Multi/Micro USB terminal CHG (Charge) lamp Battery cover Battery housing Battery ejection lever Connector cover (Multi/Micro USB terminal) REC lamp Lock lever Screw hole for tripod...
-
Page 12: Screen Display
[3] Read This First Screen display The indicators described below are displayed on the camera. This screen display is an example of when shooting movies. Display icons at 1 : Wi-Fi connection setting (single connection) : Wi-Fi connection setting (multi connection) : Bluetooth is connected : Searching for GPS satellites to receive GPS signals. -
Page 13: Checking The Bundled Items
: Time-lapse capture mode : Live streaming mode : Loop recording mode : Angle setting : Zoom ratio : UP button/DOWN button operation guide (zoom switching, shooting mode switching, invalid operation) [4] Getting Started Checking the bundled items Make sure that you have following bundled items. The number in parentheses indicates the quantity of that item bundled. -
Page 14: Inserting The Battery Pack
Attachment Buckle (1) Startup Guide (1) Reference Guide (1) [5] Getting Started Inserting the battery pack Slide down the lock lever to open the battery cover. Insert the battery pack. :Align the direction of the arrow on the camera and the battery pack. Close the battery cover and slide the lock lever up to lock. -
Page 15: To Remove The Battery Pack
Confirm that the yellow mark on the lock lever is not visible. Close the battery cover securely. Not doing so may cause a water leakage. To remove the battery pack Open the cover and slide the battery ejection lever, then remove the battery pack. To set auto power off function It is recommended that you set the camera to turn off automatically, in order to decrease the battery consumption. -
Page 16: Checking The Remaining Battery Charge
When charging is finished, disconnect the micro USB cable between the camera and the computer. Charging is complete when the CHG (Charge) lamp turns off (full charge). The time takes for charging Supplied battery pack (NP-BX1) Via a computer: Approx. 265 minutes Time required to charge a fully depleted battery pack at a temperature of 25°C (77°F). -
Page 17: To Eject The Memory Card
[7] Getting Started Inserting a memory card Inserting a memory card Open the memory card cover. Insert the memory card until it clicks. microSD card/microSDHC card/microSDXC card: Insert in the direction of Memory Stick Micro (M2) media: Insert in the direction of : Printed side : Terminal side Close the memory card cover. - Page 18 Operation with all memory cards is not assured. For details about memory cards other than cards manufactured by Sony, contact the individual makers. Confirm the direction of the memory card. If you forcibly insert the memory card in the wrong direction, the memory card, memory card slot, or image data maybe damaged.
-
Page 19: Setting The Date And Time
[9] Getting Started Setting the date and time Press the (on/standby) button to turn on the camera for the first time, the setting for area/summer time/date and time will be displayed on the screen. Use the camera after setting the date and time. - Page 20 FDR-X3000/HDR-AS300 HDR-AS50 (on/standby) button Case body...
- Page 21 Leash attachment hole (on/standby)/REC HOLD switch REC (movie/still image) button/ENTER (menu execute) button Case cover MENU button Tripod screw hole UP button DOWN button Buckle lock Buckle Lead Adaptor (HDR-AS50) Waterproof packing [11] Getting Started Using the Underwater Housing Using the Underwater Housing By inserting the camera in the Underwater Housing, you can shoot images underwater up to a depth of 60 m (197 feet) for 30 minutes continuously.
- Page 22 Insert the camera in the case body. Insert the tab of the case body into the slot of the case cover. Hook the buckle over the tab on the lower part of the case cover , then close the buckle in the direction of Make sure the buckle and buckle lock are firmly locked.
- Page 23 Note You cannot operate the (on/standby) button and REC/ENTER button when the REC HOLD switch is set to the lock position. Release the lock in the direction of the arrow below, before operation. When using FDR-X3000/HDR-AS300 with the Underwater Housing supplied with HDR-AS50, detach the adaptor ( ) from the Underwater Housing.
- Page 24 to an item you intend to use with the camera. [12] Getting Started Using the Underwater Housing On waterproof performance of the Underwater Housing When the camera is inserted in the supplied Underwater Housing, the camera can shoot up to a water depth of 60 m (197 feet) for 30 minutes continuously.
- Page 25 In the unlikely event that a malfunction of the Underwater Housing causes damage due to water leakage, Sony does not guarantee against damages to the equipment contained in it (camera, battery pack, etc.) and the recorded contents, nor expenses entailed in the photography.
-
Page 26: Maintenance
When finding a malfunction of Underwater Housing If a malfunction is found by inspection of the waterproof packing or check for water leaks, stop using the camera immediately and take it to the nearest Sony dealer. [17] Getting Started Using the Underwater Housing... - Page 27 When storing the Underwater Housing To prevent deterioration of the waterproof packing, store the Underwater Housing in a cool, well- ventilated location. Do not fasten the buckle. Prevent dust from collecting on the waterproof packing. Avoid storing the Underwater Housing in a cold, very hot or humid place, or together with naphthalene or camphor, as these conditions might damage the Underwater Housing.
- Page 28 Example of optional accessory attachment Universal head mount kit BLT-UHM1 Backpack Mount VCT-BPM1 Note Thread a suitable leash through the leash attachment hole of the Underwater Housing, then attach the leash to an item you intend to use with the camera. Before use, confirm that the screw on the attachment buckle is not loose.
- Page 29 The adhesive strength is greatest 24 hours after the item has been attached. The flat adhesive mount and curved adhesive mount cannot be used again once they are detached from the location surface. When detaching, peel off slowly. If peeled off forcibly, the surface on which the mount is fixed might be damaged.
- Page 30 [21] Shooting Shooting movies and still images Shooting still images (Photo mode) Record still images. Press the (on/standby) button to turn on the power. Press the MENU button. Press the UP button or DOWN button to select (shooting mode) - (Photo mode), then press the REC/ENTER button.
- Page 31 Press the REC/ENTER button to start shooting. To stop shooting Shooting stops when the number set in the “Time-lapse shot number” has finished. If you select in the “Time-lapse shot number”, press the REC/ENTER button during shooting. Hint To change the image size, see “Time-lapse capture image size.” To change the shooting interval, see “Time-lapse shooting interval.”...
- Page 32 To stop shooting Press the REC/ENTER button during shooting. Hint The movies and still images shot before starting loop recording cannot be deleted. On the recording media life and the write time If you keep long time recording at a high bit rate in the loop recording mode, the memory card life may be shorter significantly.
- Page 33 Note When the camera is multi connected to the Live-View Remote, pressing the UP button or DOWN button controls the following operations. Operation with the camera When , changes the zoom magnification When , switches the shooting mode Operation with the Live-View Remote Switches the live view screen of the connected camera When zoom is used, the angle of view will be changed.
- Page 34 Items you can set in (Shooting settings) Setting items – – – Image quality setting – – – Movie format – – – – Time-lapse capture image size – – – – Loop recording time – – – – Still image mode switching (FDR-X3000/HDR-AS300) –...
- Page 35 Zoom setting Flip AE shift – – – – Time-lapse AE mode Scene White balance – – Color mode – – Audio recording setting – – Wind noise reduction Items you can set in (Camera Settings) : Airplane mode : Wi-Fi connection setting : Wi-Fi Hi power setting : Bluetooth setting : Bluetooth remote controller power setting...
- Page 36 : Switching NTSC/PAL : Date & time setting : Area setting : Daylight saving time (summer time) setting : Version : Resetting the settings This setting is only available in some countries and regions. [27] Changing the Settings List of setting items How to set the setting items You can set items using the following 4 buttons on the camera.
-
Page 37: Image Quality Setting
REC/ENTER button. To retry, press , then press the REC/ENTER button. [28] Changing the Settings Shooting settings Image quality setting You can set the image resolution and frame rate for shooting movies and loop recording. Image qualities that can be set depend on the “Movie format” setting. Press the MENU button. - Page 38 *2,*4 Recorded image: High speed recording (smooth image recorded at 4× frame rate) Resolution: 1280×720 Imaging frame rate : 120p/100p Playback frame rate : 120p/100p (FDR-X3000/HDR-AS300) Recorded image: High speed recording (smooth image recorded at 8× frame rate) Resolution: 800×480 Imaging frame rate : 240p/200p Playback frame rate...
- Page 39 Imaging frame rate : 120p/100p Playback frame rate : 120p/100p (FDR-X3000) Recorded image: XAVC S 60 Mbps High speed recording Resolution: 1920×1080 Imaging frame rate : 120p/100p Playback frame rate : 120p/100p When movie format is set to (recording in XAVC S) (FDR-X3000) Recorded image: XAVC S 100 Mbps Resolution: 3840×2160 Imaging frame rate...
-
Page 40: Movie Format
The times shown are recordable times using a Sony memory card. When you play images recorded in high speed, the frame rate will be 60p/50p, and playback will be standard speed. [29] Changing the Settings Shooting settings Movie format Select the movie format for shooting movies or loop recording. - Page 41 (Shoots still images in 4K (3840 x 2160) (image size 8.3 M)) (Shoots still images in HD (1920 x 1080) (image size 2.1 M)) [31] Changing the Settings Shooting settings Loop recording time Set the time range (media area) for loop recording. The range can be set after setting the camera to the loop recording mode.
- Page 42 (Example) is set 20 min. + 5 min. + 5 min. = 30 min. or more is needed. You can check the estimated shooting time by setting the shooting mode to “Movie mode.” Even you have a free space of a memory card according above estimated time, a warning [05-04] may display on the screen due to image quality setting or movie format setting.
- Page 43 To shoot successfully in burst shooting mode Try the following shooting methods. Stabilize the camera to prevent camera shake. Use the remote control function with a smartphone or Live-View Remote, or the self-timer function to prevent camera shake for better results. Note If automatic generation in Motion Shot LE mode fails, [05-06] is displayed on the display panel.
- Page 44 Note “10f1s” (FDR-X3000/HDR-AS300), “8f1s” (HDR-AS50), “5f2s”, and “2f5s” are estimates of the maximum speed. The maximum speed may not be reached depending on the shooting conditions. [34] Changing the Settings Shooting settings Self-timer You can use self-timer when shooting still images. Press the MENU button.
- Page 45 Press the UP button or DOWN button to select (Time-lapse capture mode setting) - (Time-lapse shooting interval) - setting value, then press the REC/ENTER button. (Continues to record still images at about 1-second intervals) (Continues to record still images at about 2-second intervals) (Continues to record still images at about 5-second intervals) (Continues to record still images at about 10-second intervals) (Continues to record still images at about 30-second intervals)
- Page 46 [37] Changing the Settings Shooting settings SteadyShot (Movie) You can activate the camera-shake reduction when shooting movies. This function is available in Movie mode, Live streaming mode, and Loop recording mode. Press the MENU button. Press the UP button or DOWN button to select (Shooting settings) - (FDR-X3000/HDR-AS300)/ (HDR-AS50) (SteadyShot (Movie)) - setting...
-
Page 47: Angle Setting
Press the UP button or DOWN button to select (Photo mode setting) - (SteadyShot (Still)) - setting value, then press the REC/ENTER button. (Uses SteadyShot function when shooting still images.) (Does not use SteadyShot function when shooting still images.) [39] Changing the Settings Shooting settings Angle setting You can configure the angle of view of the camera for shooting. - Page 48 Press the UP button or DOWN button to select (Shooting settings) - (Zoom setting) - setting value, then press the REC/ENTER button. (Uses the digital zoom function) (Do not use the digital zoom function) [41] Changing the Settings Shooting settings Flip You can record the image upside down.
- Page 49 (Uses the AE shift (Set +0.3EV for example)) [43] Changing the Settings Shooting settings Time-lapse AE mode Set the adjustment method of automatic exposure (AE) during time-lapse capture. Press the MENU button. Press the UP button or DOWN button to select (Time-lapse capture mode setting) - (Time-lapse AE mode) - setting value, then press the REC/ENTER...
-
Page 50: White Balance
If you select , you cannot set the white balance. Use the supplied Underwater Housing for underwater shooting. [45] Changing the Settings Shooting settings White balance You can adjust the color balance to the recording environment. Press the MENU button. Press the UP button or DOWN button to select (Shooting settings) -... - Page 51 (Records in natural colors) (Records in vivid colors) Note If you shoot with , the image contrast may appear low. This is not a malfunction. [47] Changing the Settings Shooting settings Audio recording setting You can turn the audio recording setting ON/OFF. Press the MENU button.
-
Page 52: Airplane Mode
(Cuts low-range to reduce wind noise) (Does not reduce wind noise) Note This function does not activate while an external microphone is connected to the camera (FDR-X3000/HDR- AS300). [49] Changing the Settings Camera settings Airplane mode When you are in an airplane or other restricted areas, you can set the camera to temporarily disable all functions related to the wireless applications such as Wi-Fi/Bluetooth GPS, etc. - Page 53 Press the UP button or DOWN button to select (Camera Settings) - (Wi-Fi connection setting) - setting value, then press the REC/ENTER button. (Operates a single camera with the compatible device) (Does not operate a camera with the compatible device) (Operates multiple cameras with the compatible device) Select a shooting mode ( Connect the camera to the compatible device via Wi-Fi.
-
Page 54: Bluetooth Setting
(Standard mode) Note When set to ON, depending on the physical environment and the distance between the camera and the Live- View Remote, you may not be able to use the Live-View Remote to turn the camera on/off. In such cases, operate the Live-View Remote closer to the camera until on the screen changes to Depending on the physical environment and connected device, the communication distance will be changed. - Page 55 To enable this function, it is necessary to turn on the above setting and the Bluetooth setting of both the camera and the corresponding device in advance. For setting and operating the Live-View Remote (RM-LVR3), refer to “Bluetooth remote controller power setting” in the help guide of the Live-View Remote. http://rd1.sony.net/help/cam/1650/h_zz/...
- Page 56 For setting up and operating a smartphone, see below. Also, check the latest information and function information of the PlayMemories Mobile as well. http://www.sony.net/pmm/ Bluetooth remote controller power setting for smartphones Perform the following operations with the camera and a smartphone that is connected via Wi-Fi.
- Page 57 GPS sensor and triangulation may fail. Sony does not collect location information and routing information. To display location information and routing information as a map on a computer, Sony provides data of location information and routing information to Google Inc.
- Page 58 log files is reached, you can continue to shoot images, but cannot record log files. [55] Changing the Settings Camera settings Format Formatting is the process of deleting all images in the memory card, and restoring the memory card to its initial state. Press the MENU button.
- Page 59 About user bit User bit is a function that can record information (8-digit hexadecimal numbers) such as date/time/scene number. This function is useful for editing movies created using two or more cameras. Note When the image quality setting is MP4, the time code/user bit is not available. Press the MENU button.
- Page 60 : The time code advances only while recording XAVC S movies. It is recorded sequentially from the time code on the image recorded last time. : The time code advances sequentially, regardless of the operation of the camera. (Sets the time code to be recorded) : The newly set-up time code is recorded on recording media.
- Page 61 The remote commander & IR receiver kit RMT-VP1K and RMT-845 (sold separately) are required to use this function. Purchase a RMT-845 at a Sony service center. You can operate only the following settings using the RMT-845 (sold separately). Other settings are inoperable.
- Page 62 Unavailable when movie format is set to MP4. : Controls the recording on a device connected with HDMI (FDR-X3000). : Controls the recording on the device. : Does not control the recording on the device. Unavailable when movie format is set to MP4. Note Available for external recorders/players compatible with When...
- Page 63 Note If you change the USB power supply setting while the micro USB cable is connected, disconnect the cable, then reconnect. If you turn on the camera while charging the battery pack, charging stops and power is supplied to the camera from the device connected via USB.
-
Page 64: Beep Volume
[61] Changing the Settings Camera settings Beep volume You can set the beep volume when operating the camera. Press the MENU button. Press the UP button or DOWN button to set (Camera Settings) - (Beep volume) - setting value, then press the REC/ENTER button. (Loud beep volume) (Soft beep volume) Hint... -
Page 65: Auto Power Off
Hint Change the lamp setting for the camera if objects such as glass may be reflected on the shooting direction. [63] Changing the Settings Camera settings One touch recording Press the REC/ENTER button of the camera while the camera is turned off, and the camera will turn on and start recording. - Page 66 Press the UP button or DOWN button to select (Camera Settings) - (Auto power off) - setting value, then press the REC/ENTER button. (Turns the power off after about 20 seconds) (Turns the power off after about 60 seconds) (Does not turn off automatically) Note Auto power off is not available in the following situations.
- Page 67 button. When the setting change is completed, the camera restarts automatically. [66] Changing the Settings Camera settings Date & time setting You can set the year/month/day. Press the MENU button. Press the UP button or DOWN button to select (Camera Settings) - (Date &...
-
Page 68: Area Setting
[67] Changing the Settings Camera settings Area setting You can adjust the clock on the camera to match the time in your area without stopping the clock. The area is determined by the time difference from Greenwich Mean Time (GMT). See “The list of time differences for world capitals”. -
Page 69: Resetting The Settings
[69] Changing the Settings Camera settings Version The software version of the camera can be displayed. Press the MENU button. Press the UP button or DOWN button to select (Camera Settings) - (Version), then press the REC/ENTER button. [70] Changing the Settings Camera settings Resetting the settings You can reset the settings to their defaults. - Page 70 When you reset the settings, the Bluetooth pairing information will also be reset. To reconnect, delete the pairing information on the connected device before connecting. [71] Viewing Viewing images on a TV (FDR-X3000/HDR-AS300) Connect the camera to a TV which has an HDMI terminal using a micro HDMI cable (sold separately). Refer also to the instruction manuals of the TV.
-
Page 71: To Adjust The Volume
Playback pauses when you press the REC/ENTER button again. To control a content being played back Fast-rewind/fast-forward (movies only): Press the UP button or DOWN button. During the fast- rewind/fast-forward, each time you press the button, the speed changes in 4 levels. Pause (movies only): Press the REC/ENTER button. - Page 72 Press the REC/ENTER button of the remote control to start playback. Press the REC/ENTER button again to pause playback. Returning to the shooting mode To return to shooting mode, perform either operation. Press the MENU button on the Live-View Remote to select (shooting mode), then press the REC/ENTER button of the remote control.
- Page 73 [74] Create your movie Highlight Movie Maker Creating the highlight movie The camera detects characteristic scenes from the movies shot with the camera and creates the movie composed of them (highlight movie) automatically. You can copy highlight movies with your smartphone.
- Page 74 Select a movie that you want to add in a highlight movie from the date or the content list, then press the “Next” button. The highlight movie creation starts. You cannot select MP4 and XAVC S contents at the same time. You can select up to 100 movies by date or file.
- Page 75 See more details about “PlayMemories Mobile” from the following website. (http://www.sony.net/pmm/) Background music preinstalled on this product have officially been contracted between Sony and licensors. Movies containing the said background music are allowed for private use, duplication, distribution, or public transmission only when the said movies are intended for nonprofit purposes and without receiving any kind of consideration from the person to whom the said movies are presented to.
- Page 76 Note This setting is only available in some countries and regions. Background music preinstalled on this product have officially been contracted between Sony and licensors. Movies containing the said background music are allowed for private use, duplication, distribution, or public...
-
Page 77: Live Streaming
transmission only when the said movies are intended for nonprofit purposes and without receiving any kind of consideration from the person to whom the said movies are presented to. [76] Stream real-time movie to a movie streaming site Live Streaming with your camera (Real time movie streaming) Live Streaming You can deliver movies in real-time via video sharing websites such as Ustream by using a Wi-Fi... - Page 78 “Action Cam Movie Creator.” Download “Action Cam Movie Creator” from the following website. http://www.sony.net/acmc/ Connect the camera to your computer with supplied micro USB cable. Configure the network settings, register an account at a video distribution site and configure the SNS settings on “Camera Settings for Live Streaming”...
-
Page 79: Performing Live Streaming
[78] Stream real-time movie to a movie streaming site Live Streaming with your camera (Real time movie streaming) Performing Live Streaming You can start Live Streaming after the preparation is complete. When Live Streaming for the first time, it is recommended that you rehearse streaming in a prepared environment after setting up with a computer in advance. - Page 80 2 Starts streaming Note There may be time lag of 10 - 20 seconds between the start of Live Streaming on your camera and video streaming on the video streaming site. You can record movies that are being live distributed in the memory card of the camera. When the memory card is already inserted, movies are recorded at the same time as the distribution When the capacity of the memory card is full, only the movie recording will stop without stopping the distribution.
-
Page 81: Network Connection
For the latest information details about the functions of PlayMemories Mobile, refer to the website below. http://www.sony.net/pmm/ Search for PlayMemories Mobile on Google Play, then install it. Search for PlayMemories Mobile on App Store, then install it. - Page 82 If the password is lost 1. Connect the camera to a computer with the micro USB cable (supplied). 2. Turn on the camera. 3. Display [Compute] - [PMHOME] - [INFO] - [WIFI_INF.TXT] on your computer, then check the user ID and password. Note Google play may not be supported depending on country or region.
- Page 83 : Shooting mode settings [Movie mode] [Photo mode] [Time-lapse capture mode] [Loop recording mode] : Start/stop recording Note When Airplane mode is set to ON, the Wi-Fi and Bluetooth functions are not available. Depending on local electrical interference or the smartphone’s capabilities, the live view images may not be displayed smoothly.
- Page 84 Note When Airplane mode is set to ON, the Wi-Fi and Bluetooth functions are not available. Depending on local electrical interference or the smartphone’s capabilities, the live view images may not be displayed smoothly. When operating multiple cameras with a connected device, the NFC One-touch function is not available. [83] Using the camera connected to other devices via Wi-Fi Connecting to your smartphone Connecting a smartphone to Wi-Fi via QR Code...
- Page 85 Select [OK] (Select [OK] again when a message is displayed.) Scan the QR Code that is printed on a sticker attached to the rear of the camera's battery cover. When [Connect with the camera?] is displayed on the smartphone, select [OK].
- Page 86 Note When Airplane mode is set to ON, the Wi-Fi function is not available. Depending on local electrical interference or the smartphone’s capabilities, the live view images may not be displayed smoothly. When operating multiple cameras with a connected device, you cannot connect a smartphone to Wi-Fi via QR Code.
- Page 87 Select [OK] (Select [OK] again when a message is displayed.) Scan the QR Code that is printed on a sticker attached to the rear of the camera's battery cover. According to the instruction on the screen, complete the installation of profile (setting information).
- Page 88 On the Home screen, select the [Settings] - [Wi-Fi]. Select the SSID that is printed on a sticker attached to the rear of the camera's battery cover. Return to the Home screen, then start PlayMemories Mobile.
- Page 89 Note When Airplane mode is set to ON, the Wi-Fi function is not available. Depending on local electrical interference or the smartphone’s capabilities, the live view images may not be displayed smoothly. When operating multiple cameras with a connected device, you cannot set the Wi-Fi on a smartphone via QR Code.
- Page 90 Select the SSID that is printed on a sticker attached to the rear of the camera's battery cover. Enter the password printed on the sticker attached to the rear of the camera's battery cover (only for the first time). Note When Airplane mode is set to ON, the Wi-Fi function is not available.
- Page 91 [86] Using the camera connected to other devices via Wi-Fi Connecting to your smartphone Connecting to a smartphone using ID/password (iPhone/iPad) Perform preparation for connecting to your smartphone before connecting. Press the MENU button on the camera. Press the UP button or DOWN button to select (Camera Settings) - (Wi-Fi connection setting) -...
- Page 92 Enter the password printed on the sticker attached to the rear of the camera's battery cover (only for the first time). Confirm that the SSID that is printed on a sticker attached to the rear of the camera’s battery cover is connected. Return to the Home screen, then start PlayMemories Mobile.
- Page 93 For details, refer to “Connecting the remote control to a single camera via Wi-Fi” in the Help Guide of the Live-View Remote (RM-LVR3). http://rd1.sony.net/help/cam/1650/h_zz/ Set the connection mode of the camera. Press the MENU button, then press the UP button or DOWN button to select...
- Page 94 Turn on the Live-View Remote. For details, refer to “Connecting the remote control to multiple cameras via Wi-Fi” in the Help Guide of the Live-View Remote (RM-LVR3). http://rd1.sony.net/help/cam/1650/h_zz/ Set the camera. When you connect the camera to Live-View Remote for the first time...
- Page 95 For details, refer to “Connecting this product to one camera with Multi Camera Control (Single Connection)” in the Help Guide of the Handycam. Example: Help Guide of FDR-AX40/AX53/AX55/AXP55 http://rd1.sony.net/help/cam/1630/h_zz/ Set the connection mode of the camera. Press the MENU button, then press the UP button or DOWN button to select...
- Page 96 For details, refer to “Connecting this product to more than one camera with Multi Camera Control (Multi Connection)” in the Help Guide of the Handycam. Example: Help Guide of FDR-AX40/AX53/AX55/AXP55 http://rd1.sony.net/help/cam/1630/h_zz/ Set the connection mode of the camera. When you connect the camera to Handycam for the first time...
-
Page 97: Useful Functions Of Action Cam Movie Creator
Visit the following URL to install the software. http://www.sony.net/acmc/ Action Cam Movie Creator, which can import movies and edit movies and PlayMemories Home, which can playback, will be installed simultaneously. - Page 98 Log on as an Administrator. Close all applications running on the computer before installing the software. Visit the following URL with the Internet browser of the computer and install Action Cam Movie Creator. http://www.sony.net/acmc/ When installation is complete, Action Cam Movie Creator starts up.
- Page 99 You can also add effects such as multi-view and variable speed playback, you can also create a time- lapse movie. For the latest information details about the functions of Action Cam App, see the website below. http://www.sony.net/acap/...
-
Page 100: Recording Time
Install Action Cam App compatible to your smartphone/tablet. For latest information and function information on Action Cam App, see the following website. http://www.sony.net/acap/ Search for Action Cam App on Google play, then install it. Google play may not be supported depending on country or region. -
Page 101: Playing Time
Image quality: HQ Continuous recording time: 125 minutes (135 minutes) Typical recording time: 80 minutes (85 minutes) HDR-AS50 Image quality: HQ Continuous recording time: 165 minutes (195 minutes) Typical recording time: 110 minutes (130 minutes) Playing time FDR-X3000 Image quality is 4K 30p: 90 minutes (100 minutes) Image quality is HQ: 170 minutes (195 minutes) HDR-AS300 Image quality is HQ: 170 minutes (195 minutes) -
Page 102: Estimated Recording Time Of Movies
Approx. Approx. Approx. Approx. 60 minutes minutes minutes minutes The continuous movie shooting time varies depending on the file format, image quality setting, network environment of Wi-Fi, and how the camera was used before recording. When you check the composition repeatedly with the camera powered on, overheating will occur and the recordable time will become shorter. -
Page 103: Image Quality
128 GB 310 minutes 310 minutes 240 minutes minutes When set to Movie format (Loop recording time) Image Memory quality card MP4 (FDR- FDR-X3000/HDR- HDR- X3000/HDR- (HDR- AS300 AS50 AS300) AS50) 8 GB 35 minutes 35 minutes 16 GB 75 minutes 75 minutes 45 minutes minutes... - Page 104 4 hours 50 minutes maximum, when the imaging frame rate is 120p/100p in high speed recording, the continuous movie shooting time is approximately 9 hours 40 minutes maximum. The times shown are recordable times using a Sony memory card. [97] Information Recordable time...
- Page 105 When using 16GB memory card: 2500 images When using 32GB memory card: 5000 images When using 64GB memory card: 9900 images When using 128GB memory card: 20000 images HDR-AS50 Number of pixels: 8.3M (Time-lapse capture) (16:9) When using 8GB memory card: 2500 images When using 16GB memory card: 5000 images When using 32GB memory card: 10000 images When using 64GB memory card: 20000 images...
- Page 106 the shooting is in standby. We recommend having spare battery packs handy for two times or three times the expected shooting time, and making trial shots before taking the actual shots. You may not be able to turn on the camera or the battery pack may not be effectively charged if the terminal section of the battery pack is dirty.
- Page 107 [103] Information Battery pack To reduce the battery consumption If the setting of the camera is as follows, you can reduce the consumption of the battery by about 20% to 30% during use, compared to use with the camera's initial settings. Wi-Fi connection setting: Movie format: Image quality setting:...
- Page 108 Australia, Austria, Argentina, Belgium, Bulgaria, Brazil, China, Croatia, Czech Republic, Denmark, Finland, France, French Guiana, Germany, Greece, Hong Kong, Hungary, Indonesia, Iran, Iraq, Italy, Kuwait, Malaysia, Monaco, Netherlands, New Zealand, Norway, Paraguay, Poland, Portugal, Romania, Russia, Singapore, Slovakia, Spain, Sweden, Switzerland, Thailand, Turkey, Ukraine, United Kingdom, Uruguay, Vietnam etc.
- Page 109 Bangkok +07:00 Jakarta Hong Kong Singapore +08:00 Beijing Tokyo +09:00 Seoul Adelaide +09:30 Darwin Melbourne +10:00 Sydney New Caledonia +11:00 Fiji +12:00 Wellington Midway -11:00 Hawaii -10:00 Alaska -09:00 San Francisco -08:00 Tijuana Denver -07:00 Arizona Chicago -06:00 Mexico City New York -05:00 Bogota...
- Page 110 [108] Information Precautions Do not use/store the camera in the following places In an extremely hot, cold or humid place In places such as in a car parked under the sun, the camera body may become deformed and this may cause a malfunction. Under direct sunlight or near a heater are not suitable places for storage.
- Page 111 [111] Information Precautions On cleaning Clean the camera surface with a soft cloth slightly moistened with water, then wipe the surface with a dry cloth. Do not use any of the following as they may damage the finish or the casing. Chemical products such as thinner, benzine, alcohol, disposable cloths, insect repellent, sunscreen or insecticide, etc.
- Page 112 [114] Information Precautions Notes on optional accessories Genuine Sony accessories may not be available in some countries/regions. [115] Information Precautions On using the camera in close proximity to vibrating motors and engines (FDR-X3000/HDR-AS300) Distortion in image quality or out-of-focus may occur when used in close proximity to vibrating motors and engines.
-
Page 113: Specifications
shadowy place surrounded by buildings or trees, etc. Use the camera in open sky environments. You may not be able to record location information at locations or in situations where radio signals from the GPS satellites do not reach the camera as follows. In tunnels, indoors or under the shade of buildings Between tall buildings or at narrow streets surrounded by buildings In underground locations, locations surrounded by dense trees, under an elevated bridge, or in... - Page 114 FDR-X3000 [System] Video signal: UHDTV HDTV NTSC color, EIA standards PAL color, CCIR standards Image sensor: 1/2.5 type (7.20 mm) Exmor R CMOS sensor Pixel Gross: Approx. 8.57 megapixels Effective pixels (movie): Approx. 8.18 megapixels (16:9) (SteadyShot is OFF and Angle setting is “ : wide”) Effective pixels (still): Approx.
- Page 115 microSDHC/SDXC card (Class10 or faster) When recording XAVC S (100 Mbps) movies: microSDHC/SDXC card (UHS-I U3 or faster) [Input and Output connectors] Multi/Micro USB Terminal : micro-B/USB2.0 Hi-Speed (Supports Micro USB compatible devices.) USB connection is only for output. (For customers in some countries/regions) [Power] Power requirements: Battery terminal input: 3.6 V (NP-BX1 (supplied))
- Page 116 Mass (when shooting): Approx. 114 g (4.1 oz) (including NP-BX1 (supplied), excluding the supplied Underwater Housing) Microphone: Stereo Speaker: Monaural Splashproof performance is based on standard testing by Sony. [Wireless LAN] Corresponding standard: IEEE 802.11b/g/n Frequency: 2.4 GHz Supported security protocols: WPA-PSK/WPA2-PSK...
- Page 117 Minimum shooting distance: Approx. 50 cm (19 3/4 in.) File format: Movies: MP4: MPEG-4 AVC/H.264, XAVC S: MPEG-4 AVC/H.264 Audio: MPEG-4 AAC-LC 2ch (When recording MP4 movies), LPCM 2ch (When recording XAVC S movies) Still images: JPEG (DCF Ver. 2.0, Exif Ver. 2.3, MPF Baseline) compliant Recording media: When recording MP4 movies: Memory Stick Micro (Mark2) media...
- Page 118 Mass (when shooting): Approx. 109 g (3.9 oz) (including NP-BX1 (supplied), excluding the supplied Underwater Housing) Microphone: Stereo Speaker: Monaural Splashproof performance is based on standard testing by Sony. [Wireless LAN] Corresponding standard: IEEE 802.11b/g/n Frequency: 2.4 GHz Supported security protocols: WPA-PSK/WPA2-PSK...
- Page 119 ZEISS Tessar Lens Aperture: F2.8 Focal distance: f = 2.8 mm Focal length (35mm equivalent): f = 18.4 mm (Angle setting is “ : wide”), f = 21.8 mm (Angle setting is “ : narrow”) Camera Exposure control: Automatic exposure Minimum illumination: 6 lx (lux) Image stabilization: Electronic SteadyShot image stabilization Minimum shooting distance: Approx.
- Page 120 Power consumption: Approx. 1.6 W (when the image quality is “MP4 HQ 1920 × 1080 30p”) Battery: Rechargeable battery pack: NP-BX1 (supplied) Maximum output voltage: DC 4.2 V Output voltage: DC 3.6 V Maximum charge voltage: DC 4.2 V Maximum charge current: 1.89 A Capacity: 4.5 Wh (1240 mAh) Type: Li-ion [General]...
- Page 121 ” and “PlayStation” are registered trademarks of Sony Computer Entertainment Inc. The Bluetooth® word mark and logos are registered trademarks owned by Bluetooth SIG, Inc. and any use of such marks by Sony Corporation is under license. Other trademarks and trade names are those of their respective owners.
-
Page 122: List Of Default Setting
GPL/LGPL. Source code is provided on the web. Use the following URL to download it. http://oss.sony.net/Products/Linux We would prefer you do not contact us about the contents of source code. Copies of the licenses (in English) are stored in the internal memory of your camera. -
Page 123: Troubleshooting
If you experience trouble with the camera, try the following solutions. Check the items of troubleshooting and inspect the camera. Turn the power off the camera and then on again one minute later. Consult your Sony dealer or local authorized Sony service facility by phone. -
Page 124: Cannot Turn On The Camera
When usable battery life becomes half the usual time, even after charging the battery pack fully, the battery pack may need to be replaced. Consult your nearest Sony dealer. [128] Troubleshooting Battery pack and power Cannot charge the camera. -
Page 125: The Remaining Charge Indicator Is Incorrect
Connect the camera to a computer with the operating system that is supported by the camera. [129] Troubleshooting Battery pack and power The remaining charge indicator is incorrect. This phenomenon occurs when you use the camera in an extremely hot or cold location. A discrepancy arose between the remaining charge indicator and the actual remaining battery charge. -
Page 126: Cannot Playback Images
[133] Troubleshooting Viewing images Cannot playback images. The folder/file name of the camera has been changed by connecting to your computer. Connect a micro HDMI cable (sold separately). (FDR-X3000/HDR-AS300) [134] Troubleshooting Viewing images The image does not appear on the TV. (FDR- X3000/HDR-AS300) Check whether the connection is correct. -
Page 127: Your Computer Does Not Recognize The Camera
data is taken in. (FDR-X3000/HDR-AS300) Date & time setting is not set, or set time is shifted greatly. Set the date and time correctly. The term of validity of GPS assist data has expired. Update GPS assist data. As the positions of GPS satellites vary constantly, it may take longer to determine the location or the receiver may not be able to determine the location at all, depending on the location and time you use the camera. -
Page 128: Action Cam Movie Creator Cannot Be Installed
[141] Troubleshooting Computers Action Cam Movie Creator cannot be installed. Check the computer environment or installation procedure required to install Action Cam Movie Creator. [142] Troubleshooting Computers Action Cam Movie Creator does not work correctly. Quit Action Cam Movie Creator and restart your computer. [143] Troubleshooting Computers Cannot play back images on your computer. -
Page 129: The Date Or Time Is Incorrect
to evaporate. [146] Troubleshooting Others The camera becomes warm when you use it for a long time. This is normal. [147] Troubleshooting Others The date or time is incorrect. Set the date and time again. [148] Warning indicators and messages Warning indicators and error messages Battery indicator (Remaining battery is low) When the battery level is low,... - Page 130 Failed to format the recording media. 06-02 The memory card does not support XAVC S 100 Mbps movie recording. Use an microSDHC/SDXC memory card of Class10 or faster when shooting in XAVC S format. When the camera is in the loop recording mode, use an SDXC memory card or set the movie format to 06-04 (FDR-X3000) The memory card does not support XAVC S 100 Mbps movie recording.
- Page 131 Access point has been found but is not connected. Check the password of the access point and connect again. 08-07 Access point cannot be found. Confirm the setting of the access point using “Camera Settings for Live Streaming” of the Action Cam Movie Creator’s camera settings. 08-08 Set the date and time again on your camera.
- Page 132 There is no memory card inserted. The memory card is not inserted properly. The memory card is damaged. (FDR-X3000/HDR-AS300) The camera is not connected to a TV when playback is started. Twitter post error has occurred. Check the network or log in to Twitter again. Facebook post error has occurred.