Table of Contents
Advertisement
Available languages
Available languages
Owner's Manual
IMPORTANT SAFETY
INSTRUCTIONS
READ AND SAVE THESE SAFETY
INSTRUCTIONS BEFORE USING
THIS FAN
When using electrical appliances, basic
precautions should always be followed to
reduce the risk of fire, electric shock, and
injury to persons, including the following:
FOR US MODELS ONLY - This product
employs overload protection (fuse). A
blown fuse indicates an overload or short-
circuit situation. If the fuse blows, unplug
the product from the outlet. Replace the
fuse as per the user servicing instructions
(follow product marking for proper fuse
rating) and check the product. If the
replacement fuse blows, a short-circuit
may be present and the product should
be discarded or returned to an authorized
service facility for examination and/or
repair.
1. Use this fan only as described in this
manual. Other use not recommended as it
may cause fire, electric shock or injury to
persons.
2. This product is intended for household
use ONLY and not for commercial,
industrial or outdoor use.
3. To protect against electric shock, do not
place fan in window, immerse unit, plug
or cord in water or spray with liquids.
4. This appliance has a polarized plug
(one blade is wider than the other). To
reduce the risk of shock, this plug is
intended to fit only one way in a polarized
The Honeywell trademark is used by Kaz USA, Inc. under license from Honeywell International Inc.
Honeywell International Inc. makes no representation or warranties with respect to this product.
QUIETSET
WHOLE ROOM STAND FAN
HS-1650 Series
HS-1660 Series
outlet. If the plug does not fit fully in the
outlet, reverse the plug. If it still does
not fit, contact a qualified electrician.
DO NOT attempt to defeat this safety
feature.
5. Close supervision is necessary when any
appliance is used by or near children.
6. Turn the fan OFF and unplug the fan from
the outlet when not in use, when moving
the fan from one location to another and
before cleaning.
7. To disconnect the fan, first turn the unit
OFF, grip the plug and pull it from the
wall outlet. Never pull the plug by the
cord.
8. Do not operate the fan in the presence of
explosive and/or flammable fumes.
9. Do not place the fan or any parts near
an open flame, cooking or other heating
appliance.
10. Do not operate the fan with a
damaged cord or plug or if the product
malfunctions, is dropped
or damaged in any manner
(see warranty).
11. Avoid contact with moving fan parts.
12. The use of attachments not recommended
by the manufacturer may be hazardous.
13. Place the fan on a dry level surface.
14. Do not hang or mount fan on a wall
or ceiling.
15. Do not operate if the fan housing is
damaged.
16. A loose fit between the AC outlet
(receptacle) and plug may cause
overheating and a distortion of the plug.
Contact a qualified electrician to replace
loose or worn outlet.
™
Advertisement
Table of Contents

Related Manuals for Honeywell QUIETSET HS-1650 Series


Summary of Contents for Honeywell QUIETSET HS-1650 Series
-
Page 1: Important Safety Instructions
Owner’s Manual QUIETSET ™ WHOLE ROOM STAND FAN HS-1650 Series HS-1660 Series IMPORTANT SAFETY outlet. If the plug does not fit fully in the outlet, reverse the plug. If it still does INSTRUCTIONS not fit, contact a qualified electrician. DO NOT attempt to defeat this safety feature. READ AND SAVE THESE SAFETY 5. Close supervision is necessary when any INSTRUCTIONS BEFORE USING appliance is used by or near children. THIS FAN 6. Turn the fan OFF and unplug the fan from When using electrical appliances, basic... - Page 2 17. Do not operate any fan with a damaged under furniture or appliances. Arrange cord or plug. Discard any damaged fan, cord away from traffic areas and where it return the fan to the retailer where the will not be tripped over. fan was purchased, or request a return WARNING: authorization to return to Kaz, Inc. for To Reduce The Risk of Fire examination and/or repair. or Electric Shock, Do Not Use This Fan With 18. Do not run fan cord under carpeting. Do Any Solid State Speed Conrol Device not cover cord with throw rugs, runners, or similar coverings. Do not route cord FUSED SAFETY PLUG - FOR US MODELS ONLY This fan features a fused safety plug which is designed to cut off electric current to the fan if an electrical fault occurs. Please see below for more information on how to properly use your fan and replace the safety plug fuse, if needed.
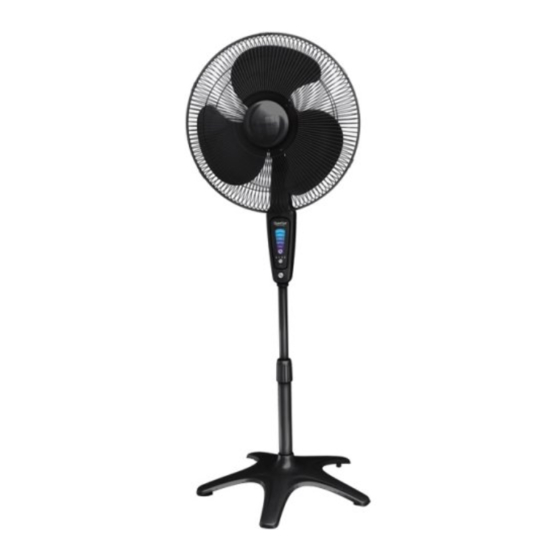
- Page 3 ASSEMBLY INSTRUCTIONS Blade Knob (D) Motor Assembly (C) Clips (G) Control Panel Rear Grille Mounting Nut (E) Rear Grille (F) Metal Fan Pole (A) Fan Blade Front Grille Height Adjustment Knob (B) Metal Fan Pole (A) Base Pole Base Cover A.
- Page 4 ASSEMBLY INSTRUCTIONS (continued) D. Assembling the Upper Portion of the Fan • Place the Motor Assembly (C) onto the Metal Pole Extension and secure it by turning the Assembly Knob CLOCKWISE (Fig. 3). Note: If turning the assembly knob CLOCKWISE does not secure the motor assembly to the metal pole extension, turn the Assembly Knob COUNTER- CLOCKWISE until the metal pole extension can slide further into the Motor Assembly.
-
Page 5: Speed Control
ASSEMBLY INSTRUCTIONS (continued) REMOTE CONTROL BATTERY INSTALLATION/ Fig. 9 REPLACEMENT INSTRUCTIONS A. Remove battery door by sliding downward in direction of arrow. B. Insert 2 AAA batteries into the remote following the directional guides in the recessed slots (Fig. 9). Batteries are included. C. R eplace battery door by sliding upward opposite of arrow direction until door snaps in place. NOTE: DO NOT MIX OLD AND NEW BATTERIES. DO NOT MIX ALKALINE, STANDARD (CARBON-ZINC) OR RECHARGEABLE (NICKEL-CADMIUM) BATTERIES. SEE RECYCLERS IN YOUR AREA FOR PROPER DISPOSAL OF BATTERIES. HS-1655, HS-1665 SERIES FAN OPERATION FAN OPERATION FAN OPERATION ON/OFF... - Page 6 HS-1655, HS-1665 SERIES REMOTE CONTROL OPERATION ON/OFF Fig. Press the Power button ( ) once to turn the fan on. Press the Power button a second time to turn the fan off (Fig.12/13). SPEED CONTROL To adjust the speed up or down, press the Fan Speed button ( ) repeatedly to increase level (Fig.12/13). TIMER Choose from 1, 2, 4, or 8 hour settings by performing the following function (Fig.12/13): • 1 hour: Press the Timer button ( ) once. • 2 hours: Press the Timer button twice. • 4 hours: Press the Timer button a third time. • 8 hours: Press the Timer button a fourth time. Press the Timer button a fifth time to turn the Timer feature off (Fig. 12/13). Fig. 13 Speed Timer Power...
-
Page 7: Cleaning And Storage
USER SERVICING INSTRUCTIONS CLEANING AND STORAGE • Be sure your fan is in the OFF position. • Unplug the fan before cleaning. • Use only a soft, damp cloth to gently wipe the fan clean. • DO NOT immerse the fan in water and never allow water to enter the Motor Housing. • DO NOT use gasoline, paint thinner or other chemicals to clean the fan. REMOVAL OF THE FRONT GRILLE FOR CLEANING • Remove the Front Grille by releasing the Grille clips. • Unscrew the Blade Knob by turning it CLOCKWISE (REVERSE THREAD). • Pull the Fan Blade away from the Motor Housing. • Gently wipe the Fan Blade and Grilles with a soft, damp cloth. • Assemble the fan by following the last three steps in the ASSEMBLY INSTRUCTIONS. STORAGE • For storage disassemble and clean the fan carefully as instructed. Store the fan in its original box. You may also leave the fan fully assembled and covered with plastic to protect it from dust. Store your fan in clean, dry place. CONSUMER RELATIONS Mail questions or comments to: Call us toll-free at: 1-800-477-0457... -
Page 8: Year Limited Warranty
1 YEAR LIMITED WARRANTY You should first read all instructions before C. This warranty does not cover damage resulting attempting to use this product. from any unauthorized attempts to repair or from any use not in accordance with the A. This 1 year limited warranty applies to repair or instruction manual. replacement of product found to be defective in material or workmanship. This warranty D. Return defective product to Kaz USA, Inc. with does not apply to damage resulting from a brief description of the problem. Include proof commercial, abusive, unreasonable use or of purchase and a $10 US/$15.50 CAN check supplemental damage. Defects that are the or money order for handling, return packing result of normal wear and tear will not be and shipping charges. Please include your considered manufacturing defects under this name, address and a daytime phone number. warranty. KAZ USA, INC. IS NOT LIABLE FOR You must prepay shipping charges. Send to: INCIDENTAL OR CONSEQUENTIAL DAMAGES In U.S.A.:... -
Page 9: Instructions De Sécurité Importantes
à un centre de services agréé pour pièces près de flammes nues ou près vérification et/ou réparation. d’appareils de cuisson ou de chauffage. 10. Ne vous servez pas du ventilateur si 1. N’employez le ventilateur que tel que décrit dans ce manuel. Tout autre usage son cordon ou sa fiche est abîmé, s’il a mal fonctionné, a été échappé ou non conseillé pourrait entraîner incendie, choc électrique et blessures corporelles. endommagé d’une façon quelconque (voyez la garantie). 2. Ce ventilateur est UNIQUEMENT destiné 11. Évitez tout contact avec les pièces à l’usage domestique et non à l’emploi commercial, industriel ou en plein air. mobiles. 12. L’emploi d’accessoires non 3. Afin de prévenir les chocs électriques, recommandés par le fabricant peut se ne placez pas le ventilateur dans une révéler dangereux. fenêtre, n’immergez ni l’appareil, ni sa La marque de commerce Honeywell est utilisée par Kaz USA, Inc. avec l’autorisation de Honeywell International, Inc. Honeywell International Inc. ne fait aucune assertion et n’offre aucune garantie en ce qui concerne ce produit. - Page 10 13. Posez l’appareil sur une surface plane et demander l’autorisation de le renvoyer à sèche. Kaz, Inc. pour fins de vérification et/ou réparation. 14. N’accrochez pas le ventilateur au mur ou 18. Ne pas acheminer le cordon sous tapis ou au plafond. moquette, ne pas le recouvrir de carpettes 15. Ne vous en servez pas si le boîtier est ou autres revêtements de sol. Ne pas abîmé. passer le cordon sous les meubles ou les 16. Une fiche mal assujettie dans la prise de appareils ménagers. Éloigner le cordon courant peut surchauffer et se déformer. des endroits passants, afin qu’il ne risque Demandez à un électricien de remplacer pas de faire trébucher. toute prise de courant usée. 17. Ne jamais faire fonctionner un ventilateur AVERTISSEMENT : Pour éviter tout risque dont le cordon ou la fiche est abîmé. d’incendie ou de choc électrique, ne Jeter tout ventilateur endommagé, le pas utiliser ce ventilateur avec une retourner au détaillant qui l’a vendu ou commande de vitesse transistorisée.
-
Page 11: Instructions De Montage
INSTRUCTIONS DE MONTAGE Bouton de Boitier du pales (D) moteur (C) Attaches (G) Tableau de commande Écrou de montage de la grille arrière Module de pales Poteau Grille arrière (F) métallique (A) Grille avant Bouton de réglage de la hauteur (B) Poteau métallique (A) Base... - Page 12 INSTRUCTIONS DE MONTAGE (SUITE) D. Assemblage du haut du ventilateur • Placez le boîtier du moteur (C) sur la rallonge métallique et immobilisez-le en tournant le bouton d’assemblage en sens HORAIRE (fig. 3). Remarque : Si tourner le bouton d’assemblage en sens horaire n’immobilise pas le boîtier du moteur à la rallonge métallique, tournez le bouton en sens antihoraire jusqu’à ce que la rallonge glisse plus loin dans l’ensemble du moteur puis tournez le bouton d’assemblage en sens horaire pour le fixer à...
- Page 13 INSTRUCTIONS DE MONTAGE (SUITE) MISE EN PLACE DES PILES DE LA TÉLÉCOMMANDE/ Fig. 9 INSTRUCTIONS DE REMPLACEMENT A. Faites glisser le volet du compartiment des piles dans le sens de la flèche. B. Placez 2 piles AAA tel que l’indiquent les guides directionnels des rainures (fig. 9). Les piles sont fournies. C. F aites coulisser le volet du compartiment dans le sens inverse de la flèche jusqu’à ce qu’il s’assujettisse fermement. REMARQUE : NE MÉLANGEZ NI DES PILES USAGÉES ET NEUVES NI DES PILES ALCALINES, STANDARD (CARBONE-ZINC) ET RECHARGEABLES (NICKEL-CADMIUM). RENSEIGNEZ-VOUS QUANT À L’ÉLIMINATION DES PILES AUPRÈS DES RECYCLEURS DE VOTRE RÉGION. MODE D’EMPLOI DU VENTILATEUR DE LA SÉRIE HS-1655, HS-1665 FAN OPERATION FAN OPERATION Marche et arrêt Pour mettre le ventilateur en marche, appuyez...
-
Page 14: Marche Et Arrêt
EMPLOI DE LA TÉLÉCOMMANDE DE LA SÉRIE HS-1655, HS-1665 MARCHE ET ARRÊT Fig. Pressez la touche d’alimentation ( ) une fois pour mettre le ventilateur en marche, une deuxième fois pour l’éteindre (fig. 12/13). COMMANDE DE VITESSE Pour augmenter ou réduire la vitesse, pressez la touche de vitesse du ventilateur ( ) coup sur coup (fig. 12/13). MINUTERIE Peut être réglée à 1, 2, 4 ou 8 heures en agissant comme suit (fig. 12/13) : • 1 heure : pressez la touche minuterie ( ) une fois • 2 heures : pressez la touche minuterie deux fois • 4 heures : pressez la touche minuterie trois fois • 8 heures : pressez la touche minuterie quatre fois Pressez la touche minuterie une cinquième fois pour mettre la minuterie hors fonction (fig. 12/13). -
Page 15: Service À La Clientèle
INSTRUCTIONS D’ENTRETIEN DESTINÉES À L’UTILISATEUR NETTOYAGE ET ENTREPOSAGE • S’assurer que le ventilateur est réglé à la position OFF • Débrancher le ventilateur avant de le nettoyer. • Nettoyer le ventilateur au moyen d’un linge doux et humide uniquement. • ÉVITER de plonger le ventilateur dans l’eau ou de laisser de l’eau s’infiltrer dans le boîtier du moteur. • ÉVITER d’utiliser de l’essence, du diluant pour peintures ou un autre produit chimique pour nettoyer le ventilateur. DÉMONTAGE DE LA GRILLE AVANT POUR LE NETTOYAGE • Enlever la grille avant en la détachant de la grille arrière. • Dévisser le bouton de pales en le tournant DANS LE SENS DES AIGUILLES D’UNE MONTRE (À L’ENVERS DES FILETS). • Séparer le module de pales du boîtier du moteur. • Essuyer doucement les pales et les grilles au moyen d’un linge doux humide. • Assembler le ventilateur en suivant les trois dernières étapes des INSTRUCTIONS D’ASSEMBLAGE. ENTREPOSAGE • Au moment de ranger l’appareil, le démonter et le nettoyer soigneusement, conformément aux instructions, avant de le placer dans sa boîte d’origine. Si on... - Page 16 GARANTIE LIMITÉE DE 1 AN Prière de lire toutes les instructions avant de tenter B. À sa discrétion, Kaz USA, Inc. réparera ou d’utiliser ce produit. remplacera ce produit si l’on constate qu’il comporte un vice de matière ou de main- A. Cette garantie limitée de 1 an s’applique d’œuvre. à la réparation ou au remplacement d’un C. Cette garantie ne couvre pas les dommages produit comportant un vice de matière ou de main-d’œuvre. Cette garantie ne s’applique découlant des tentatives de réparation pas aux dégâts découlant d’un usage non autorisées ou de toute utilisation non commercial, abusif ou déraisonnable, ni aux conforme au présent manuel. dégâts supplémentaires. Les défaillances D. Retourner tout produit défectueux à Kaz USA, résultant de l’usure normale ne sont pas Inc., accompagné d’une brève description considérées comme des vices de fabrication du problème. Inclure une preuve d’achat en vertu de la présente garantie. KAZ USA, et un chèque ou un mandat de poste de INC. N’EST NULLEMENT RESPONSABLE 10,00 $ US/15,50 $ CAN pour les frais DES DOMMAGES FORTUITS OU INDIRECTS, de manutention, d’emballage de retour et QUELS QU’ILS SOIENT.
-
Page 17: Instrucciones De Seguridad Importantes
10. No opere este ventilador con el cable o 1. Utilice este ventilador sólo como se el enchufe dañado o si el producto no describe en este manual. Otros usos funciona correctamente, se ha caído no son recomendados ya que pueden o dañado en cualquier manera (vea la resultar en incendio, descarga eléctrica o garantía). lesiones corporales. 11. Evite el contacto con las partes móviles 2. Este producto está hecho para utilizarse del ventilador. SÓLO en el hogar y no para uso 12. El uso de accesorios no recomendados comercial, industrial o en el exterior. por el fabricante puede ser peligroso. La marca registrada Honeywell es utilizada por Kaz USA, Inc. bajo licencia de Honeywell International Inc. Honeywell International Inc. no hace ninguna declaración o garantía con respecto a este producto. - Page 18 13. Coloque el ventilador en una superficie donde fue comprado, o solicite una seca y plana. devolución autorizada para regresarlo a 14. No cuelgue ni monte el ventilador en la Kaz, Inc. para revisión y/o reparación. pared o el techo. 18. No pase el cable del ventilador debajo 15. No opere si la cubierta del ventilador está de alfombras. No cubra el cable con dañada. tapetes, alfombras o cubiertas similares. 16. Un falso contacto entre un tomacorriente No pase el cable debajo de muebles CA (enchufe empotrado) y el enchufe o aparatos. Acomode el cable lejos de puede causar sobrecalentamiento y áreas de tráfico y donde no pueda causar deformación en el enchufe. Contacte a tropiezos. un eléctrico calificado para reemplazar el ADVERTENCIA: Para Reducir el Riesgo de tomacorriente flojo o desgastado. Incendio o Descarga Eléctrica, No Utilice 17. No opere ningún ventilador con el cable Este Ventilador con Ningún Dispositivo o el enchufe dañados. Deseche cualquier ventilador dañado, regréselo a la tienda...
-
Page 19: Instrucciones De Montaje
INSTRUCCIONES DE MONTAJE Motor Bulto de Caja del la Plata (D) Prendedores (G) Motor (C) Panel de Control Tuerca de Reja Trasera Montaje Pala del de la Reja Ventilador Trasera (E) Poste de Metálica del Ventilador (A) Reja Delantera Botón de Ajuste de la Altura (B) Poste de Metálica del Ventilador (A) - Page 20 INSTRUCCIONES DE MONTAJE (Continuación) D. Armar la Parte Superior del Ventilador • C oloque el Montaje del Motor (C) en la Extensión Metálica del Poste y asegúrelo girando la Perilla de Montaje hacia la DERECHA (Fig. 3). Nota: Si girando el montaje de la perilla hacia la derecha no asegura el montaje del motor a la extensión del poste, gire el montaje de la perilla hacia la izquierda hasta que la extensión del poste metálico pueda deslizarse más en el montaje del motor.
- Page 21 INSTRUCCIONES DE MONTAJE (Continuación) INSTALACIÓN DE BATERÍAS DEL CONTROL REMOTO/ Fig. 9 INSTRUCCIONES DE REEMPLAZO A. Retire la tapa de las baterías deslizándola hacia abajo en la dirección de la flecha. B. Introduzca 2 baterías AAA en el control remoto siguiendo la guía de acomodo dentro de las ranuras del compartimiento (Fig. 9). Baterías incluidas. C. Coloque de nuevo la tapa deslizándola hacia arriba en sentido opuesto a la dirección de la flecha hasta que la tapa encaje en su lugar. NOTA: NO MEZCLE BATERÍAS NUEVAS Y USADAS. NO MEZCLE LAS BATERÍAS ALCALINAS, ESTÁNDAR (CARBÓN-ZINC) O RECARGABLES (NIQUEL-CADMIO). VISITE LOS SITIOS DE RECICLAJE EN SU ÁREA PARA UN DESECHO APROPIADO DE LAS BATERÍAS. OPERACIÓN DEL VENTILADOR SERIES SERIES HS-1655, HS-1665 ENCENDIDO/APAGADO Modèle HS-1655, Modèle HS-1655C, Para encender el ventilador, presione el botón HS-1665 HS-1665C de Encendido ( ) located at the bottom of the control panel (Fig. 10).
-
Page 22: Control De Velocidad
OPERACIÓN CONTROL REMOTO SERIES HS-1655, HS-1665 ENCENDIDO/APAGADO Fig. Presione una vez el botón de Encendido ( )para encender el ventilador. Presione de nuevo el botón de Encendido para apagar el ventilador (Fig. 12/13). CONTROL DE VELOCIDAD Para ajustar la velocidad hacia arriba o hacia abajo, presione el botón de Velocidad del Ventilador ( ) repetitivamente para aumentar el nivel (Fig. 12/13). TEMPORIZADOR Escoja entre los ajustes de 1, 2, 4 u 8 horas realizando la siguiente función (Fig. 12/13): • 1 hora: Presione una vez el botón del Temporizador ( ). • 2 horas: Presione dos veces el botón del Temporizador. • 4 horas: Presione tres veces el botón del Temporizador. • 8 horas: Presione cuatro veces el botón del Temporizador. -
Page 23: Limpieza Y Almacenamiento
USUARIO LAS INSTRUCCIONES DE SERVICIO LIMPIEZA Y ALMACENAMIENTO • Compruebe que el ventilador está apagado. • Desenchufe siempre el ventilador antes de limpiarlo. • Para limpiar el ventilador, simplemente utilice un trapo suave humedecido. • NO sumerja el ventilador en el agua, ni deje que se infiltre agua en el cajetín del motor. • NO use gasolina, disolvente para pintura ni ningún otro producto químico para limpiar el ventilador. DESMONTAJE DE LA REJILLA DELANTERA PARA LIMPIEZA • Quite la rejilla separándola de la rejilla trasera. • Desatornille el botón de las hojas girándolo EN EL SENTIDO DE LAS AGUJAS DE UN RELOJ (AL CONTRARIO DE LAS ROSCAS). • Separe el módulo de las hojas del cajetín del motor. • Limpie con cuidado las hojas y las rejillas con un paño suve humedecido. • Vuelva a montar el ventilador siguiendo las 3 últimas etapas de las INSTRUCCIONES DE ENSAMBLAJE. ALMACENAMIENTO • Cuando vaya a guardar su aparato, desmóntelo y límpielo cuidadosamente siguiendo las instrucciones antes de colocarlo en su embalaje original. Si prefiere no desmontar el ventilador, cúbralo con un plástico para protegerlo del polvo. - Page 24 1 AÑO DE GARANTIA LIMITADA Primero debe leer todas las instrucciones B. A su consideración, Kaz USA, Inc. reparará o antes de intentar usar este producto. cambiará este producto si encuentra defecto en materiales o de fabricación. Los productos A. Esta garantía limitada por 1 año aplica defectuosos deben de regresarse al lugar de para reparación o reposición del producto compra de acuerdo con las políticas de la contra defecto en materiales o mano de tienda. A partir de ese momento, mientras obra. Esta garantía no aplica para daños se encentre dentro del período de garantía, hechos por uso comercial, abusivo o no el producto defectuoso se debe regresar a razonable o daños adicionales. Defectos que Kaz USA, Inc.. sean resultado del uso y desgaste normal C. Esta garantía no cubre daños por intentos de no serán considerados como defecto bajo esta garantía. KAZ USA, INC. NO SE HACE reparación no autorizados, o por cualquier otro RESPONSABLE POR DAÑOS INCIDENTALES uso que no esté de acuerdo con el manual de...