Table of Contents
Advertisement
Advertisement
Table of Contents

Related Manuals for Baumatic BMC460BGL


Summary of Contents for Baumatic BMC460BGL
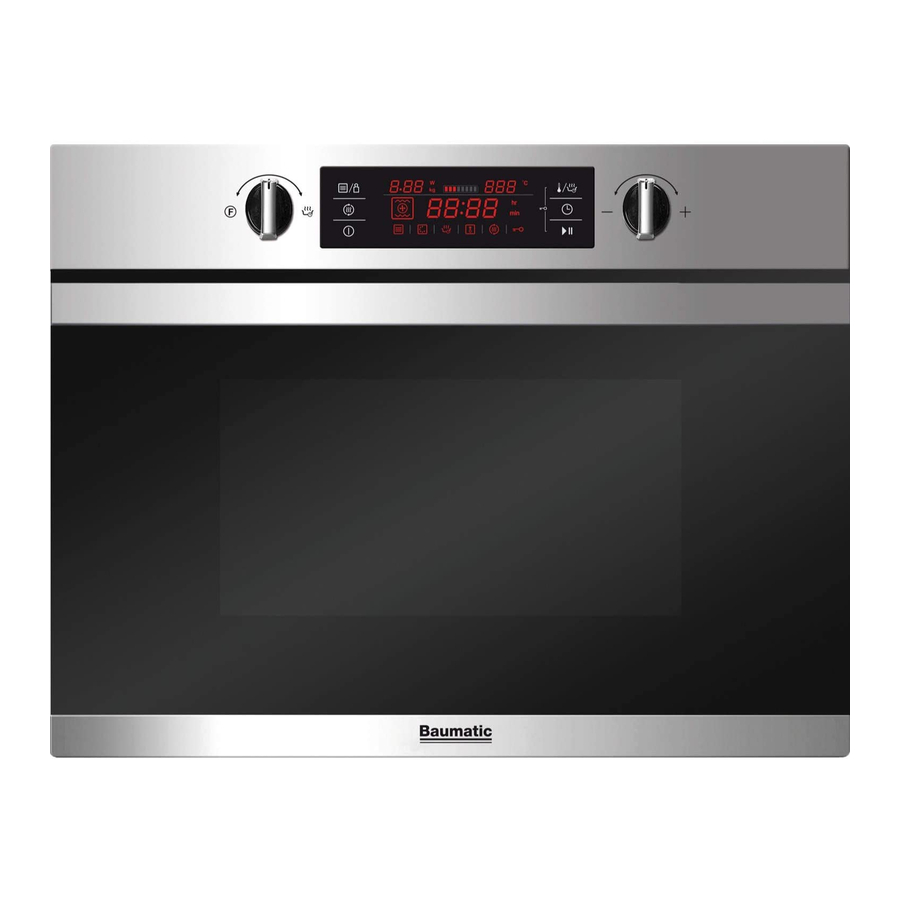
- Page 1 BMC460BGL / BMC450SS 44 Litre, 46cm high compact combination microwave oven...
- Page 2 User Manual for your Baumatic BMC460BGL BMC450SS 44 Litre, 46cm high compact combination microwave oven NOTE : This User Instruction Manual contains important information, including safety & installation points, which will enable you to get the most out of your appliance. Please keep it in a safe place so that it is easily available for future reference;...
-
Page 3: Table Of Contents
The appliance interior Turntable and turntable support General cleaning advice 29 - 30 Installation 30 - 33 Electrical connection 30 - 31 Aperture and ventilation requirements Fixing the appliance into the housing unit Troubleshooting 34 – 35 Baumatic consumables Contact details... -
Page 4: Environmental Note
Environmental note o The packaging materials that Baumatic uses are environmentally friendly and can be recycled. o Please discard all packaging material with due regard for the environment. -
Page 5: Important Safety Information
IMPORTANT SAFETY INFORMATION Your safety is of the utmost importance to Baumatic. Please make sure that you read this instruction booklet before attempting to install or use the appliance. If you are unsure of any of the information contained in this... - Page 6 You should stop using the appliance, disconnect it from the mains supply and contact the Baumatic Customer Care Department. o Only genuine Baumatic spare parts should be fitted to your appliance. These can be obtained from the Baumatic Spares Department.
- Page 7 Warning and safety instructions o This appliance complies with all current European safety legislation. Baumatic do wish to emphasise that this compliance does not remove the fact that the appliance surfaces will become hot during use and retain heat after operation.
- Page 8 This appliance must be correctly installed by a suitably qualified person, strictly in accordance with the manufacturer’s instructions. o Baumatic Ltd. declines any responsibility for injury or damage, to person or property, as a result of improper use or installation of this appliance.
- Page 9 Declaration of conformity This appliance complies with the following European Directives: - 2006/95/EC regarding “low voltage” - 2004/108/EC regarding “electromagnetic disturbances” - Regulation (EC) N° 1935/2004 regarding “materials in contact with food” o The above directives comply with 93/68/EEC regarding CE marking.
-
Page 10: Specifications
Specifications Product dimensions Aperture dimensions Height: 454.5 mm Height: 450 mm (built in) Width: 594 mm 458+2 mm MIN Depth: 568 mm (built under) Width: 560 mm Depth: 550 mm MIN Product specifications o 9 cooking functions o 15 auto functions o 5 power levels o LED temperature and function display o Knob and touch control operation... -
Page 11: Electrical Details
Electrical details Rated Voltage: 230 Vac 50 Hz Fuse Rating: 16 AMP Electrical Connection Rating: 3.35 kW For future reference please record the following information which can be found on the rating plate and the date of purchase which can be found on your sales invoice. -
Page 12: Turntable Installation
Turntable installation o NEVER place the enamel tray upside down. The enamel tray movement should never be restricted. o The tray must ALWAYS be used during microwave or combination cooking. o All food and containers of food should ALWAYS be placed on the enamel tray when microwave or combination cooking. -
Page 13: Using Your Microwave Oven
Using your microwave oven WARNING: The accessible surface may be hot during operation and for a period of time afterwards. Functions: Function Mode Microwave Microwave Use the microwave function to cook and reheat vegetables, potatoes, rice, fish and meat. Fan oven With fan oven cooking you can prepare meals in the same way as you do with a normal oven. -
Page 14: Setting The Clock
Setting the clock o When your appliance is connected to the power supply for the first time, the LED display will show 00:00 and an audible signal will sound once. o Use the adjustment dial (8) to adjust the current time. You can adjust the hour time between 00:00 –... -
Page 15: Microwave Power Level Chart
o Turn the adjustment dial (8) to set the cooking time. The maximum time is 90 minutes or 30 minutes for full 900W power. o Once the cooking time that you require appears on the LED display, press the microwave power button (2) to change the power setting. o Turn the adjustment dial (8) to set the cooking power that you require. -
Page 16: Power Level Cooking Chart
Power level cooking chart Power level Food 900 W o Boiling water o Reheating o Cooking chicken, fish and vegetables 700 W o Reheating o Cooking mushrooms and shellfish o Cooking dishes containing eggs and cheese 450 W o Cooking rice and soup 300 W o Defrosting o Melting chocolate and butter... -
Page 17: Grill Cooking
o Press the timer button (6) to change the cooking time. The default time set is 10 minutes. Use the adjustment dial (8) to set the required cooking time. The maximum time is 5 hours. o Press the start / stop button (7) and your microwave oven will start to cook. -
Page 18: Grill + Fan Cooking
Grill + fan cooking o Place whatever you are cooking in the centre of the microwave cavity and then close the microwave door. IMPORTANT: You should make sure that the door of the microwave is shut securely. o Turn the cooking function selection dial (1) once clockwise to select oven/heating cooking mode. -
Page 19: Preheating Function
IMPORTANT: You must select the cooking function within 10 seconds or the displayed default setting will be programmed. o Press temperature setting button change temperature. Turn the adjustment dial (8) to select the required temperature from 100 - 230°C increasing in 5°C intervals. The maximum temperature is 230°C and the minimum temperature is 100°C. -
Page 20: Combination Cooking
Combination cooking Microwave and grill cooking o Place whatever you are cooking in the centre of the microwave cavity and then close the microwave door. IMPORTANT: You should make sure that the door of the microwave is shut securely. o Turn the cooking function selection dial (1) twice clockwise to select combination cooking mode. -
Page 21: Microwave And Fan Oven Cooking
Microwave and fan oven cooking o Place whatever you are cooking in the centre of the microwave cavity and then close the microwave door. IMPORTANT: You should make sure that the door of the microwave is shut securely. o Turn the cooking function selection dial (1) twice clockwise to select combination cooking mode. -
Page 22: Microwave And Grill Fan Cooking
Microwave and grill fan cooking o Place whatever you are cooking in the centre of the microwave cavity and then close the microwave door. IMPORTANT: You should make sure that the door of the microwave is shut securely. o Turn the cooking function selection dial (1) twice clockwise to select combination cooking mode. -
Page 23: Microwave And Bottom-Heat Cooking
Microwave and bottom-heat cooking Place whatever you are cooking in the centre of the microwave cavity and then close the microwave door. IMPORTANT: You should make sure that the door of the microwave is shut securely. o Turn the cooking function selection dial (1) twice clockwise to select combination cooking mode. -
Page 24: Other Functions
Auto-cooking menu There are 15 automatic cooking programs on your appliance. You only have to choose the program and set the weight to begin cooking. The power, time and temperature are already programmed to achieve optimum cooking results. To select a cooking program follow the steps below: o Press the ON / OFF button (4) to activate the microwave function. -
Page 25: Defrost Function
* These programs are preheated. During preheating, the cooking time pauses and the preheating symbol turns on. After preheating, you will hear an alarm and the preheating symbol will flash. ** These programs use only the microwave function. Defrost function o Turn the cooking function selection dial (1) four times clockwise to select defrost mode. -
Page 26: Microwave Cooking Guidelines
Microwave cooking guidelines o If you are heating liquid in the microwave, then you must also place a teaspoon in the container. This will ensure that the liquid does not boil suddenly after being removed from the microwave cavity. o This phenomenon is called “delayed boiling”, this means that a liquid can be close to boiling point, even if there is no steam coming off the liquid or the liquid is not bubbling. -
Page 27: Materials You Can Use In A Microwave Oven
o After the cooking time has completed, you should let the food stand for a few minutes. This is called “standing time” and will allow the heat generated by the microwave to spread evenly throughout the food. Materials you can use for microwave cooking Material Remarks Aluminium foil To be used for shielding only. -
Page 28: Materials Not To Be Placed In A Microwave Oven
Materials you cannot use for microwave cooking Material Remarks Aluminium tray cause arcing. Transfer food into microwave-safe dish. Food carton with cause arcing. Transfer food into metal handle microwave-safe dish. Metal or metal- Metal shields the food from microwave energy. trimmed utensils The metal trim may cause arcing. -
Page 29: Cleaning And Maintenance
Cleaning and maintenance Cleaning operations must only be carried out when the oven is cool. The appliance should be disconnected from your mains supply before commencing any cleaning process. The appliance exterior o You should wipe over the front of the appliance with a soft cloth and warm water mixed with a little washing up liquid. -
Page 30: Installation
Any damage that is caused to the appliance by a cleaning product will not be fixed by Baumatic free of charge, even if the appliance is within the guarantee period. Installation... - Page 31 o WARNING: THIS APPLIANCE MUST BE EARTHED. o This appliance is supplied with a mains supply cable. It must be wired into a 16 A double pole switched fused spur outlet, having 3 mm contact separation and placed in an easily accessible position adjacent to the appliance.
-
Page 32: Aperture And Ventilation Requirements
Aperture and ventilation requirements o The diagram above shows aperture ventilation requirements that you require to build the appliance into a housing unit. o Ensure that the rear panel of the furniture housing unit has been removed. o This oven may be installed without any additional ventilation cut outs being made in the housing unit. -
Page 33: Fixing The Appliance Into The Housing Unit
IMPORTANT: OTHER METHODS INSTALLING MICROWAVE ARE SANCTIONED BY BAUMATIC. o Fully insert the appliance into the aperture hole and centre it. o Ensure that none of the cables are kinked or compressed when the appliance is in position. o Screw the appliance to the aperture using the fixing screws. -
Page 34: Troubleshooting
Baumatic Customer Care Department. o The interior light bulb is not working. * Call the Baumatic Customer Care Department. The interior light bulb can only be replaced by a trained service technician. o My food is not cooking properly. - Page 35 Or any installation other than the one specified by Baumatic Ltd. has been completed. Please refer to the conditions of guarantee that appear on the...
-
Page 36: Baumatic Consumables
BC005 Stainless Steel Cleaner and Protector (250 ml) o BC007 E-Cloth – General Purpose Cloth o BC008 Microwave Cover To order a Baumatic consumable product please call 0123 5437 244 and quote the product code. You can also order online from eshop.baumatic.co.uk... -
Page 37: Contact Details
United Kingdom Czech Republic Baumatic Ltd., Baumatic CR s.r.o. Baumatic Buildings, Lípová 665 6 Bennet Road, 460 01 Liberec 4 Reading, Berkshire Czech Republic RG2 0QX United Kingdom +420 483 577 200 www.baumatic.cz Sales Telephone (0118) 933 6900 Slovakia Sales Fax Baumatic Slovakia, s.r.o.