Table of Contents
Advertisement
Quick Links
Advertisement
Table of Contents

Related Manuals for Baumatic BMC455TS


Summary of Contents for Baumatic BMC455TS
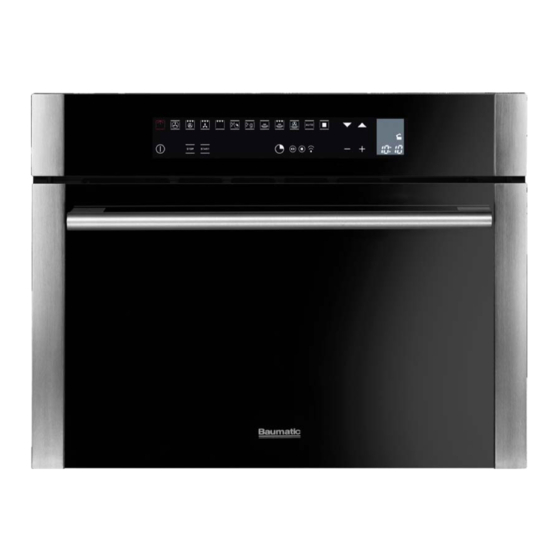
- Page 1 BMC455TS 46 cm High compact combination microwave oven...
- Page 2 User Manual for your Baumatic BMC455TS 46 cm High, compact combination microwave oven NOTE : This User Instruction Manual contains important information, including safety & installation points, which will enable you to get the most out of your appliance. Please keep it in a safe place so that it is easily available for future reference;...
-
Page 3: Table Of Contents
Cleaning and maintenance 33-34 The appliance exterior The appliance interior Turntable and turntable support 33-34 General cleaning advice Installation 35-40 Electrical connection 35-36 Aperture and ventilation requirements 37-40 Fixing the appliance into the housing unit Troubleshooting 40-42 Baumatic consumables Contact details... -
Page 4: Environmental Note
Environmental note o The packaging materials that Baumatic uses are environmentally friendly and can be recycled. o Please discard all packaging material with due regard for the environment. -
Page 5: Important Safety Information
IMPORTANT SAFETY INFORMATION Your safety is of the utmost importance to Baumatic. Please make sure that you read this instruction booklet before attempting to install or use the appliance. If you are unsure of any of the information contained in this... - Page 6 If you notice that the door seal, door surfaces, power cord and plug are damaged. You s hould stop using the appliance, disconnect it from the mains supply and contact the Baumatic Customer Care Department. o Only genuine Baumatic spare parts should be fitted to your appliance.
- Page 7 Warning and safety instructions o This appliance complies with all current European safety legislation. Baumatic do wish to emphasise that this complian does not remove the fact that the appliance surfaces will become hot during use and retain heat after operation.
- Page 8 This appliance must be correctly installed by a suitably qualified person, strictly in accordance with the manufacturer’s instructions. o Baumatic Ltd. declines any responsibility for injury or damage, to person or property, as a result of improper use or installation of this appliance.
- Page 9 Declaration of conformity o CE: Appliance conforming European directives 89/336/EEC, 93/68/EEC, 73/23/EEC and subsequent revisions and “RoHS” directive 2002/95/CE.* o The manufacturer declares that the oven is built using certified materials requires appliance installed accordance with the standards currently in force. This appliance must be used by a trained person for domestic purposes only.
-
Page 10: Specifications
Specifications Product dimensions Aperture dimensions* Height: 454 mm Height: 458 mm MIN Width: 598 mm Width: 560 mm Depth: 558 mm Depth: 560 mm * Please refer to the installation instructions for more detailed information about the size of aperture required. Product specifications o 7 cooking functions: Microwave... -
Page 11: Standard Accessories
o Automatic recipes setting o Defrost by weight and time o LCD full programmer with temperature and function display o Touch control operation o Safety lock o Stainless steel interior o Front opening double-glazed door o Internal light o Audible signal at the end of cooking o Capacity: 34 litres o Turntable diameter:... -
Page 12: Control Panel
Control Panel 1) Light control button 2) Fan oven selection button 3) Fan oven and grill selection button 4) Grill and fan selection button 5) Grill selection button 6) Defrost by time selection button 7) Defrost by weight selection button 8) Microwave selection button 9) Microwave and grill selection button 10) Microwave and fan oven selection button... -
Page 13: Using Your Microwave Oven
Using your microwave oven WARNING: The accessible surface may be hot during operation and for a period of time afterwards. Functions: Light: The oven light automatically turns on when using the microwave function however is manually controlled in other functions in the interests of saving energy. Fan oven: This function uses the circular element while the heat is distributed by the fan. -
Page 14: Turning The Appliance On
Turning the appliance on o Press the ON/OFF button (27) once to turn the microwave on. You are able to turn the oven light on and off and set the minute minder function without turning the appliance on, however for everything else you need to turn it on. -
Page 15: Setting The Clock
o To disable the demonstration mode, press and hold the light control button (1) for about 5 seconds. The appliance will then be ready for use and you can proceed to set the time of day. o The microwave will only enter demonstration mode after the first start up and after a power failure. -
Page 16: The Oven Light
The oven light o You can turn the oven light on and off manually, even if a cooking function has not been selected. o To turn the oven light on, press the light control button (1) once. Repeat this action again to turn the oven light back off. o The oven light automatically turns on when the oven is heating. -
Page 17: Changing The Operating Language
o All buttons on the control panel will be locked and the safety lock CLOSED icon (16) will light on the display. o To deactivate the safety lock, press and hold the ON/OFF button (27) for about 3 seconds again. o All buttons on the control panel will be unlocked for use. -
Page 18: Timer Functions
abrasive cleaners should be used. The appliance should be thoroughly dried afterwards. The timer functions Setting the minute minder o The minder minute can be programmed with the oven turned on for cooking purposes or with the oven turned off for other kitchen tasks. -
Page 19: Setting The Cooking Time
Setting the cooking time This timer function enables you to input the length of cooking time. After this time has elapsed, the oven will automatically stop heating. o This timer feature can only be used on the fan oven, fan oven and grill, grill and fan and grill oven functions. -
Page 20: Setting The End Of Cooking Time
Setting the end of cooking time This timer function works the same way as the cooking time function however instead of programming the length of cooking time, you can set the time of day that you wish the oven to stop heating at. -
Page 21: Setting The Delayed Cooking Time
Setting the delayed cooking time This timer function allows you to program the length of cooking time and the time of day that you wish the oven to turn off at so that the oven turns on and off automatically according to your needs. -
Page 22: Selecting A Cooking Function
show “Program finished remove the dish” to prompt you to remove your cooked food from the oven. o Press any button on the control panel or open the door to silence the acoustic signal. o After 1 minute, the oven will switch itself off unless another cooking function is set. -
Page 23: Residual Heat
o During heating, the “°C” symbol will flash to indicate that the oven is heating up or cooling down to reach the selected temperature. When the set temperature is reached the symbol stops flashing and the oven beeps. Residual heat o After the appliance has been used, the display will show the internal temperature of the oven, even when it is no longer heating, until it falls to 50°C. -
Page 24: Using The Microwave Function
Using the microwave function Turn the appliance on by pressing the ON/OFF button (27) once. Press the microwave selection button (8) to choose the microwave function. o Use the increase (14) and decrease (13) buttons to adjust the default microwave power in 150W intervals. -
Page 25: Using The Microwave And Fan Oven Function
o When the desired settings are shown on the display, press the start button (25) to begin the cooking process. The time will count down on the display. o IMPORTANT: You must set a cooking time or the start button will not work and the display will show the time flashing. -
Page 26: Defrost By Time
o IMPORTANT: You must set a cooking time or the start button will not work and the display will show the time flashing. o At the end of the cooking time, a beep will signal the end of the program. Press any button on the control panel or open the door to silence the acoustic signal. -
Page 27: Maximum Defrost Weights
o The display shows the weight of the food to be defrosted. You can use the plus (19) and minus (20) buttons to set the correct weight of the food. The minimum weight is 50g. It is advised that you do not exceed the maximum weight for the food type you are defrosting (see table below) or there is a risk of the food not defrosting properly. -
Page 28: Auto Recipes
Auto recipes o Press the ON/OFF button (27) once to turn the appliance o Press the auto recipes selection button (11) to access the auto recipes. o The display will show 2 options of personal recipes or preset recipes. Preset recipes are already saved settings which you can access and use. -
Page 29: Saving A Personalised Recipe
o The display will then prompt you to save the recipe if you require. After 1 minute, the machine will turn off if no other function is selected. o IMPORTANT: If you accidentally select the wrong option at any time and want to change the settings of your recipe, you can press the stop button (26) to cancel the current setting. -
Page 30: Microwave Cooking Guidelines
o All of your saved recipes will appear on the display. You can use the increase (14) and decrease (13) buttons to scroll through the menu. Please note that recipe names are given by default. o When the recipe, which is to be deleted, is highlighted on the display, press the stop button (26). -
Page 31: Materials You Can Use In A Microwave Oven
o This phenomenon is called “delayed boiling”, this means that a liquid can be close to boiling point, even if there is no steam coming off the liquid or the liquid is not bubbling. If the liquid container is even gently shaken, then the liquid can without warning boil over or even spurt. -
Page 32: Materials You Cannot Use For Microwave Cooking
Oven cooking Follow the manufacturer’s instructions. Do not close with bags a metal tie. Make slits in the bag to allow steam to escape. Paper plates Use for short-term cooking/warming only. Do not leave and cups the oven unattended whilst cooking. Paper towels Use to cover food for reheating and absorbing fat. -
Page 33: Cleaning And Maintenance
plastic dish Kitchen paper Metal tray Metal rack Aluminium foil and foil containers * Combination mode applies to microwave + grill and microwave + fan oven modes. Cleaning and maintenance Cleaning operations must only be carried out when the oven is cool. The appliance should be disconnected from your mains supply before commencing any cleaning process. -
Page 34: General Cleaning Advice
Any damage that is caused to the appliance by a cleaning product will not be fixed by Baumatic free of charge, even if the appliance is within the guarantee period. -
Page 35: Installation
Installation The installation must be carried out by a suitably qualified person, in accordance with the current version of the following. o UK Regulations and Safety Standards or their European Norm Replacements. o Building Regulations (issued by the Department of the Environment). - Page 36 The brown wire must be connected to the terminal marked “L” (live), or coloured red. The blue wire must be connected to the terminal marked “N” (neutral), or coloured black. The green and yellow wire must be connected to the terminal marked “E”...
-
Page 37: Aperture And Ventilation Requirements
Aperture and ventilation requirements Built in: o The diagram above shows aperture ventilation requirements that you require to build the appliance into a housing unit. o Ensure that the rear panel of the furniture housing unit has been removed. o This oven may be installed without any additional ventilation cut outs being made in the housing unit. - Page 38 Built under: o The diagram above shows aperture ventilation requirements that you require to build the appliance under a work surface. o Ensure that the rear panel of the furniture housing unit has been removed. o This oven may be installed without any additional ventilation cut outs being made in the housing unit.
- Page 39 Built in with a warming drawer: o The diagram above shows aperture ventilation requirements that you require to build the appliance into a housing unit with a warming drawer below. o Ensure that the rear panel of the furniture housing unit has been removed.
-
Page 40: Fixing The Appliance Into The Housing Unit
IMPORTANT: OTHER METHODS INSTALLING MICROWAVE ARE SANCTIONED BY BAUMATIC. o Fully insert the appliance into the aperture hole and centre it. o Ensure that none of the cables are kinked or compressed when the appliance is in position. o Screw the appliance to the aperture using the fixing screws and bushings provided. - Page 41 Baumatic Customer Care Department. o The interior light bulb is not working. * Call the Baumatic Customer Care Department. The interior light bulb can only be replaced by a trained service technician. o My food is not cooking properly.
- Page 42 Or any installation other than the one specified by Baumatic Ltd. has been completed. Please refer to the conditions of guarantee that appear on the...
-
Page 43: Baumatic Consumables
BC005 Stainless Steel Cleaner and Protector (250ml) o BC007 E-Cloth – General Purpose Cloth o BC008 Microwave Cover To order a Baumatic consumable product please call 0123 5437 244 and quote the product code. You can also order online from eshop.baumatic.co.uk... -
Page 44: Contact Details
United Kingdom Czech Republic Baumatic Ltd., Baumatic CR s.r.o. Baumatic Buildings, Lípová 665 6 Bennet Road, 460 01 Liberec 4 Reading, Berkshire Czech Republic RG2 0QX United Kingdom +420 483 577 200 www.baumatic.cz Sales Telephone (0118) 933 6900 Slovakia Sales Fax Baumatic Slovakia, s.r.o.