Table of Contents
Advertisement
Advertisement
Table of Contents

Summary of Contents for Craftsman BRUSHWACKER 636.795454
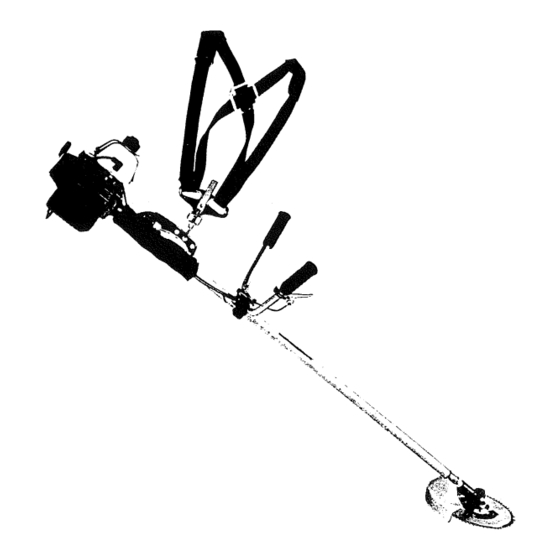
- Page 1 NB04D-9150/I Sears] owner's manual MODEL 636.795454 I:RRFTSM GASBRUSHWACKEW o". 37.7 cc CAUTION: • Assembly • Maintenance Read Rules for • Operation • Repair Parts Safe Operation and Instructions Carefully Sears, Roebuck Co., Chicago, Ill. 60684 U.S.A. NB04D.9150/| 6/82 PRINTED IN JAPAN...
- Page 2 ° _..:1' "Y'E-,_.R'_WA_ R_A-N T _'_O N CR_'A:I= T S M A_N _'-'_" _""_ _SHWACKER _M• 636. 795454 _CKER_M.• fails to perform properly, due toa defect in material or workmanship with- in one (1) year from date of purchase Sears will repair it free of charge c ase, Sears will rep_ •...
- Page 3 KNOW YOUR BRUSHWACKERTM Your BRUSHWACKERT.M. has been carefully packed at the factory to prevent damage during shipping and storage, however, even with the best of preventative measures, damage does sometimes occur. It is recommended that you follow check out procedures listed below: Remove...
- Page 4 SPLASH DEFLECTOR ASSEMBLY ASSEMBLY INSTRUCTIONS Attach the splash deflector unit to the Drive Shaft Hous- After checking parts, fasten fuel tank and fit drive shaft ing using the clamp and screws provided. See figure 4. to engine with four screws. Figure 1. GROUND WIRE OF TOGGLE...
- Page 5 20 and 25 parts gasoline tolPart oil (1 gal. gasoline to 6 oz. oil) regular leaded gasoline. Use 32-36555 Craftsman Engine Oil or a high grade two stroke cycle engine oil For the first twenty hours, use the mixing ratio of between 15 and 20 to 1.
- Page 6 Engine Starting Procedure {cont'd} Stopping Engine Reduce the engine rpm to idle. Set the throttle lever at starting position with the lock- ing button of throttle lever. Figure 9. Set the toggle switch at "OFF". Figure After stopping the engine, IMMEDIATELY CLOSE FUEL...
- Page 7 Tips for Long Storage Emergency measure during operation In case of emergency, pull the detaching belt upward strongly Drain all fuel from the fuel tank and carburetor. Remove and the machine will be detached from the body. spark plug, pour a teaspoon of oil through the plug hole.
- Page 8 NYL ON LINE TRIMMER INSTRUCTIONS TO USE THE LINE TRIMMER Line Trimmer is designed trimming and light edging Keep hands feet clear of the nylon cutting head work. It uses only the (very) tip of a monofilament nylon line while unit is in use.
- Page 9 Engine Operation (cont'd.} Always release the trigger and allow the engine to return to idle speed whe'n not cutting. The carburetor has been carefully adjusted at the factory should require further adjustment. carburetor adjustment, ENGINE ADJUSTMENTS section in this manual. stop engine, move...
- Page 10 SCALPING D° To remove all unwanted vegetation around trees, posts, monuments, etc., maintain a 30 degree angle with the nylon cutting head and allow the tip of cutting line to strike the ground. Figure 19. NOTE: Increased line wear is to be expected when using the edging or scalping techniques.
- Page 11 GENERAL MAINTENANCE Line & Spool Maintenance [€ont'd] LUBRICATION FOLLOW INSTRUCTIONS! After every 10 hours of operation, remove the plug and fill gear box with grease, Figure 24 Figure 26 There are two eyelets, one on each side. After the nylon cord has been threaded through...
- Page 12 it" €/) <...
- Page 13 ..__-=a "I- < 0_0000000 _°_ < <o _So_S 2ZZZZZZZZoZ...
- Page 15 <_: , ooo_ .:-__oSozzzzzzoooooo t,., "I- ..€/) €/) ._ ._ c). _ <...
- Page 16 <_...
- Page 17 ,.=, "6 m" .F..--. €,o >: E ,D °...
- Page 18 €_ €_ €_ "I" rl" €_ €/) €/)
- Page 19 r,,, X"_ < p ._ ._ .=_ o -_ mm_" I.Ll m_Q< • '''''*''' ZZZZZZZZZ ZZZ_ O00000_ZZ...
- Page 20 The Model Number will be found on the top of recoil starter. Always mention the Model Number when requesting service or repair parts for your unit. All parts listed herein may be ordered from any SEARS, ROEBUCK CO. OR SIMPSONS-SEARS LIMITED retail or catalog store.


