Table of Contents
Advertisement
Available languages
Available languages
Owner's Manual
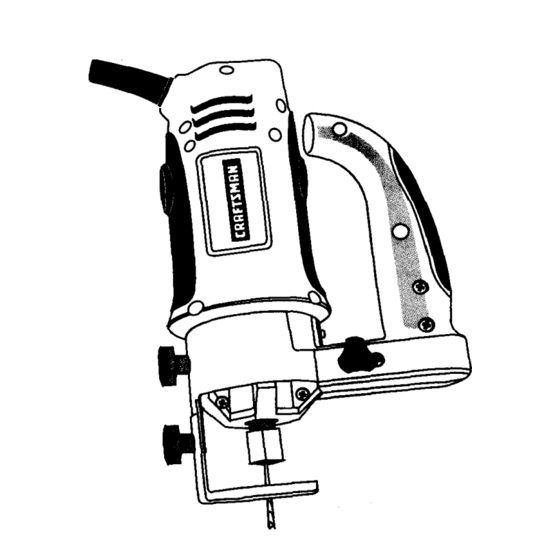
CRRFTSMANe
CUTTER
Model No.
183.172500
CAUTION:
Before using this Cutter,
read this manual and
follow all its Safety Rules
and Operating
Instructions.
• SafIty Instructions
• Accessories
• Assembly
• Operation
• Maintenance
• Parts List
• Espenol
Sears, Roebuck and Co., Hoffman Estates, IL 60179 USA
ParL No. 149277480001
Rev. 1
07/13/01
Advertisement
Table of Contents

Related Manuals for Craftsman 183.172500


Summary of Contents for Craftsman 183.172500
- Page 1 Owner's Manual CRRFTSMANe CUTTER Model No. 183.172500 • SafIty Instructions CAUTION: • Accessories Before using this Cutter, • Assembly read this manual and • Operation follow all its Safety Rules • Maintenance and Operating Instructions. • Parts List • Espenol Sears, Roebuck and Co., Hoffman Estates, IL 60179 USA ParL No.
- Page 2 SECTION PAGE SECTION PAGE warranty ........Carton Contents ......6, 7 Know Your Cutl_......Product Specifications ....... Power Tool Safety ......Assembly & OpemUon ...... 9 - 17 Maintenance ........Cutter Safety ........Repair Parts ........18 - 22 Elech'ical R equirements &...
- Page 3 [A WARNINGJ Before using your cutter, it is critical that you read and understand these safety rules. Failure to follow these rules could result in serious injury to you or damage to the cutter. REMOVE ADJ_ KEYS AND WRENCHES. Good safe_ practices are a combina_n of common sense, staying alert and undemtanding howto...
- Page 4 _ARNING_ 11. NEVER HOLD THE WORKPIECE IN ONE HAND For your safety, do not plug in your cutter or try to while operating the fool with the other hand. use any accessory until it is complemly assembled and installed according to these Instructions, 12.
- Page 5 [ellJll]illl_lile]:l 1:l)[41l:ll_k'l[I]_: [ata];llk [lJli=|ilPl_k_._--"'Jllll]. Make sure your extension cord is in good condWon. This cutter is double insulated to protect you from electrical shock. When using an extension cord, be sure to use one heavy enough to carry the current the tool will draw. An undersized cord will cause a drop in line voltage resulting IA WARNING I...
- Page 6 r II _J_mn1_i_ _Xo(o] II.$'_o] =]i;i_' !i ! AVAILABLE ACCESSORIES UNPACKING CHECKING CARTON CONTENTS IA WARNmGI WARNING Use only accessories recommended for this spiral If any part is mlsek!tg or damaged, do not plug the cutter. Follow instructions that accompany cutter into the PoWer source until the missing or...
- Page 7 [o,Io_...
- Page 8 K41_e]vAvJ k_e]l_ [e,]l]lil_l Mou_ting MBr°Ua_ Loddng Knob Circle CutBng Knob Mir_g Sole Plate _'-_'"_ Mounting Sole Plate Disc Motor ..Housing Adjusting Knobs Locking P_dsior_ KnOb Handle eev_ KnObs Router Base Sole Plate...
- Page 9 WARNINGI INSTALLING CUTTING BITS Remove the plug from the power source before assembly, changing accessorkm or cutters Insert new bit (4) into the colleL making adjustments. This safety action wftl help prevent accidental etarting of the tool which could WARNING result In eertous Injury.
- Page 10 CHANGING COLLET INSERT INSTALLING FREEHAND SOLE PLATE - cont'd The bits for this tool are locked into place with a collet nut Remove locking knob (1) from the base of the cutter motor housing (see Fig. 4). Slide freehand (1) and collet lsee Fig. 3). The tool is assembled at the factory with a "/8"collet (2) which is used to hold the sole plate mounting bracket (2) onto the bottom of...
- Page 11 PRACTICE GUTS USING FREEHAND SOLE PLATE IA WARN,NO Turn the switch ON. Have you read "POWER TOOL 8AI=ETY", When the motor is up to full speed, slowly tip the tool "CUTTER SAFETY" and "ELECTRICAL SAFETY" to an upright position, letting the hit cut into the on pages 3, 4 and 5 of thto Manual? If not, please...
- Page 12 [,:][oT CUTTING OUTLET OPENINGS IN DRYWALL CUTTING OUTLET OPENINGS IN DRYWALL - cont'd Move the bit slowly to the right until you feel and hear DANGER I the bit contacting the inside of the bo_ Do not attempt to use this tool to make cut-outa around any fixture or opening which has live electdcal Pull the bit out far enough to slip it over the edge of...
- Page 13 I-) lS"d 5:][o)"-.] iOD] •J_(_k,"l[e] _1I_" f__l_l|]ll In= [qgiianil=l" INSTALLING PRECISION HANDLE ADJUSTING FREEHAND SOLE PLATE - Cont'd The precision handle is designed for use when precision control over the tool movement is desired. comfortable handle can be used with either the right or left hand.
- Page 14 I]I _MII mR[_-_--- CIRCLE CUTTER OPERATION CIRCLE CUTTER QPERATION - cont'd Tumthe_0N IA WARNINGI Unplug the tool from the power source before When the molo_ m up m full speed, slowly tip the tool changing accessories, changing bits and making and circle cuter assembly to an uprK3ht position,...
- Page 15 SETFING ROUTIER DEPTH ;|O|IPlll = =4I-'f_-_ -_ The router accessory converts your cuffing tool into a Depth of cutting is controlled by sliding the router base up small hobby router that is capable of handling small 1/4, and down in the adjusting sleeves. shank router bits as well as the cuffing bit.
- Page 16 FREEHAND CUTTING AND ROUTING CUTTING STRAIGHT LINE WITH STRAIGHT EDGE When the router base accessory isinstalledon the cutting To cut a straight llne_ you can use a straight edge tool,itwillfunctionas a small router to be used for template to guide b'le router base. freehand cut'dng ofirregular shaped pattems.
- Page 17 For your own safety, turn the switch OFF and remove the plug from the power souma before maintaining your cutter. When sarvtolng, use only IdellMCat Craftsman parts. Use of any other part may creath a hazard or cause product damage.
- Page 18 Main Unit...
- Page 19 IA WARNING J When servicing use only CRAFTSMAN mpiscement parts. Use of any _ parts may create a HAZARD or cause damage to your Drill Preos. Any attempt to repair or replace electrical parts on this Drill Press may create...
- Page 20 _ff.. _A[o]D]=Im Ii [:]_l Bllo_I0z0_ Handle Assembly Part Name Part # 02AS-000201 Screw 02AS-000206-A0 Screw 02AS-000269-A0 Machine screw 02AS-000270-00 Screw 02AS-000271-00 Machine screw 2203-MA0010-00 Sole plate 2204-MA0001-00 Handle holder 2203-PA0009-00 Hexagon screw holdS, 2203-PA0010-00 Hexagon screw case 2204-PA0001,-00 Right handle grip 2204..PA0002-00 Left handle grip 2204-PA0003÷00...
- Page 21 lv [o]m]= . ilE;! lll oIo] Circle Cutter Assembly PertNamo Part# Key# 02AN-000017-00 Square nut 02AN-000018-00 Hexagon nut 02AS-000258-00 Machine screw 02AW-000022-00 Spdng washer 2206-MA0001-00 Circular arm (mebic) 2206-MA0002-00 Washer 2206-MA0003-00 Handle bushing 02AS-000272-00 Screw 2206-MA0005-00 Circular arm (Impelt_) 2205-PA0005-00 Handle cover 2205-PA0006-00...
- Page 22 Router Assembly Pert Name Key# Pmtal Part Name (;It Key # Part # 1 2205-M_Om. 02AG-000133-00 ' Friction plate Guide bushing 02A J-000009-00 TgUng base 2205_ Ruler (metric) 1_ !220_0 02AN-000012-00 Ru er (Irnperia) 02AN-000013-00 Square nut 2203-PA00_ Hexagon screw cover 02AN-000016-00 SCrew nut 2203-PA00_).
- Page 23 For repairofmajorbrandappliancesin your oum home... no matterwhomade it' no matterwho sdd itT 1-800-4-MY-HOME ® Anytime, day ornight (1-800-469-4663) (U.S,A. and Canada) www.seam.com www.sears.ca For repairof carry-in products likevacuums,_ equipment, andelectronics, callfor the location of yournearest Seam Parts and Repair Centmr. t400-488-1222 Anyt_e,day ornight (U.SJ_.
- Page 24 Manual del propietario CRAFTSMAN. SIERRA Modelo 183.172500 ADVERTENCIA: • Instmcciones de seguridad • Accesorios Lea este manual y siga todas sus reglas de • Montaje seguridad • instrucciones • Operaci0n de operaci6n antas de • Mantenimiento usar esta sierra .
- Page 25 SECCION P/_GINA SECCI6N PAGINA Garant|a ........Contenido de la caja ......6, 7 Familiaricese con su sierra ....Especificaciones del producto ..... Seguridad con herramientas el6ctricas.. Montaje y operacibn ......9 - 17 Seguridad con la sierra ....... Mantenimiento ........ Requisitos de elecb'icidad y seguridad...
- Page 26 Antes de usar su sierra es vital que lea y que comprenda estas reglas de seguridad. Si no sigue estas reglas puede suffir lesiones serias o dahar la sierra RETIRE CLAVlJAS Y LLAVES DE AJUSTE. Las buenas prdctP._as de seguridad son la combinacibn Fbrmese el t'_bito de verificar que se hayan retJrado det sentido comt_n, de ester alerte y de saber cbmo usar las clavijas y las Ilaves de ajuste de la henamienta...
- Page 27 FUE SEMPRE LA PEZA DE TRABAJO ADVERTENCIA ABRAZADERAS PARA MANTENERLA FIRME MIENTR.,I_(N)RTE _sto dejar_ libres ambas manos Para su segurldad, no enchufe su sterra nl Intente para operar la herramienta. user cualquler accesorio que no est6 ensambtedo 11. NUNCA 80_rENGA LA PEZA DE TRABAJO instatado...
- Page 28 _1k'11f;1LMI---.." -- Esta sierra Uene un aislamkmtodobie para protegedo Verlflque que _m cable de extansl6n est6 en buen contm choquesek_ctr_.os. eMado. Cuando use un cable de extensibn, asegOrese de que el rnismo l_eda transm_r la con'Jente que requiem IA W.
- Page 29 A_E_RIOSDISPONIB_S DESEMPAQUE Y VERIFICACI_N DEL CONTENIDO LA CAJA IA ,OW T.C= Use s61o los accesodos recomendados palm esta sierra espiral. Siga las instrucdones vlemm Si falta algtma pkllli o si la misma esUi dahada, los accesorlos. El uso de acce_xlos inadecuados conecte la skllfa...
- Page 30 ¢...
- Page 31 Periila de L.---,_ ..i- de rrmntaje AJ_-az_era euiecien Perilla de _ncada Perilla de puMo rnontaje de _vote M_:lidor de ajustar la altura...
- Page 32 MONTAJE DE BROCAS PARA I..4, SIERRA Retire el enchut_ de la fuerre de cm_lente antes del Siga pulsendo HACIA ADENTRO el bot_ de cien-e montaJe, cambio de accesodos o de la sierra y antes del v_tago mlentras hace gimr la tuema det mandril de hacer los ajustos.
- Page 33 MONTAJE DE LA BANCADA DE MANOS LIBRES RECAMBIO DEL INSERTO DEL MANDRIL DE PINZA Continuacldn Las brocas pare esta hen'amienta quedan fijas pot"medio de la tuerca del mandril de pmza (1) y del mandril de pinza (vet la fig. 3). La herramienta viene de f_bdca con NO use b _ de mnos...
- Page 34 AJUSTE DE LA BANCADA DE MANO8 UBRES ContJnuacidm 4. Ajuste la Wofundidadde la bancada tal como eft la fig. 5. Antes de comenzar el corte, vedfique la profundidad de la broca, y que kJ bancada est6 en _ngulo recto Apoye el bolde de la bancada sobm la pmza de respecto a la misma y est6 bkm sujeta.
- Page 35 PRACTIQUE CORTES CON LA BANCADA Cuando abra un odficio en una superficie vertical, evite MANO8 LIBRES terrninar la aperture en el rondo del orirmio. Comlance y termine siempm an el "tope" del mismo papa que la pieza Pass el intemJptor a la posicidn de ENCENDIDO. cortade no caiga _ la broca en movimiento.
- Page 36 APERTURA DE ORIFICIOS PARA TOMACORRIENTES EN PIRCA - Cor_nuaci6n MONTURA DEL _ DE PRECISION Mueva la broca tentamente a la derecha haste que sienta y oiga que hamisma toca el interior de la caja. El asa de preciel_m ut_ dios_ade para cuande se desea toner un control pmdso del movimiento de la herramieota.
- Page 37 _Ki]_r_ll=l h_ [o]_ [_]_1 AJUSTE DE LA BANCADA DE MANOS LIBRES - Ajuste el radio del ¢ortador de cimulos atlojando la Continuaci6n penlla punhgude de pivote (6), deelizdndola al radio correcto _ CIft:ulo y volvidndola a apretar en el sitio Antes de iniciar el code, revise la pfofundidad de la deseado.
- Page 38 =1 W .._----']Z4f'--I|I----:L __._-- OPERACI_N DEL CORTADOR DE CiRCULOS OPERAP.J(_ DEL CORTADOR DE CiRCULOS Continuack_ Pase el intem_or a la posick_ de ENCENDIDO. antes de camblar los accesorlos, camblar la broca Cuando el motor Ilegue a la velocidad debida, hacer los ajustes. endereoe lentamente la henamienta y el montaje del...
- Page 39 AJUSTE DE LA PIROfUNDIDAD DE LA FRESA El a ccesout0 de fresedo conviede asu sierra en un La profundided del _ se controla deslizando la base de fresador de bdcolaje capaz de user fmsas peque_s fresedo hacia antba o hacia abajo sobre las mangas de v_stago de 114", asi como laIxoca...
- Page 40 CORTE Y FRESADO A MANOS LIBRES CORTE DE UNA LINEA RECTA CON BORDE DERECHO Cuando se instala el accoseno de la base de fresado en Se puede usa" urm plantilla de borde recto pare guier la la sierra, ie misma funciona como une fi'esedora base de fresado y cotter une linea recta.
- Page 41 Inten'uptor y retire el se requiem el uso de lubricante. enchufe de I tomacordentes antes de dar serviclo a su siena. Utilico s_lo piezas Craftsman Id4nticas para dar serviclo. El uso de otras piezas puede crHr desgos daitar el producto.
- Page 42 Unidad principal...
- Page 43 {l!l."_l_ Ilia"] lill:l,:_l,: , , vl_l[e](r:,'ll!i'i] il{:tl]lilr#,lloIt] Use s_io piezas de recamblo CRAFTSMAN cuando haga el servlcio. El uso de otras piezas puede crear un RIESGO o dahar su taiadro de mesa,. Cualquler Intento de reparar o recamblar Its piezas...
- Page 44 PJI::lP'_r_._.IL_[o) _ o] i!:! _ ,. ii_.,l_l_0D] Montaje del asa #de p_za Nombre de la iI_ii Ctd. c6d. 02AS-000201-A0 Tornino 02AS-000206-A0 Tomillo 02AS-000269-A0 Pemo induslzlal 02AS-000270-00 T_illo 02AS-000271-00 Pemo _1_1 2203-MA0010-00 Banc_la 2204-MA0001-00 S_te de__ 2203-.PA0009-00 Tapa del pemo indult_ 2203-PA0010-00 Cubiefta del pemo industd_...
- Page 45 IN_I_ _ l_[o]_ [::it(o]ilE:]_J i l J5 _ ;[09_ Montaje del cortador de circulos _® # de pim Nombre de la pieza Ctd. c6d. 02AN-000017-00 Tuerca cuadrada 02AN-000018-00 Tuerca hexagonal 02AS-000258-00 Pemo indus_al 02AW-000022-00 Arandela de presk_ --5-- 2206-MA0001-00 Brazo circular (_) 2206-MA0002-00 2206-MA0003-00 Casqu_o...
- Page 46 • !LvA![o]m]=lmU[o] E:][,r, Jl P'. 0Io] Montaje del fresador Nombrede_pleza Ctd. #de #dem Nombre de '- pleza Ctd. c_l. 1" 02AG-000133-00 Chapa de fdcck_n Casqulo de gula 2205-MA0002-00 02AJ-0(X)(X)9-00 Base indlrlable Regla (mqr_k:a) 02AN-000012-00 Tue_ca Regla (impedal) 02AN-000013-00 Tuerca cuadrada Tal)a del pemo industdal 02AN-000016-00 Tuerca roscada...
- Page 47 Para reparar los a rticuloe fal_cantes reconocidos en su _ hogar ..sin importar el fabri(;an_ o el proveedor, 1-800-4-MY-HOME_ A c.=qu_r h ot= _ ek= (1-800-469-4663) (en EE.UU. yen Canada) t_vw.sears.corn www.sears.ca Pare reparar productos port,tiles como aspiradoras, cortagramas y productos electr(micos, Ilame y pida la ubicacibn rn_8 cercana de su Centro de partes y de mparaciones...