Table of Contents
Advertisement
Available languages
Available languages
Owner's
Manual
183172520003
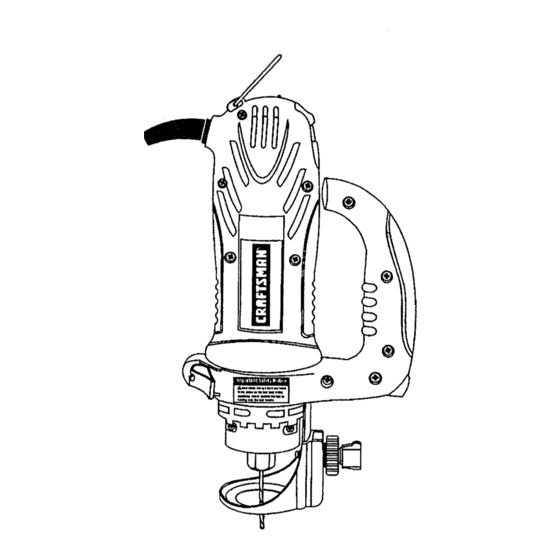
CRAFTSMAN®
ALL-IN-ONE
CUTTING
TOOL
Model No.
183.172521
Important
Safety
Notice
IA WARNING
I
Always have one hand firmly
placed on the tool body while
operating. Never operate the
tool by holding only the tool
handle,
®
®
CAUTION:
Before using this Cutting
Tool, read this manual and
follow all its Safety Rules
and Operating
Instructions.
• Safety Instructions
• Accessories
• Assembly
• Operation
• Maintenance
• Parts List
• Espanol
Sears, Roebuck and Co., Hoffman
Estates, IL 60179 USA
Part. No. 183172520003
Rev. 3 06/27/02
Advertisement
Table of Contents

Related Manuals for Craftsman 183.172521


Summary of Contents for Craftsman 183.172521
- Page 1 183172520003 Owner's Manual CRAFTSMAN® ALL-IN-ONE CUTTING TOOL Model No. 183.172521 ® ® Important Safety Notice IA WARNING Always have one hand firmly placed on the tool body while operating. Never operate the tool by holding only the tool handle, • Safety Instructions CAUTION: •...
- Page 2 SECTION PAGE SECTION PAGE Carton Contents ......6, 7 Warranty ........Know Your Cutting Tool ....Product Specifications ...... Assembly & Operation ...... 9 - 18 Power Tool Safety ......Maintenance ........Cutting Tool Safety ......Repair Parts ........19 - 25 Electrical Requirements &...
- Page 3 IA WARNING I Before using your cutting tool, it is critical that you read understand these safety rules. Failure to follow these rules could result in serious injury to you or damage to the cutting tool. Good safety practices are a combination of common REMOVE ADJUSTING KEYS AND WRENCHES.
- Page 4 IA WARNING n NEVER HOLD THE WORKPIECE IN ONE HAND For your safety, do not plug in your cutting tool or try to use any accessory until it is completely assembled while operating the tool with the other hand. and installed according to these instructions, NEVER PLACE HANDS IN THE PATH OF THE until you have read and understood this Owner's Manual,...
- Page 5 DleJlJ :] ! i I_ _lJ I It] _ [e'llJliJ]=l!l_l=l[,..'] ;[e]:t I:}:,(li:l_!.'][e]_[l_[e]:|il_ This cutting tool is double insulated to protect you from Make sure your extension cord is In good condition. electrical shock. When using an extension card, be sure to use one heavy enough to carry the current the tool will draw.
- Page 6 AVAILABLE ACCESSORIES UNPACKING AND CHECKING CARTON CONTENTS IA WARNINGJ [,_, WARNING] Use only accessories recommended for this cutting If any part is missing or damaged, do not plug the tool. Follow instructions that accompany accessories. cutting tool into the power source until the missing Use of improper accessories may cause injury to the damaged part is replaced and assembly is complet,...
- Page 8 Motor Housing Motor Housing Quick Mounting Bracket Lever MounUng Bracket Circle Cutting Quick Adjus_ng Knob Lever Disc Moungng Inse_ Locking Knob Motor Handle Housing Depth Motor Stop Housing Precision Height Adjus_ng Knobs Lockinl Plunge Lockin Knob Action Lever Tu_et Bevel Adjusting Router Lock...
- Page 9 IA WARNINGI Remove the plug from the power source before INSTALLING CUTTING BITS - Cont'd assembly, changing accessories or cutters and making adjustments. This safety action will help Insert new cutting bit (4) into the collet. prevent accidental starting of the tool which could WARNING result in serious injury.
- Page 10 INSTALLING FREEHAND SOLE PLATE - cont'd CHANGING COLLET INSERT Slide freehand sole plate mounting bracket (1) on" The cutting bits for this tool are locked into place with a the bottom of motor housing (2) until the slot in th collet nut (1) and collet (see Fig.
- Page 11 PRACTICE CUTS USING FREEHAND SOLE PLATE IA WA"NING Set the speed control switch to the appropriate speed. Have you read "POWER TOOL SAFETY", Turn the switch ON. "cu'n'ING TOOL SAFETY" and "ELECTRICAL SAFETY" on pages 3, 4 and 5 of this Manual? If When the motor is up to full speed, slowly tip the tool not, please do it now before you operate this to an upright position, letting the bit cut into the...
- Page 12 cu'n'ING OUTLET OPENINGS IN DRYWALL - con_' CUTTING OUTLET OPENINGS IN DRYWALL Move the bit slowly to the right until you feel and DANGER the bit contacting the inside of the box. Do not attempt to use this tool to make out-outs around any fixture or opening...
- Page 13 ADJUSTING FREEHAND SOLE PLATE - Cont'd •"lr_g.l =15" INSTALLING PRECISION HANDLE The precision handle is designed for use when precision control over the tool movement is desired. The comfortable handle can be used with either the right or left hand. Fig.
- Page 14 ll:ll!llltlli/l_ CIRCLE CURER OPERATION CIRCLE CUTTER OPERATION - cont'd Turn the switch ON. WARNING] Unplug the tool from the power source before When the motor is up to full speed, slowly 1 changing accessories, changing bite and making and circle cutter assembly to an upright pc adjustments.
- Page 15 SETTING ROUTER DEPTH FOR SINGLE DEPTH ONLY • ImB = I_Ul_,[€_:41_ellJ.l_ KY-,_::II Depth of cutting is controlled by sliding the router base up The router accessory converts your cutting tool into a and down on the guide rods and locking it in place. small hobby plunge router that is capable of handling sman ¼"...
- Page 16 SETTING PLUNGE DEPTH - cont'd SETTING ROUTER BASE BEVEL Loosen both height adjusting knobs (6) by tuming Bevel cutting with the cutting bit can be done with the them counter clockwise. router base tilted to the desired angle. NOTE: Only loosen height adjusting knobs enough to release the tension on the guide rods (7).
- Page 17 CUTTING STRAIGHT LINE WITH STRAIGHT EDGE FREEHAND CUTTING ROUTING To cut a straight line, you can use a straight edge When the router base accessory is installed on the cutting template to guide the router base, tool, it will function as a small router to be used for freehand cutting of irregular shaped patterns.
- Page 18 For your own safety, turn the switch OFF and remove the plug from the power source before maintaining lubrication is required. your cutting tool, When servicing, use only identical Craftsman parts. Use of any other part may create a hazard or cause product damage.
- Page 19 Main Unit...
- Page 20 WARNING} When servicing use only CRAFTSMAN replacement parts. Use of any other parts may create a HAZARD or ca damage to your Cutting Tool. Any attempt to repair or replace electrical parts on this Cutting Tool may create a hazard unless repair is performed by a qualified technician.
- Page 21 Freehand Soleplate Assembly Key # Part # Part Name 02AF-000041-10 Fixing shaft 02AF-000076-00 Release lock pin 02AS-000287-00 Screw 2213-MA0010-00 Freecut metal round guide Lock 2213-PA0010-00 2213-PA0011-00 Fixbase 2213-PA0012-00 Plastic guide base 2213-PA0013-00 Adjustment Gear 15"1" Sleeve 2213-PA0014-00 2213-PA0015-00 Screw lock F...
- Page 22 Handle Assembly Part # Part Name Key # 02AF-000041-10 Fixing shaft [ Qt),l 02AF-000076-00 Release lock pin 02AH-000106-00 Compressive spdng 02A8-000148-00 Screw 02AS-000287-00 Screw 02AS-000288-00 Screw 02AW-000067-00 Washer 2213-MA0013-00 S-round guide holder Lock 2213-PA0010-00 2213-PA0012-00 Plastic guide base 2213-PA0013-00 Adjustment Gear 15T 22t3-PA0014-00 Sleeve 2213-PA0015-00...
- Page 23 Circle Cutter Assembly Key # Part # Part Name 02AN-000017-00 Square nut 02AN-000018-00 Hexagon thin nut 02AS-000258-00 Machine screw 02AS-000272-00 Screw 02AW-000022-00 Spring washer 2206-MA0001-.00 Circular arm (metric) 2206-MA0005-.00 Circular arm (inch) 2206-MA0002-00 Washer 2206-MA0003-00 Handle bush 2206-PA0001-00 Distance lock with center pin 2206-PA0003-00 Locking base 2206-PA0004-00...
- Page 24 Router Assembly...
- Page 25 Router Assembly Part # Part Name Key # 02AF-000041-10 Fixing shaft 02AF-000077-00 Base release lock pin 02AF-000078-00 Height rod 02AG-000145-00 Guide bush 02AJ-000017-00 Router tile base 02AH-000107-00 Spring 02AH-000108-00 Spring 02AH-000109-00 Spdn9 02AN-000001-A0 Screw nut 02AN-000013-00 Square nut 02AN-000019-00 M4 fixing nut 02AN-000024-00 Hexagon thin nut 02AQ-000001-A0...
- Page 26 For repair of major brand appliances in your own home... no matter who made it, no matter who sold it! 1-800-4-MY-HOME ® Anytime, day or night (1-800-469-4663) (U.S.A. and Canada) ........w..W_N_ .sears.corn ...._:sears:ca ...... For repair of carry-in products like vacuums, lawn equipment, and electronics, call for the location of your nearest Sears Parts and Repair Center.
- Page 27 Manual del propietario CRAFTSMAN® HERRAMIENTA DE CORTE TODO EN UNA Modelo No. 183.172521 Aviso importante de segurldad _1_ ADVERTENClA] Siempre sostenga el cuerpo de la herramienta con una mano mientras la use. Nunca use la herramienta sostenidndola sblo pot el asa.
- Page 28 SECCION PAGINA SECCION PAGINA Garantia ........Contenido de la caja ......6, 7 Especificaciones del producto..... Familiadcese con su herramienta de corte ..Seguridad con herramientas el_ctdcas.. Montaje y operaci6n ......9 - 18 Seguridad con la herramienta Mantenimiento ........ corte .....
- Page 29 Antes de usar su herramienta de corte es vital que lea y que comprenda estas reglas de seguridad. Si no sigue estas reglas puede sufrir lesiones serlas o dar_ar la herramienta de corte. uso de accesorios inadecuados puede causarle lesiones y Las buenas pr_cticas de seguridad son ta combinacibn del senUdo da_ar la herramienta.
- Page 30 para operar la herramienta. AOVERTENClAJ NUNCA SOSTENGA LA PIEZA DE TRABAJO COt Para su seguridad, no enchufe su herramienta de UNA MANe mientras opera la herramienta con lae corte ni intente user cualquier accesorio que no est6 mane. ensamblado e instalado complatamente segdn estas NUNCA COLOQUE LAS MANES EN EL CAMINO instrucciones,...
- Page 31 :! [_] IF±1_Vjl I _ _11 I[O] mIo] :| Ill II ! I _1_.'1_vdI :l_ll Ko}.l ",/:A :!;lof:_l :| I1:_1 o] :11 ::Q i _ _kl[o] _d Esta herramienta de corte tiene un aislamiento doble para Verifique que su cable de extensi6n estd en buen protegedo contra choques el_ctdcos.
- Page 32 ACCESORIOS DISPONIBLES DESEMPAQUE Y VERIFICACI(_N DEL CONTE t.A CAJA I& "°vE"TE"c'AI ADVERTENCIA] Use sbto los accesorios recomendados para esta herramienta de corte. Siga las instrucciones Si falta alguna pieza o si la misma est_ da_a¢ vienen con los accesorios. El uso de accesorios conecte la herramienta de corte a la fuente d_ inadecuados...
- Page 34 motor Abrazadera de rnonLaje Perilia de rapido Discode montaie Inser_o de mont_je Perilta de Bancada s_ec_n Cuerpo del motor Asa de CueR_:_ .___..---- del motor Pedflas para i altura recisibn PaEanca Pedlla de sujecibn _pido Cierre de ajuste del biset Ban- cada...
- Page 35 MONTAJE DE BROCAS DE CORTE - Continuaci6n ADVERTENCIA Siga pulsando HAClA ADENTRO el bot(_n de cierre Retire el enchufe de la fuente de corriente antes del v:_stago mientras hace girar la tuerca del mandril montaje, cambio de accesorios o de sierras y antes de pinza en sentido contra las agujas del reloj con la hacer...
- Page 36 Use l avelocidad BAJA cuando desbaste, corte pl_slicos, :Y-'I _ [_:I _7,..! . ] =11 _ 5 _ '-,_ ?, [ e_.l II1:{N =k.'_-" pula y use c epillos de alambre ode cerdas. l a ALTA velocidad cuando corte madera, use sierras de corte y MONTAJE DE LA BANCADA DE MANOS LIBRES para "canar"...
- Page 37 Fije el interruptor de velocidsd a la velocidad debida. Pase el interruptor a la posicibn de ENCENDIDO. Cuando el motor alcance la-velocidad debida, mueva i.,Ya ley6 "SEGURIDAD CON HERRAMIENTAS lentamente la herramienta a una posicibn derecha, ELECTRICAS", SEGURIDAD CON LA HERRAMIENTA DE dejando que la broca corte la pieza de trabajo (ver la CORTE"...
- Page 38 APERTURA DE ORIFIClOS PARA TOMACORRIENTES APERTURA DE ORIFICIOS PARA TOMACORRIEi EN PIRCA EN PIRCA - Continuaci6n IA PEUGRO I Mueva la broca lentamente a la derecha hasta sienta y oiga que la misma toca el interior de la No Intente usar esta herramienta para hacer aberturas cerca de cualquier aparato o apertura que tenga Saque la broca Io suficiente para poderla des]iz...
- Page 39 AJUSTE DE LA BANCADA DE MANES LIBRES - • • MONTURA DE PRECISI6N El asa de precisi6n est:_ disefiada para cuando se desea Continuaci6n 9_7"-" tener un control precise del movimiento de la herramienta. Esta asa cemoda se puede usar con cualquiera de tas dos manes.
- Page 40 _=] :ll if,..1 a ]Ze] : | J] =1[_ J _,(H I| I[e}.m OPERACION DEL CORTADOR DE CiRCULOS OPERACI6N DEL CORTADOR DE CJRCUL Continuaci6n _,_i, ADVERTENC|A Pase el interrupter a la posici6n de ENCE Desconecte la herramienta de la fuente de corriente antes de cambiar los accesorios, camloiar la broca y Cuando el motor llegue a la veLocidadde hacer los ajustes.
- Page 41 AJUSTE DE LA PROFUNDIDAD DE FRESADO PAR& _lo] I_ _1_1=11 = __,_1111 :T:_.'i =No] =N_I _I _I.'_:I FRESADO FIJO El accesodo de fresado convierte a su herramlenta de code en un fresador penetrante de bdcolaje capaz de La profundidad de corte se controla haciendo subiry bajar usar fresas pequeflas con v;_stago de 1/4", aal como la la base de fresado sobre la barra de guIa, y fij&ndolaen su sitio.
- Page 42 AJUSTE DE LA INCLINACION DE LA BASE DE AJUSTE DE LA PROFUNDIDAD DE PENETRACI6N FRESADO Continuaci6n Se pueden hacer cortes biselados con la broca de cc inclinando la base de fresado al bngulo deseado. Afloje ambas peritlas para ajustar la altura (6) 9ir._ndolas en sentido contrado alas agujas del reloj.
- Page 43 :Y,._-I _II J ] :II _I t ,l :l-'f'-I CORTE DE UNA LJNEA RECTA BORDE CORTE Y FRESADO A MANOS LIBRES DERECHO Cuando se instala el accesodo de la base de fresado en Se puede usar una plantilla de borde recto para guiar la la herramienta de code, la misma funciona como una base de fresado y cortar una linea recta.
- Page 44 Utilice s61o piezas Craftsman id6ntlcas para dar serviclo. El uso de otras plezas puede crear riesgoe o dahar el producto.
- Page 45 Unidad principal...
- Page 46 "OVE"TE"O'AI Use s61oplezas de recamblo CRAFTSMAN cuando haga el servlclo. El uso de otras piezas puede crear un RIESGO o dafiar s_ taladro de mesa. Cualquier intents de reparar o recamblar las plezas eldcUtcas de este taladro de mesa puede...
- Page 47 Montaje de la bancada de manos Iibres # de # de pieza Nombre de la pieza Ctd. c6d. 02AF-000041-10 Eje de suiecibn 02AF-000076-00 Arandela de sujeci6n 02AS-000287-00 Tornillo 2213-MA0010-00 Guia circular de metal para cortes libres 2213-PA0010-00 Seguro 2213-PA0011-00 Abrazadera de sujeccibn 2213-PA0012-00 Base pl_stica de 9uia 2213-PA0013-00...
- Page 48 Montaje del asa # de pieza Nombre de la pieza .k----- " o2_-Io E'e_-- L_!__ 02AF÷00(_076_ Arande_a de sdeci6n Reserte a resi6n " Tornillo " 02AS-000287-00- 02AS-000288-00 Tomitlo .._-_- _ ' 2213--MA0013--00 So orteS de I_ular 321' 2_2"13 - P A001---_0"_-0-Seguro 323"--'2213-PA00i2,-00 Base I_sticade...
- Page 49 E l Jil l Montaje del cortador de circulos # de # de pieza Nombre de la pieza Ctd, c6d. 02AN-000017-00 Tuerca cuadrada 02AN-000018-00 Tuerca hexagonal delgada 02AS-000258-00 Tornillo industrial 02AS-000272-00 Tornillo 02AW-000022-00 Arandela a presibn 2206-MA0001-00 Brazo circular (m6tdco) 2206-MA0005-00 Brazo circular (imperial) 2206-MA0002-00...
- Page 50 Montaje del fresador...
- Page 51 Montaje del fresador # de # de pieza Nombre de la pieza Ctd. cbd. 02AF-000041-10 Eja de sujeci6n 02AF-000077-00 Pasador para soltar la base 02AF-000078-00 Barra de altura 02AG-000145-00 Casquillo de guia 02AJ-000017-00 Base inclinable del fresador 02AH-000107-00 Resorte 02AH-000108-00 Resorte 02AH-000109-00 Resorte...
- Page 52 sin importar el fabricante o el proveedor, Z ¸ 1-800-4-MY-HOME_ A cualquier hora del dia (1-800-469-4663) (en EE.UU. y en Canad_l) www.sears.com www.sears.ca ii_i, _I::_ Para reparar productos portatiles como aspiradoras, cortagramasy productos electr_nicos, Ilame y pida la ubicacibnmas cercana de su Centro de partes y de reparaciones de Sears.