Table of Contents

Related Manuals for Asus B1M


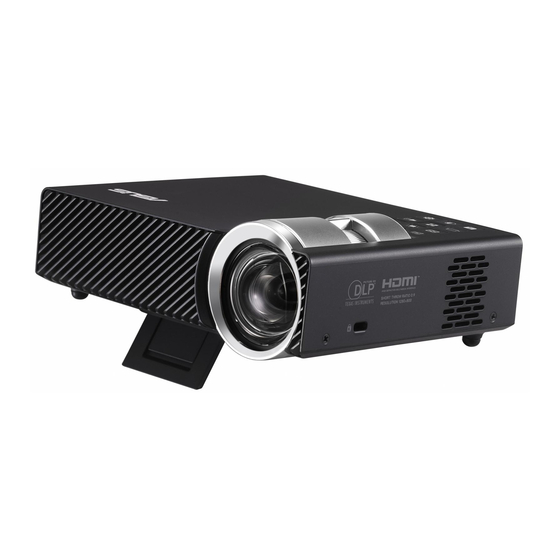
Summary of Contents for Asus B1M
- Page 1 LED projector E-Manual...
- Page 2 ASUS will only be responsible for or indemnify you for loss, damages or claims based in contract, tort or infringement under this Warranty Statement. This limit also applies to ASUS’ suppliers and its reseller. It is the maximum for which ASUS, its suppliers, and your reseller are collectively responsible.
-
Page 3: Table Of Contents
DRAFT 2 12/17/12 Table of Contents About this manual ..................... 5 Conventions used in this manual ............... 6 Typography ......................6 Safety precautions ..................... 7 Using your LED projector ................7 Servicing and replacement of parts ............7 Caring for your LED projector ..............8 Proper disposal .................... - Page 4 Launching the Media Center ..............41 Opening files from the SD Card or USB Drive ........42 EZLink ......................49 WiFi ......................51 Appendices Federal Communications Commission Statement ......56 Canadian Department of Communications Statement....57 Global Environmental Regulation Compliance and Declaration .57 ASUS Recycling/Takeback Services ............57 LED projector E-Manual...
-
Page 5: About This Manual
DRAFT 2 12/17/12 About this manual This manual provides information about the hardware and software features of your LED projector through the following chapters: Chapter 1: Knowing your LED Projector This chapter details the parts of your LED projector and its accompanying remote control. -
Page 6: Conventions Used In This Manual
DRAFT 2 12/17/12 DRAFT 2 12/17/12 Conventions used in this manual To highlight key information in this manual, some text are presented as follows: IMPORTANT! This message contains vital information that must be followed to complete a task. NOTE: This message contains additional information and tips that can help complete tasks. -
Page 7: Safety Precautions
Do not disassemble or attempt to service this LED projector by yourself. Contact your local ASUS service center for assistance. • When replacing parts of your LED projector, purchase items as specified by ASUS and contact your local service center for assistance. LED projector E-Manual... -
Page 8: Caring For Your Led Projector
DRAFT 2 12/17/12 DRAFT 2 12/17/12 Caring for your LED projector • Switch off then unplug the LED projector from the power outlet before cleaning it. • When cleaning the LED projector’s housing, use a clean soft cloth dampened with water or a mix of water and neutral detergent. -
Page 9: Chapter 1: Knowing Your Led Projector
DRAFT 2 12/17/12 Chapter 1: Knowing your LED projector Chapter 1: Knowing your LED projector LED projector E-Manual... -
Page 10: Features
DRAFT 2 12/17/12 DRAFT 2 12/17/12 Features Top view Focus ring The focus ring allows you to adjust the image focus of your LED projector. LED projector E-Manual... - Page 11 DRAFT 2 12/17/12 Control panel buttons The control panel buttons allow you to navigate the onscreen display menu. Individually, these buttons also correspond to a specific LED projector setting as indicated below. Media Center Input Power Image Position Brightness Image Quality Keystone Main menu/OK Volume...
-
Page 12: Front View
DRAFT 2 12/17/12 DRAFT 2 12/17/12 Front view Air vents The air vents allow cool air to enter and warm air to exit the LED projector. WARNING! Ensure that paper, books, clothing, cables, or other objects do not block any of the air vents or else overheating may occur. -
Page 13: Rear View
DRAFT 2 12/17/12 Rear view AV-IN Infrared (IR) sensor The IR sensor detects signal from your LED projector’s remote control, allowing you to access the LED projector’s control panel from a distance of up to 7 meters. Headphone output jack port The headphone output jack port allows you to connect your LED projector to amplified speakers or headphones. - Page 14 DRAFT 2 12/17/12 DRAFT 2 12/17/12 HDMI port This port is for the HDMI (High-Definition Multimedia Interface) connector and is HDCP compliant for HD DVD, Blu-ray, and other protected content playback. VGA port This port allows you to connect your LED projector to other VGA-compatible devices.
-
Page 15: Right Side
DRAFT 2 12/17/12 Right side Kensington® lock port The Kensington® lock port allows you to secure your LED projector using Kensington® compatible LED projector security products. Air vents The air vents allow cool air to enter and warm air to exit the LED projector. -
Page 16: Left Side
DRAFT 2 12/17/12 DRAFT 2 12/17/12 Left side Power (DC) input port Insert the bundled power adapter into this port to charge the AV-IN battery pack and supply power to your LED projector. WARNING! The adapter may become warm to hot while in use. -
Page 17: Bottom View
DRAFT 2 12/17/12 Bottom view Built-in stand This LED projector comes with a built-in stand that allows you to adjust the height of the projector by either 5 degrees or 9.5 degrees. Tripod socket Connect the LED projector to a tripod using this socket. LED projector E-Manual... -
Page 18: Led Projector Remote Control
DRAFT 2 12/17/12 DRAFT 2 12/17/12 LED projector remote control Control panel buttons The control panel buttons allow you to navigate the onscreen display menu. Individually, these buttons also correspond to a specific LED projector setting. NOTE: For more details on using the control panel buttons, refer to the Using the onscreen display menu section in this manual. -
Page 19: Replacing The Battery
DRAFT 2 12/17/12 Replacing the battery A. Move the battery compartment’s latch to the right to unlock the battery holder. Pull down the battery holder and remove it completely out of the battery compartment. LED projector E-Manual... - Page 20 DRAFT 2 12/17/12 DRAFT 2 12/17/12 Remove the old battery then insert the new CR2025 lithium coin battery into the battery holder with the positive side (+) facing D. Slide the battery holder back into the battery compartment. Push it all the way in until you hear a soft click, indicating that the battery compartment is locked back in place.
-
Page 21: Chapter 2: Setting Up
DRAFT 2 12/17/12 Chapter 2: Setting up Chapter 2: Setting up LED projector E-Manual... -
Page 22: Operating Your Led Projector
A. Connect the AC/DC power cord to the power adapter. Connect the AC power cord to a power source. Connect the DC power connector to your LED projector. NOTE: This LED projector is also compatible with ASUS power adapters within the 65W to 95W range. A V -I... -
Page 23: Ac Power Cord Requirements
DRAFT 2 12/17/12 AC power cord requirements Use the correct AC plug type according to your current location. IMPORTANT! Contact your sales dealer if the AC power cord bundled with your LED projector does not match your local power source. NOTE: We highly recommend that you use a video source device that also uses a grounding type plug to prevent signal interference due to voltage fluctuations. -
Page 24: Connect The Led Projector To Your Device Using The Appropriate Port
DRAFT 2 12/17/12 DRAFT 2 12/17/12 2. Connect the LED projector to your device using the appropriate port. A. Headphone output jack port and audio/video input jack port. A V -I Memory card reader A V -I NOTE: For details on how to launch files from a memory card, refer to the Launching the Media Center section in this manual. - Page 25 DRAFT 2 12/17/12 HDMI port A V -I D. VGA port A V -I LED projector E-Manual...
- Page 26 DRAFT 2 12/17/12 DRAFT 2 12/17/12 D. USB 2.0 port A V -I Compatible USB 2.0 input devices: Wi-Fi dongle USB cable flash drive NOTE: For details on using the USB 2.0 port to launch supported file formats, refer to the Launching the Media Center section in this manual. LED projector E-Manual...
-
Page 27: Adjust The Height Of The Led Projector
DRAFT 2 12/17/12 4. Adjust the height of the LED projector. Your LED projector comes with a built-in stand that helps adjust the image height onscreen. WARNING! Ensure that the built-in stand is fully retracted before placing the LED projector inside the projector bag. NOTES: •... - Page 28 DRAFT 2 12/17/12 DRAFT 2 12/17/12 Screen size and projection distance table Adjust the LED projector’s distance from the screen using the table below. screen size LED projector projection distance Screen size - 16:10 Projection distance (inches) (millimeters) (meters) 0.58 1016 0.78 1524...
-
Page 29: Press The Power Button
DRAFT 2 12/17/12 3. Press the power button. LED projector E-Manual... -
Page 30: Adjust The Image Focus
DRAFT 2 12/17/12 DRAFT 2 12/17/12 5. Adjust the image focus. Move the focus ring to the left or to the right to adjust the image focus. NOTE: Use a still image when adjusting the onscreen display. LED projector E-Manual... -
Page 31: Chapter 3: Using Your Led Projector
DRAFT 2 12/17/12 Chapter 3: Using the onscreen display menu Chapter 3: Using your LED projector LED projector E-Manual... -
Page 32: Launching Programs From The Onscreen Display Menu
DRAFT 2 12/17/12 DRAFT 2 12/17/12 Launching programs from the onscreen display menu The onscreen display menu contains a set of programs and settings designed to maximize your use of the LED projector. You can navigate inside the onscreen display menu using the control panel buttons on your LED projector or its accompanying remote control. -
Page 33: Control Panel Grid
DRAFT 2 12/17/12 Control panel grid The control panel grid guides you through the process of using the control panel buttons to launch active options inside your onscreen display menu. It represents the 8 buttons surrounding the button on the control panel. control panel control panel grid color... -
Page 34: Using Your Led Projector For The First Time
Refer to the following steps when using your LED projector for the first time. Set up your LED projector then press the power button. Wait for a few minutes until the ASUS welcome screen appears. Using the control panel buttons, select the language for your LED projector. - Page 35 DRAFT 2 12/17/12 Accessing your LED projector’s settings Aside from using the control panel buttons to navigate the onscreen display menu, you can also use each of these buttons to launch the following LED projector settings: IMPORTANT! Press Projector Setting on the control panel grid to use these functions in the Media Center.
- Page 36 DRAFT 2 12/17/12 DRAFT 2 12/17/12 Contrast Press this button to set the difference between lighten or darken your projection onscreen. Media Center Press this button to launch the Media Center. NOTE: For more details, refer to the Using the Media Center section in this manual.
-
Page 37: Image Setting
DRAFT 2 12/17/12 Image Setting Press this button to access the following image settings: Color Temperature - This option allows you to adjust the light • temperature of your LED projector according to the following options: Low, Medium, High. Color Adjustment - This option allows you to adjust the color •... -
Page 38: Image Position
DRAFT 2 12/17/12 DRAFT 2 12/17/12 Image Position Press this button to access the following image position settings: Auto Keystone - This option allows you to automatically adjust • the alignment of your image. Horizontal Positioning - This option allows you to shift the •... - Page 39 DRAFT 2 12/17/12 Aspect Ratio - This option allows you to change the projection • of your display according to the following aspect ratios: AUTO, 4:3, 16:9, and 16:10. Digital Zoom - This option allows you to zoom in or zoom out •...
- Page 40 DRAFT 2 12/17/12 DRAFT 2 12/17/12 Setting Press this button to access the following LED projector settings: Information - This option shows you the following information • about your LED projector: currently used input port, LED projector’s model name, and currently used Splendid mode. Reset All - This option allows you to reset all the settings you •...
-
Page 41: Using The Media Center
DRAFT 2 12/17/12 Using the Media Center Show photos, play videos, listen to audio music, and view documents using your LED projector’s Media Center. Through the Media Center, you can also access the Wi-Fi capabilities of your LED projector and connect to USB-enabled input devices. -
Page 42: Opening Files From The Sd Card Or Usb Drive
DRAFT 2 12/17/12 DRAFT 2 12/17/12 Opening files from the SD Card or USB Drive Photo Supported image file formats: • • JPEG • To open an image file: 1. Connect your input device to the LED projector. 2. Turn on the LED projector to launch the Media Center’s onscreen display menu. -
Page 43: Supported Video Formats
DRAFT 2 12/17/12 Video Supported video formats: • • • • • • MPEG • To open a video file: 1. Connect your input device to the LED projector. 2. Turn on the LED projector to launch the Media Center’s onscreen display menu. - Page 44 DRAFT 2 12/17/12 DRAFT 2 12/17/12 4. Select Video. 5. Refer to the control panel grid to help you browse and select the file from your input device. 6. Press to open the selected folder or file. 7. After opening the file, press on the control panel to launch the video file’s control panel grid.
- Page 45 DRAFT 2 12/17/12 Audio Supported audio formats: • • • • • • ADPCM-WAV • PCM-WAV To project images, refer to the following steps: 1. Connect your device to the LED projector. 2. Turn on the LED projector to launch the Media Center’s onscreen display menu.
- Page 46 DRAFT 2 12/17/12 DRAFT 2 12/17/12 5. Refer to the control panel grid to help you browse and select the file from your input device. Press 6. Press to open the selected folder or file. 7. After opening the file, press on the control panel to launch the audio file’s control panel grid.
- Page 47 DRAFT 2 12/17/12 Document Supported document formats: • • • DOCX • • • PPTX • To view documents, refer to the following steps: 1. Connect your device to the LED projector. 2. Turn on the LED projector to launch the Media Center’s onscreen display menu.
- Page 48 DRAFT 2 12/17/12 DRAFT 2 12/17/12 5. Refer to the control panel grid to help you browse and select the file from your input device. Press 6. Press to open the selected folder or file. 7. After opening the file, press on the control panel to launch the Document control panel grid.
-
Page 49: Ezlink
DRAFT 2 12/17/12 EZLink This feature allows you to project from input devices, such as laptops and desktop computers, using a USB cable. To project files using EZLINK USB, you need to install the EZ USB CD in your input device’s operating system. For Windows®: Connect your LED projector to your device using a USB cable. - Page 50 DRAFT 2 12/17/12 DRAFT 2 12/17/12 Using EZLink to project from your input device Turn on your input device then connect to the LED projector using a USB cable. Turn on the LED projector. If the Media Center does not automatically launch, press on the control panel.
-
Page 51: Wifi
DRAFT 2 12/17/12 WiFi This feature enables wireless connections to your LED projector from input devices equipped with Wi-Fi capabilities like laptops and mobile phones. IMPORTANT! A Wi-Fi dongle is required to enable this feature. Inside WiFi Display by AP mode Using this mode, you can establish a one-to-one connection between your input device and your LED projector. - Page 52 EZLINK-WIFI>Display by AP mode. Enable the WiFi connection in your input device. Select ASUS B1 (default SSID) or the new SSID you configured for the B1M LED projector. Type the password on your input device as shown on the LED projector to enable the AP mode connection.
- Page 53 DRAFT 2 12/17/12 Select Projector. Tap the EZ Display feature you would like to use. EZ Remote - This feature allows you to use your mobile phone as a remote control for your LED projector. Pix Viewer - This feature allows you to project photos from your input device.
- Page 54 DRAFT 2 12/17/12 DRAFT 2 12/17/12 Using Display by Client mode Connect the Wi-Fi dongle to your LED projector to launch the Media Center. NOTE: If the Media Center does not automatically launch, press then select EZLINK-WIFI Select Display by Client mode. Press to scroll up or to scroll down the list of available...
-
Page 55: Appendices
DRAFT 2 12/17/12 Appendices Appendices Appendices LED projector E-Manual... -
Page 56: Federal Communications Commission Statement
DRAFT 2 12/17/12 DRAFT 2 12/17/12 Federal Communications Commission Statement This equipment has been tested and found to comply with the limits for a class B digital device, pursuant to Part 15 of the Federal Communications Commission (FCC) rules. These limits are designed to provide reasonable protection against harmful interference in a residential installation. -
Page 57: Canadian Department Of Communications Statement
ASUS follows the green design concept to design and manufacture our products, and makes sure that each stage of the product life cycle of ASUS product is in line with global environmental regulations. In addition, ASUS disclose the relevant information based on regulation requirements. - Page 58 DRAFT 2 12/17/12 LED projector E-Manual...