Table of Contents
Advertisement
Quick Links
Advertisement
Table of Contents

Related Manuals for Asus B1MR


Summary of Contents for Asus B1MR
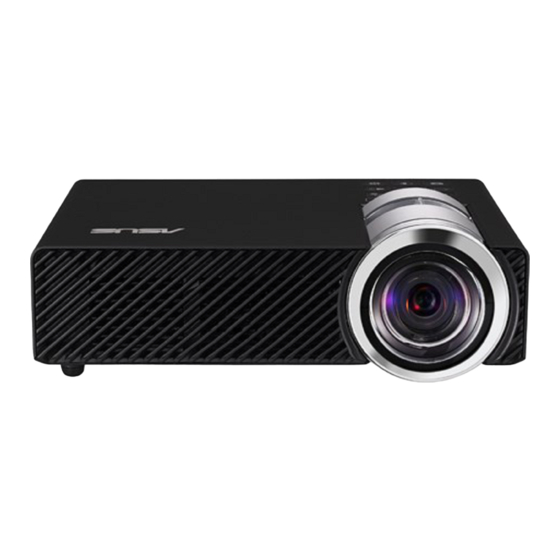
- Page 1 LED projector E-Manual B1M/B1MR...
- Page 2 ASUS will only be responsible for or indemnify you for loss, damages or claims based in contract, tort or infringement under this Warranty Statement. This limit also applies to ASUS’ suppliers and its reseller. It is the maximum for which ASUS, its suppliers, and your reseller are collectively responsible.
-
Page 3: Table Of Contents
Table of Contents About this manual ..................... 5 Conventions used in this manual ............... 6 Typography ......................6 Multi-language versions ................6 Safety precautions ..................... 7 Using your LED projector ................7 Servicing and replacement of parts ............7 Caring for your LED projector ..............8 Proper disposal .................... - Page 4 Appendices Federal Communications Commission Statement ......68 Regional notice for California ..............68 Canadian Department of Communications Statement....69 Global Environmental Regulation Compliance and Declaration .69 ASUS Recycling/Takeback Services ............69 Specifications for B1M/B1MR LED projector .........70 Support PC Timings ..................73 LED projector E-Manual...
-
Page 5: About This Manual
About this manual This manual provides information about the hardware and software features of your LED projector through the following chapters: Chapter 1: Knowing your LED Projector This chapter details the parts of your LED projector and its accompanying remote control. Chapter 2: Setting up This chapter shows you how to set up your LED projector and use its parts for input device connection. -
Page 6: Conventions Used In This Manual
Bold = This indicates a menu or an item that must be selected. Italic = This indicates sections that you can refer to in this manual. Multi-language versions Download other language versions of this E-Manual via this website:http://support.asus.com LED projector E-Manual... -
Page 7: Safety Precautions
Servicing and replacement of parts • Do not disassemble or attempt to service this LED projector by yourself. Contact your local ASUS service center for assistance. • When replacing parts of your LED projector, purchase items as specified by ASUS and contact your local service center for assistance. LED projector E-Manual... -
Page 8: Caring For Your Led Projector
Caring for your LED projector • Switch off then unplug the LED projector from the power outlet before cleaning it. • When cleaning the LED projector’s housing, use a clean soft cloth dampened with water or a mix of water and neutral detergent. Wipe it dry using a soft dry cloth. • Ensure that the lens is cool before cleaning it. Gently wipe the lens using a lens cleaning paper. Do not touch the lens with your hands. -
Page 9: Chapter 1: Knowing Your Led Projector
Chapter 1: Knowing your LED projector Chapter 1: Knowing your LED projector LED projector E-Manual... -
Page 10: Features
Features Top view Focus ring The focus ring allows you to adjust the image focus of your LED projector. LED projector E-Manual... - Page 11 Control panel buttons The control panel buttons allow you to navigate the onscreen display menu. Individually, these buttons also correspond to a specific LED projector setting as indicated below. Media Center Input Power Image Position Brightness Image Quality Keystone Main menu/OK Volume Splendid Contrast...
-
Page 12: Front View
Front view Air vents The air vents allow cool air to enter and warm air to exit the LED projector. WARNING! Ensure that paper, books, clothing, cables, or other objects do not block any of the air vents or else overheating may occur. -
Page 13: Rear View
Rear view AV-IN Infrared (IR) sensor The IR sensor detects signal from your LED projector’s remote control, allowing you to access the LED projector’s control panel from a distance of up to 7 meters and a receiving angle of 15 degrees. Audio output jack port The audio output jack port allows you to connect your LED projector to amplified speakers or headphones. - Page 14 HDMI port This port is for the HDMI (High-Definition Multimedia Interface) connector and is HDCP compliant for HD DVD, Blu-ray, and other protected content playback. VGA port This port allows you to connect your LED projector to other VGA-compatible devices. USB 2.0 port The USB 2.0 (Universal Serial Bus 2.0) port is compatible with USB 2.0 or USB 1.1 devices.
-
Page 15: Right Side
Right side Kensington® security slot The Kensington® security slot allows you to secure your LED projector using Kensington® compatible LED projector security products. Air vents The air vents allow cool air to enter and warm air to exit the LED projector. WARNING! Ensure that paper, books, clothing, cables, or other objects do not block any of the air vents or else overheating may occur. -
Page 16: Left Side
Left side Power (DC) input port Insert the bundled power adapter into this port to charge the AV-IN battery pack and supply power to your LED projector. WARNING! The adapter may become warm to hot while in use. Do not cover the adapter and keep it away from your body while it is connected to a power source. -
Page 17: Bottom View
Bottom view Built-in stand This LED projector comes with a built-in stand that allows you to adjust the height of the projector by either 5 degrees or 9.5 degrees. Tripod socket Connect the LED projector to a tripod using this socket. LED projector E-Manual... -
Page 18: Led Projector Remote Control
LED projector remote control Control panel buttons The control panel buttons allow you to navigate the onscreen display menu. Individually, these buttons also correspond to a specific LED projector setting. NOTE: For more details on using the control panel buttons, refer to the Using the onscreen display menu section in this manual. -
Page 19: Replacing The Battery
Replacing the battery A. Move the battery compartment’s latch to the right to unlock the battery holder. Pull down the battery holder and remove it completely out of the battery compartment. LED projector E-Manual... - Page 20 Remove the old battery then insert the new CR2025 lithium coin battery into the battery holder with the positive side (+) facing D. Slide the battery holder back into the battery compartment. Push it all the way in until you hear a soft click, indicating that the battery compartment is locked back in place.
-
Page 21: Chapter 2: Setting Up
Chapter 2: Setting up Chapter 2: Setting up LED projector E-Manual... -
Page 22: Operating Your Led Projector
A. Connect the AC/DC power cord to the power adapter. Connect the AC power cord to a power source. Connect the DC power connector to your LED projector. NOTE: This LED projector is also compatible with ASUS power adapters within the 65W to 95W range. A V -I... - Page 23 AC power cord requirements Use the correct AC plug type according to your current location. IMPORTANT! Contact your sales dealer if the AC power cord bundled with your LED projector does not match your local power source. NOTE: We highly recommend that you use a video source device that also uses a grounding type plug to prevent signal interference due to voltage fluctuations.
-
Page 24: Connect The Led Projector To Your Device
2. Connect the LED projector to your device A. Audio output jack A V -I A V - A V - LED projector E-Manual... - Page 25 A V - Audio/video input jack A V -I A V - NOTE: Refer to the table below to know which pin to connect into the AV-IN port. Signal Ground White - Left Audio Red - Right Audio Yellow - Video LED projector E-Manual...
- Page 26 SD/SDHC A V -I A V - NOTE: For details on how to launch files from a memory card, refer to the Launching the Media Center section in this manual. LED projector E-Manual...
- Page 27 D. HDMI A V -I A V - NOTE: Some mobile phone models may require a specific adapter for use with HDMI ports. LED projector E-Manual...
- Page 28 A V -I LED projector E-Manual...
- Page 29 USB 2.0 A V - Compatible USB 2.0 input devices: Wi-Fi dongle USB cable Flash drive NOTE: For details on using the USB 2.0 port to launch supported file formats, refer to the Launching the Media Center section in this manual. LED projector E-Manual...
-
Page 30: Adjust The Height Of The Led Projector
3. Adjust the height of the LED projector Your LED projector comes with a built-in stand that helps adjust the image height onscreen. WARNING! Ensure that the built-in stand is fully retracted before placing the LED projector inside the projector bag. NOTES: • Place the LED projector on a stable flat surface. - Page 31 Screen size and projection distance table Adjust the LED projector’s distance from the screen using the table below. screen size LED projector projection distance Screen size - 16:10 Projection distance (inches) (millimeters) (meters) 0.58 1016 0.78 1524 1.16 2032 1.55 2540 1.94 3048...
-
Page 32: Press The Power Button
4. Press the power button LED projector E-Manual... -
Page 33: Adjust The Image Focus
5. Adjust the image focus Move the focus ring to the left or to the right to adjust the image focus. NOTE: Use a still image when adjusting the onscreen display. LED projector E-Manual... - Page 34 LED projector E-Manual...
-
Page 35: Chapter 3: Using The Onscreen Display Menu
Chapter 3: Using the onscreen display menu Chapter 3: Using the onscreen display menu LED projector E-Manual... -
Page 36: Launching Programs From The Onscreen Display Menu
NOTE: The following screenshots are for reference only and may be updated without prior notice. Launching programs from the onscreen display menu The onscreen display menu contains a set of programs and settings designed to maximize your use of the LED projector. You can navigate inside the onscreen display menu using the control panel buttons on your LED projector or its accompanying remote control. -
Page 37: Control Panel Grid
Control panel grid The control panel grid guides you through the process of using the control panel buttons to launch active options inside your onscreen display menu. The control panel grid represents the 8 buttons surrounding the button on the control panel. control panel buttons control panel grid sample LED projector E-Manual... -
Page 38: Using Your Led Projector For The First Time
Refer to the following steps when using your LED projector for the first time. Set up your LED projector then press the power button once. The ASUS welcome screen appears to indicate that the LED projector is now turned on. Using the control panel buttons, select the language you want to use in your LED projector. - Page 39 Off - This option disables viewing demo videos on your LED projector and proceeds to scan for connected input devices. IMPORTANT! This option deactivates the Demo Mode control panel grid and instead launches the Input control panel grid whenever you turn on your LED projector.
-
Page 40: Accessing Your Led Projector's Settings
Accessing your LED projector’s settings Aside from using the control panel buttons to navigate the onscreen display menu, you can also use each of these buttons to launch the following LED projector settings: IMPORTANT! Press Projector Setting on the control panel grid to use these functions in the Media Center. - Page 41 Contrast Press this button to set the difference between lighten or darken your projection onscreen. Media Center Press this button to launch the Media Center. NOTE: For more details, refer to the Using the Media Center section in this manual. Input Press this button to scan the connected devices to your LED projector.
- Page 42 Splendid Press this button to activate either of the following display modes: Standard, Black Board, White Board, Dynamic, sRGB, Theater, Scenery. LED projector E-Manual...
- Page 43 Image Setting Press this button to access the following image settings: NOTE: The available options under Image Setting varies between the VGA and Composite source. Color Temperature - This option allows you to adjust the light • temperature of your LED projector according to the following options: Low, Medium, High.
- Page 44 Image Position Press this button to access the following image position settings: Auto Keystone - This option allows you to automatically adjust • the alignment of your image. Horizontal Positioning - This option allows you to shift the • image’s position horizontally. Projector Position - This option allows you to adjust the •...
- Page 45 Phase - This option allows you to adjust the number of lines • emitted by the LED projector relative to the computer. Clock - This option allows you to adjust the frequency of the • LED projector relative to the computer. LED projector E-Manual...
- Page 46 Setup Press this button to access the following LED projector settings: Information - This option shows you the following information • about your LED projector: currently used input port, LED projector’s model name, and currently use Splendid mode. Reset All - This option allows you to reset all the settings you •...
- Page 47 Power Timeout - This option allows you to set the number of • minutes before your LED projector automatically shuts down when not in use. Demo Mode - This option turns the demo video features of your • LED projector on or off. NOTE: For more details, refer to the Using Demo Mode section in this manual.
-
Page 48: Using 3D Glasses
Using 3D glasses Your LED projector supports 3D technology for an enhanced viewing experience. Refer to the following details when using your purchased 3D glasses with this LED projector. IMPORTANT: Purchase TI 3D-ready glasses. Your 3D files must be compatible with the TI 3D format. NOTE: For more details on viewing 3D files, refer to the user guide that comes with your 3D glasses. -
Page 49: Using Demo Mode
Using Demo Mode View the internal demo video that comes with your LED projector or your own demo videos using Demo Mode. Demo Mode is automatically enabled in your LED projector if you chose On when you turn on the device for the first time. However, choosing Off disables this feature. -
Page 50: Creating And Playing Your Own Demo Video
Connect the SD card or USB drive to your LED projector. Turn on the LED projector. If Demo Mode is enabled, press On to play the demo video stored in the ASUS folder of your SD card or USB drive. -
Page 51: Using The Media Center
Using the Media Center Show photos, play videos, listen to audio music, and view documents using your LED projector’s Media Center. Through the Media Center, you can also access the Wi-Fi capabilities of your LED projector and connect to USB-enabled input devices. Launching the Media Center The Media Center automatically launches after the LED projector detects an SD card, external drive, or Wi-Fi dongle connection. -
Page 52: Opening Files From The Sd Card Or Usb Drive
Opening files from the SD Card or USB Drive Photo Supported image file formats: • JPG • JPEG • BMP (bitmap) To open an image file: 1. Connect your input device to the LED projector. 2. Turn on the LED projector to launch the Media Center’s onscreen display menu. - Page 53 Video File Type Video Codec Resolution Frame Audio Remarks Rate Rate Codec DIVX4/5/6 1080P 30 fps No Support VC-1 XVID Mbps DIVX MPEG-2/4 MPEG 1/2/3 H. 264 H. 264 support M-JPEG ADPCM less than 4 WMV3 reference frames MPEG-2 1080P 30 fps H.
- Page 54 To open a video file: 1. Connect your input device to the LED projector. 2. Turn on the LED projector to launch the Media Center’s onscreen display menu. 3. Select the input device you wish to access. 4. Select Video. 5.
- Page 55 Audio File Type Sample Rate (KHz) Bit Rate (Kbps) MP1/ MP2/ MP3 8-48 8—320 22-48 5—320 8-48 64—320 ADPCM-WAV 8-48 32—384 PCM-WAV 8-48 128—1536 8-48 8—256 To play audio files, refer to the following steps: 1. Connect your device to the LED projector. 2.
- Page 56 Document File Type Support Version Pages /Lines Size Limitation Comment Limitation Adobe PDF PDF 1.0 Up to 100 pages Up to 75 MB PDF 1.1 (One File) PDF 1.2 PDF 1.3 PDF 1.4 Microsoft® Microsoft® Office Word 1995, Because the office Up to 100 MB Does not support Office Word...
- Page 57 To view documents, refer to the following steps: 1. Connect your device to the LED projector. 2. Turn on the LED projector to launch the Media Center’s onscreen display menu. 3. Select the input device you wish to access. 4. Select Document. 5.
-
Page 58: Ezlink
Ezlink This feature allows you to project from input devices, such as laptops and desktop computers, using a USB cable. To project files using Ezlink you need to install EZ Display in your input device’s operating system. For Windows®: Connect your LED projector to your device using a USB cable. Turn on your input device and go to My Computer. - Page 59 Using Ezlink to project from your input device Turn on your input device then connect to the LED projector using a USB cable. Turn on the LED projector. If the Media Center does not automatically launch, press on the control panel. Select EzLink.
-
Page 60: Wifi
• from Google® Play Store. If you are using an iOS, download ASUS WiFi Projection from • App Store. • If you are using a laptop, tablet, or desktop PC, download the ASUS WiFi Projection software using the following steps: 1. Turn on your device then select ASUS-B1MR from the list of available wireless networks. LED projector E-Manual... - Page 61 2. Type the password as shown on your LED projector. 3. After connecting your device, type in this IP address on your browser: http://192.168.111.1 LED projector E-Manual...
- Page 62 4. Download ASUS WiFi Projection software from the IP address by clicking on either of the following icons. NOTE: The ASUS WiFI projection software is compatible with Windows® 7, Windows® XP, Windows® Vista, and Mac® OS X. The list of compatible operating systems are subject to change without prior notice.
- Page 63 WiFi>Display via AP mode. Enable the WiFi connection in your input device. Select ASUS- B1MR (default SSID) or the new SSID you configured for the B1M/B1MR LED projector. NOTE: You may also refer to the steps presented onscreen.
- Page 64 Refer to the control panel grid when navigating the keyboard to input the Wi-Fi hotspot’s password then press Enter. NOTE: The B1M/B1MR LED projector supports WPA/WPA2-enabled devices. Press OK to start the Wi-Fi connection between the Wi-Fi hotspot and your LED projector.
-
Page 65: Multi-Language Versions
Using WiFi Client setting This scans the available WiFi hotspots that you can connect to your LED projector to enable the Display by Client mode. Multi-language versions Download other language versions of this E-Manual via this website:http://support.asus.com LED projector E-Manual... - Page 66 LED projector E-Manual...
-
Page 67: Appendices
Appendices Appendices Appendices LED projector E-Manual... -
Page 68: Federal Communications Commission Statement
Federal Communications Commission Statement This equipment has been tested and found to comply with the limits for a class B digital device, pursuant to Part 15 of the Federal Communications Commission (FCC) rules. These limits are designed to provide reasonable protection against harmful interference in a residential installation. -
Page 69: Canadian Department Of Communications Statement
ASUS follows the green design concept to design and manufacture our products, and makes sure that each stage of the product life cycle of ASUS product is in line with global environmental regulations. In addition, ASUS disclose the relevant information based on regulation requirements. -
Page 70: Specifications For B1M/B1Mr Led Projector
Specifications for B1M/B1MR LED projector Display Display Technology 0.45” DLP® Light Source R/G/B LED Light Source Life 30,000 hours (max) True Resolution (native) WXGA 1280x800 Light Output 900 Lumens (B1MR), 700 Lumens (B1M) Contrast Ratio (typical) 3500:1 DCR Color Saturation (NTSC) - Page 71 Power Power On Mode ≤65W(Eco mode)/≤85W(Normal Mode) Standby Mode <0.5W Noise Acoustic Noise Normal mode: 32dBA - 34dBA Eco mode: 28dBA - 30dBA Input or PC Signal Input D-sub, HDMI1.3 (HDCP support) Output Video Input Composite Video Audio Out Earphone out Card Reader Yes (1 x SD card slot for multimedia playback)
- Page 72 Mechanical Chassis Colors Black Design Tripod Socket Supporting Stand Yes (tilt angle: 5±1° and 9.5 ±1°) On-machine Buttons Yes (Media Center, Input, Power, Image position, Brightness, Image quality, Keystone, Enter, Volume, Splendid, Contrast, Setup) Lens Cover Security Kensington lock Dimension Physical Dimension 175(W)x139(D)x44.5(H)mm Box Dimension...
-
Page 73: Support Pc Timings
Support PC Timings DSUB Input Resolution Mode Refresh rate (Hz) H-frequency (kHz) Clock (MHz) 720 x 400 720x400_70 70.087 31.469 28.322 640 x 480 VGA_60 59.94 31.469 25.175 VGA_72 72.809 37.861 31.5 VGA_75 37.5 31.5 VGA_85 85.008 43.269 800 x 600 SVGA_56 56.25 35.156... - Page 74 HDMI (PC) Resolution Mode Refresh rate (Hz) H-frequency (kHz) Clock (MHz) 640 x 480 VGA_60 59.94 31.469 25.175 VGA_72 72.809 37.861 31.5 VGA_75 37.5 31.5 VGA_85 85.008 43.269 720 x 400 720x400_70 70.087 31.469 28.322 800 x 600 SVGA_60 60.317 37.879 SVGA_72 72.188...