Table of Contents
Advertisement
Advertisement
Table of Contents

Related Manuals for AEG LAVATHERM 56609 EXCLUSIV


Summary of Contents for AEG LAVATHERM 56609 EXCLUSIV
- Page 1 LAVATHERM 56609 EXCLUSIV Condensation Dryer Operating instructions...
-
Page 2: Dear Customer
Dear customer, Please read these operating instructions through carefully. Please make sure you read the safety instructions on the first pages of these operating instructions! Keep the operating instructions for future reference. Pass them on to any future owners. With the warning triangle and/or by means of key words (Danger!, Caution!, Attention!), information is emphasized which is important for your safety or the correct functioning of the appliance. -
Page 3: Table Of Contents
Content Safety instructions ..........5 General information . - Page 4 Content Troubleshooting ..........26 Replace the filament bulb .
-
Page 5: Safety Instructions
Safety instructions 1 Safety instructions The safety of AEG electrical appliances complies with the established technical principles and statutory equipment safety regulations. Nevertheless, as manufacturer we have to draw your attention to the following safety instructions. General safety • Repairs of the dryer may be carried out only by trained personnel. - Page 6 Safety instructions Safety of children • Children are often not aware of the dangers involved when handling electrical equipment. Therefore provide the necessary supervision of children when operating the appliance and do not let children play with the dryer – there is a danger that children could become trapped inside the appliance.
-
Page 7: Installation And Connection
Safety instructions Installation and connection • First take-off the base shroud before carrying the dryer! • Check the dryer for Transportation damage. Never connect-up a damaged appliance! Contact your supplier if the appliance is damaged. • Do not set-up the dryer in frost-endangered rooms! •... -
Page 8: General Information
General information 3 General information • Starched washing leaves traces of starch on the drum and therefore should not be placed in the tumble dryer. • If you exceed the maximum load stipulated in the program table your washing is more likely to get creased! For very delicate fabrics you should only fill in 1.5kg washing at the most. -
Page 9: Disposal
Disposal 2 Disposal Dispose of the packaging material! Dispose of the packaging material of your tumble dryer correctly. All the packaging materials used are harmless to the environment and can be recycled. • Plastic parts are marked with standard international abbreviations: –... -
Page 10: Environmental Protection Tips
Environmental protection tips 2 Environmental protection tips • When washing, do not use soft rinsing agent! Your laundry will become light and soft in the laundry dryer even without a soft rinsing agent. Just try it! • Loosen your laundry! Loosen your laundry before filling it into the dryer. - Page 11 Environmental protection tips • Choose the right drying program! Choose the right drying program for the kind and quantity of laundry. The dryer will then operate as economically as possible. Some typical consumption values: Power Fill weight Duration in Drying program consumption in kg Minutes...
-
Page 12: Construction Of The Appliance
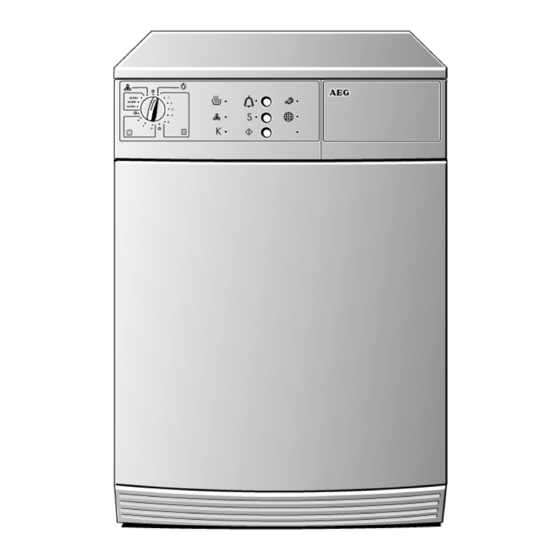
Construction of the appliance Construction of the appliance Front view Condensate container Fluff filter Operator control mask with handle flap Filament lamp bulb interior illumination (inside the drum) Type plate Ventilation slots Feet Base mask Fill-in door (all height-adjustable) in front of heat (stop exchangeable) exchanger... -
Page 13: Operator Control Mask
Construction of the appliance Operator control mask A Program selector: for setting the drying program : light : programs for cottons : programs for easy care fabrics : cool air B Program run display: The currently running phase of the drying process is indicated. -
Page 14: The Program Selector
Before the first drying process The program selector • Setting OFF Y: The laundry dryer is switched off. • Setting LIGHT: the drum illumination is switched-on when the fill-in door is opened. • Program group 1-5 R COTTON: Here you find the programs for drying cotton and linen fabrics;... -
Page 15: Brief Operating Instructions
Brief operating instructions Brief operating instructions • Remove as much water as possible from the laundry before drying. • Preparing the laundry. • Filling-in the laundry. • Set the drying program on the program selector. – Press the SPECIAL CARE button? –... -
Page 16: Drying
Drying Drying Preparing the laundry • To prevent tangled bundles of laundry: Close zip fasteners; button-up bed linen and pillow cases; tie-together loose tapes, e.g. of aprons. • Empty all pockets. • Remove all metal objects (paper clips, safety pins, etc.). •... -
Page 17: Start The Drying Program
Drying • AUDIBLE SIGNAL Button During the crease-protection phase (immediately after the drying process), an acoustic signal is sounded at certain intervals (see "End of drying process"). • SPECIAL CARE button The set program is executed with reduced heating power. Press the SPECIAL CARE button for textiles bearing the care symbol S. -
Page 18: Take-Out Laundry Or Put-In Laundry When Necessary
Drying Take-out laundry or put-in laundry when necessary You can interrupt the drying process at any time to take out some laundry or to put in more laundry. 0 Open the fill-in door. Caution! The laundry and the drum may be hot. -
Page 19: Empty The Condensate Container
Drying Empty the condensate container Caution! The condensate is not suitable for drinking or for use with foodstuffs. Make it a habit to empty the condensate container after every drying process. This avoids automatic interruption of the drying process when the condensate container is full. -
Page 20: Clean The Fluff Filter
Drying Clean the fluff filter To ensure unimpeded air circulation during the drying process, clean the fluff filter after each drying process. Also check whether there are any remnants or fluff from the washing in the drum; remove immediately. 0 Press the unlatching button of the filter lid downwards. -
Page 21: Program Tables
Program tables Program tables Program group 1-5 COTTONS care symbols R, Q; fill-in quantity up to 5kg Program Laundry type Examples for laundry/Textiles Thick or multi-layer textiles EXTRA DRY which are to be dried Towel laundry, dressing gowns throughout Textiles of uniform thickness CUPBOARD Towel laundry, jersey laundry, which are to be dried... -
Page 22: Time Programs
Program tables TIME programs care symbols R, S , Q; fill-in quantity less than 1kg You can select between 20, 40 and 60 minutes program duration for after-drying individual pieces of laundry or to dry small quantities. 1) Press the W SPECIAL CARE button! COOL AIR Program V: The laundry is treated for 10 minutes in a stream of cold air;... -
Page 23: A Small Glossary Of Textile Information
A small glossary of textile information A small glossary of textile information Care symbols Check whether your fabric is suitable for tumble drying. One of the following symbols should be present on the care label: Basically, this fabric can be tumble dried. The fabric manufacturer does not stipulate if the piece of laundry in question can be dried on the normal program or if the gentle drying program must be used. -
Page 24: Cleaning And Maintenance
Cleaning and maintenance Cleaning and maintenance Cleaning the condenser Important! It is essential to clean the condenser after every thirty drying processes. Otherwise your dryer might suffer damage. Furthermore, energy consumption is greater when the condenser is covered with fluff. 0 Open the fill-in door. -
Page 25: Cleaning The Filter Area
Cleaning and maintenance Cleaning the filter area A small amount of fluff reaches the area around the filter in spite of the fluff filter. Therefore you should clean the entire filter area from time to time, but at least every three months. 0 Remove the fluff filter. -
Page 26: Troubleshooting
Troubleshooting Troubleshooting In the event of a malfunction try to solve the problem yourself using the information below. If you call out the customer service to solve one of the problems listed here or due to incorrect operation, a charge will be made for the visit of the service engineer even during the warranty period. - Page 27 Troubleshooting Problem Possible cause Remedy Heat exchanger covered Cleaning the heat The drying process takes with fluff exchanger unusually long Fluff filter clogged Clean the fluff filter Fluff filter not inserted Insert the fluff filter and/ The fill-in door cannot be and/or filter lid not or let the filter lid latch closed...
-
Page 28: Replace The Filament Bulb
Troubleshooting Replace the filament bulb 0 Procure a special filament bulb for your Lavatherm through the customer service organisation (ET-No. 647072580). Warning! Never use standard lamp bulbs in your Lavatherm! They produce too much heat, causing overheating under the lamp covering hood and possible damage. -
Page 29: Changing-Over The Door Stop
Changing-over the door stop Changing-over the door stop If the door stop does not suit the local conditions, it can be changed over. Warning! Before changing-over the door stop,disconnect the mains plug; if the installation is permanent: Screw-out the fuse or switch-off the circuit breaker. - Page 30 Changing-over the door stop 0 Remove the notched lock cover J. 0 Insert the door lock H and lock cover J in the opening on the opposite side and screw it down/let it click in. 0 Push the door with the hinges into the openings provided in the front of the appliance and screw it down.
-
Page 31: Technical Data
Technical data Technical data HeightxWidthxDepth 85x60x60cm Depth with the door open 117cm Height adjustable from 1.0/–0.4cm Empty weight approx. 46kg Load (depending on the program) max. 5kg (Different loads in some countries are due to different measuring methods) Power consumption in acc. with IEC 1121 s.e. 3.5kWh (5 kg Cotton, spun at 800 revolutions per minute, program 2... -
Page 32: Special Accessories
Special accessories Special accessories You can obtain the following special accessories through the AEG customer service organisation or from your dealer: Kit for external condensate drain-off With this kit (E-No. 916 019 000) you can lead the condensate directly into a drain (sink, siphon, drain grating) with a maximum feed height of 1m above the floor on which the dryer is standing (3m Length). -
Page 33: Content
Content Acryl ....... 17 Solvent(s) ......6 Acrylic . -
Page 35: Service
Service In the chapter "Troubleshooting" some disturbances have been summarised, which you can solve yourself. If you do not find any helpful information there, please contact your local customer service centre. It is nearby and if necessary can reach you quickly. (Addresses and phone numbers can be found in the Warranty Conditions/Service Departments) Be well prepared before you phone. - Page 36 AEG Hausgeräte GmbH Postfach 1036 D-90327 Nürnberg http://www.aeg.hausgeraete.de © Copyright by AEG H 245 217 610 –00- 0300/PRO...