Table of Contents
Advertisement
Advertisement
Table of Contents

Related Manuals for AEG LAVATHERM 55800


Summary of Contents for AEG LAVATHERM 55800
- Page 1 LAVATHERM 55800 Condensation dryer User information...
-
Page 2: Dear Customer
Dear Customer, Please read this user information carefully and keep it to refer to later. Please pass the user information on to any future owner of the appli- ance. The following symbols are used in the text: Safety instructions Warning! Information that affects your personal safety. Important! Information that prevents damage to the appliance. -
Page 3: Table Of Contents
Contents Operating Instructions Safety ............Disposal . - Page 4 Installation and connection instructions ....24 Installation safety instructions ........24 Removing transport safety equipment .
-
Page 5: Operating Instructions
Operating Instructions 1 Safety Before first starting up • Note the ”Installation and connection instructions” • Before first starting up, check the machine for any damage incurred during transport. Never connect up a damaged machine. If parts are damaged, contact your supplier. Intended use •... -
Page 6: Child Safety
Child safety • Keep packaging away from children. Risk of suffocation! • Children can often not see the dangers associated with electric ma- chines. Never leave unsupervised children near the dryer. • Ensure that children and small animals cannot climb into the dryer’s drum. -
Page 7: Disposal
Disposal Packaging material The packaging materials are environmentally friendly and can be recy- cled. The plastic components are identified by markings, e.g. >PE<, >PS<, etc. Please dispose of the packaging materials in the appropriate container at your local waste disposal facilities. Old appliance Please dispose of your old appliance in line with the guidelines for dis- posal in your area. -
Page 8: Description Of Machine
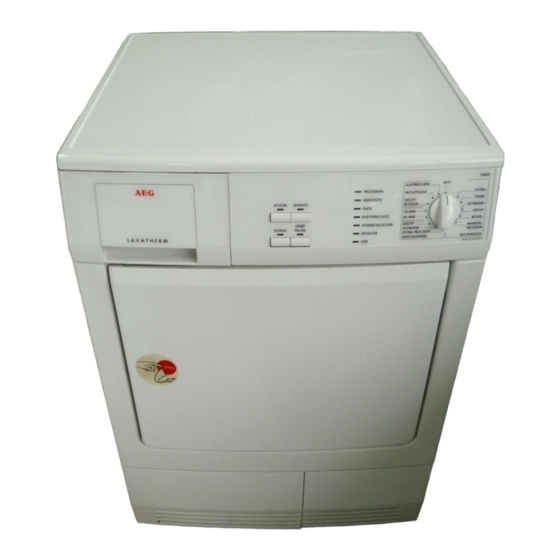
Description of machine Drawer containing condensate tank Lamp for inside light Micro-fine filter (lint filter) Type plate Base door up- stream of heat ex- changer Operating screen Block of but- tons and dis- Air slots Programme progress display Maintenance displays –... -
Page 9: Before The First Drying Cycle
Before the first drying cycle In order to remove any residue which may have been produced during production, wipe the dryer drum with a damp cloth or undertake a brief drying cycle (20 MIN) with damp cloths. Sorting and preparing laundry Sorting laundry •... -
Page 10: Overview Of Programmes
Overview of programmes Programme EXTRA DRY INTENSIVE STORAGE DAMP HAND IRON MACHINE IRON EXTRA DRY STORAGE DAMP 1) SPECIAL CARE and SENSITIVE cannot both be selected at the same time. 2) Press the SPECIAL CARE button! Additional functions Application/properties Drying thick or multi-layered tex- •... - Page 11 Additional Programme 20 MIN • 40 MIN EASY IRON • WOOL CARE • REFRESH • 1) SPECIAL CARE and SENSITIVE cannot both be selected at the same time. 2) Press the SPECIAL CARE button! functions Application/properties For drying individual items of laundry •...
-
Page 12: Drying
Drying Switching machine on / switching light on Turn the programme selector to any programme or turn it to LIGHT. The machine has been switched on. When the loading door is opened, the drum is illuminated. Opening loading door / loading laundry 1. -
Page 13: Audible Signal
AUDIBLE SIGNAL When the drying cycle has finished, an intermittent audible signal will sound. SENSITIVE For gentle drying of frequently-worn textiles. Programme starts on full heat setting, which is then reduced towards the end of the programme to ensure gentle care of laundry. SPECIAL CARE and SENSITIVE cannot be selected together. -
Page 14: Drying Cycle Complete / Removing Laundry
Drying cycle complete / removing laundry Once the drying cycle is complete, the END and CREASE GUARD dis- plays light up. If the AUDIBLE SIGNAL button has been pressed, an au- dible signal sounds intermittently. The drying cycle is automatically followed by a crease guard phase which lasts around 30 minutes. -
Page 15: Cleaning And Maintenance
Cleaning and maintenance Cleaning fluff filter To ensure that the dryer works perfectly, the fluff filters (micro-fine fil- ter and fine strainer) must be cleaned after every drying cycle. Caution! Never operate the dryer without fluff filters or with damaged or blocked fluff filters. -
Page 16: Emptying The Condensate Tank
Clean the entire filter area The strainer area does not have to be cleaned after every drying cycle, but should be checked regularly and cleaned of fluff if necessary. 6. To do this, grip the top of the large mesh filter and pull it forwards un- til it comes loose from the two brackets. -
Page 17: Cleaning Heat Exchanger
1. Pull drawer containing condensate tank out all the way. 2. Pull out condensate tank’s outlet connections and pour condensate out into basin or other suitable container. 3. Slide outlet connections in and re- fit condensate tank. If the programme has been inter- rupted as a result of the conden- sate tank being full: Press the START/PAUSE button to continue the drying cycle. -
Page 18: Cleaning The Drum
4. Turn both lock washers inwards. 5. Pull heat exchanger out of base by the handle. Caution! Do not use sharp objects to clean. The heat exchanger could develop leaks. 6. Clean heat exchanger. It is best to use a brush or to rinse thoroughly with a shower head. -
Page 19: What To Do If
What to do if…? Troubleshooting by yourself If, during operation, the dryer shows an error display (one or more dis- plays flashing on the programme progress display), check first of all whether you can remedy the problem yourself by means of the table below. - Page 20 Problem When pressing a but- ton, the corresponding button flashes several times. Drum light does not work. Programme inactive, EMPTY WATER display illuminated. Drying cycle ends shortly after pro- gramme starts. END display illuminated. Drying cycle lasts an unusually long time. Note: After up to 5 hours the drying cycle finishes...
-
Page 21: Changing Bulb For Inside Light
Changing bulb for inside light Only use a special bulb which is designed specially for dryers. The spe- cial bulb is available from the after-sales service, ET-Nr. 112 552 000-5. Warning! Do not use standard bulbs! These develop too much heat and may damage the machine! Warning! Before replacing the bulb, disconnect the mains plug;... -
Page 22: Programming Options
Programming options Objective Permanently program in the audible signal which reminds you that the programme is com- plete. Adjust detection of de- gree of drying: If the laundry is slightly drier or slightly damp- er at the end of the programme than with the standard setting. -
Page 23: Technical Data
Technical data This appliance conforms with the following EU Directives: – 73/23/EEC dated 19.02.1973 Low Voltage Directive – 89/336/EEC dated 03.05.1989 EMC Directive inclusive of Amending Directive 92/31/EEC – 93/68/EEC dated 22.07.1993 CE Marking Directive Height x width x depth Depth with loading door open Height can be adjusted by Weight when empty... -
Page 24: Installation And Connection Instructions
Installation and connection instructions 1 Installation safety instructions • Before first starting up, all parts of the transport safety equipment must be removed. The machine may otherwise be damaged. • Before starting up for the first time, ensure that the nominal voltage and type of current specified on the machine type plate match the nominal voltage and type of current at the installation site. -
Page 25: Electrical Connection
Electrical connection Any electrical work required to install this appliance should be carried out by a qualified electrician or competent person. WARNING – THIS APPLIANCE MUST BE EARTHED. The manufacturer declines any liability should these safety measures not be observed. Before switching on, make sure the electricity supply voltage is the same as that indicated on the appliance rating plate. -
Page 26: Changing Door Stop
Permanent Connection In the case of a permanent connection it is necessary that you install a double pole switch between the appliance and the electricity supply (mains), with a minimum gap of 3mm between the switch contacts and of a type suitable for the required load in compliance with the current electrical regulations. - Page 27 5. Unscrew hinge A from the loading door, rotate through 180°, reinsert on the opposite side and screw down. 6. Reinsert cover plates B and C on the opposite site having first rotated them through 180°. 7. Unscrew cover plates E from the front of the machine, rotate through 180, screw on the opposite side.
-
Page 28: Special Accessories
Special accessories The following special accessories are available from your specialist dealer: Intermediate installation kits for stacked washer and dryer: These intermediate installation kits can be used to arrange the dryer and an automatic AEG washing machine (60cm wide, front loading) as a space-saving washer/dryer stack. -
Page 29: Warranty Conditions
Warranty conditions Great Britain Standard guarantee conditions We, AEG, undertake that if within 12 months of the date of the purchase this AEG appliance or any part thereof is proved to be defective by reason only of faulty workmanship or materials, we will, at our discretion repair or replace the same FREE OF CHARGE for labour, materials or carriage on condition that: •... -
Page 31: Service And Spare Parts
Service and Spare Parts If the event of your appliance requiring service, or if you wish to pur- chase spare parts, please contact Service Force by telephoning: 0870 5 929 929 Your telephone call will be automatically routed to the Service Force Centre covering your post code area. - Page 32 From the Electrolux Group. The world´s No.1 choice. The Electrolux Group is the world´s largest producer of powered appliances for kitchen, cleaning and outdoor use. More than 55 million Electrolux Group products (such as refrigerators, cookers, washing machines, vacuum cleaners, chain saws and lawn mowers) are sold each year to a value of approx. USD 14 billion in more than 150 countries around the world.