NETGEAR DGN2200v1 User Manual
N300 wireless adsl2+ modem router
Hide thumbs
Also See for DGN2200v1:
- Setup manual (43 pages) ,
- Installationshandbuch (43 pages) ,
- Configuration manual (7 pages)

Related Manuals for NETGEAR DGN2200v1


Summary of Contents for NETGEAR DGN2200v1
-
Page 1: User Manual
N300 Wireless ADSL2+ Modem Router DGN2200 User Manual 350 East Plumeria Drive San Jose, CA 95134 February 2011 202-10563-04 v1.0... -
Page 2: Technical Support
NETGEAR, Inc. Technical Support Thank you for choosing NETGEAR. To register your product, get the latest product updates, or get support online, visit us at http://support.netgear.com. -
Page 3: Table Of Contents
NETGEAR Genie Setup ........ - Page 4 N300 Wireless ADSL2+ Modem Router DGN2200 Turn Off Wireless Connectivity ....... . 30 Disable SSID Broadcast .
- Page 5 N300 Wireless ADSL2+ Modem Router DGN2200 Run Diagnostic Utilities........61 Chapter 6 USB Storage USB Drive Requirements .
- Page 6 Step 1: Configure the Client-to-Gateway VPN Tunnel ....98 Step 2: Configure the NETGEAR ProSafe VPN Client... . . 101 Set Up a Gateway-to-Gateway VPN Configuration .
- Page 7 Configuration Summary (Telecommuter Example) ....149 Setting Up Client-to-Gateway VPN Configuration (Telecommuter Example)150 Step 1: Configure Gateway A (the NETGEAR VPN Router at the Main Office)151 Step 2: Configure Gateway B (the Modem Router at the Regional Office)152 Monitoring the VPN Tunnel (Telecommuter Example) .
-
Page 8: Chapter 1 Hardware Setup
(PCs, gaming consoles, and so on) that you connect to your home network. For more information on the topics covered in this manual, visit the Support website at http://support.netgear.com. If you have not already set up your new modem router using the installation guide that comes in the box, this chapter walks you through the hardware setup. -
Page 9: Unpack Your Modem Router
Installation guide with cabling and modem router setup instructions • If any parts are incorrect, missing, or damaged, contact your NETGEAR dealer. Keep the carton and original packing materials, in case you need to return the product for repair. Hardware Features Before you cable your modem router, take a moment to become familiar with the label and the front and back panels. -
Page 10: Back Panel
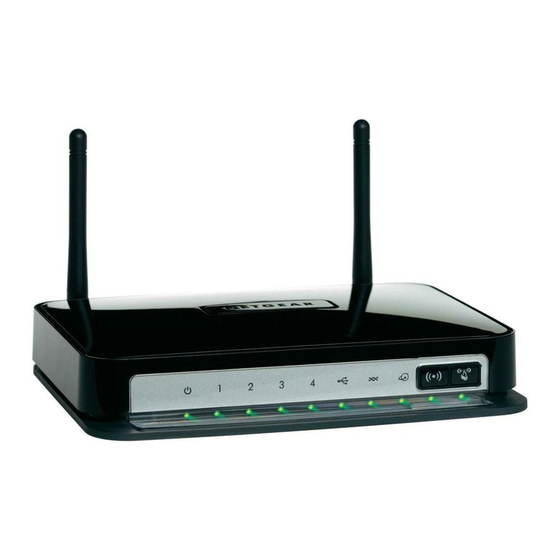
N300 Wireless ADSL2+ Modem Router DGN2200 Back Panel The back panel has the On/Off button and port connections as shown in the figure. Power ADSL On/Off Ethernet LAN Figure 2. Back panel port connections Front Panel The modem router front panel has the status LEDs and icons shown in the figure. Note that the Wireless and WPS icons are buttons. - Page 11 N300 Wireless ADSL2+ Modem Router DGN2200 Table 1. Front Panel LEDs Icon LED Activity Description Power Solid green Power is supplied to the modem router. Solid red POST (power-on self-test) failure or a device malfunction has occurred. Power is not supplied to the modem router. Restore factory The LED blinks momentarily when the Restore Factory Settings button on settings...
-
Page 12: Modem Router Stand
N300 Wireless ADSL2+ Modem Router DGN2200 Modem Router Stand For optimal wireless network performance, use the stand (included in the package) to position your modem router upright. Orient your modem router vertically. Insert the tabs of the stand into the slots on the bottom of your modem router as shown. -
Page 13: Adsl Microfilters
N300 Wireless ADSL2+ Modem Router DGN2200 ADSL Microfilters If this is the first time you have cabled a router between a DSL phone line and your computer or laptop, you might not be familiar with ADSL microfilters. If you are, you can skip this section and proceed to on page 14. -
Page 14: Summary
N300 Wireless ADSL2+ Modem Router DGN2200 microfilter into the wall outlet, plug your phone equipment into the jack labeled Phone, and plug the modem router into the jack labeled ADSL. Plugs into the DSL line Figure 5. Two-line ADSL microfilter with built-in splitter Summary One-line ADSL microfilter. - Page 15 N300 Wireless ADSL2+ Modem Router DGN2200 Use the included phone cable with RJ-11 jacks to connect the ADSL port (A) of the modem router to the ADSL port (B) of the two-line ADSL microfilter. Figure 7. Cable the modem modem router to the microfilter Connect the Ethernet cable from a modem router LAN port (C) to an Ethernet port (D) in your computer Figure 8.
-
Page 16: Verify The Cabling
N300 Wireless ADSL2+ Modem Router DGN2200 Verify the Cabling Verify that your modem router is cabled correctly by checking the modem router LEDs. Turn on the modem router by pressing the On/Off button on the back. The Power LED is green when the modem routeris turned on. •... -
Page 17: Chapter 2 Modem Router Setup
This chapter explains how to set up your Internet connection using one of three methods: NETGEAR Genie®, Setup Wizard, or manual setup. If you have already set up your modem router using one of these methods, the initial setup is complete. Refer to this chapter if you want to become familiar with the modem router menus, view or adjust the initial settings, or change the modem router password and login time-out. -
Page 18: Modem Router Setup Preparation
N300 Wireless ADSL2+ Modem Router DGN2200 Modem Router Setup Preparation You can set up your modem router with the NETGEAR Genie as described in NETGEAR on page 19, with the Setup Wizard as described in on page 22, or Genie Setup... -
Page 19: Netgear Genie Setup
N300 Wireless ADSL2+ Modem Router DGN2200 NETGEAR Genie Setup NETGEAR Genie is on the Resource CD and runs on a PC with Microsoft Windows 7, Windows Vista, Windows XP, or Windows 2000 with Service Pack 2 or later. It is the easiest way to set up the modem router because it automates many steps and verifies that those steps have been successfully completed. -
Page 20: Log In To The Modem Router
URL, your computer might need a minute or two to recognize the LAN connection. Relaunch your browser and try again. If you are having trouble accessing the modem router wirelessly, NETGEAR recommends that during setup you use an Ethernet cable to connect your computer so that you can log in to the modem router. -
Page 21: Upgrade Modem Router Firmware
Click Yes to check for new firmware (recommended). The modem router checks the NETGEAR database for new firmware. If no new firmware is available, click No to exit. You can check for new firmware later. -
Page 22: Setup Wizard
These links work once you have an Internet connection. Setup Wizard If you do not use the NETGEAR Genie, you have to log in to the modem router to set the country, language, and Internet connection. If you performed the NETGEAR Genie setup, the country, language, Internet, and wireless network settings are already configured. -
Page 23: Manual Setup (Basic Settings)
N300 Wireless ADSL2+ Modem Router DGN2200 It is important to specify the location where the modem router operates so that the Internet connection works correctly. Select either Yes or No, I want to configure the Router myself. If you select No, proceed on page 23. - Page 24 N300 Wireless ADSL2+ Modem Router DGN2200 Click Test to test your Internet connection. If the NETGEAR website does not appear within 1 minute, and see on page 128. Troubleshooting ISP does not require login ISP does require login Figure 10. Basic Settings screen without (left) and with (right) login.
- Page 25 N300 Wireless ADSL2+ Modem Router DGN2200 Table 2. Basic Settings Screen Description Settings Description These fields Encapsulation Encapsulation is a method for enclosing multiple protocols. PPP stands display only if for Point-to-Point Protocol. The choices are: your ISP • PPPoE (PPP over Ethernet) requires a •...
-
Page 26: Adsl Settings
Contact your ISP to verify that you have the correct configuration information. Read Troubleshooting. If problems persist, register your NETGEAR product and Chapter 9, contact NETGEAR Technical Support. If you cannot connect to the modem router, check the Internet Protocol (TCP/IP) properties in the Network Connections section of your PC Control Panel. -
Page 27: Change Password And Login Time-Out
N300 Wireless ADSL2+ Modem Router DGN2200 Change Password and Login Time-Out For security reasons, the modem router has its own user name and password that default to admin and password. You can and should change these to a secure user name and password that are easy to remember. -
Page 28: Log Out Manually
N300 Wireless ADSL2+ Modem Router DGN2200 Log Out Manually The modem router interface provides a Logout command at the bottom of the modem router menus. Log out when you expect to be away from your computer for a relatively long period of time. -
Page 29: Chapter 3 Wireless Settings
Wireless Settings Protecting your network This chapter describes how to use the Wireless Settings screens to view and change (if needed) your wireless network settings. Security features to prevent objectionable content from reaching your PCs are covered in Chapter 4, Content Filtering Settings. -
Page 30: Preset Security
Wireless Security Options The Wireless Settings screen lets you view and change the preset security settings. However, NETGEAR recommends that you not change your preset security settings. you do decide to change your preset security settings, make a note of the new settings and store it in a safe place where you can easily find it. -
Page 31: Disable Ssid Broadcast
(PSK) encryption and 802.1x encryption for enterprises. Note that it is also possible to disable wireless security. NETGEAR does not recommend this. You can view or change the wireless security options in the Wireless Settings screen. See on page 33. -
Page 32: Manual Method
WPA or WPA2 wireless security. The modem router automatically sets security for each computer or device that uses WPS to join the wireless network. To use WPS, make sure that your wireless devices are Wi-Fi certified and support WPS. NETGEAR products that use WPS call it Push 'N' Connect. -
Page 33: Wireless Settings Screen
NETGEAR recommends that you use these settings. If you decide to change them, note the new settings and save them in a secure location. -
Page 34: Consider Every Device On Your Network
N300 Wireless ADSL2+ Modem Router DGN2200 Consider Every Device on Your Network Before you begin, check the following: Every wireless computer has to be able to obtain an IP address by DHCP from the • modem router as described in on page 18. -
Page 35: Wireless Settings Screen Fields
32-character (maximum) name in this field. This field is case-sensitive. The default SSID for your primary network is randomly generated, and there is typically no need to change it. If you want to set up guest networks, NETGEAR does recommend that you customize the default guest network names (SSIDs). -
Page 36: Change Wpa Security Option And Passphrase
The primary network for your preset modem router is already set up with WPA2 and WPA security. NETGEAR recommends that you set up wireless security for each guest network that you plan to use. For information about changing these settings, see... -
Page 37: Wireless Guest Networks
N300 Wireless ADSL2+ Modem Router DGN2200 Select the authentication type. The default is Automatic. Other choices are Open System (any client can authenticate itself to the network) and Shared Key (a passphrase and a four-way challenge are needed for authentication). Select the encryption strength setting, either 64 bit or 128 bit. - Page 38 You can specify whether the SSID broadcast is enabled, and whether you want to allow the guest to access your local network. You can also change the SSID. NETGEAR strongly recommends that you change the SSID to a different name. Note •...
-
Page 39: Chapter 4 Content Filtering Settings
Content Filtering Settings Keeping unwanted content out of your network This chapter explains how to use the basic firewall features of the modem router to prevent objectionable content from reaching the PCs and other devices connected to your network. This chapter contains the following sections: •... -
Page 40: Logs
N300 Wireless ADSL2+ Modem Router DGN2200 Logs The modem router logs security-related events such as denied incoming service requests, hacker probes, and administrator logins. If you enable content filtering in the Block Sites screen, the Logs screen show you when someone on your network tries to access a blocked site. -
Page 41: Examples Of Log Messages
Following are examples of log messages. In all cases, the log entry shows the time stamp as day, year-month-date hour:minute:second. Activation and Administration Tue, 2006-05-21 18:48:39 - NETGEAR activated [This entry indicates a power-up or reboot with initial time entry.] Tue, 2006-05-21 18:55:00 - Administrator login successful-IP:192.168.0.2 Thu, 2006-05-21 18:56:58 - Administrator logout - IP:192.168.0.2... -
Page 42: Keyword Blocking Of Http Traffic
N300 Wireless ADSL2+ Modem Router DGN2200 Keyword Blocking of HTTP Traffic Use keyword blocking to prevent certain types of HTTP traffic from accessing your network. The blocking can be always or according to a scheduled. Select Security > Block Sites. Select one of the keyword blocking options: Per Schedule. -
Page 43: Specify Trusted Computer
N300 Wireless ADSL2+ Modem Router DGN2200 Specify Trusted Computer You can exempt one trusted computer from blocking and logging. The computer you exempt has to have a fixed IP address. In the Trusted IP Address field, enter the IP address. Click Apply to save your changes. -
Page 44: Inbound Rules (Port Forwarding)
N300 Wireless ADSL2+ Modem Router DGN2200 To set up firewall rules: Select Security > Firewall Rules to display the following screen: To add an inbound or outbound rule: For an outbound rule, click Add under Outbound Services. • For an inbound rule, click Add under Inbound Services. •... - Page 45 N300 Wireless ADSL2+ Modem Router DGN2200 Some residential broadband ISP accounts do not let you run server Note: processes (such as a Web or FTP server) from your location. Your ISP might periodically check for servers and suspend your account if it discovers any active services at your location.
-
Page 46: Considerations For Inbound Rules
N300 Wireless ADSL2+ Modem Router DGN2200 Log. You can select whether to log the traffic: • Never. No log entries are made for this service. Always. Any traffic for this service type is logged. Match. Traffic of this type that matches the settings and action are logged. Not match. -
Page 47: Outbound Rules (Service Blocking)
N300 Wireless ADSL2+ Modem Router DGN2200 Outbound Rules (Service Blocking) You can block computers on your local network from using certain Internet services. This is called service blocking or port filtering. You can add an outbound rule to block Internet access from a local computer based on the computer, Internet site, time of day, and type of service. -
Page 48: Set Up Services
N300 Wireless ADSL2+ Modem Router DGN2200 Set Up Services Services are functions performed by server computers at the request of client computers. For example, Web servers serve Web pages, time servers serve time and date information, and game hosts serve data about other players’ moves. When a computer on the Internet sends a request for service to a server computer, the requested service is identified by a service or port number. -
Page 49: Set The Time Zone
N300 Wireless ADSL2+ Modem Router DGN2200 Set the Time Zone The modem router uses the Network Time Protocol (NTP) to obtain the current time and date from one of several network time servers on the Internet. Select Security > Schedule. Select your time zone. -
Page 50: Schedule Services
N300 Wireless ADSL2+ Modem Router DGN2200 Schedule Services If you enabled service blocking in the Block Services screen or port forwarding in the Ports screen, you can set up a schedule for when blocking occurs or when access is not restricted. Select Security >... -
Page 51: Enable Security Event Email Notification
N300 Wireless ADSL2+ Modem Router DGN2200 Enable Security Event Email Notification To receive logs and alerts by email, provide your email information in the E-mail screen and specify which alerts you want to receive and how often. Select Security > E-mail to display the following screen: Figure 12. - Page 52 N300 Wireless ADSL2+ Modem Router DGN2200 Send Alerts Immediately. Select the corresponding check box if you would like • immediate notification of a significant security event, such as a known attack, port scan, or attempted access to a blocked site. Send logs according to this schedule.
-
Page 53: Chapter 5 Network Maintenance
Network Maintenance Administering your network This chapter describes the modem router settings for administering and maintaining the modem router and home network. This chapter contains the following sections: • Upgrade the Modem Router Firmware • Manually Check for Firmware Upgrades •... -
Page 54: Upgrade The Modem Router Firmware
Upgrade the Modem Router Firmware The modem router firmware (routing software) is stored in flash memory. By default, when you log in to your modem router, it checks the NETGEAR website for new firmware and alerts you if there is a newer version. -
Page 55: Stop The Automatic Firmware Check
Select Maintenance > Router Upgrade. Clear the Check for Updated Firmware Upon Log-in check box. Manually Check for Firmware Upgrades You can use the Router Upgrade screen to manually check the NETGEAR website for newer versions of firmware for your product. WARNING! -
Page 56: Manage The Configuration File
N300 Wireless ADSL2+ Modem Router DGN2200 Select Maintenance > Router Upgrade to display the following screen: Click Browse, and locate the firmware you downloaded (the file ends in .img). Click Upload to send the firmware to the modem router. When the upload is complete, your modem router restarts. The upgrade process typically takes about 1 minute. -
Page 57: Restore
N300 Wireless ADSL2+ Modem Router DGN2200 Restore Enter the full path to the file on your network, or click the Browse button to find the file. When you have located the .cfg file, click the Restore button to upload the file to the modem router. -
Page 58: Lan Port (Local Ports)
N300 Wireless ADSL2+ Modem Router DGN2200 LAN Port (Local Ports) MAC Address. The modem router LAN port Ethernet MAC address. IP Address. The modem router LAN port IP address. The default is 192.168.0.1. DHCP. If Off, the modem router does not assign IP addresses to PCs on the LAN. If On, the modem router does assign IP addresses to PCs on the LAN. -
Page 59: Show Statistics
N300 Wireless ADSL2+ Modem Router DGN2200 Show Statistics Click the Show Statistics button on the Router Status screen to display a screen similar to this: Port The statistics for the WAN (Internet), LAN (local), and wireless LAN (WLAN) ports. For each port, the screen displays the following: Status. -
Page 60: Connection Status
N300 Wireless ADSL2+ Modem Router DGN2200 Connection Status In the Router Status screen, click the Connection Status button to display a screen similar to this: Connection Time. The time elapsed since the last connection to the Internet through the • DSL port. -
Page 61: Run Diagnostic Utilities
N300 Wireless ADSL2+ Modem Router DGN2200 Run Diagnostic Utilities The modem router has a diagnostics feature. Select Maintenance > Diagnostics to display the following screen. You can perform the following functions: Ping an IP address to test connectivity to see if you can reach a remote host. •... -
Page 62: Chapter 6 Usb Storage
USB Storage This chapter describes how to access and configure a USB storage drive attached to your modem router. Figure 13. USB port on rear panel. The USB port on the modem router can be used only to connect USB storage devices like flash drives or hard drives. -
Page 63: Usb Drive Requirements
The modem router should work with USB 2.0-compliant or 1.1-compliant external flash and hard drives. For the most up-to-date list of USB drives supported by the modem router, go to http://kb.netgear.com/app/answers/detail/a_id/12345. When selecting a USB device, bear in mind the following: The USB port on the modem router can be used with one USB hard drive at a time. -
Page 64: Share Large Files With Ftp Via Internet
N300 Wireless ADSL2+ Modem Router DGN2200 Share Large Files with FTP via Internet To protect your network, set up security if someone else will be downloading the files. Create a user name and password with appropriate access. If you want to limit USB drive access to only read access, from the modem router USB Storage (Basic Settings) screen, click Edit a Network folder. -
Page 65: Basic Settings Screen Fields And Buttons
N300 Wireless ADSL2+ Modem Router DGN2200 Type \\readyshare in the address field of your Web browser. • Network/device name: \\readyshare Share name: \\readyshare\USB_Storage If you logged in to the modem router before you connected your USB device, you might not see your USB device in the modem router screens until you log out and then log in again. - Page 66 N300 Wireless ADSL2+ Modem Router DGN2200 Click the Edit button to open the Edit Network Folder screen: You can use this screen to select a folder, to change the share name, or to change read access or write access from All-no password to admin. The password for admin is the same one that is used to log in to the modem router main menu.
-
Page 67: Usb Storage Advanced Settings
N300 Wireless ADSL2+ Modem Router DGN2200 USB Storage Advanced Settings To configure advanced USB settings, select USB > Advanced Settings. The USB Storage (Advanced Settings) screen displays: You can use this screen to specify access to the USB storage device. The settings are as follows: Network Device Name. -
Page 68: Create A Network Folder
N300 Wireless ADSL2+ Modem Router DGN2200 Available Network Folders Folder Name. Full path of the Network folder. • Volume Name. Volume name from the storage device (either USB drive or HDD). • Total Free Space. The space currently available on the storage device. •... -
Page 69: Unmount A Usb Drive
N300 Wireless ADSL2+ Modem Router DGN2200 Unmount a USB Drive To unmount a USB disk drive so that no users can access it, from the USB Settings screen, click the Safely Remove USB button. This takes the drive offline. CAUTION: Unmount the USB drive before physically unplugging it from the modem router. -
Page 70: Connect To The Usb Drive From A Remote Computer
N300 Wireless ADSL2+ Modem Router DGN2200 Connect to the USB Drive from a Remote Computer To connect to the USB drive from remote computers using a Web browser, you use the modem router’s Internet port IP address. Locate the Internet Port IP Address The Router Status screen shows the Internet port IP address: Log in to the modem router. - Page 71 N300 Wireless ADSL2+ Modem Router DGN2200 In Windows 2000 and Windows XP, File and Printer Sharing is Note: enabled by default. Configuring Windows 98SE and Windows ME The easiest way to get to your network properties is to go to your desktop, right-click Network Neighborhood and then select Properties.
-
Page 72: Chapter 7 Advanced Settings
Advanced Settings Configuring for unique situations This chapter describes the advanced features of your modem router. The information is for users with a solid understanding of networking concepts who want to set the modem router up for unique situations such as when remote access from the Internet by IP or domain name is needed. -
Page 73: Wan Setup
N300 Wireless ADSL2+ Modem Router DGN2200 WAN Setup Select Advanced > WAN Setup to display the following screen: The following settings are available: Disable Port Scan and DoS Protection. The firewall protects your LAN against port • scans and denial of service (DoS) attacks. This protection should be disabled only in special circumstances. -
Page 74: Default Dmz Server
N300 Wireless ADSL2+ Modem Router DGN2200 Default DMZ Server The default demilitarized zone (DMZ) server feature is helpful when you use online games and video conferencing applications that are incompatible with NAT. The modem router is programmed to recognize some of these applications and to work correctly with them, but there are other applications that might not function well. -
Page 75: Dynamic Dns
N300 Wireless ADSL2+ Modem Router DGN2200 Dynamic DNS If your network has a permanently assigned IP address, you can register a domain name that is linked to your IP address by public Domain Name Servers (DNS). More commonly, Internet accounts have dynamically assigned IP addresses in which the IP addresses change frequently. -
Page 76: Lan Setup
N300 Wireless ADSL2+ Modem Router DGN2200 If your ISP assigns a private WAN IP address such as 192.168.x.x or 10.x.x.x, the Dynamic DNS service does not work because private addresses are not routed on the Internet. LAN Setup The LAN Setup screen allows configuration of LAN IP services such as DHCP and Routing Information Protocol (RIP). -
Page 77: Lan Setup Screen Settings
N300 Wireless ADSL2+ Modem Router DGN2200 LAN Setup Screen Settings IP Address. The LAN IP address of the modem router. • IP Subnet Mask. The LAN subnet mask of the modem router. Combined with the IP • address, the IP subnet mask allows a device to know which other addresses are local to it, and which have to be reached through a gateway or modem router. -
Page 78: Quality Of Service (Qos)
N300 Wireless ADSL2+ Modem Router DGN2200 Quality of Service (QoS) Quality of Service (QoS) is an advanced feature that can be used to prioritize some types of traffic ahead of others. The modem router can provide QoS prioritization over the wireless link and on the Internet connection. -
Page 79: Advanced Wireless Settings
N300 Wireless ADSL2+ Modem Router DGN2200 Click Setup QoS rule. The QoS Priority Rule list displays: To change a rule, select its radio button, scroll down and click Edit. To add a custom rule, click Add Priority Rule. Click Apply to save your changes and return to the QoS Setup screen. In the QoS Setup screen, click Apply. -
Page 80: Advanced Wireless Settings
If the Keep Existing Wireless Settings check box is not selected, the next time you use WPS to connect WPS-capable devices to your wireless network, the modem router generates a new random SSID and WPA/WPA2 passphrase. NETGEAR does not recommend this. 80 |... -
Page 81: Wireless Card Access List
N300 Wireless ADSL2+ Modem Router DGN2200 Wireless Card Access List The Wireless Card Access List lets you restrict access to your network to a specific list of devices based on their MAC addresses. This section explains how to set up the list. Select Advanced >... -
Page 82: Remote Management
N300 Wireless ADSL2+ Modem Router DGN2200 Remote Management The Remote Management screen lets you allow a user or users on the Internet to configure, upgrade, and check the status of your modem router. Select Advanced > Remote Management to display this screen: Select the Turn Remote Management On check box. -
Page 83: Static Routes
N300 Wireless ADSL2+ Modem Router DGN2200 Static Routes Static routes provide additional routing information to your modem router. Under normal circumstances, the modem router has adequate routing information after it has been configured for Internet access, and you do not need to configure additional static routes. You configure static routes only for unusual cases such as multiple routers or multiple IP subnets located on your network. -
Page 84: Add A Static Route
N300 Wireless ADSL2+ Modem Router DGN2200 Add a Static Route Select Advanced > Static Routes to display the following screen: Click Add to open the following screen. Fill in the fields: In the Route Name field, enter a route name for this static route. This name is for •... -
Page 85: Universal Plug And Play
N300 Wireless ADSL2+ Modem Router DGN2200 Universal Plug and Play Universal Plug and Play (UPnP) helps devices, such as Internet appliances and computers, access the network and connect to other devices as needed. UPnP devices can automatically discover the services from other registered UPnP devices on the network. Select Advanced >... -
Page 86: Traffic Meter
N300 Wireless ADSL2+ Modem Router DGN2200 Traffic Meter Traffic metering allows you to monitor the volume of Internet traffic passing through your modem router’s Internet port. With the Traffic Meter utility, you can set limits for traffic volume, set a monthly limit, and get a live update of traffic usage. To monitor traffic on your modem router: Select Advanced >... -
Page 87: Advanced Usb Settings
N300 Wireless ADSL2+ Modem Router DGN2200 Advanced USB Settings For added security, you can specify that only approved USB devices are shared. Select Advanced > USB. The following screen displays: Select No and click Apply. To define the approved devices, click USB Approved Devices. Wireless Bridging and Repeating Networks With the modem router, you can build large bridged wireless networks that form an IEEE 802.11n Wireless Distribution System (WDS). - Page 88 N300 Wireless ADSL2+ Modem Router DGN2200 Select Advanced > Wireless Repeating Function to display the following screen: Enable Wireless Repeating Function. Select this check box if you want to use the • wireless repeating function. Wireless MAC of this router. This field displays the MAC address for your modem router •...
-
Page 89: Set Up A Point-To-Point Bridge
N300 Wireless ADSL2+ Modem Router DGN2200 Set Up a Point-to-Point Bridge In point-to-point bridge mode, the modem router communicates as an access point with another bridge-mode wireless station. As a bridge, wireless client associations are disabled. Only wired clients can be connected. Use wireless security to protect this communication. The following figure shows an example of point-to-point bridge mode. -
Page 90: Set Up A Multi-Point Bridge
N300 Wireless ADSL2+ Modem Router DGN2200 Set Up a Multi-Point Bridge Multi-point bridge mode allows a router to bridge to multiple peer access points simultaneously. Wireless client associations are disabled. Only wired clients can be connected. Multi-point bridge mode configuration includes the following steps: Set up the modem router for wireless repeating as the base station, and specify the MAC •... -
Page 91: Repeater With Wireless Client Association
N300 Wireless ADSL2+ Modem Router DGN2200 Set up AP 2 and AP 3 to be wireless repeaters. a. In the Wireless Repeating Function screen for AP 2 and AP 3, select the Enable Wireless Repeating Function check box. b. Select the Wireless Repeater radio button. c. - Page 92 N300 Wireless ADSL2+ Modem Router DGN2200 The following figure shows an example of a repeater mode configuration. Wireless PC associated with AP 1 Wireless PC associated with AP 2 DGN2200 AP 2 in repeater mode Internet Wireless PC associated 192.168.0.1 with AP 3 AP 1 (parent AP in repeater mode) AP 3 in repeater mode...
- Page 93 N300 Wireless ADSL2+ Modem Router DGN2200 The access points are on the same LAN. That is, the LAN IP addresses for the • access points are in the same network. If you are using DHCP, access point devices are set to Obtain an IP address •...
-
Page 94: Virtual Private Networking
VPN communications paths are called tunnels. VPN tunnels provide secure, encrypted communications between your local network and a remote network or computer. See Appendix Configuration, and click the link to B, NETGEAR VPN Virtual Private Networking (VPN) page 159 to learn more about VPNs. This chapter is organized as follows: on page 95 •... -
Page 95: Overview Of Vpn Configuration
VPN tunnel N300 Wireless Modem Router DGN2200 Internet PC running NETGEAR ProSafe VPN Client Figure 17. Telecommuter VPN tunnel A VPN client access allows a remote PC to connect to your network from any location on the Internet. The remote PC is one tunnel endpoint, running the VPN client software. The modem router on your network is the other tunnel endpoint. -
Page 96: Plan A Vpn
N300 Wireless ADSL2+ Modem Router DGN2200 A VPN between two or more NETGEAR VPN-enabled routers is a good way to connect branch or home offices and business partners over the Internet. VPN tunnels also enable access to network resources across the Internet. In this case, use gateways on each end of the tunnel to form the VPN tunnel end points. -
Page 97: Vpn Tunnel Configuration
N300 Wireless ADSL2+ Modem Router DGN2200 page 146) can allow a VPN endpoint with a dynamic IP address to initiate or respond to a tunnel request. Otherwise, the side using a dynamic IP address has to always be the initiator. Which method will you use to configure your VPN tunnels? •... -
Page 98: Set Up A Client-To-Gateway Vpn Configuration
Set Up a Client-to-Gateway VPN Configuration Setting up a VPN between a remote PC running the NETGEAR ProSafe VPN Client and a network gateway involves these two steps: on page 98 describes how to use •... - Page 99 N300 Wireless ADSL2+ Modem Router DGN2200 The following worksheet identifies the parameters used in this procedure, which are highlighted in blue. For a blank worksheet, see on page 96. Plan a VPN Table 5. VPN Tunnel Configuration Worksheet Parameter Value to Be Entered Field Selection Connection Name RoadWarrior Pre-Shared Key...
- Page 100 N300 Wireless ADSL2+ Modem Router DGN2200 Select the radio button for the type of target end point, and click Next. Enter the remote IP address and subnet mask, and click Next. The Summary screen displays: Note: To view the VPNC-recommended authentication and encryption settings used by the VPN Wizard, click the here link.
-
Page 101: Step 2: Configure The Netgear Prosafe Vpn Client
VPN tunnel. Step 2: Configure the NETGEAR ProSafe VPN Client This section describes how to configure the NETGEAR ProSafe VPN Client on a remote PC. These instructions assume that the PC running the client has a dynamically assigned IP address. - Page 102 N300 Wireless ADSL2+ Modem Router DGN2200 b. From the Edit menu of the Security Policy Editor, select Add, and then click Connection. A New Connection listing appears in the list of policies. c. Rename the new connection so that it matches the Connection Name field in the VPN Settings screen of the modem router on LAN A.
- Page 103 N300 Wireless ADSL2+ Modem Router DGN2200 Configure the security policy in the NETGEAR ProSafe VPN Client software: a. In the Network Security Policy list, expand the new connection by double-clicking its name or clicking the + symbol. My Identity and Security Policy subheadings appear below the connection name.
- Page 104 N300 Wireless ADSL2+ Modem Router DGN2200 c. In the ID Type drop-down list, select IP Address. If you are using a virtual fixed IP address, enter this address in the Internal Network IP Address field. Otherwise, leave this field empty. d.
- Page 105 N300 Wireless ADSL2+ Modem Router DGN2200 d. In the Encrypt Alg drop-down list, select the type of encryption that is configured for the Encryption Protocol in the modem router in on page 96. This example Table 3 uses Triple DES. e.
- Page 106 Connect option in the NETGEAR ProSafe menu bar. The NETGEAR ProSafe client reports the results of the attempt to connect. Since the remote PC has a dynamically assigned WAN IP address, it has to initiate the request.
- Page 107 N300 Wireless ADSL2+ Modem Router DGN2200 To launch this function, click the Windows Start button, then select Programs > NETGEAR ProSafe VPN Client > Log Viewer. The Log Viewer screen for a successful connection is shown in this figure: Note:...
-
Page 108: Set Up A Gateway-To-Gateway Vpn Configuration
N300 Wireless ADSL2+ Modem Router DGN2200 Set Up a Gateway-to-Gateway VPN Configuration This section describes how to use the VPN Wizard to set up the VPN tunnel using the VPNC default parameters listed in on page 97. If you have special requirements not covered Table 4 by these VPNC-recommended parameters, see Set Up VPN Tunnels in Special... - Page 109 N300 Wireless ADSL2+ Modem Router DGN2200 The LAN IP address ranges of each VPN endpoint has to be different. The connection will fail if both are using the NETGEAR default address range of 192.168.0.x. To configure a gateway-to-gateway VPN tunnel using the VPN Wizard: Log in to Gateway A on LAN A.
- Page 110 N300 Wireless ADSL2+ Modem Router DGN2200 The VPN Wizard Summary screen displays: To view the VPNC-recommended authentication and encryption settings used by the VPN Wizard, click the here link. Click Done on the Summary screen. The VPN Policies screen displays, showing that the new tunnel is enabled. on page 118 for Note: Use Auto Policy to Configure VPN Tunnels...
- Page 111 N300 Wireless ADSL2+ Modem Router DGN2200 The VPN Status screen is only one of three ways to active a VPN Note: tunnel. See on page 112 for information Activate a VPN Tunnel about the other ways. a. On the modem router menu, select VPN Status. The VPN Status/Log screen displays: b.
-
Page 112: Vpn Tunnel Control
N300 Wireless ADSL2+ Modem Router DGN2200 VPN Tunnel Control Activate a VPN Tunnel There are three ways to activate a VPN tunnel: Use the VPN Status screen. • Ping the remote endpoint. • Start using the VPN tunnel. • on page 118 for Note: Use Auto Policy to Configure VPN Tunnels information about how to enable the IKE keep-alive capability on an... - Page 113 PC to the DGN2200’s network by using the Connect option in the NETGEAR ProSafe menu bar. The NETGEAR ProSafe client reports the results of the attempt to connect. Since the remote PC has a dynamically assigned WAN IP address, it has to initiate the request.
- Page 114 N300 Wireless ADSL2+ Modem Router DGN2200 This causes a continuous ping to be sent to the first DGN2200. Within 2 minutes, the ping response should change from timed out to reply. You can use Ctrl-C to stop the pinging. Note: Once the connection is established, you can open a browser on the PC and enter the LAN IP address of the remote DGN2200.
-
Page 115: Verify The Status Of A Vpn Tunnel
N300 Wireless ADSL2+ Modem Router DGN2200 Verify the Status of a VPN Tunnel Select Advanced - VPN > VPN Status to display the VPN Status/Log screen. This log shows the details of recent VPN activity, including the building of the VPN tunnel. If there is a problem with the VPN tunnel, refer to the log for information about what might be the cause of the problem. -
Page 116: Deactivate A Vpn Tunnel
N300 Wireless ADSL2+ Modem Router DGN2200 HLifeTime (Secs). The remaining hard lifetime for this SA in seconds. When the hard • lifetime becomes 0 (zero), the SA (wecurity association) is terminated. (It is re-established if required.) Deactivate a VPN Tunnel Sometimes a VPN tunnel has to be deactivated for testing purposes. - Page 117 N300 Wireless ADSL2+ Modem Router DGN2200 Use the VPN Status Screen to Deactivate a VPN Tunnel Select Advanced - VPN > VPN Status to display the VPN Status screen. Click VPN Status. The Current VPN Tunnels (SAs) screen displays: Click Drop for the VPN tunnel that you want to deactivate. Chapter 8.
-
Page 118: Delete A Vpn Tunnel
N300 Wireless ADSL2+ Modem Router DGN2200 Delete a VPN Tunnel Select Advanced - VPN > VPN Policies to display the VPN Policies screen. In the Policy Table, select the radio button for the VPN tunnel to be deleted, and then click Delete. - Page 119 N300 Wireless ADSL2+ Modem Router DGN2200 The most common configuration scenarios use IKE to manage the authentication and encryption keys. The IKE protocol performs negotiations between the two VPN endpoints to automatically generate and update the required encryption parameters. Select Advanced - VPN > VPN Policies, and click the Add Auto Policy button to display the VPN - Auto Policy screen: The DGN2200 VPN tunnel network connection fields are defined in the following sections.
- Page 120 N300 Wireless ADSL2+ Modem Router DGN2200 The ping IP address has to be associated with the remote endpoint. You have to use the remote LAN address. This IP address will be pinged periodically to generate traffic for the VPN tunnel. The remote keep-alive IP address needs to be covered by the remote LAN IP range and to correspond to a device that can respond to a ping.
- Page 121 N300 Wireless ADSL2+ Modem Router DGN2200 Diffie-Hellman (DH) Group. The Diffie-Hellman algorithm is used when keys are • exchanged. The DH Group setting determines the bit size used in the exchange. This value needs to match the value used on the remote VPN gateway. Local Identity Type.
-
Page 122: Example Of Using Auto Policy
N300 Wireless ADSL2+ Modem Router DGN2200 This setting applies to both IKE and IPSec SAs. When configuring the remote endpoint to match this setting, you might have to specify the key group used. For this device, the key group is the same as the DH Group setting in the IKE section. Example of Using Auto Policy IP:192.168.3.1 IP: 192.168.0.1... - Page 123 N300 Wireless ADSL2+ Modem Router DGN2200 Select Advanced - VPN > VPN Policies and click the Add Auto Policy button. The VPN Auto Policy screen displays: Enter these policy settings: Auto Policy Field Description General Policy Name GtoG Remote VPN Endpoint Fixed Address Type Remote VPN Endpoint...
- Page 124 N300 Wireless ADSL2+ Modem Router DGN2200 Auto Policy Field Description Direction Initiator and Responder Exchange Mode Main Mode Diffie-Hellman (DH) Group Group 2 (1024 Bit) Local Identity Type Use the default setting. Remote Identity Type Use the default setting. Parameters Encryption Algorithm 3DES Authentication Algorithm...
-
Page 125: Use Manual Policy To Configure Vpn Tunnels
N300 Wireless ADSL2+ Modem Router DGN2200 a. Select VPN > VPN Status to display the VPN Status/Log screen. Then click VPN Status to display the Current VPN Tunnels (SAs) screen: b. Click Connect for the VPN tunnel that you want to activate. Review the VPN Status/Log screen (Figure a on page 111) to verify that the tunnel is connected. - Page 126 N300 Wireless ADSL2+ Modem Router DGN2200 Select Advanced - VPN > VPN Policies, and then click the Add Manual Policy radio button to display the VPN - Manual Policy screen: The following sections explain the fields in the VPN Manual Policy screen. VPN Manual Policy General Settings The DGN2200 VPN tunnel network connection fields are as follows.
- Page 127 N300 Wireless ADSL2+ Modem Router DGN2200 Single/Start IP Address. The IP address for a single address, or the starting address for • an address range used on the LAN. If you want to make a single server on your LAN available to remote users, use a single address Any settings.
-
Page 128: Chapter 9 Troubleshooting
Diagnosing and Solving Problems This chapter provides information to help you diagnose and solve problems you might have with your modem router. If you do not find the solution here, check the NETGEAR support site at for product and contact information. -
Page 129: Troubleshooting With The Leds
Check that the power cord is correctly connected to your modem router and the power • supply adapter is correctly connected to a functioning power outlet. Check that you are using the 12 V DC power adapter supplied by NETGEAR for this • product. -
Page 130: Lan Led Is Off
Factory on page 138. This sets the modem router’s IP address to 192.168.0.1. Settings If the error persists, you could have a hardware problem and should contact NETGEAR Technical Support. LAN LED Is Off If the appropriate LAN LED does not light when the Ethernet connection is made, check the... -
Page 131: Troubleshooting The Internet Connection
N300 Wireless ADSL2+ Modem Router DGN2200 Make sure you are using the correct login information. The factory default login name is • admin, and the password is password. Make sure that Caps Lock is off when you enter this information. Troubleshooting the Internet Connection If your modem router is unable to access the Internet, you should check the ADSL connection, then the WAN TCP/IP connection. -
Page 132: Internet Led Is Red
To check the Internet IP address from the browser interface: Launch your browser, and select an external site such as www.netgear.com. Access the main menu of the modem router’s configuration at http://192.168.0.1. In the main menu, under Maintenance, select Router Status and check that an IP address is shown for the WAN port. -
Page 133: Troubleshooting Pppoe Or Pppoa
N300 Wireless ADSL2+ Modem Router DGN2200 Troubleshooting PPPoE or PPPoA The PPPoE or PPPoA connection can be debugged as follows: Access the main menu of the modem router at http://192.168.0.1. Select Maintenance > Router Status. Click the Connection Status button. If all of the steps indicate OK, then your PPPoE or PPPoA connection is up and working. -
Page 134: Test The Lan Path To Your Modem Router
N300 Wireless ADSL2+ Modem Router DGN2200 Test the LAN Path to Your Modem Router You can ping the modem router from your computer to verify that the LAN path to your modem router is set up correctly. To ping the modem router from a PC running Windows 95 or later: From the Windows task bar, click the Start button, and select Run. -
Page 135: Cannot Log In
N300 Wireless ADSL2+ Modem Router DGN2200 Check that your PC has the IP address of your modem router listed as the default modem • router. If the IP configuration of your PC is assigned by DHCP, this information is not visible in your PC’s Network Control Panel. -
Page 136: Changes Not Saved
N300 Wireless ADSL2+ Modem Router DGN2200 Changes Not Saved If the modem router does not save the changes you make in the modem router interface, check the following: When entering configuration settings, always click the Apply button before moving to •... -
Page 137: Appendix A Supplemental Information
Supplemental Information This appendix includes the factory default settings and technical specifications for the N300 Wireless ADSL2+ Modem Router DGN2200, and instructions for wall-mounting the unit. This appendix contains the following sections: • Factory Settings • Specifications • Wall-Mount Your Modem Router Appendix A. -
Page 138: Factory Settings
N300 Wireless ADSL2+ Modem Router DGN2200 Factory Settings You can return the modem router to its factory settings. On the bottom of the modem router, use the end of a paper clip or some other similar object to press and hold the Restore Factory Settings button for at least 7 seconds. - Page 139 N300 Wireless ADSL2+ Modem Router DGN2200 Table 8. Factory Default Settings (Continued) Feature Default Behavior Wireless Wireless communication Enabled SSID name Can be found on the label on the bottom of the unit. Security Can be found on the label on the bottom of the unit. Broadcast SSID Enabled Country/region...
-
Page 140: Specifications
N300 Wireless ADSL2+ Modem Router DGN2200 Specifications Specification Description Network protocol and TCP/IP, RIP-1, RIP-2, DHCP, PPPoE or PPPoA, RFC 1483 Bridged or standards compatibility Routed Ethernet, and RFC 1577 Classical IP over ATM Power adapter North America: 120V, 60 Hz, input UK, Australia: 240V, 50 Hz, input Europe: 230V, 50 Hz, input All regions (output): 12V @ 1.5A output... -
Page 141: Wall-Mount Your Modem Router
N300 Wireless ADSL2+ Modem Router DGN2200 Wall-Mount Your Modem Router Your modem router’s location can affect wireless connections. For example, the thickness and number of walls the wireless signal passes through might limit its range. For best results, place your modem router: Near an AC power outlet, close to computers you plan to connect with Ethernet cables, •... - Page 142 N300 Wireless ADSL2+ Modem Router DGN2200 Insert screws into the wall anchors, leaving 3/16 in. (0.5 cm) of each screw exposed. Figure 26. Insert screws into the wall anchors For best wireless performance, position the wireless antennas as shown with the top one facing up and the bottom one facing away from the modem router..
-
Page 143: Appendix B Netgear Vpn Configuration
NETGEAR VPN Configuration This appendix is a case study on how to configure a secure IPSec VPN tunnel from a NETGEAR DGN2200 to a FVL328. This case study follows the VPN Consortium interoperability profile guidelines (found at http://www.vpnc.org/InteropProfiles/Interop-01.html). Configuration Profile The configuration in this appendix follows the addressing and configuration mechanics defined by the VPN Consortium. -
Page 144: Step-By-Step Configuration
Enter toGW_A for the connection name. b. Enter 14.15.16.17 for the remote WAN’s IP address. c. Enter the following: IP Address. 10.5.6.1 • Subnet Mask. 255.255.255.0 • d. In the Summary screen, click Done. 144 | Appendix B. NETGEAR VPN Configuration... - Page 145 Test the VPN tunnel by pinging the remote network from a PC attached to Gateway A (modem router). a. Open the command prompt (Start > Run > cmd). b. Type ping 172.23.9. If the pings fail the first time, try the pings a second time. Appendix B. NETGEAR VPN Configuration | 145...
-
Page 146: Modem Router With Fqdn To Gateway B
Modem Router with FQDN to Gateway B This section is a case study on how to configure a VPN tunnel from a NETGEAR modem router to a gateway using a fully qualified domain name (FQDN) to resolve the public address of one or both routers. -
Page 147: Step-By-Step Configuration
In the Host Name field, type • gw_a.dyndns.org. In the User Name field, enter the account • user name. In the Password field, enter the account • password. c. Click Apply. Appendix B. NETGEAR VPN Configuration | 147... - Page 148 N300 Wireless ADSL2+ Modem Router DGN2200 d. Click Show Status. The resulting screen should show Update OK: good: On NETGEAR Gateway B, configure the Dynamic DNS settings. Assume a correctly configured DynDNS account. a. From the main menu, select Dynamic DNS.
-
Page 149: Configuration Summary (Telecommuter Example)
If the pings fail the first time, try the pings a second time. Configuration Summary (Telecommuter Example) The configuration in this section follows the addressing and configuration mechanics defined by the VPN Consortium. Gather the necessary information before you begin configuration. Appendix B. NETGEAR VPN Configuration | 149... -
Page 150: Setting Up Client-To-Gateway Vpn Configuration (Telecommuter Example)150
Figure 30. Telecommuter Example Setting Up Client-to-Gateway VPN Configuration (Telecommuter Example) Setting up a VPN between a remote PC running the NETGEAR ProSafe VPN Client and a network gateway involves two steps: • Step 1: Configure Gateway A (the NETGEAR VPN Router at the Main Office) page 151. -
Page 151: Step 1: Configure Gateway A (The Netgear Vpn Router At The Main Office)151
N300 Wireless ADSL2+ Modem Router DGN2200 Step 1: Configure Gateway A (the NETGEAR VPN Router at the Main Office) Log in to the VPN router. Select VPN Policies to display the VPN Policies screen. Click Add Auto Policy to proceed and enter the information. -
Page 152: Step 2: Configure Gateway B (The Modem Router At The Regional Office)152
Note: or firewall software you might be running on your PC. Install the NETGEAR ProSafe VPN Client on the remote PC, and then reboot. a. You might need to insert your Windows CD to complete the installation. b. If you do not have a modem or dial-up adapter installed in your PC, you might see the warning message stating “The NETGEAR ProSafe VPN Component requires at... - Page 153 In this step, you provide information about the remote VPN client PC. You have to provide the pre-shared key that you configured in the modem router and either a fixed IP address or a fixed virtual IP address of the VPN client PC. Appendix B. NETGEAR VPN Configuration | 153...
- Page 154 VPN router configuration. a. In the Network Security Policy list on the left side of the Security Policy Editor window, expand the Security Policy heading by double-clicking its name or clicking the + symbol. 154 | Appendix B. NETGEAR VPN Configuration...
- Page 155 After you have configured and saved the VPN client information, your PC automatically opens the VPN connection when you attempt to access any IP addresses in the range of the remote VPN router’s LAN. Check the VPN connection. Appendix B. NETGEAR VPN Configuration | 155...
- Page 156 To perform a ping test using this example, start from the remote PC: a. Establish an Internet connection from the PC. b. On the Windows taskbar, click the Start button, and then select Run. c. Type ping -t 192.168.0.1, and then click OK. 156 | Appendix B. NETGEAR VPN Configuration...
-
Page 157: Monitoring The Vpn Tunnel (Telecommuter Example)
Use the active VPN tunnel information and pings to determine Note: whether a failed connection is due to the VPN tunnel or some reason outside the VPN tunnel. The Connection Monitor screen displays: Appendix B. NETGEAR VPN Configuration | 157... -
Page 158: Viewing The Vpn Router's Vpn Status And Log Information
VPN Status screen: On the modem router main menu, select Router Status, and then click the VPN Status button. The VPN Status/Log screen displays: To view the VPN tunnels status, click VPN Status. 158 | Appendix B. NETGEAR VPN Configuration... -
Page 159: Appendix C Notification Of Compliance
This transmitter must not be co-located or operating in conjunction with any other antenna or transmitter. FCC Declaration of Conformity We, NETGEAR, Inc., 350 East Plumeria Drive, Santa Clara, CA 95134, declare under our sole responsibility that the model N300 Wireless ADSL2+ Modem Router DGN2200 complies with Part 15 Subpart B of FCC CFR47 Rules. - Page 160 10 mW EIRP in the frequency range of 2454 – 2483.5 MHz. For detailed information the end-user should contact the national spectrum authority in France. For complete DoC, visit the NETGEAR EU Declarations of Conformity website at: •...
- Page 161 Hereby, NETGEAR Inc., declares that this Radiolan is in compliance with the essential requirements and other relevant provisions of Directive 1999/5/EC. Español [Spanish] Por medio de la presente NETGEAR Inc. declara que el Radiolan cumple con los requisitos esenciales y cualesquiera otras disposiciones aplicables o exigibles de la Directiva 1999/5/CE.
- Page 162 övriga relevanta bestämmelser som framgår av direktiv 1999/5/EG. Íslenska [Icelandic]Hér með lýsir NETGEAR Inc. yfir því að Radiolan er í samræmi við grunnkröfur og aðrar kröfur, sem gerðar eru í tilskipun 1999/5/EC. Norsk [Norwegian] NETGEAR Inc. erklærer herved at utstyret Radiolan er i samsvar med de grunnleggende krav og øvrige relevante krav i direktiv 1999/5/EF.
-
Page 163: Index
Index connection, Internet content filtering access lists country setting adapter, wireless CU-SeeMe addresses, DNS ADSL see also DSL settings ADSL microfilter date and time cabling, described daylight savings time filter, described deactivating VPN tunnels ADSL settings default demilitarized zone (DMZ) server ADSL statistics, viewing default factory settings Advanced Wireless Settings screen... - Page 164 (FQDN), configuring VPN troubleshooting tunnels using verifying cabling Log Viewer logging in cannot gateway IP address changing password gateway-to-gateway VPN tunnels genie, NETGEAR router time-out guest networks types upgrade firmware logs host name logs, emailing host, trusted...
- Page 165 N300 Wireless ADSL2+ Modem Router DGN2200 NETGEAR genie repeater mode with wireless client association NETGEAR ProSafe VPN Client replace existing router Network Address Translation (NAT) reserved IP address network folder restore creating configuration file editing factory settings button Network Time Protocol (NTP)
- Page 166 N300 Wireless ADSL2+ Modem Router DGN2200 network troubleshooting VPN network connections no Internet connection VPN status technical specifications VPN tunnels technical support activating control time of day deactivating time zone, setting deleting time-stamping monitoring trademarks special setup traffic metering status traffic, log VPN Wizard troubleshooting...
- Page 167 N300 Wireless ADSL2+ Modem Router DGN2200 wrong date or time Index | 167...