Table of Contents
Advertisement
Advertisement
Table of Contents

Related Manuals for Panasonic CQ-5109U


Summary of Contents for Panasonic CQ-5109U
-
Page 1: Operating Instructions
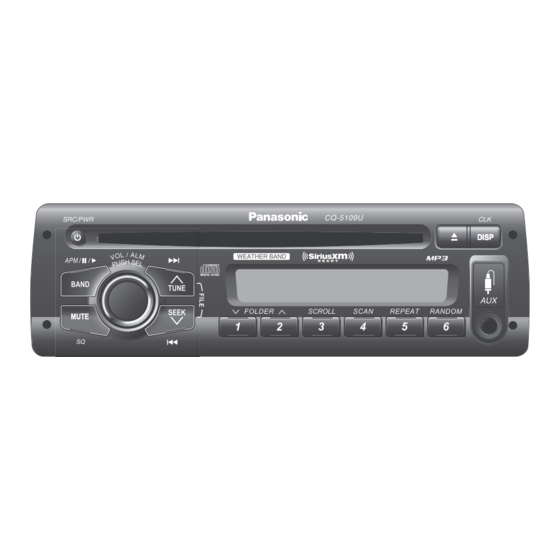
MP3 CD Player/Weather Band Receiver SiriusXM-Ready DISP DISP CQ-5109U Model: Operating Instructions Please read these instructions (including “Limited Warranty” and “Customer Services Direc- ¡ tory”) carefully before using this product and keep this manual for future reference. -
Page 2: Safety Information
They contain instructions about how to ing from improper connections and operations. The mean- use the system in a safe and effective manner. Panasonic ings of the pictographs are explained below. It is important assumes no responsibility for any problems resulting from that you fully understand the meanings of the pictographs failure to observe the instructions given in this manual. -
Page 3: This Unit
Keep the sound volume at an appropriate ence. For maximum safety, have it installed by your dealer level. or an authorized Panasonic Servicenter. Panasonic is not Keep the volume level low enough to be aware of road liable for any problems resulting from your own installa- and traffic conditions while driving. -
Page 4: Accessories
Safety Information (continued) The following applies only in the U.S.A. Caution Part 15 of the FCC Rules THIS PRODUCT IS A CLASS I LASER PRODUCT. FCC Warning: USE OF CONTROLS OR ADJUSTMENTS OR This device complies with Part 15 of the FCC PERFORMANCE OF PROCEDURES OTHER THAN Rules for Radio Receiver. -
Page 5: Before Reading These Instructions
Purchase Parts, Accessories and Instruction Books online for all control, improper maintenance, improper antenna, inadequate signal Panasonic Products by visiting our Web Site at: reception or pickup, power line surge, improper voltage supply, http://www.pasc.panasonic.com... -
Page 6: Table Of Contents
Contents Safety Information ......2 Troubleshooting ......21 If you suspect something wrong Accessories ......... 4 Common Before Reading These Instructions ..5 Radio Customer Services Directory Limited Warranty SiriusXM Satellite Radio Control Contents ........6 Product servicing Features ........7 Error Display Messages....24 Front AUX terminal CD/MP3... -
Page 7: Features
Features Front AUX terminal Your mobile audio player and other devices are con- nectable to this unit without any difficulty. Sound control SQ (Sound Quality) You have four preset modes (FLAT, ROCK, POP and VOCAL). SiriusXM Satellite Radio SiriusXM Satellite Radio service requires a sub- scription and the purchase of a SiriusXM Connect Vehicle Tuner. -
Page 8: Controls Layout
Controls Layout SRC Source page 10) PWR Power page 9, 10) page 14) u (Eject) BAND page 12, 13, 16, 17, 18, 19) DISP Display y / 5 Pause/Play page 9, 12, 15, 17, 18) page 14) CLK Clock page 9) Disc slot APM Auto Preset Memory page 12) -
Page 9: Preparation
Preparation First time power on Clock Display at Power Off Turn the key in the ignition until the acces- Press [DISP] to change the display. sory indicator lights. Display off Press [PWR] (Power). Clock adjustment Clock display The 12-hour (AM/PM) system is used for the clock adjustment. -
Page 10: General
General Source selection The source changes as follows every time [SRC] (Source) is pressed. Radio FM, AM, WB page 12) Disc player CD, MP3 page 14) When device connected to the front AUX terminal of this unit (The sound of connected device is output from car speaker.) SiriusXM satellite radio control When the optional SiriusXM Connect Vehicle Tuner is connected to this unit, this source mode is selectable and the SAT (Satellite radio) -
Page 11: Sound Controls
Sound Controls SQ (Sound Quality) SQ is a function that can call up various sound (FLAT) fl at frequency response: types at the touch of button in accordance with your does not emphasize any part. (default) listening music type. (ROCK) speedy and heavy sound: Hold down [SQ] for more than 2 seconds to exaggerates bass and treble. -
Page 12: Radio
Radio Caution To ensure safety, never attempt to preset stations while you are driving. Band Display Change Press [BAND] to change the band. Press [DISP] (display) to switch to the clock display. Radio mode display Weather Band page 13) Clock display (FM stereo) indicator lights while receiving an FM stereo signal. -
Page 13: Tuning In A Weather Band Station
Tuning in a weather band station Warning Press [BAND] to select WB (Weather Band). page 12) Any NOAA broadcast weather report, including Press any of the buttons [1] through [6] to current and forecasts, may not reflect your actual monitor the preset station. weather conditions at your exact time and loca- Note: The weather band (CH1-6) has been pre- tion. -
Page 14: Cd/Mp3 Player
CD/MP3 Player Caution ¡ Refer to the section on “Notes on CD-Rs/RWs” ¡ Do not insert a disc when the indicator page 28). lights. ¡ Refer to the section on “Notes on MP3”. ¡ This unit does not support 8 cm {3”} discs. page 26) ¡... -
Page 15: Display Change
Display change Press [DISP] (Display) to change the display. Notes: For scrolling text, press [SCROLL]. ¡ “NO TEXT” is displayed when there is no information on the disc. ¡ CD-DA Track number/ Folder number/ Play time File number Disc title* Play time Track title* Folder name/... -
Page 16: Siriusxm Satellite Radio Control
SiriusXM Satellite Radio Control Signal strength indicator Satellite Radio indicator (lights when connected with optional SiriusXM Connect Vehicle Tuner) DISP DISP DISP DISP [DISP] [BAND] [SEL] [TUNE/SEEK }] (d) [1] through [6] (Preset Buttons) (FOLDER }/FOLDER {) [TUNE/SEEK {] (s) Connecting SiriusXM Tuner Note: “CH LOCKD”... -
Page 17: Channel Preset
Category selection Repeat the steps 2 and 3 to enter a 4-digit [FOLDER }]: Next category number code. [FOLDER {]: Preceding category When a 4-digit number code is correctly entered and [BAND] is finally pressed, the all locked channels are unlocked and start to be received. Channel selection (Once turns ACC ON/OFF, the channels return to [TUNE/SEEK }]: Next available/subscribed... -
Page 18: System Control Mode Selection
SiriusXM Satellite Radio Control (continued) Signal strength indicator Satellite Radio indicator [DISP] DISP DISP DISP DISP [BAND] [TUNE/SEEK }] (d) [SEL] [TUNE/SEEK {] (s) System control mode selection SiriusXM radio display Press and hold [SEL] for more than 2 seconds to open SXM function setting screen. SiriusXM function setting mode Note: See below “Function settings”... - Page 19 Function settings (continued) Parental lock setting mode This function disables the audience from selecting To set parental lock ON/OFF: the locked channel. Press [SEL] to open lock ON/OFF mode Press and hold [SEL] for more than 2 after step 3. seconds to open SXM function setting screen.
-
Page 20: Alarm Setting
Alarm Setting DISP DISP [ALM] [VOL] [s]/[d] Alarm time setting Notes: The procedure of alarm time setting under Siri- ¡ usXM radio mode is different with above step 1, Hold down [ALM] (Alarm) for more than 2 refer page 18 for its instructions. seconds. -
Page 21: Troubleshooting
Immediately stop using the unit and sonnel. Please refer the checking and the repair to consult your dealer or an authorized Panasonic professionals. Panasonic shall not be liable for any Servicenter. accidents arising out of neglect of checking the unit ¡... -
Page 22: Radio
The microcontroller in the unit operates abnormally due to noise or Disc unejectable other factors. Unplug the power cord and plug it again. In case the unit is still out of order, consult your dealer or an authorized Panasonic Servicenter. -
Page 23: Radio
Visit www.siriusxm.com to see the list of channels available. Product servicing If the suggestions in the charts do not solve the problem, we recommend that you take it to your dealer or an authorized Panasonic Servicenter. The product should be serviced only by a qualified technician. -
Page 24: Cd Mp3
No operation by some cause. Unplug the power cord and plug it again. In case the unit is still out of order, consult your dealer or an authorized Panasonic Servicenter. The player for some reason cannot read the file you are trying to play. -
Page 25: Maintenance
Fuse If the replaced fuse fails, contact your dealer or an Warning authorized Panasonic Servicenter. Use fuses of the same specified rating (15 A). Using substitutes or fuses with higher ratings, or connecting the unit directly without a fuse could cause fire or damage to the unit. -
Page 26: Notes On Mp3
Notes on MP3 MP3 (MPEG Audio Layer-3) is a format for compressed audio file. These formats allow users to save all the files contained in approximately 10 pieces of existing CDs on one piece of CD-R/RW. Note: Each of encoding software is not included with this unit. *MPEG Layer-3 audio coding technology licensed from Fraunhofer IIS and Thomson. -
Page 27: Recording Mp3 Files On A Cd-Media
Recording MP3 files on a CD-Media Compressed audio file writing Folder selection order/file playback order ¡ Do not save an audio file (CD-DA file) and a compressed audio file on the same disc. Failure to observe this may result in difficulty in play- Root Folder (Root Directory) ing. -
Page 28: Notes On Discs
Notes on Discs How to hold the disc Disc insert ¡ Do not touch the underside of the disc. The surfaces of new discs tend to be slippery. ¡ Do not scratch the disc. Therefore, when using such a disc for the first time, ¡... -
Page 29: Installation Guide
Installation Guide WARNING p This installation information is designed for professional installers with knowledge of automobile electrical safety systems and is not intended for non-technical, do-it-yourself individuals. It does not contain instructions on the electrical installation and avoidance of potential harm to air bag, anti-theft and ABS braking or other systems necessary to install this product. -
Page 30: Preparation
Installation Guide (continued) Preparation Installation hardware Item Diagram Q’ty Warning q Mounting Collar* If your vehicle is equipped with air bag and/or anti-theft systems, specific procedures may be required for connection and disconnection of the w Plain Washer (5 mm ø) battery to install this product. -
Page 31: Securing Of The Main Unit
Securing of the main unit Caution ¡ We strongly recommend that you wear gloves for installation work to protect yourself from injuries. ¡ When bending the mounting tab of the mounting collar with a screwdriver, be careful not to injure your hands and fingers. -
Page 32: Removing The Unit From The Vehicle's Dashboard
Installation Guide (continued) Removing the unit from the vehicle’s dashboard Insert each Removal Tool i and pull. i Removal Tool (U-shaped) Note: Do not lose Removal Tools. They will be needed to remove the unit from the vehicle’s dashboard. -
Page 33: Electrical Connections
Electrical Connections Caution ¡ This wiring information is for experienced technical individual, for safety reason, please your dealer wire this connection. ¡ This product is designed to operate with a 12 V DC, negative @ ground battery system. ¡ To prevent damage to the unit, be sure to follow the connection diagram below. ¡... -
Page 34: Speaker Connections
Electrical Connections (continued) Speaker Connections Caution Please follow the instructions given below. Failure to do so will cause damage to the unit and speakers. <Right> ¡ Use ungrounded speaker only. ¡ The maximum speaker input should be 45 W or more. (If used with the (White) optional power amplifier, the speaker input should be higher than the maxi- (White/Black) -
Page 35: Specifications
Specifications General CD Player Power Supply: 12 V DC (11 V – 16 V), test Sampling Frequency: 8 times oversampling Voltage 14.4 V, Negative @ DA Converter: 1 bit DAC System ground Pick-Up Type: Astigma 3-beam Current consumption: Less than 2.5 A (CD mode, Light Source: Semiconductor laser 0.5 W 4-speaker) - Page 36 YFM264C241ZB PTW0411-2061 Printed in Taiwan...