ViewSonic gTablet Software Manual
How to use android
Hide thumbs
Also See for gTablet:
- User manual (24 pages) ,
- Quick start manual (19 pages) ,
- Quick start manual (2 pages)

Related Manuals for ViewSonic gTablet


Summary of Contents for ViewSonic gTablet
- Page 1 ANDROID: User’s Overview and Tutorial...
- Page 2 Getting Started with Android When you power up your Android device for the first time, you will see a Welcome screen. Touch the Android image to proceed through a brief set-up process.
- Page 3 Android: Log In to Google Account The first thing you will do is link your device to your Google Account, which is how Android manages your e-mail, contacts and Android Market downloads. Your Google Account gives you access to other Google Mobile Services, such as Google Maps, Google Talk, Google Books, Google Earth and much more.
- Page 4 Android: Connect by 3G or WiFi If you are using a SIM card enabled device, you should be automatically connected to the Internet via your carrier’s data connection. Alternately, you may connect via WiFi. Android will scan for available WiFi connections and connect automatically, or prompt you for a password if required.
- Page 5 Android: Connectivity Settings • Let’s take a closer look at configuring a wi-fi connection.
- Page 6 Android: Connectivity Settings • Let’s take a closer look at configuring a wi-fi connection. • First, open up the app launcher and select Settings.
- Page 7 Android: Connectivity Settings • From the Settings menu, select Wireless & networks.
- Page 8 Android: Connectivity Settings • From the Wireless & networks menu, select Wi-Fi: Turn on Wi-Fi.
- Page 9 Android: Connectivity Settings • From the Wireless & networks menu, select Wi-Fi: Turn on Wi-Fi. • A green check appears when Wi-Fi is turned on.
- Page 10 Android: Connectivity Settings • Now select Wi-Fi settings.
- Page 11 Android: Connectivity Settings • Your Android device will try to scan for and connect to a network automatically. • You can select a network from the Wi-Fi settings menu to manually connect.
- Page 12 Android: Connectivity Settings • Your Android device will try to scan for and connect to a network automatically. • You can select a network from the Wi-Fi settings menu to manually connect. • Tap the network name and then tap Connect to network.
- Page 13 Android: Connectivity Settings • If required, you will be prompted for a password.
- Page 14 Android: Connectivity Settings • If required, you will be prompted for a password. • Enter the network password and tap Connect.
- Page 15 Android: Connectivity Settings • Now the Wi-Fi settings menu will show that you are connected.
- Page 16 Android: Connectivity Settings • To add a network that is not automatically detected, select Add Wi-Fi network. • You will need the name and address of the network you wish to add.
- Page 17 Android Buttons: Navigation • Before we dig deeper into the Android operating systems, let’s take a look at how you can navigate using the built-in buttons. These may appear on screen or on the case of your device. • The four common buttons you will most likely find on an Android phone or tablet are: »...
- Page 18 Android Buttons: Volume • Most Android devices will also have Volume Up and Down buttons somewhere along the edge of the device. • On phone-enabled devices, pressing the Volume buttons from the home screen will change the ringer volume. • Pressing the Volume buttons while in an app will change the “media”...
-
Page 19: Volume Settings
Volume Settings • You can also change your volume from the Settings menu. – Select Settings > Sound > Volume – You can adjust volume settings for Ringtone, Media and Alarm. -
Page 20: Android Settings
Android Settings • You have already seen a couple of examples of the Settings menu. From here you can view and change a wide variety options for controlling your Android device, operating system and applications. – Scroll up and down to view all available options. - Page 21 Android Settings • The Call Settings menu allows you to set various options related to phone functionality. (Only available on phone enabled devices.)
- Page 22 Android Settings • Display settings allows you to change the brightness, screen timeout, and other display settings.
- Page 23 Android Settings • Select the Applications menu to modify and manage your installed apps.
- Page 24 Android Settings • Check Unknown sources if you will be installing apps from sources other than Android Market. • The Manage applications menu allows you to view, update and uninstall apps. • Running services allows you to view and control running apps and services. •...
- Page 25 Android: Connected and Configured • Now that you have learned how to connect your Android device to a network and control the various settings, let’s take a look at how you use the operating system.
-
Page 26: Program Launcher
Android: Welcome Home Your Android Home screen offers quick access to the program launcher, application shortcuts, desktop widgets and status bar notifications. Please note: The Android home pictured is a ViewPad4 screen shot. Different devices are used to illustrate Android screens throughout this presentation. - Page 27 Android: Welcome Home The Status Bar displays important information including the current time, battery life, connection strength, and notification icons.
- Page 28 Android: Welcome Home Touch the Status bar and swipe down to drag open the notifications window. Here you will see any notifications such as files downloaded, updates available, etc.
- Page 29 Android: Welcome Home Widgets are applications that run right on your Home Screen. In this example, the Google Search widget allows you to search the Web. Touch the search box to enter your query by text, or touch the microphone button to use Voice Search.
- Page 30 Android: Welcome Home Application icons offer instant access to your favorite programs. Simply tap the icon on the screen to launch the app.
- Page 31 Android: Welcome Home The Launcher icon opens up the Application Launcher.
- Page 32 Android: Welcome Home Your Launcher displays all apps installed on the device. Swipe up and down to scroll through the available applications. Simply touch an icon to open the app.
- Page 33 Android: Launcher Your Launcher displays all apps installed on the device. Swipe up and down to scroll through the available applications. Simply touch an icon to open the app. Tap the Home icon to close the Launcher and return to your Home screen.
- Page 34 Android: When One Home Isn’t Enough Android offers multiple Home Screens. Swipe right or left across the screen to change Home Screens.
- Page 35 Android: When One Home Isn’t Enough Android offers multiple Home Screens. Swipe right or left across the screen to change Home Screens.
- Page 36 Android: When One Home Isn’t Enough Android offers multiple Home Screens. Swipe right or left across the screen to change Home Screens.
- Page 37 Android: When One Home Isn’t Enough Android offers multiple Home Screens. Swipe right or left across the screen to change Home Screens.
- Page 38 Android: When One Home Isn’t Enough The tiny dots at the bottom of the screen indicate which Home Screen you are on and how many are available.
- Page 39 Android: When One Home Isn’t Enough In this example, we are on the fourth of five screens. The dots indicate: The tiny dots at the bottom of the screen indicate which Home Screen you are on and how many are available.
- Page 40 Android: When One Home Isn’t Enough In this example, we are on the fourth of five screens. The dots indicate: The tiny dots at the 1 screen to the right bottom of the screen indicate which Home Screen you are on and how many are available.
- Page 41 Android: When One Home Isn’t Enough In this example, we are on the fourth of five screens. The dots indicate: The tiny dots at the 1 screen to the right bottom of the screen indicate which Home 3 screens to the left Screen you are on and how many are available.
- Page 42 Android: When One Home Isn’t Enough You can also tap on the dots to scroll right and left between the screens.
- Page 43 Android: When One Home Isn’t Enough Press and hold the Launcher button to display icons of each Home Screen. Tap a screen icon to switch to that Home Screen.
- Page 44 Android: A Home of Your Own You can easily customize your Home Screen by adding Widgets, Shortcuts, Folders and Wallpapers.
- Page 45 Android: A Home of Your Own Touch and hold any blank space on the home screen to open up a context menu.
- Page 46 Android: A Home of Your Own Touch and hold any blank space on the home screen to open up a context menu. Context menus are available for many Android objects, including icons and menu items. Press and hold any item to open a menu, if available, offering additional options.
- Page 47 Android: A Home of Your Own The Home Screen context menu offers the following options: ! Shortcuts: Apps, Bookmarks, Contacts and more. ! Widgets: Apps that can run right on your Home Screen. ! Folders: Create folders to organize your files. ! Wallpapers: Backgrounds for your Home Screen.
- Page 48 Android: A Home of Your Own Select Shortcuts to see a menu of the different types of shortcuts available.
- Page 49 Android: A Home of Your Own Select Applications to see options for Application Shortcuts.
- Page 50 Android: A Home of Your Own Select the application activity for which you want a shortcut.
- Page 51 Android: A Home of Your Own Add Widgets, Folders and Wallpapers from the appropriate menus.
- Page 52 Android: A Home of Your Own Live Wallpapers are dynamic, animated backgrounds. Live Wallpapers can respond to music that is playing or pull data from the Web.
- Page 53 Android: A Home of Your Own This example demonstrates the Stock Ticker and News Reader widgets.
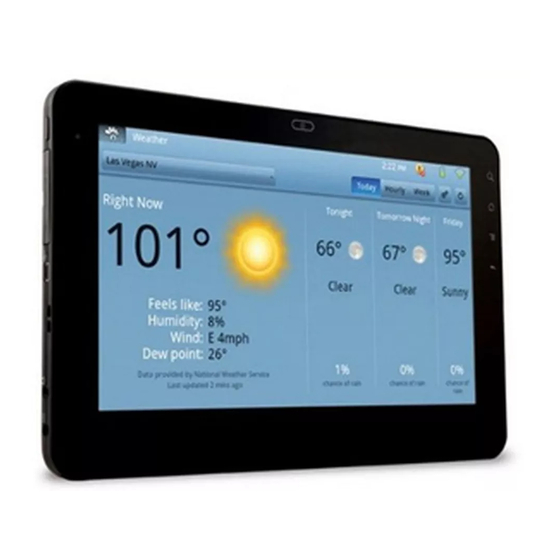
- Page 54 Android: A Home of Your Own Tapping a widget will open the application in full screen mode – for example, the News and Weather apps:...
- Page 55 Android: A Home of Your Own You can also add shortcuts directly from the Launcher menu.
- Page 56 Android: A Home of Your Own You can also add shortcuts directly from the Launcher menu. Simply touch and hold an icon until it “floats” out of the launcher and onto the Home Screen.
- Page 57 Android: A Home of Your Own You can also add shortcuts directly from the Launcher menu. Simply touch and hold an icon until it “floats” out of the launcher and onto the Home Screen.
- Page 58 Android: A Home of Your Own Now you can drop the Shortcut icon anywhere on the Home Screen.
- Page 59 Android: A Home of Your Own Now you can drop the Shortcut icon anywhere on the Home Screen.
- Page 60 Android: A Home of Your Own To move icons around on the Home Screen, also touch and hold.
- Page 61 Android: A Home of Your Own To move icons around on the Home Screen, also touch and hold. The icon appears larger once it is “lifted” from the screen. You may drag and drop the icon wherever you like.
- Page 62 Android: A Home of Your Own Drop it in the trash to remove the icon from the Home Screen. The app will still be available from the Launcher.
- Page 63 Android: A Home of Your Own Widgets work the same way. Touch and hold, then drag to the desired place on screen or drop in the trash.
- Page 64 Android: Input Text The soft keyboard is your primary means of inputting text to your Android device. The keyboard appears automatically for some applications. If it is not visible, it will appear as soon as you select a text field. Type right on the screen just as you would with a hardware keyboard.
- Page 65 Android: Input Text Android offers suggestions as you type to simplify and speed up your data entry.
- Page 66 Android: Using the Browser You can access the Web browser through the Launcher, the Google Search widget, or the Application Shortcut on your Home Screen.
- Page 67 Android: Using the Browser The Android browser works like a standard Web browser. Select the address bar at the top of the screen to enter a URL. The X icon will stop a currently loading page.
- Page 68 Android: Using the Browser “Pinch” and “pull” the screen to zoom in and out, or use the magnifying icons that appear in the lower right corner.
- Page 69 Android: Using the Browser Press the Menu button on your device to open up the browser menu featuring standard commands.
- Page 70 Android: Using the Browser Press the Menu button on your device to open up the browser menu featuring standard commands. The More option opens a menu with additional functions.
- Page 71 Android: Using the Browser Press the Menu button on your device to open up the browser menu featuring standard commands. The More option opens a menu with additional functions. The Windows option gives you a graphical view of open browser windows and allows you to close or switch between menus.
- Page 72 Android: Working with Links Press and hold a link to display additional options for opening, bookmarking, saving and sharing the link.
- Page 73 Android: Downloading Apps Files will download automatically when you touch the link. Visit the Downloads menu option to view or run downloaded files. Android apps will download as Android Package (APK) files which must be installed first. Simply select the APK file from the Downloads menu to install.
- Page 74 Android: Downloading Apps Where do you find Android apps? • In addition to the Android Market (which is only available on supported devices), a wide variety of third-party sites offer Android apps for download. Alternate app stores include: • Handango.com •...
- Page 75 Android: Downloading Apps • Be on the lookout for an Amazon.com App Store coming soon! • You may also find apps for download from various individual developers’ web sites. • Be sure you trust the source when downloading and installing any applications from sources other than Google’s Android Market.
- Page 76 Android: Android Market In addition to manually downloading apps, you can access Android Market on supported devices. Android Market is Google’s official app store and the preferred way of browsing and installing new apps...
- Page 77 Please note: Due to Google licensing restrictions, only the ViewSonic Viewpad7 currently supports Google Market. Other Android app stores will be discussed later in the presentation. ViewSonic will be adding support for Google Market on our other tablets in the near future.
- Page 78 Android: Android Market The Market main menu displays a list of Featured Apps and the following options:...
- Page 79 Android: Android Market The Market main menu displays a list of Featured Apps and the following options: Search: Search apps for keywords...
- Page 80 Android: Android Market The Market main menu displays a list of Featured Apps and the following options: Search: Search apps for keywords Apps: Browse applications...
- Page 81 Android: Android Market The Market main menu displays a list of Featured Apps and the following options: Search: Search apps for keywords Apps: Browse applications Games: Browse game applications...
- Page 82 Android: Android Market The Market main menu displays a list of Featured Apps and the following options: Search: Search apps for keywords Apps: Browse applications Games: Browse game applications My apps: Display downloaded and installed applications...
- Page 83 Android: Android Market The Menu button on your Android device will open an application menu offering additional options, including Settings and Help. If you are not on the Market Home screen, the Home icon will also be visible.
- Page 84 Android: Android Market To download an app, press the Install button on the application details screen.
- Page 85 Android: Android Market Market will then tell you what information and device functions the app will be allowed to access. Touch the “Accept permissions” button to confirm and begin your download.
- Page 86 Android: Android Market My apps shows you which apps you have downloaded and installed, as well as the progress of apps currently downloading.
- Page 87 Some device manufacturers will overlay a custom user interface on top of the standard Android interface. One example is the “Tap ‘n Tap” (TNT) skin used on the ViewSonic 10” GTablet. The TNT interface provides an easy-to- use dashboard style home screen with three different customizable layouts.
- Page 88 Android: Custom Interfaces Each of the three content areas can be configured to run a variety of dashboard widgets including e-mail, music player, photo galley, calendar and more.
- Page 89 Android: Custom Interfaces Each of the three content areas can be configured to run a variety of dashboard widgets including e-mail, music player, photo galley, calendar and more.
- Page 90 Android: Custom Interfaces Each of the three content areas can be configured to run a variety of dashboard widgets including e-mail, music player, photo galley, calendar and more.
- Page 91 Android: Custom Interfaces The TNT interface features an apps “drawer” holding all the applications you would find in your standard Android launcher.
- Page 92 What will you do with your Android?
- Page 93 What will you do with your Android?
- Page 94 What will you do with your Android?
- Page 95 What will you do with your Android?
- Page 96 What will you do with your Android?
- Page 97 What will you do with your Android?
- Page 98 GOODBYE!